I know, I know, it’s winter up there in the Northern Hemisphere, but NetWorker 9.1 is landing and given I’m in Australia, that makes NetWorker 9.1 a Summer Fresh release. (In fact, my local pub for the start of summer started doing a pale ale infused with pineapple and jalapeños, and that’s sort of reminding me of NetWorker 9.1: fresh, light and inviting you to put your heels up and rest a while.)
 –
–
NetWorker 9 was a big – no, a huge – release. It’s a switch to a more service catalogue driven approach to backups, Linux block based filesystem backups, block based application backups, deep snapshot integration and more recently in NetWorker 9.0 SP1, REST API control as well.
NetWorker 9.1 as you’d expect is a smaller jump from 9.0 than we had from 8.2 to 9.0. That being said, it’s introduced some excellent new features:
- VMAX SmartSnap integration – the ability to backup and restore a VMAX device based on the device WWN, increasing the depth of snapshot support in NetWorker further.
- Snapshot Alternate Location Rollback – this lets you do a snapshot rollback, but to a different set of devices.
- Data Domain High Availability integration – Data Domain now supports high-availability on the earlier 9500 platform, in addition to the 9800, 9300 and 6800 systems. And with v9.1, NetWorker fully understands and integrates with DDHA platforms.
- Cloud Tier Integration – NetWorker gets deep integration into the Cloud Tier functionality introduced in Data Domain OS 6.0. This lets NetWorker cloning policies control the migration of data out to the Cloud Tier, and more seamlessly integrate with the recall process.
Cloud Tier integration is more than just a tick in the box to though. Consider the module space – NetWorker Module for Microsoft Applications, for instance, doesn’t just get the option to recover data from Cloud Tier, but also perform granular recoveries from Cloud Tier – SQL table level recoveries and Exchange granular recoveries as well.
By the way, the NetWorker Usage Survey is still running – don’t forget to fill in how you’re using NetWorker! (And be in the running for a prize.)
I’ve saved the best – and biggest – feature for last, though. This is a doozy. Say goodbye to needing a EBR/VBA for VMware backups. That EBR/VBA functionality is now embedded in the NetWorker server itself, leaving you to just deploy some very lightweight proxies to handle the data transport processes, all controlled by NetWorker.
The current EBR appliance and proxies will continue to work with NetWorker 9.1, but I can’t think of anyone who’d want to upgrade to 9.1 without rapidly transitioning to the new platform. Here are just some of the advantages of the new process:
- Less virtual infrastructure required – no EBRs
- Virtual machines stored in raw VMDK file – no additional processing required for the backup, and this will also mean faster instant access processes, too
- The FLR web GUI now runs on the NetWorker server itself
- NMC can be used for FLR instead of the web GUI, making it more accessible to the NetWorker administrators if they don’t have access to the virtual machines being protected
- Proxies support more concurrent virtual machine backups:
- Maximum 25 concurrent hotadd operations;
- Maximum 25 concurrent NBD operations
- Significantly increased File Level Recovery (FLR) counts from VMware Image Level Backups (recommended 20,000 – more on that in a minute)
- Significantly faster FLR operations.
In fact, I’m going to spend a little bit of time on FLR for this post, and step through the new NMC-based FLR process to give you an overview of the process. This is using the newly deployed NetWorker VMware Protection (NVP) system, with backup to and recovery from Data Domain virtual edition.
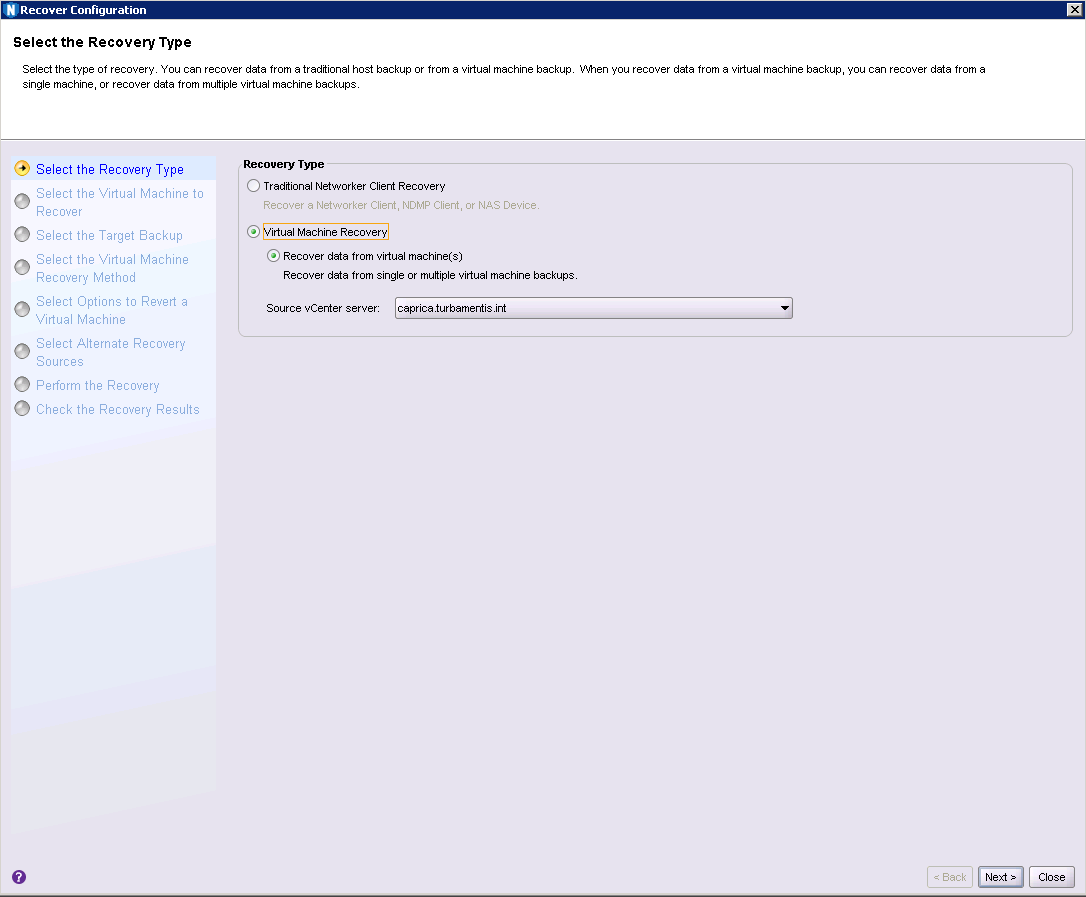
You start by telling NMC you want to do a virtual machine recovery and choose the vCenter server that owns the virtual machine(s) you want to recover data from.
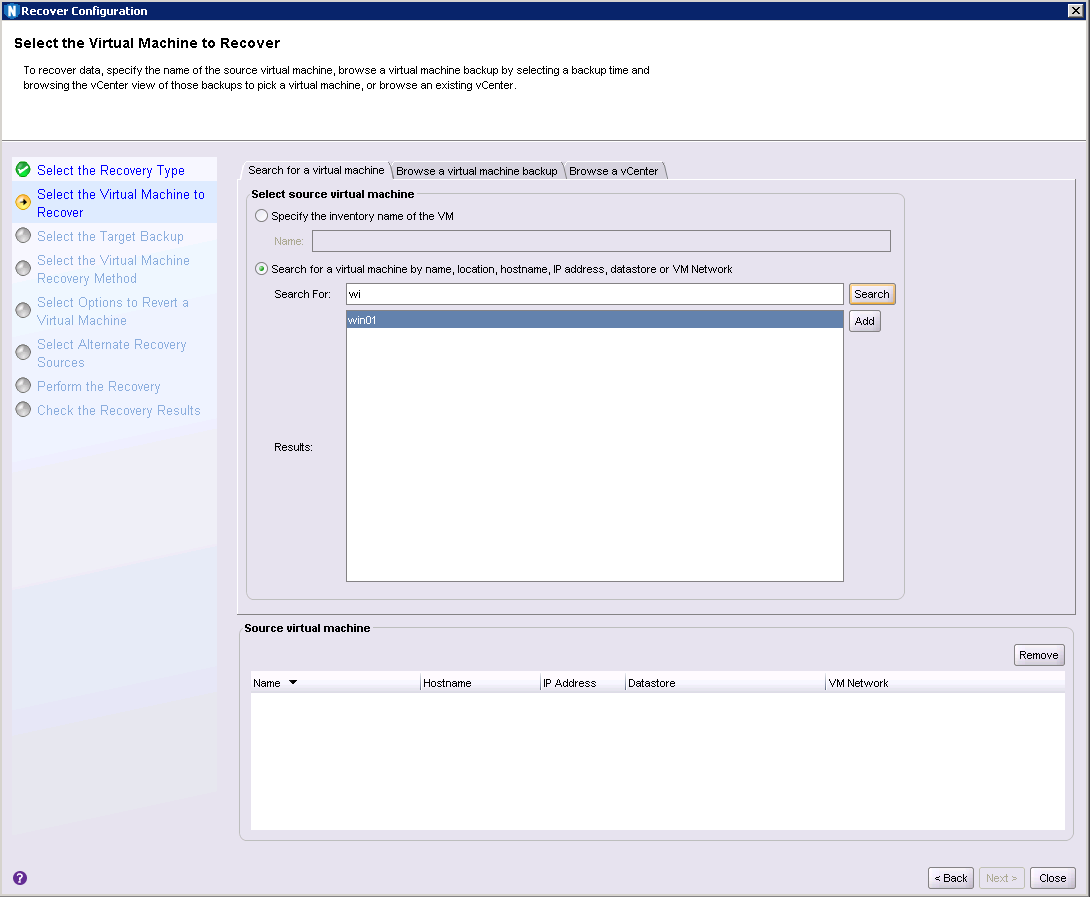
There’s various options for choosing the virtual machine to recover data for – you can enter the name directly, search for it, browse the various backups that have been performed, or browse the vCenter server itself.
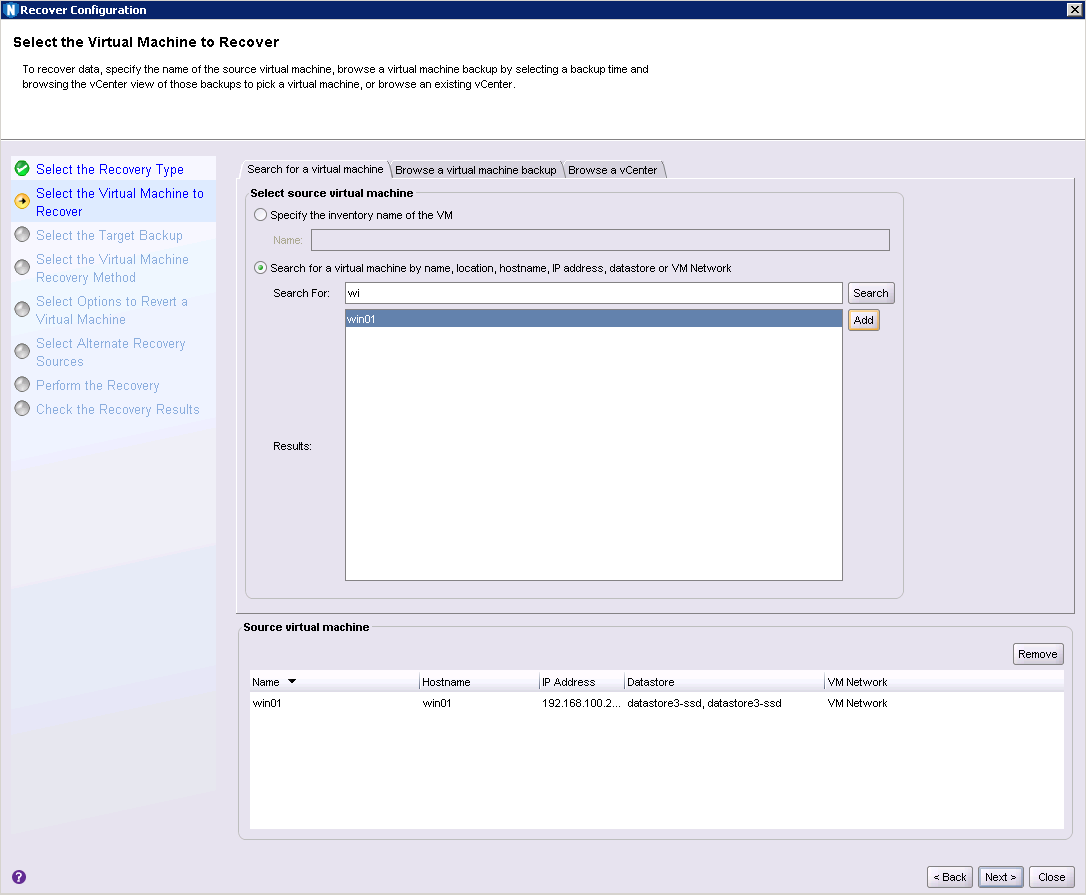
Once you’ve selected a virtual machine for recovery, you can click Next to choose the backup to recover from.
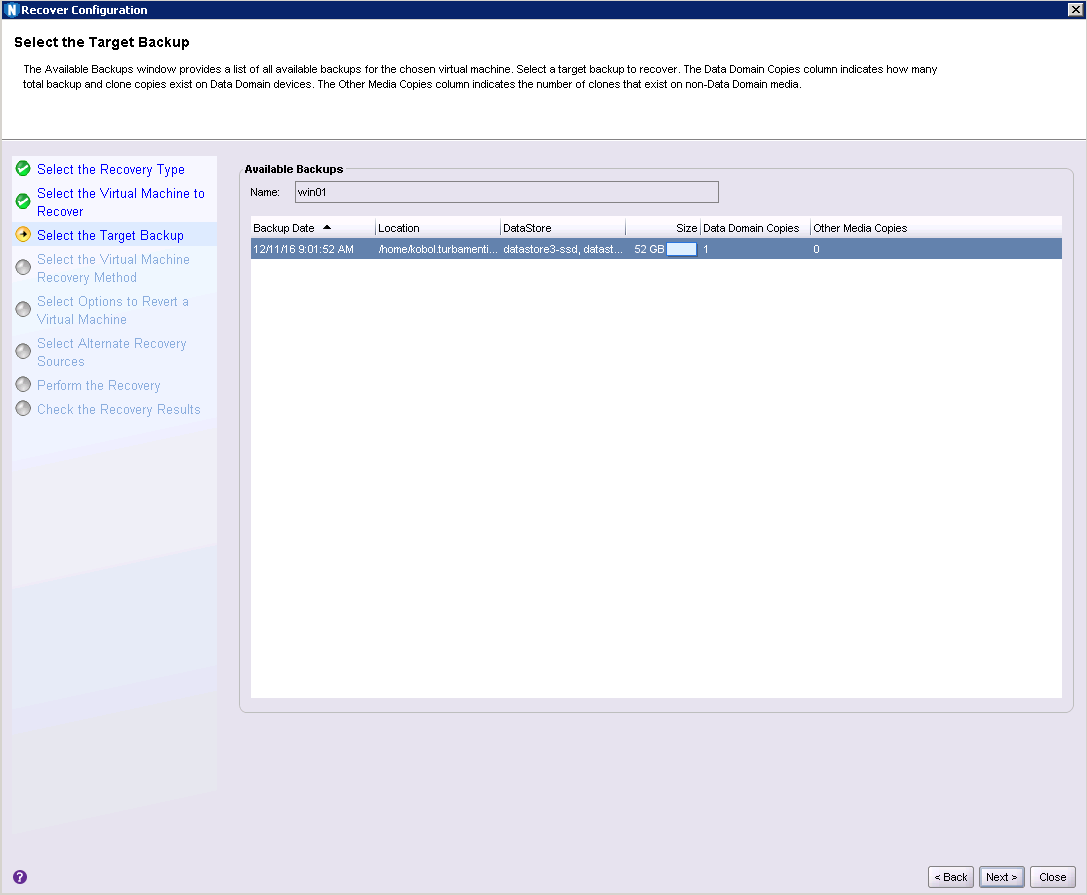
In this case, I only had a single backup under the new NVP system for that virtual machine, so I was able to just click Next to continue the process. At this point you get to choose the type of recovery you want to perform:
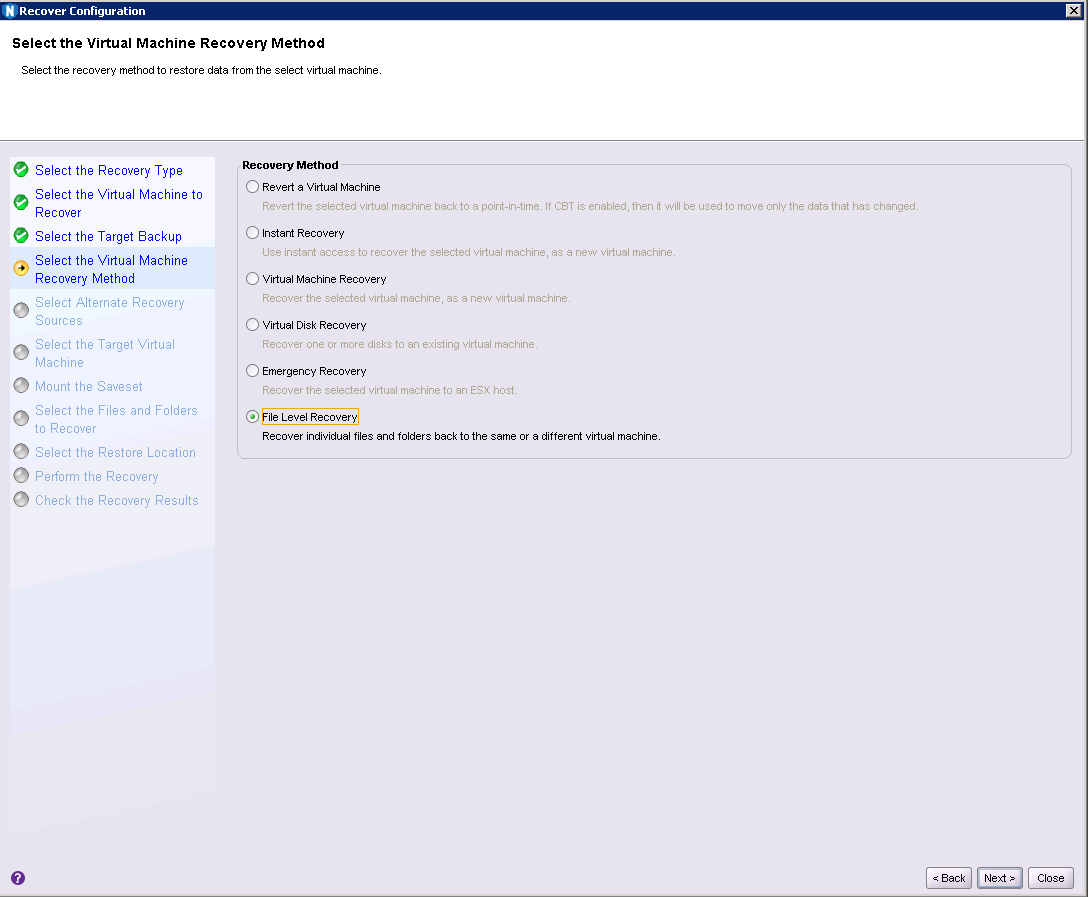
As you can see, there’s a gamut of recovery options for virtual machines within NMC. I’m focusing on the FLR options here so I chose the bottom option and clicked Next.
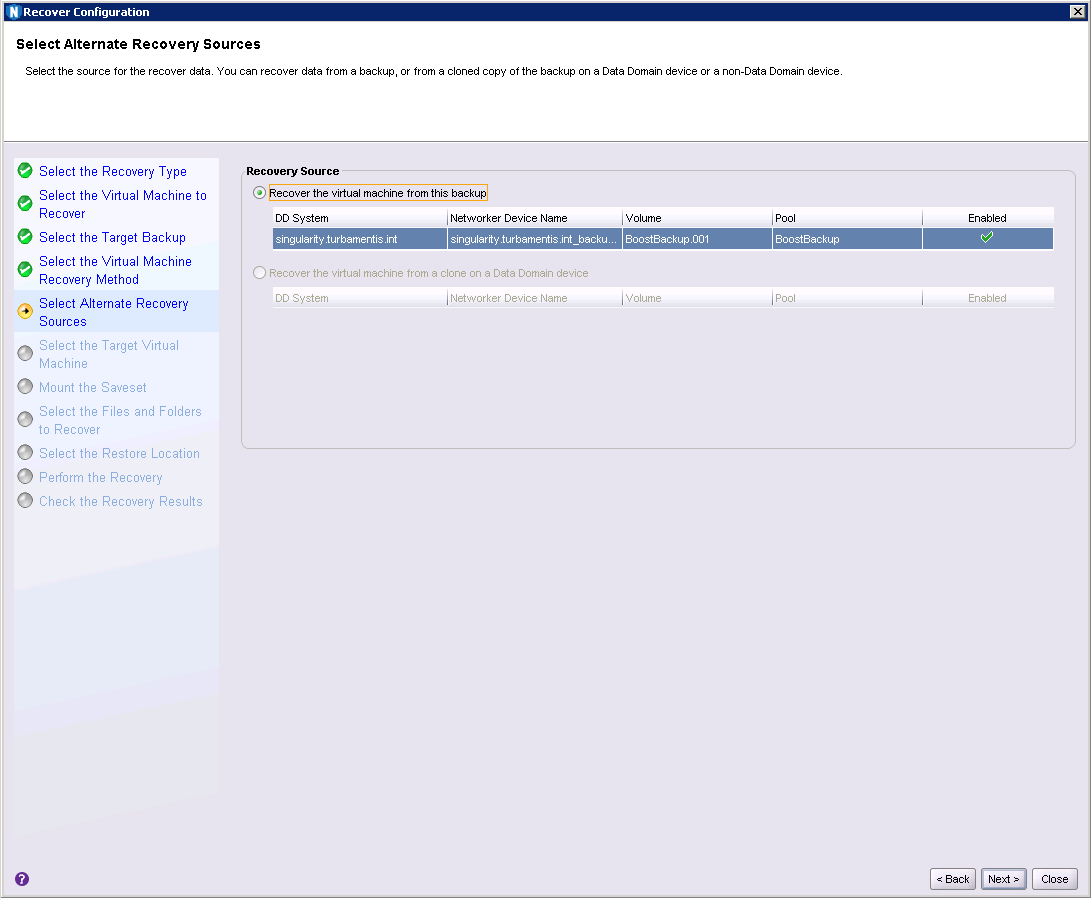
Next you get to choose the backup instance you want to recover from. If the backup has been cloned it may be that there’s topologically a better backup to recover from than the original, and choosing an alternate is as simple as scrolling through a list of clones.
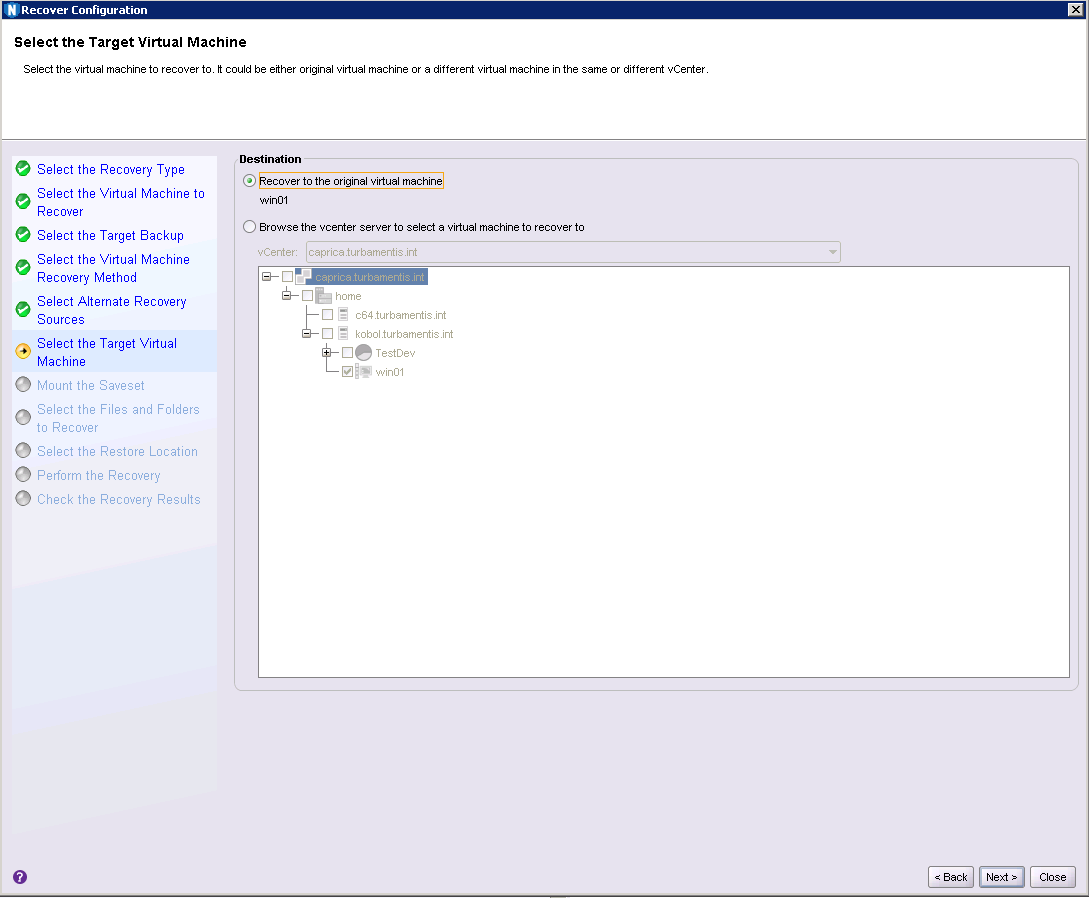
At that point you get to choose where you want to recover to:
Next, you’ll supply appropriate credentials for the virtual machine to be able to perform the recovery and initiate a mount of the backup into the proxy server:
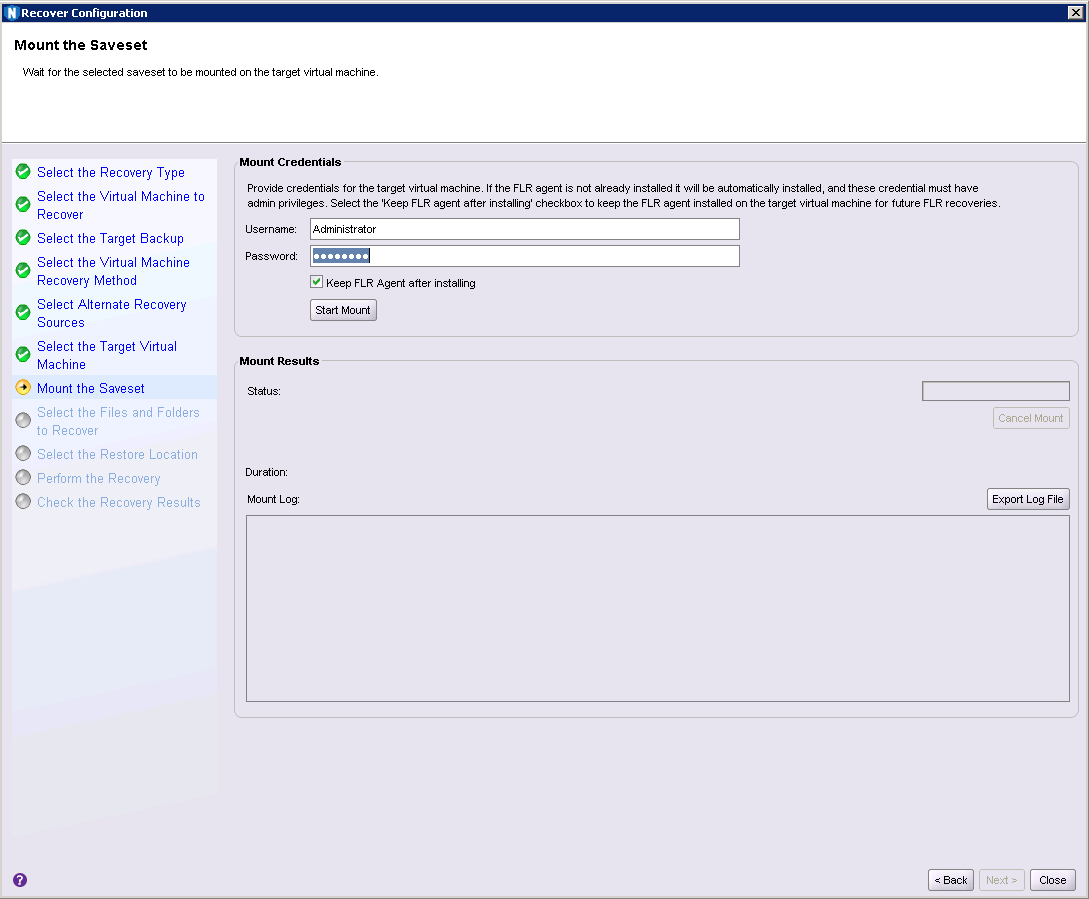
After you’ve supplied the credentials you’ll click “Start Mount” to make the specific backup available for recovery purposes, and after a few seconds that’ll result in log information such as:
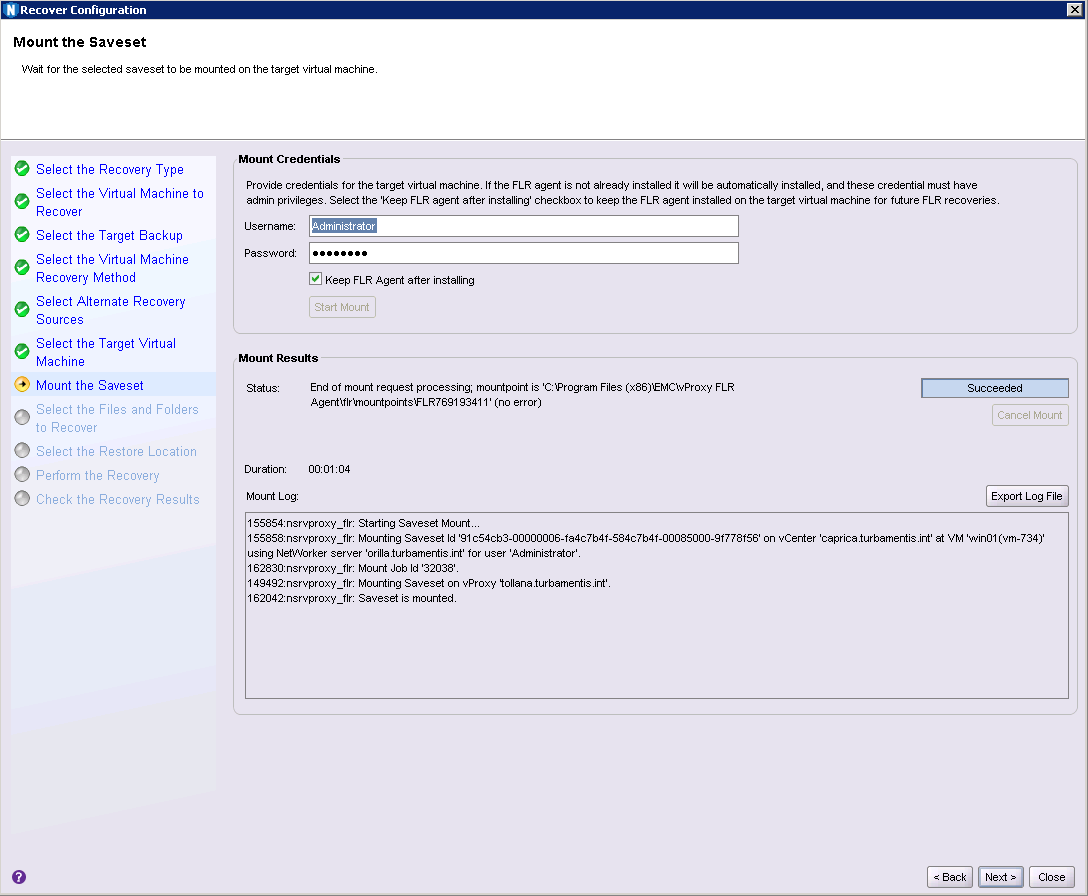
When the mount is done, you’re ready to click Next and start browsing files for recovery.
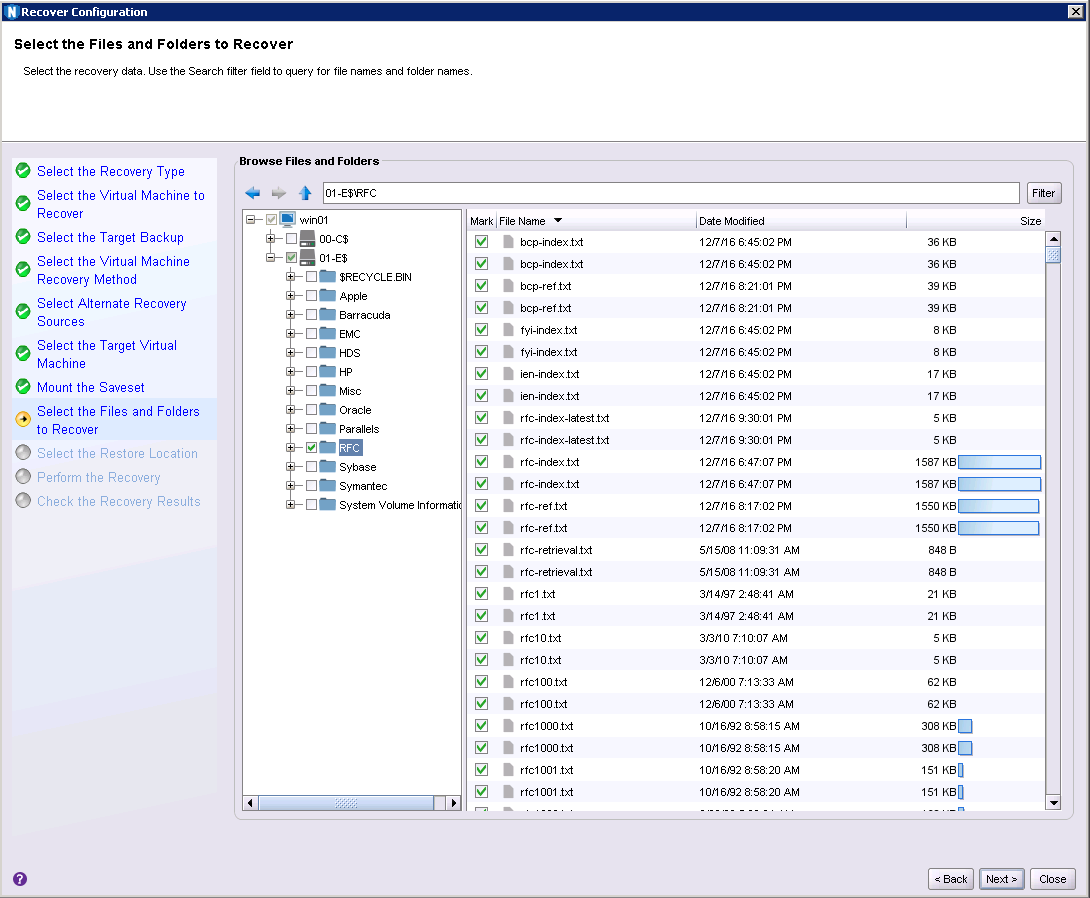
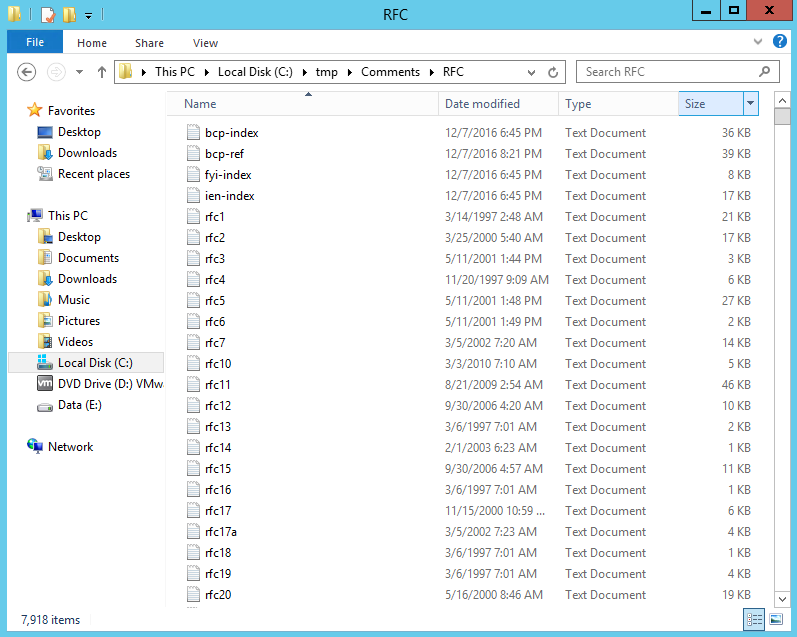
In this example, I selected a directory with about 7,800 files in it and the marking of files for recovery took just a few seconds to complete. After which, Next to choose where to recover the data to on the selected virtual machine:
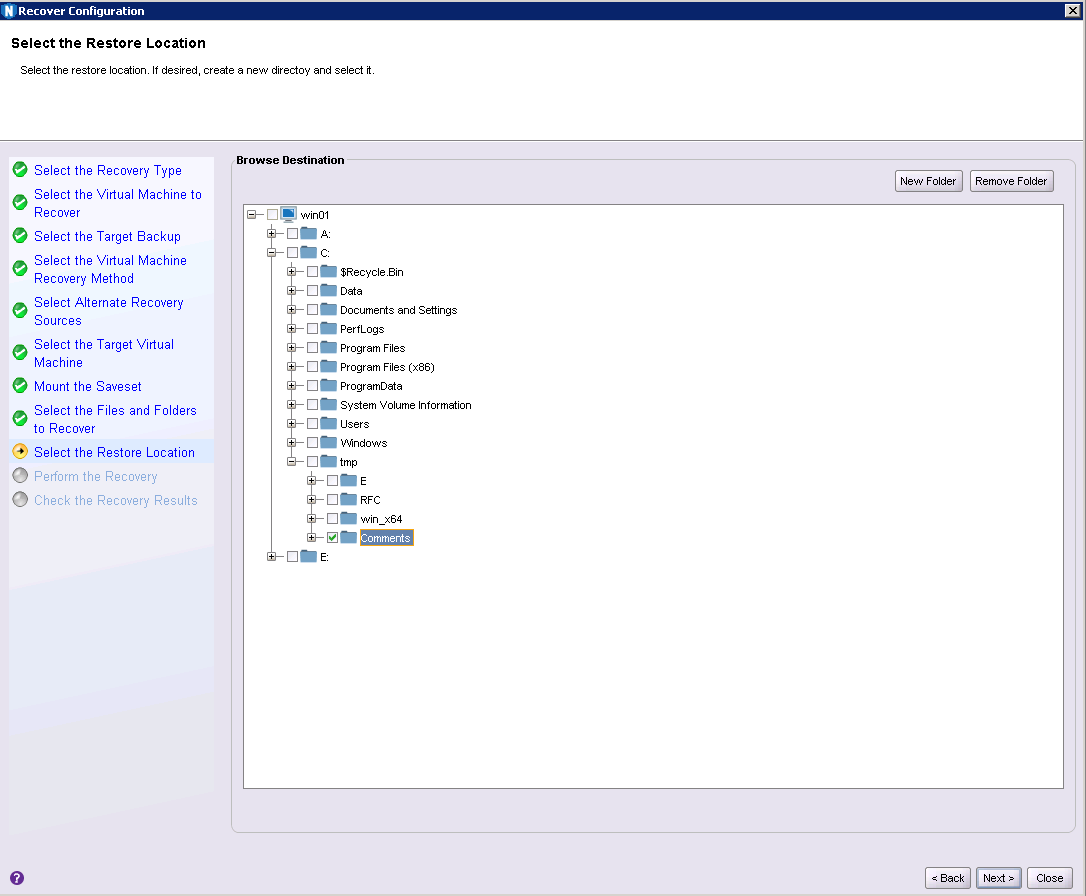
In this case I choose to recover to C:\tmp on the virtual machine. Clicking Next allows finalisation of the recovery preparation:
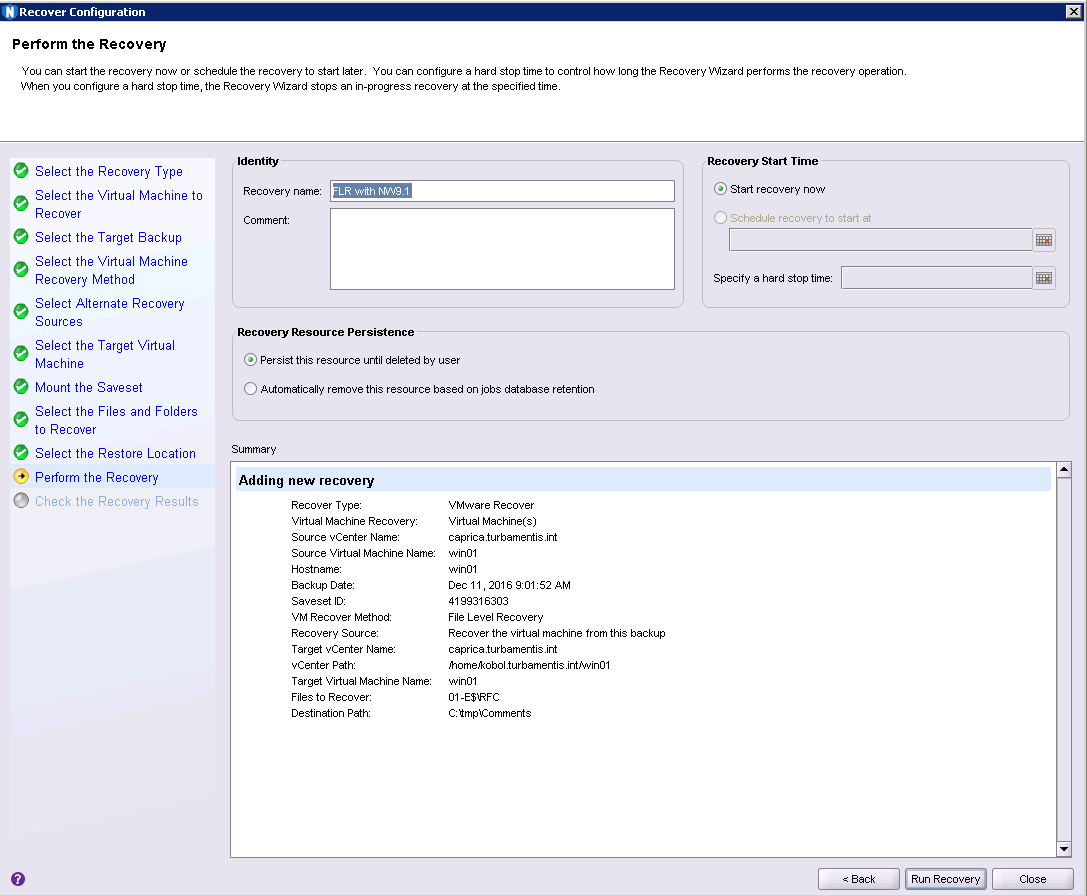
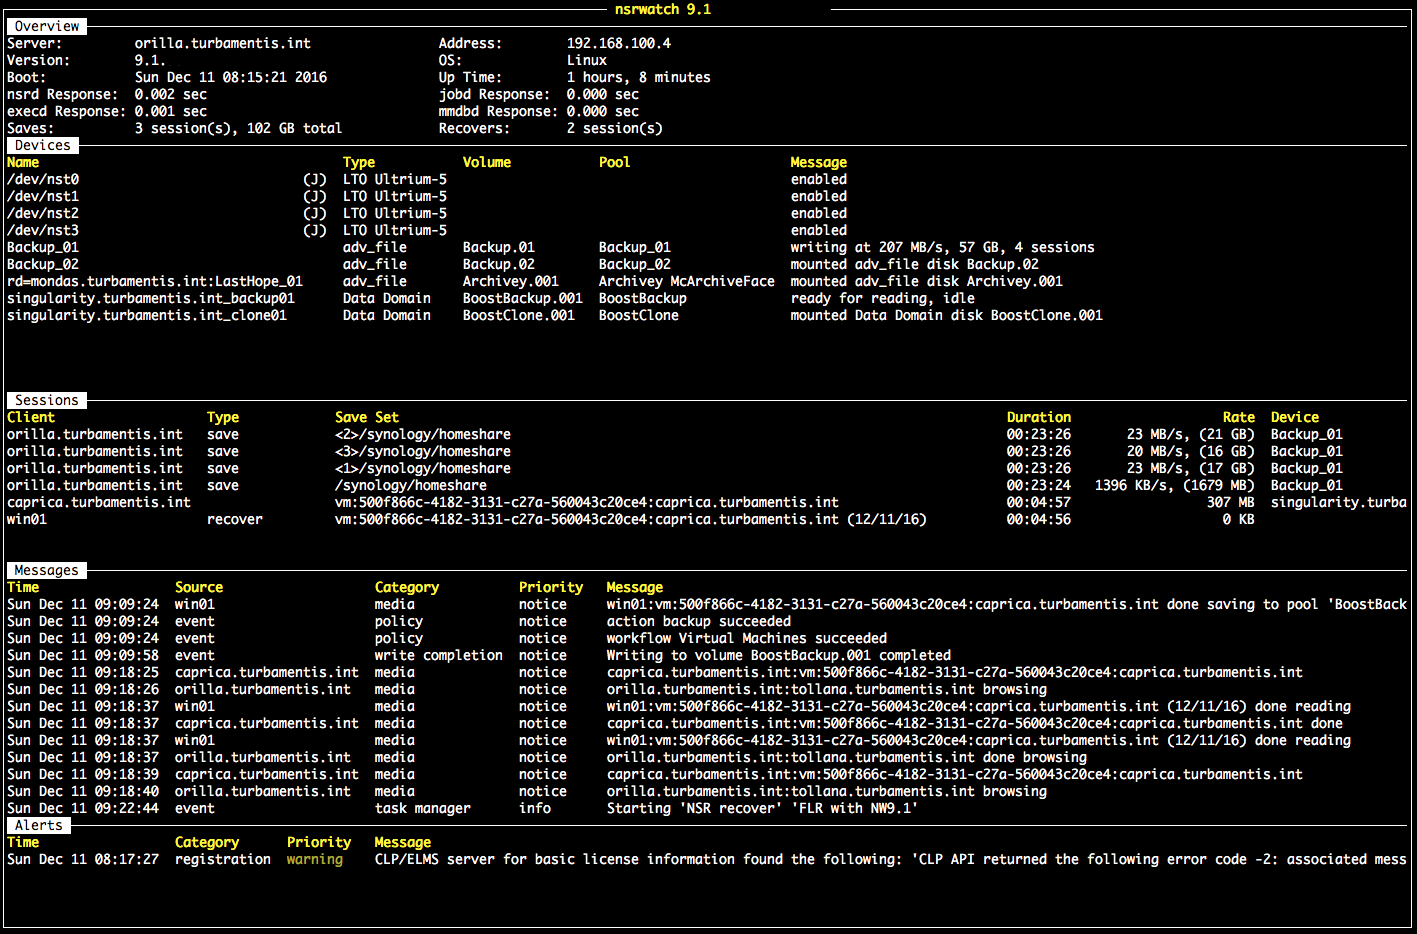
As you would expect with the tightly integrated controls now, FLR is fully visible within the NetWorker environment – even nsrwatch:
And finally we have a completed recovery:
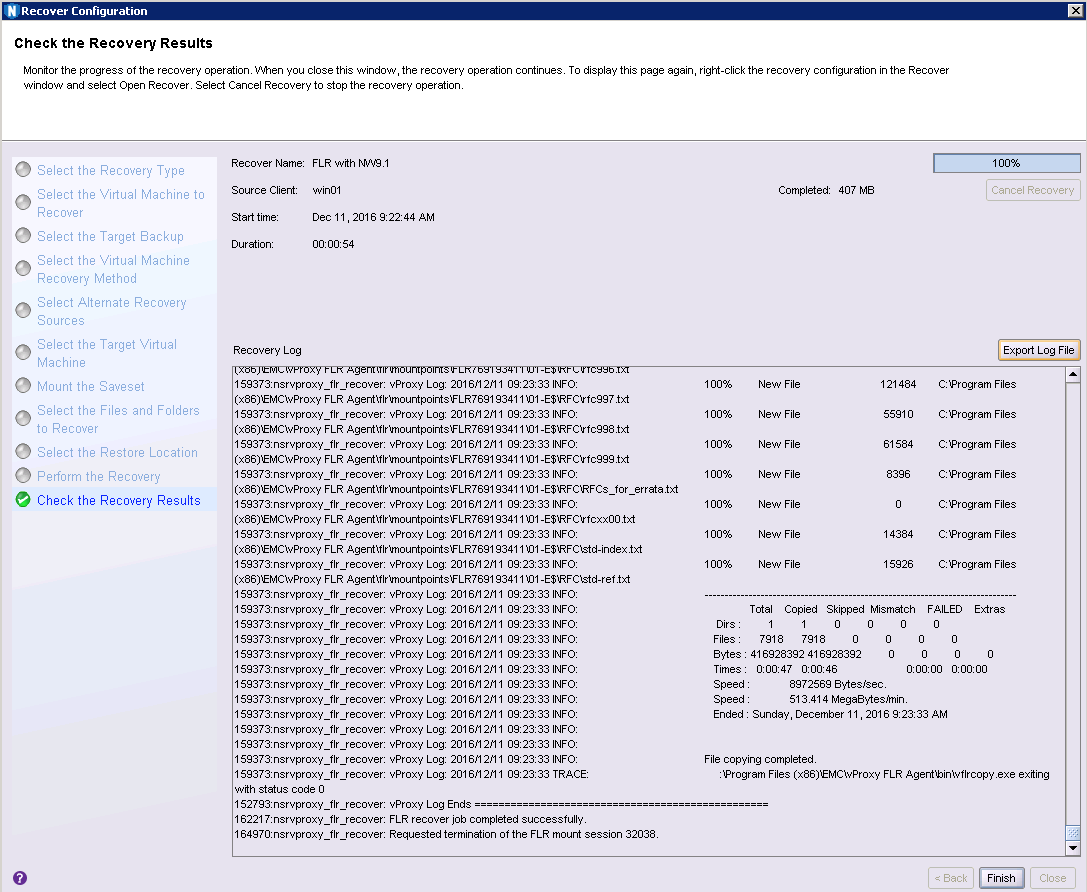
That’s 7,918 files recovered from an image level backup in 54 seconds:
I wanted to check out the FLR capabilities a little more and decided to risk pushing the system beyond the recommendations. Instead of just recovering a single folder with 7,900 files or thereabouts, I elected to recover the entire E:\ drive on the virtual machine – comprising over 47,000 files. Here’s the results:
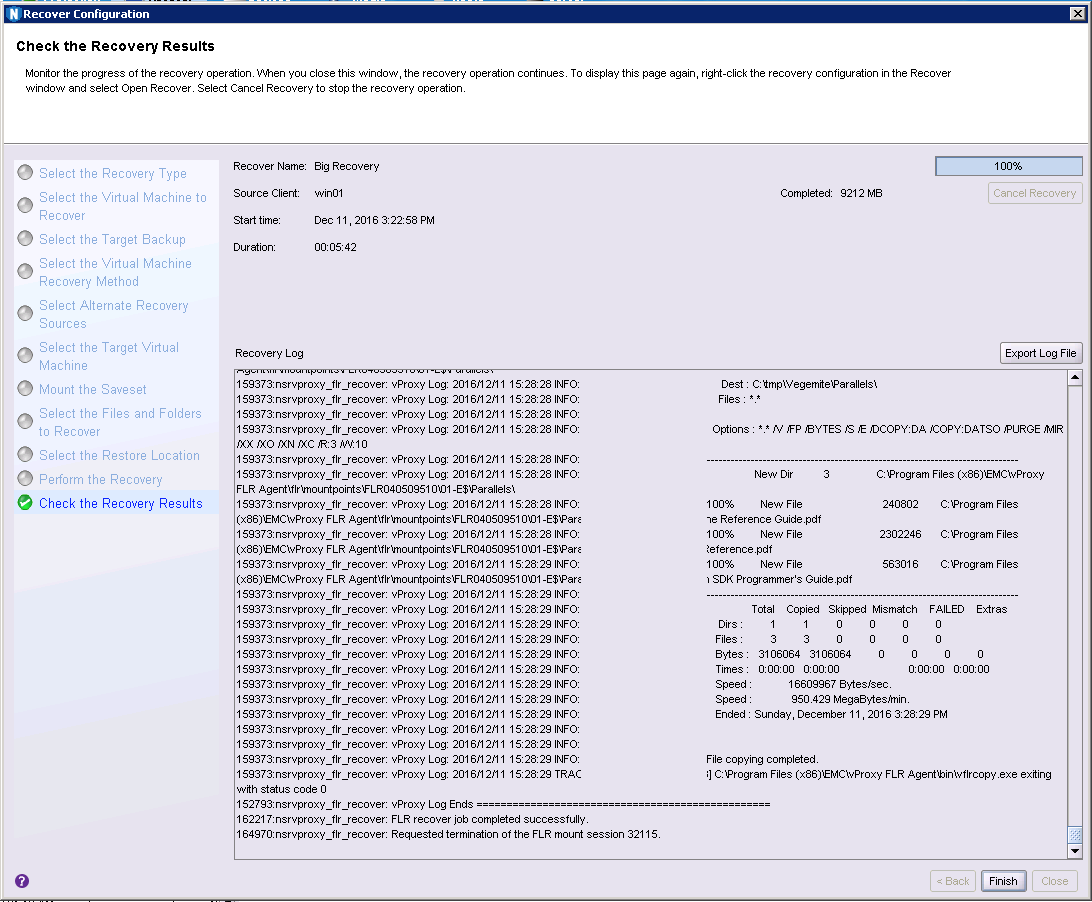
The recovered folder:
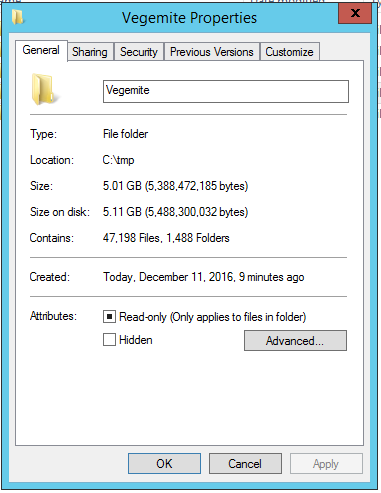
47,198 files, 1,488 folders, 5.01GB of data recovered as an FLR from an image level backup in just 5 minutes and 42 seconds.
If you’re using NetWorker for VMware backups, here’s the version you want to be on.
You can get it from the EMC Support page for NetWorker today.
Hi Preston,
What document should I be looking at to learn how to use the new VMWare backup features with the legacy enabler-code based licensing model?
Thank you for this blog!
-Eugene
Hi Eugene,
The VMware Integration Guide covers the new backup features for VMware. The licensing requirements will be unchanged if you’ve previously been using VBA/EBR to backup virtual machines.
Cheers,
Preston.
Sadly, we aren’t using any VMware backup features today with 8.2 SP3, and it’s hard to tell in the 8.2 Licensing Guide which features require an enabler.
OK there are some specific enablers you’ll need there. I don’t have the licensing guide with me at the moment, being on holidays, but I’ll make a note to get back to you in the new year with the details you need. (Sometime between 2 and 5 January, I imagine.)
Excellenta News!
This sounds to good to be true! 🙂
And ehat about using tags on VMs for automatically getting VMs into backup policies? Is that also coming with 9.1?
Thanks for the update! 🙂
I’ve deployed a test server for 9.1 in order to familiarise myself a little before upgrading from 8.2.
The integration of VM backup/restore into the Networker console is excellent – it always felt a bit of a cludge to have to modify backup jobs in vCenter, and if you wanted to only backup particular disks it was painful.
The NVP servers are much slimmer and only need ~180GB of disk space but the CPU/Memory requirements for the appliance is the same as the EBR/VBA 0.5TB appliance (4CPU, 8GB).
Thanks for the blog Preston, and may you have a prosperous 2017!