In my previous post, I mentioned how NetWorker 18.1 introduces the WebUI. While NMC is still present in NetWorker 18.1, the WebUI is there and can be used for some functions, with those functions to be expanded more fully in time. Having just upgraded my lab NetWorker server from 9.2.1.1 to 18.1, I wanted to go through the WebUI a little bit.
My NetWorker server is Linux, so after doing the preparatory work and upgrading the previously installed NetWorker packages, I also needed to install the WebUI server package:
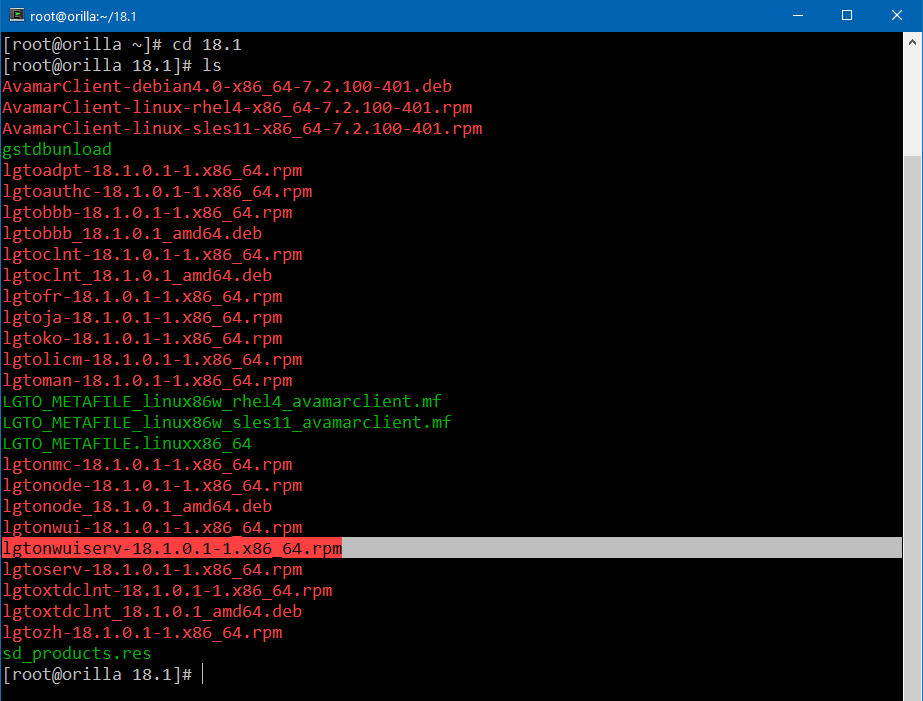
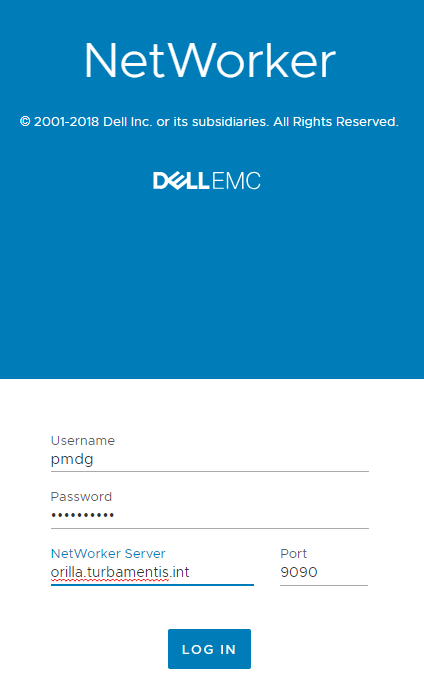
In this case it was as simple as running rpm -ivh lgtonwuiserv-18.1.0.1-1.x86_64.rpm, then executing the post-install script, which establishes connectivity between the WebUI server and the NetWorker authentication service. Once that’s been done, you can access the WebUI server by browsing to https://servername:9090/nwui. This will bring you to the login form for the WebUI server:

[Edit: Thanks to Marcin Stepniak for pointing out I’d given the incorrect URL.]
To login, I entered my NetWorker/NMC username/password, and the NetWorker server I wanted to connect to:
Once you’ve logged in, you’re presented with the WebUI interface, which for the moment is focused on virtualisation.
Since I’d upgraded my environment, to test out the interface, I decided to add the newly deployed NetWorker 18.1 vProxy via the WebUI.
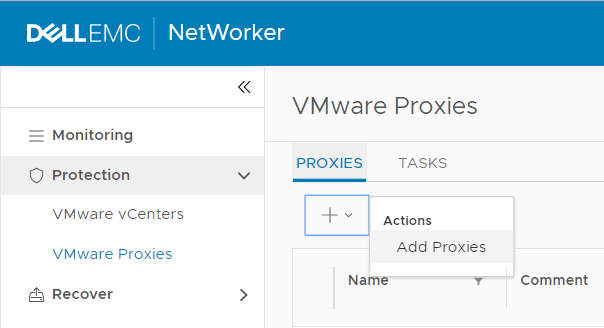
When you choose to add a proxy, you get a Wizard that allows you to select a proxy that has finished deployment, and add it to the environment:
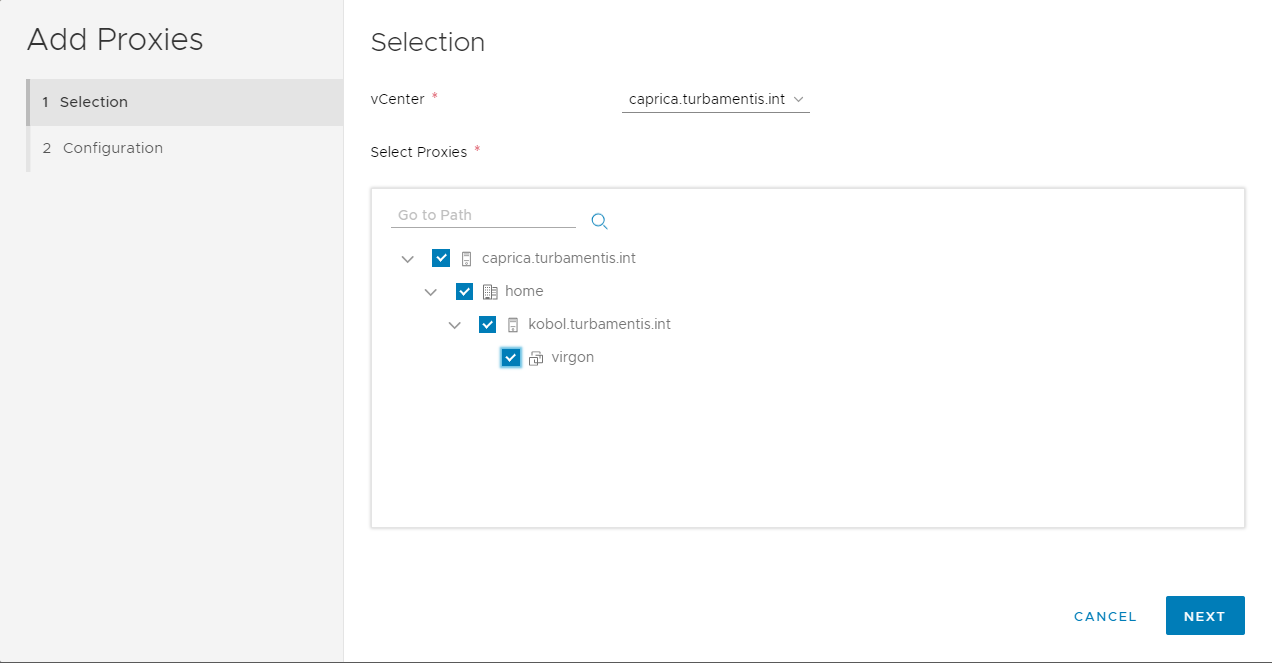
With the vProxy selected, you’ll need to enter password information (particularly if you deployed with something other than the default password) to complete the registration:
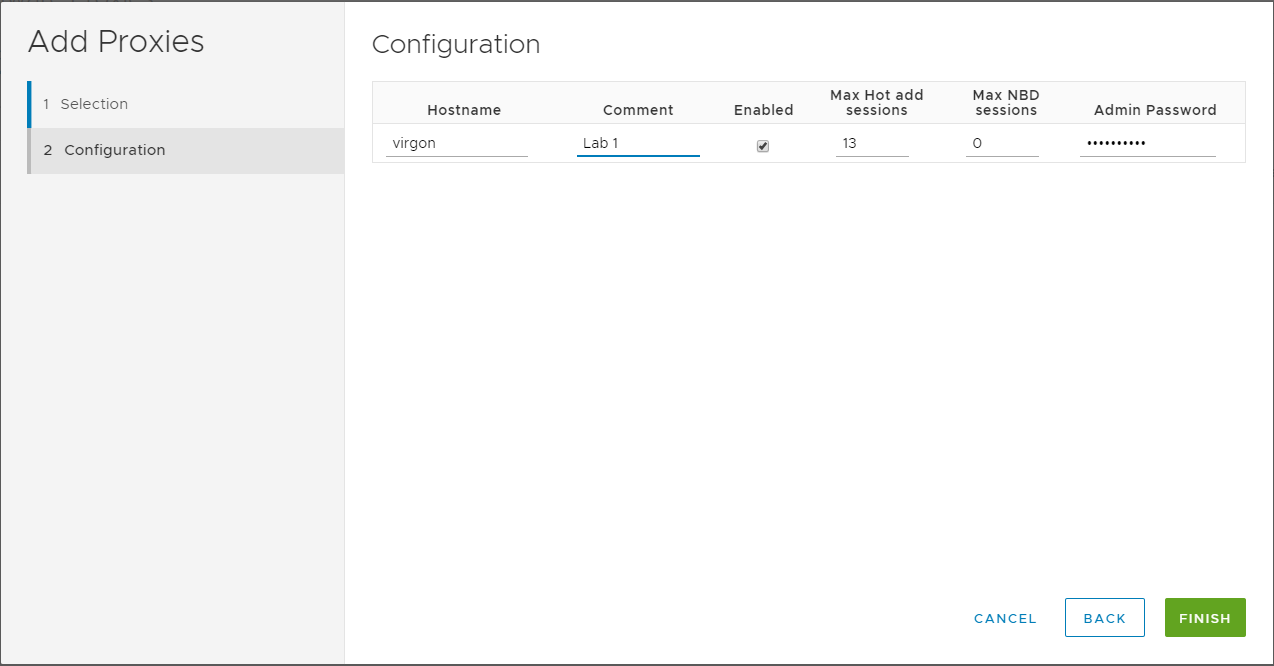
With the configuration details complete, you can click Finish to complete the addition of the vProxy into your environment. The WebUI will tell you that you can monitor the setup of the vProxy via the Tasks tab, and you’ll briefly see the setup running:

The WebUI auto-refreshes, so you’ll pretty quickly see the Tasks area change to show the task is complete:

After this was done, I figured a good test would be to execute an FLR on a client. I don’t currently have any Windows VMware systems in my lab that are getting backups, so I ran a recovery for a Linux virtual machine. To do that, I went to the Recover area in the WebUI and selected the Virtual Machine I wanted to recover from:
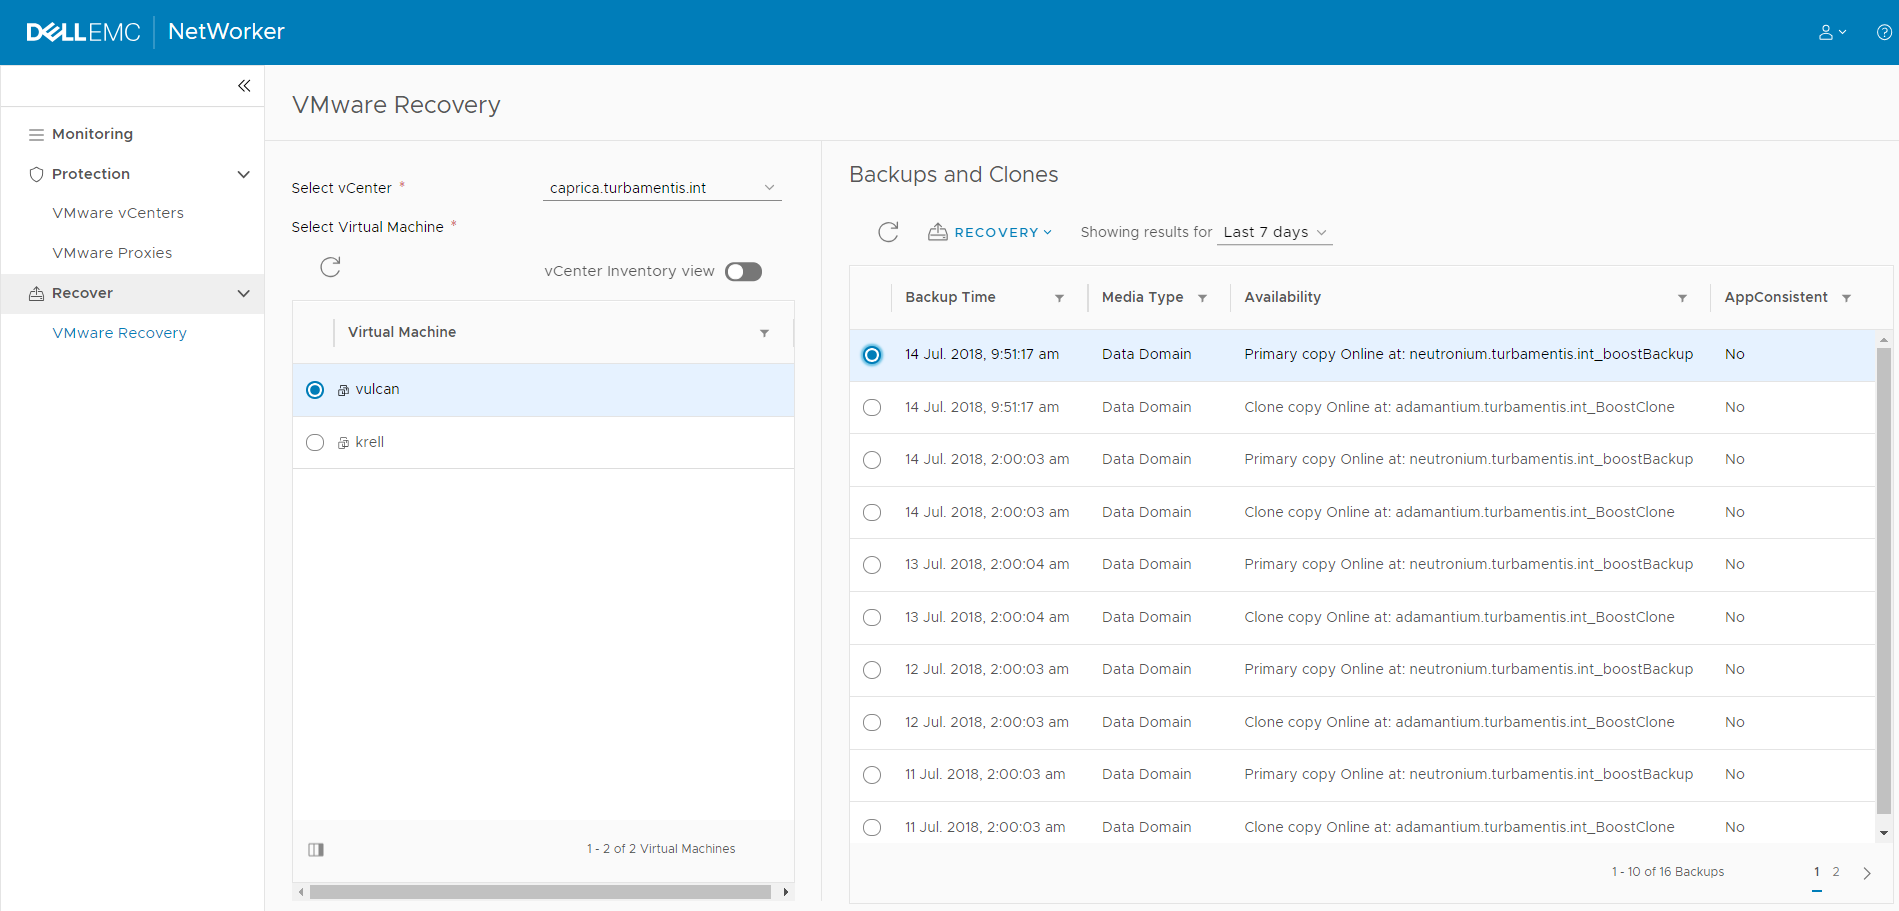
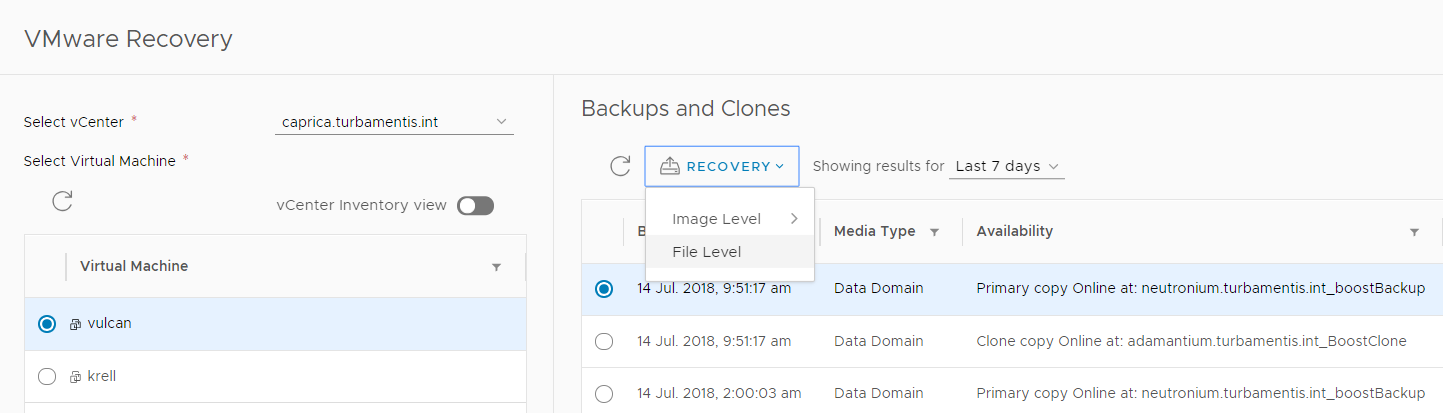
(I’ve got to say – this is a really sweet, responsive interface, and it’s making me already look forward to this future view of NetWorker.) Now, with the virtual machine and backup selected, I clicked the Recovery option to choose whether I wanted an Image Recovery, or File Level Recovery:
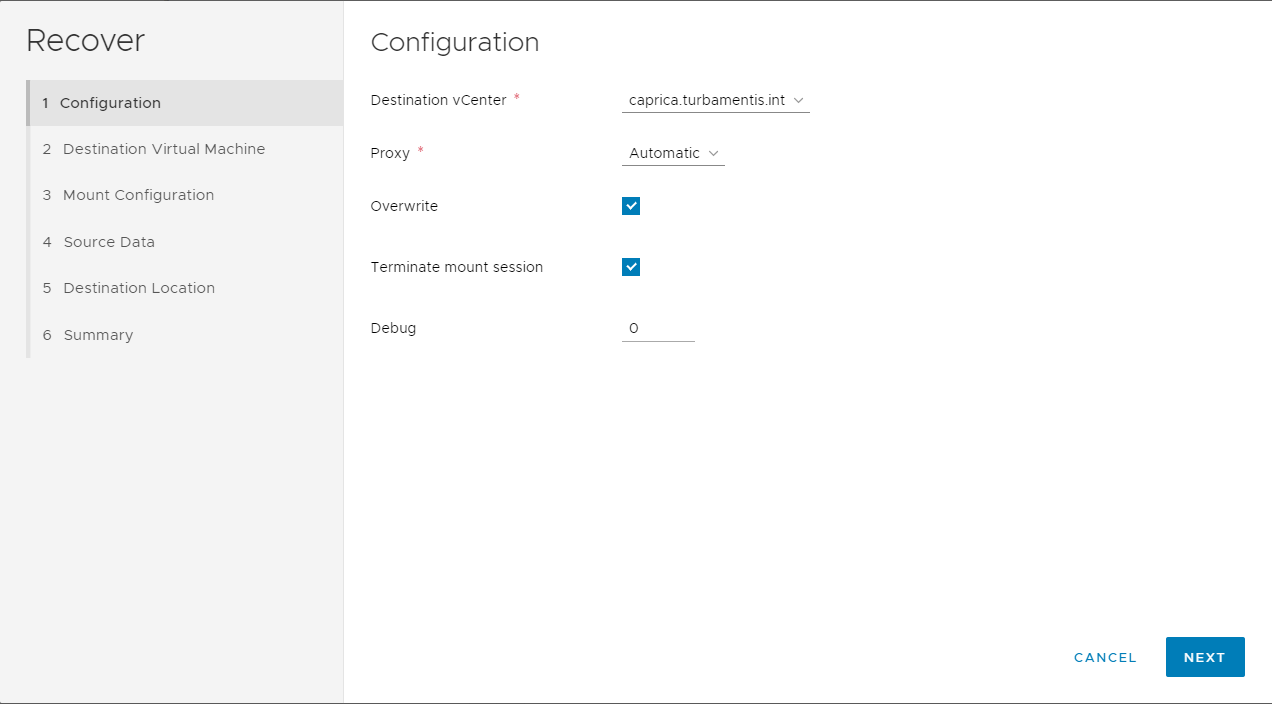
Choosing FLR presents you a wizard to execute the recovery from, with Step 1 confirmation of the vCenter, and other basic details of the recovery:
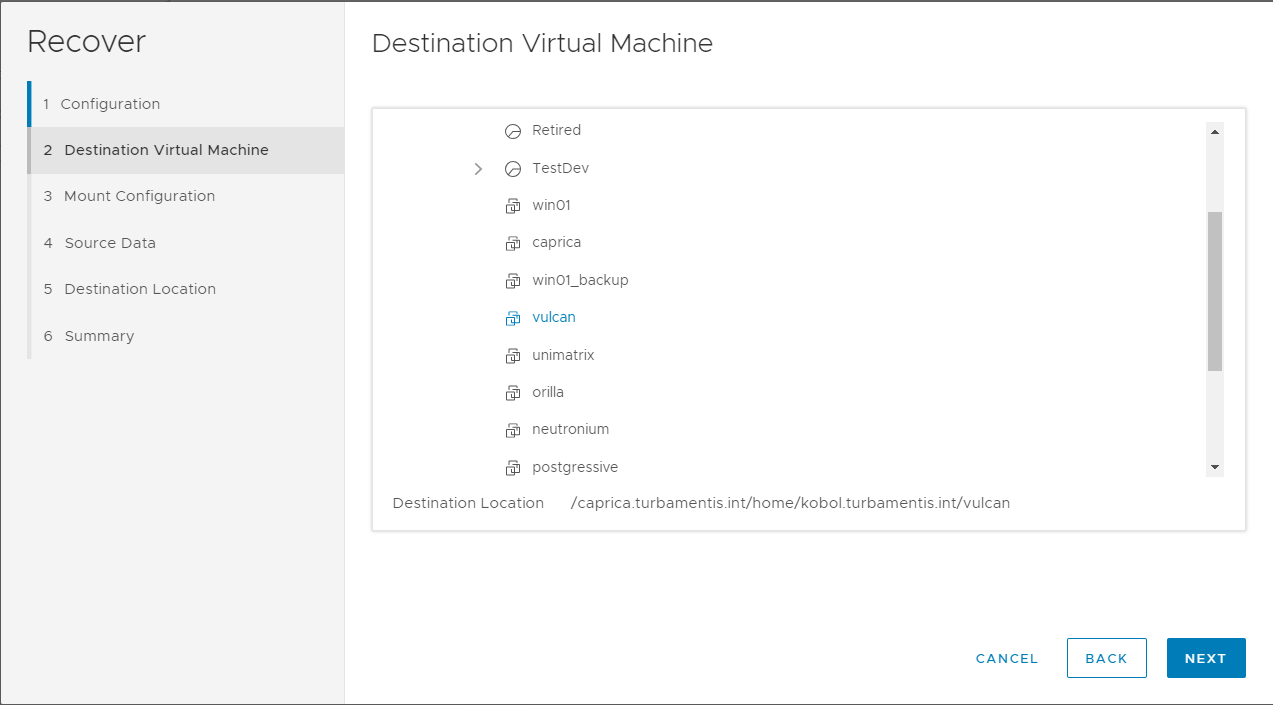
Clicking Next I was able to select the destination virtual machine I wanted to recover to:
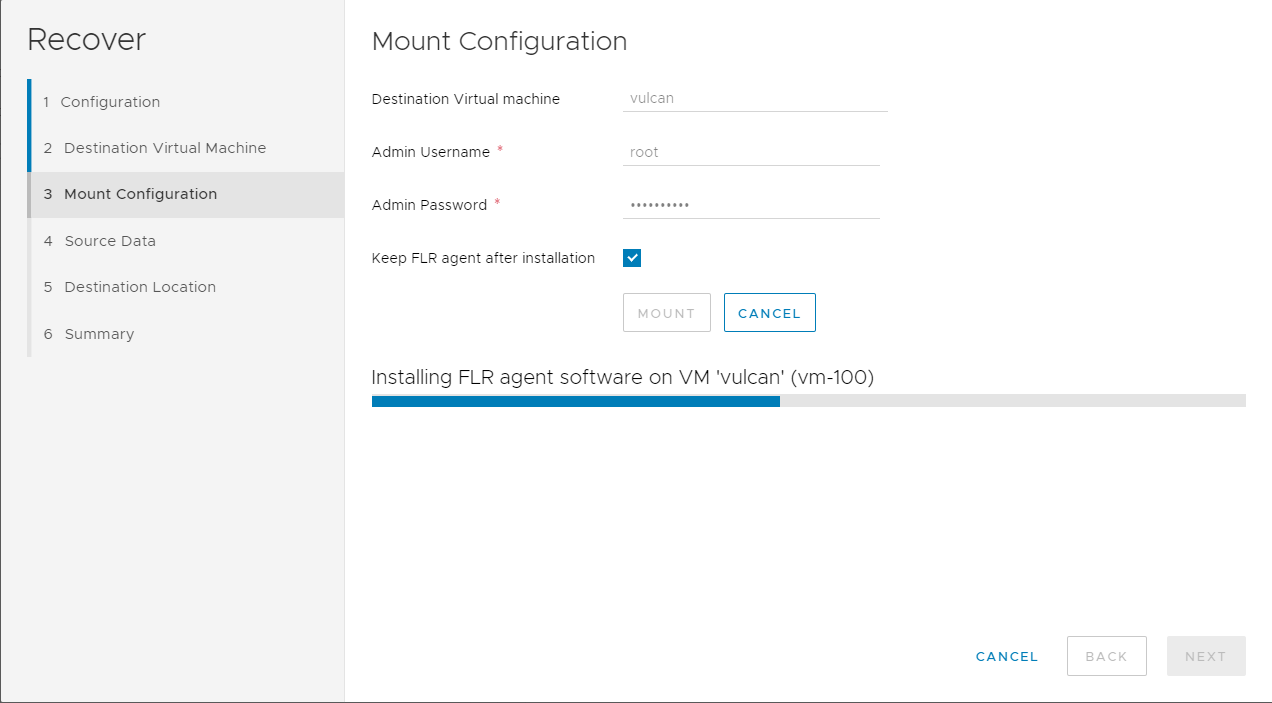
Clicking Next again brings you to mount options, including whether or not you want to keep the FLR micro-agent installed after the recovery is complete:
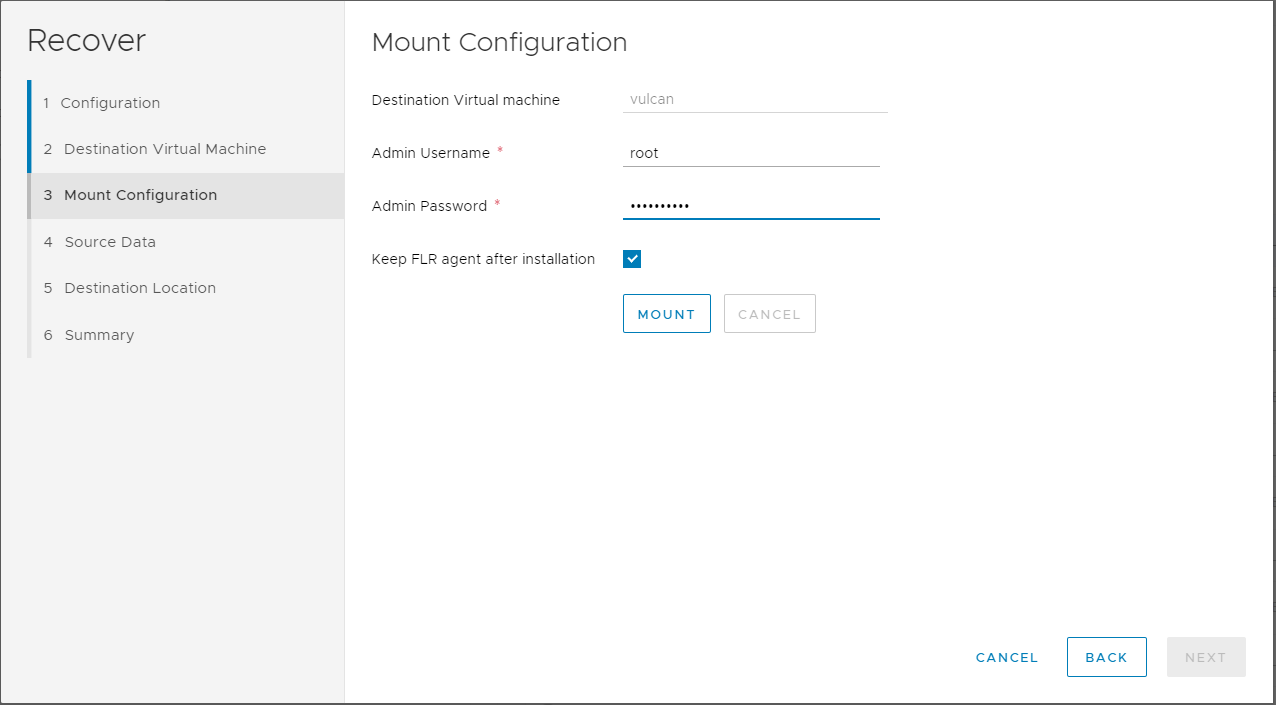
You’ll also need to enter Virtual Machine administrator privileges here. Once you’ve entered the details you need to, click the Mount option to start the process of mounting the backup for recovery. This will run through some steps quickly, but which I’ve captured just to show you the process:
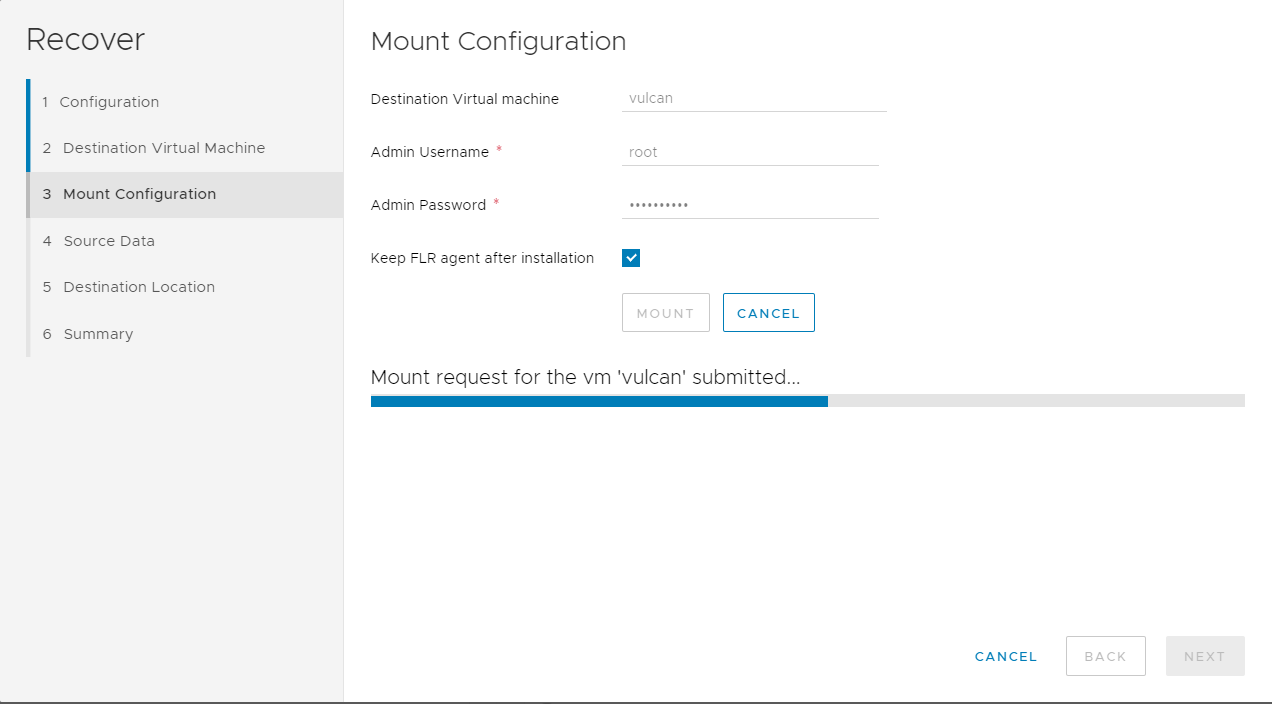
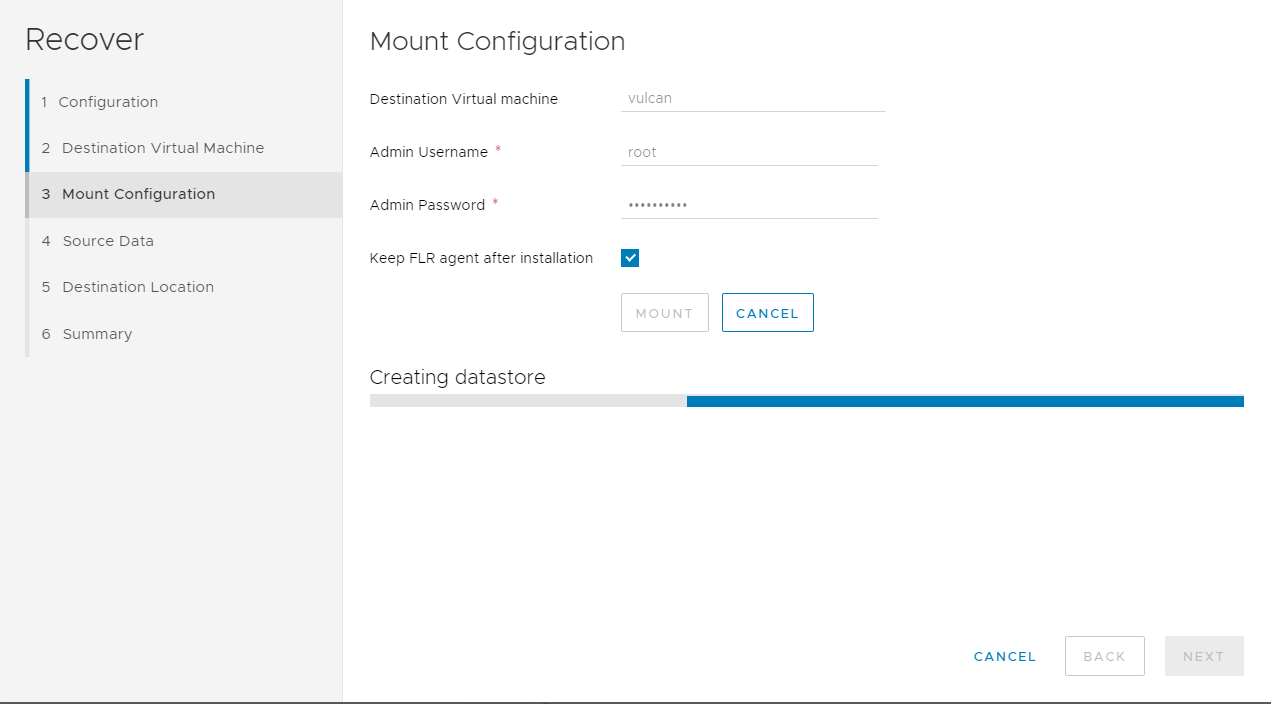
Those processes typically just take a few seconds each – there’s really not much to them at all. Once they’re all complete, you’ll get a status report and the Next button will be available to continue with the recovery:

When you click Next from here, you get to choose what data you want to recover:
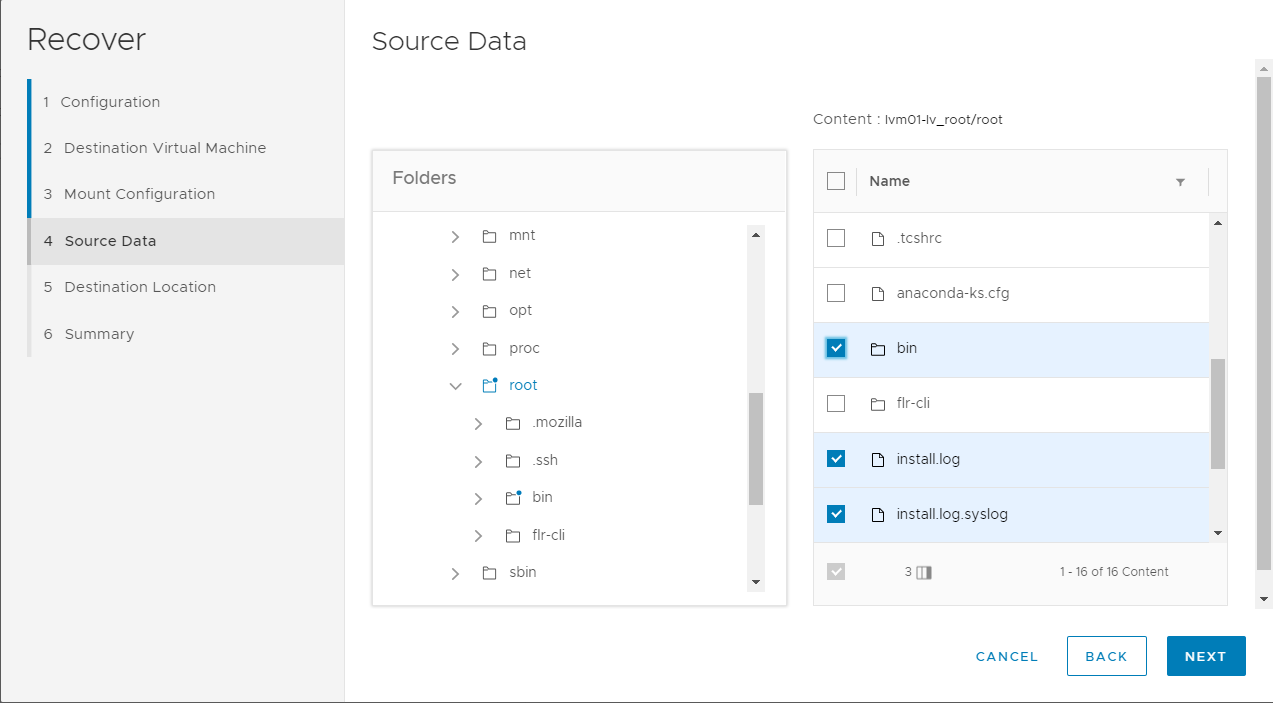
I selected a couple of basic files and a subdirectory within the /root folder. (Don’t forget, with vProxy in use, you can select tens of thousands of files for rapid recovery from image level backup, a substantial improvement over the days of VBA. In this case, my virtual machine has very few files to begin with.)
Clicking Next lets you choose the recovery destination, which I set to /tmp on the Virtual Machine:
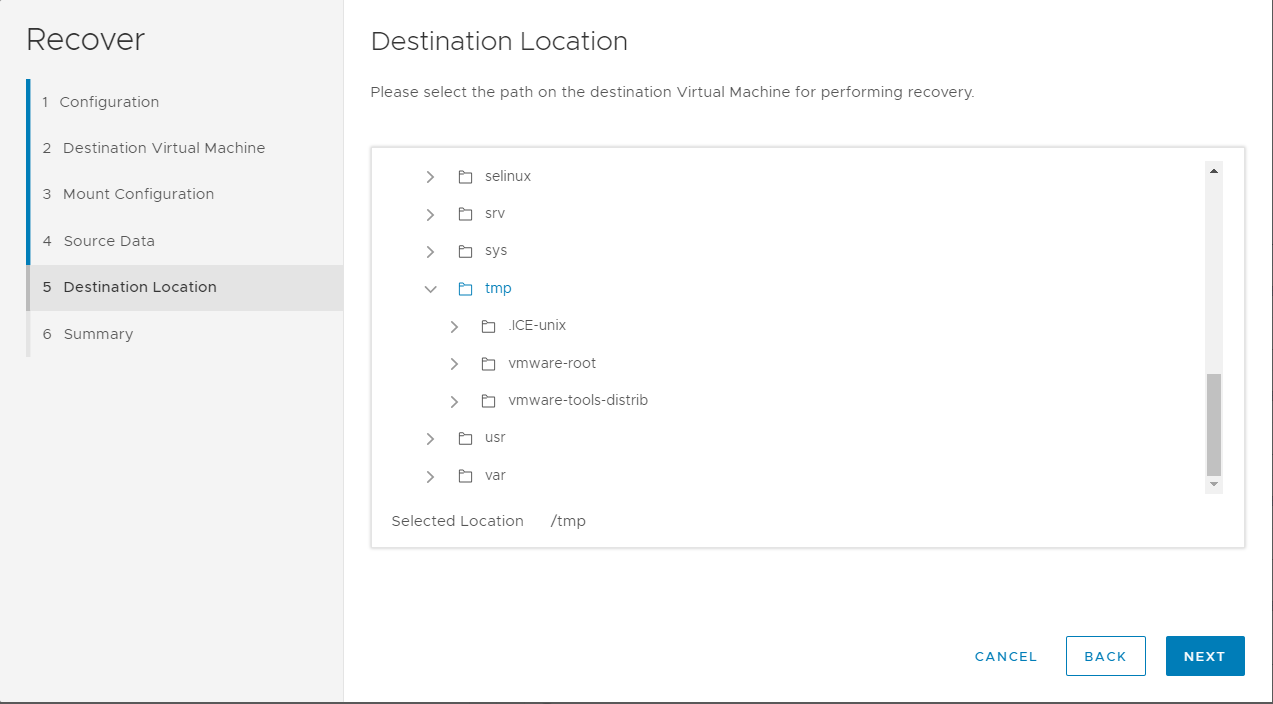
With the recovery destination selected, it was just a case of clicking Next to the summary tab:
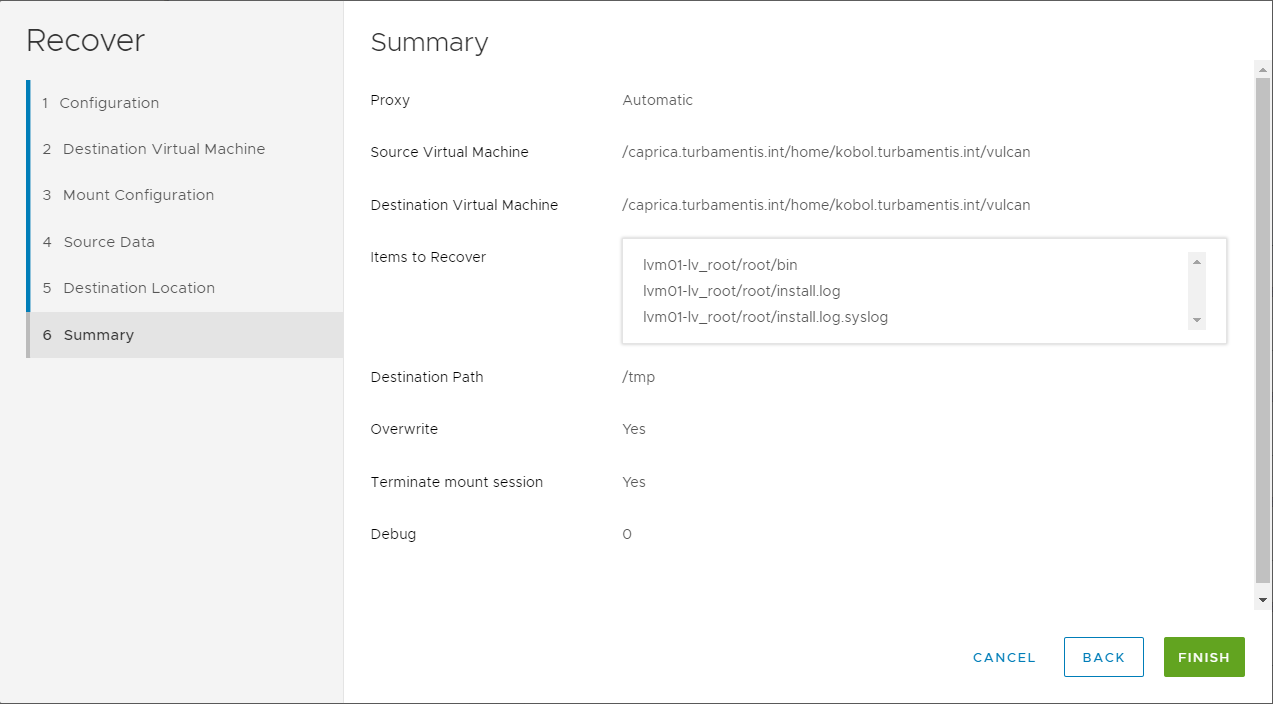
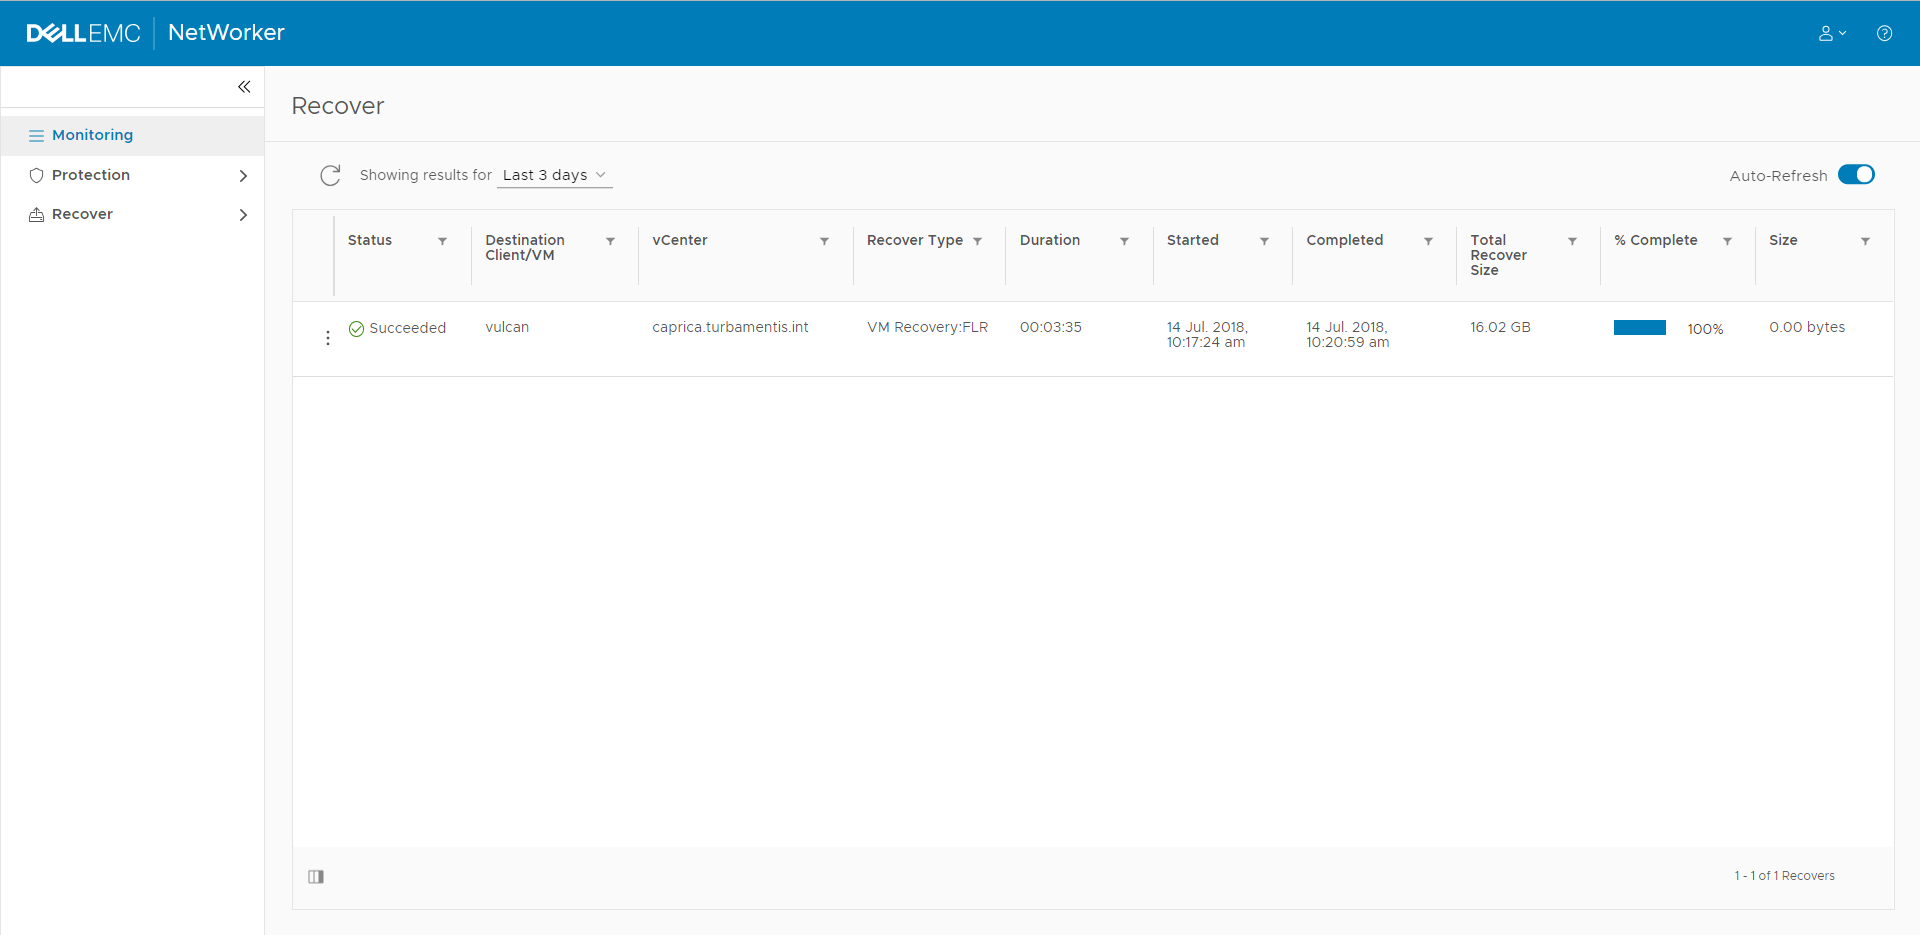
I was happy with all my selections, so I clicked Finish to start the recovery. Once the recovery job was submitted, WebUI advised me to go to the Monitoring tab to check the execution of it:
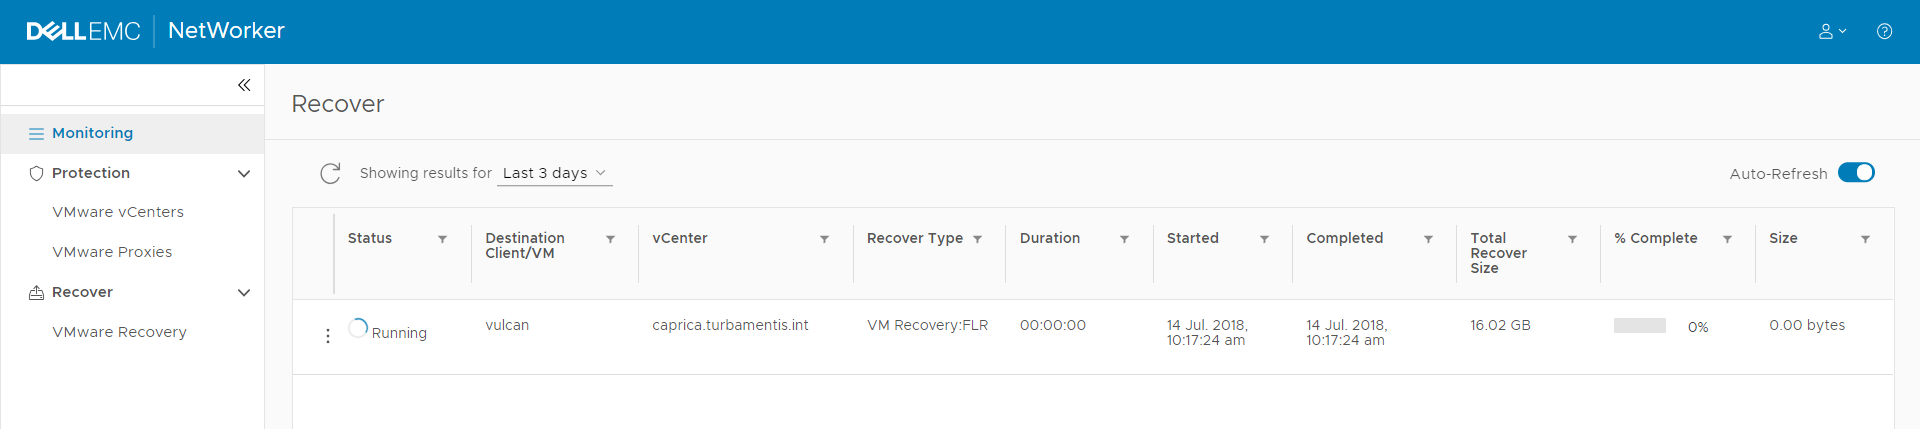
(Note that Total Recover Size refers to the size of the virtual machine.)
Being self-refreshing, it was only a few moments before the monitoring window had refreshed to say the recovery job was complete.
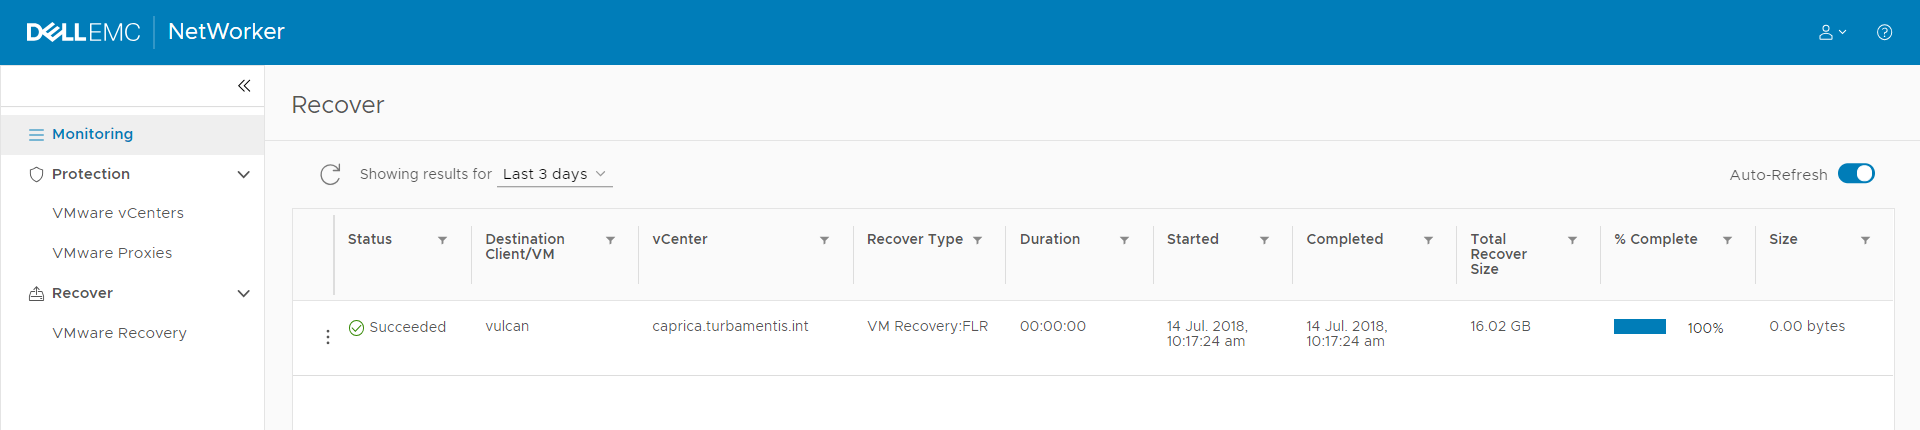
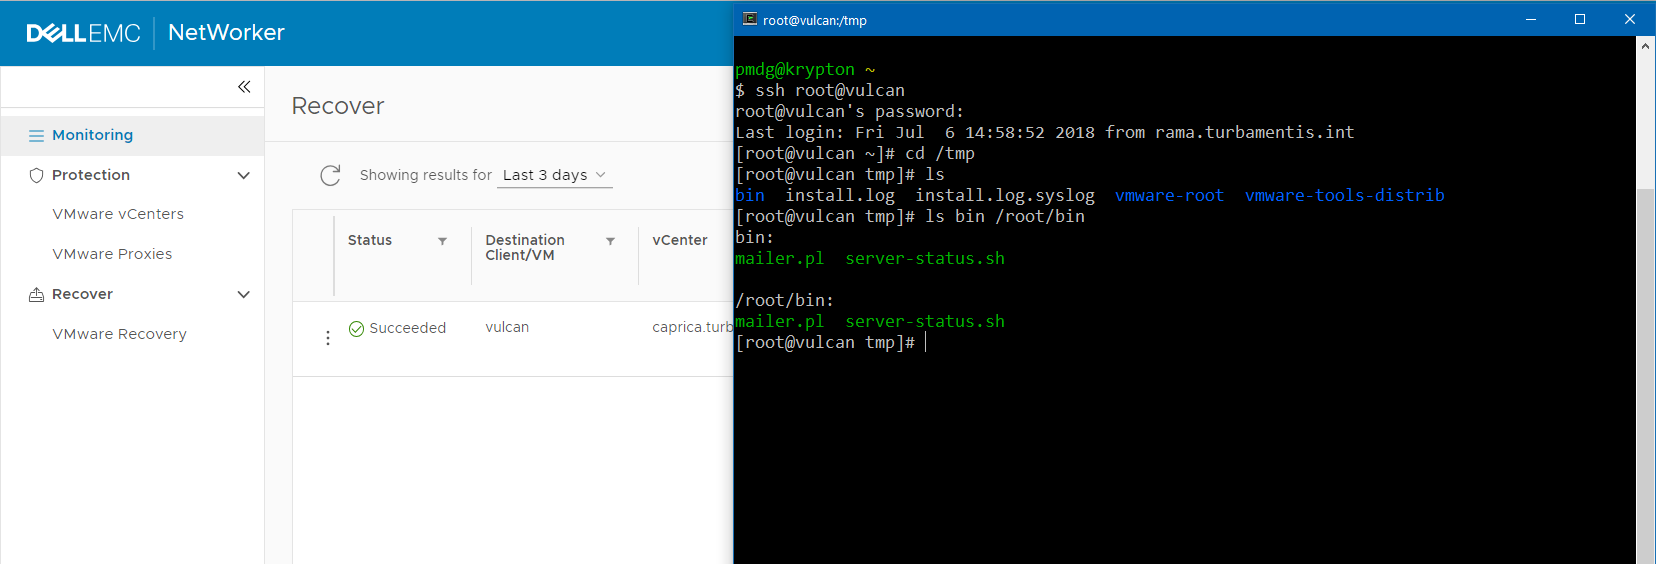
The recovery was so short it effectively didn’t register – I actually caught the Running/Succeeded updates literally in moments. With the recovery completed, I logged onto the host and confirmed the files had been created in /tmp:
There you have it – a quick view of the new NetWorker 18.1 WebUI, and some of the control items in it. I’m really looking forward to see this interface evolve, and I have to say: great work from the NetWorker development team for such a beautifully fluid and responsive HTML5 interface.
Great overview Preston. I am looking forward to be using this and installing to our customer base.
Great work Preston, but you made a little mistake the Web UI adres is not https://servername:9090/webui but https://servername:9090/nwui
Hi Marcin,
Thanks for the feedback and correction. You’re quite right – I’ll correct the article.
Thanks!