In previous posts I’ve talked about options around database backups – specifically whether you’d use a NetWorker module or say, DDBoost for Enterprise Applications. There’s a lot of architectural positives towards having the database administrators in control of the backup, but sometimes you’ll want the backups to be controlled and coordinated by NetWorker. It could be your organisation doesn’t have DBAs on-staff and need backup administrators to have more hands-on control over the environment, or it could be you have a policy to fully integrate database backup and recovery operations within NetWorker.
I’ve been going through a re-setup of my lab environment recently and today I wanted to spend a bit of time outlining how easy it is with NetWorker 9 (and NMDA v9) to configure Oracle backups, perform them, and do the recoveries as well – particularly if you’re a backup admin rather than a database admin.
With a freshly installed Oracle 12 instance on CentOS 6.7, I went through the process of installing and configuring NetWorker backups.
First you need to install the base NetWorker client package. (I always install the Extended client package for my lab servers, unless I’m specifically testing otherwise.) Once that’s been installed, you can install the appropriate NMDA package:
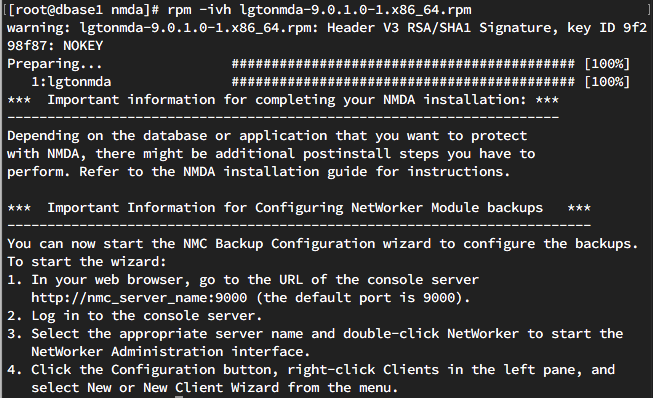
You’ll note at the end of the installation it tells you there may be additional postinstall steps to perform. I forgot to do that which generated an “oops” moment later – I’ll get to that at the appropriate time. But yes, there is a post-install operation you need to perform with Oracle databases.
Anyway, with the plugin installed and NetWorker started on the client, I jumped over to NMC to configure database backups for this system using the wizard:
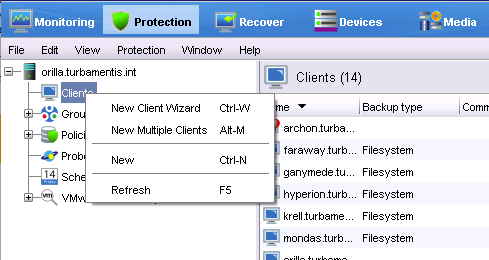
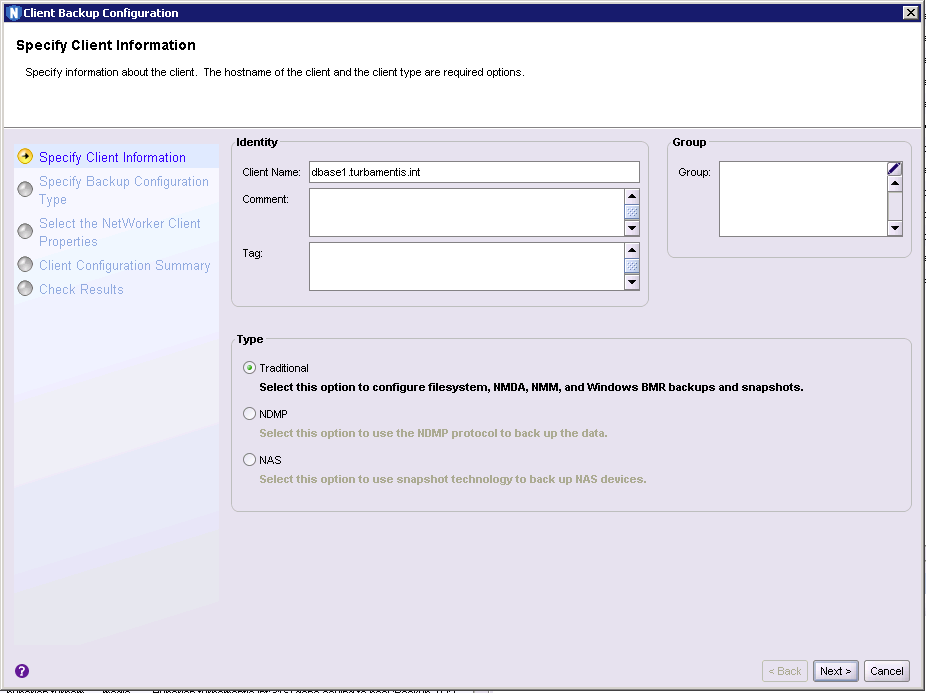
Just choose “New Client Wizard” to start a step-by-step configuration process for Oracle backups for the newly installed system. The first thing you’re prompted for of course is the host name and what type of backup you’re intending to configure.
Hitting next, you’ll have NetWorker interrogate the client software to determine what backup modules and options are available and you’ll get to pick what you want to do:
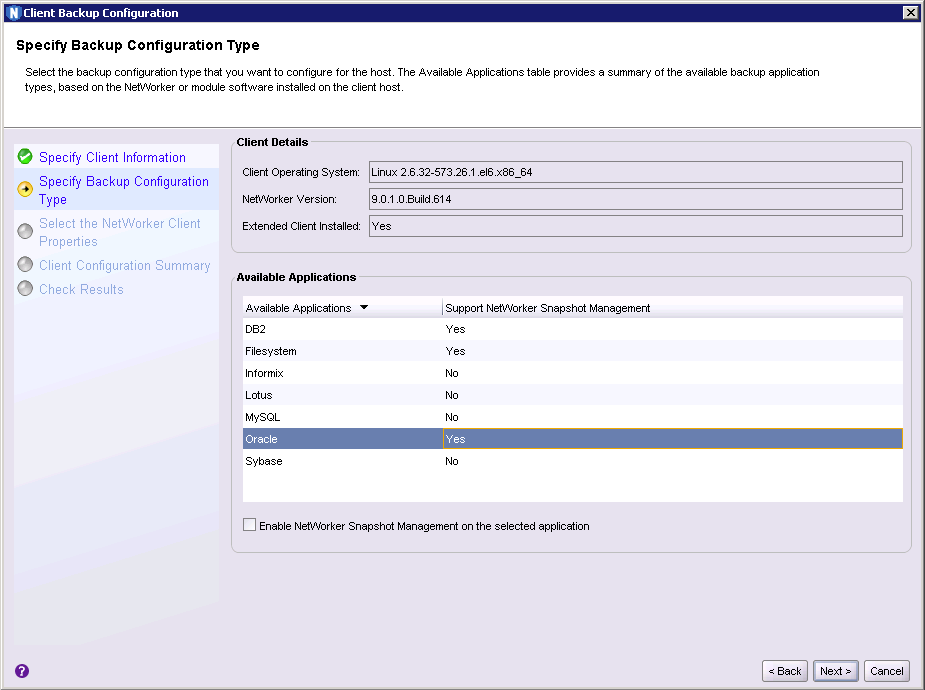
And yes, it really is that simple – just select Oracle and hit Next.
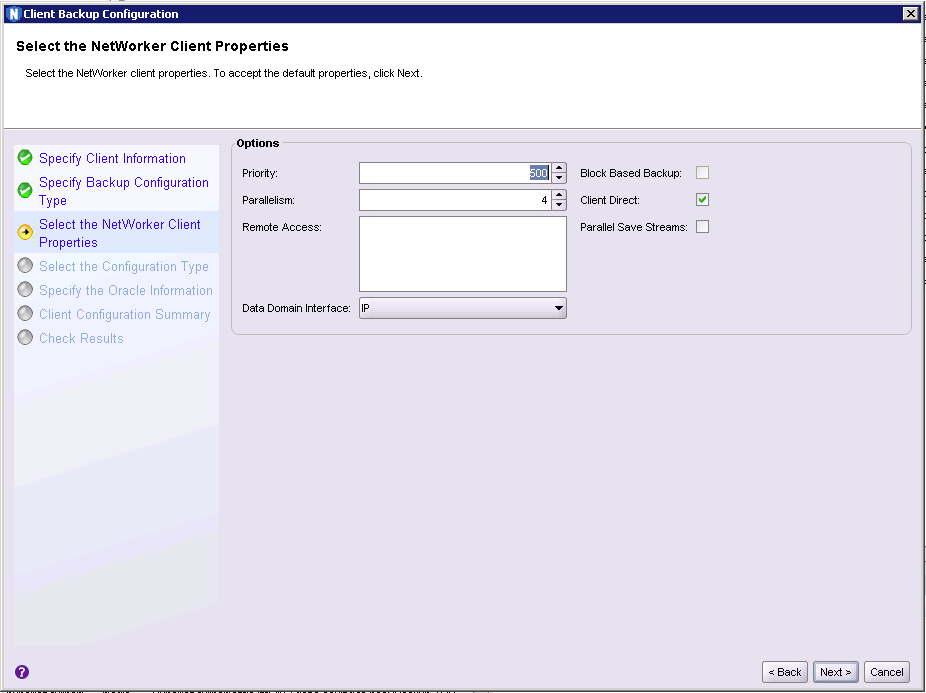
The above part of the wizard covers the absolute basics about the configuration, and unless you’re planning on backing up the database over DDBoost-FC, you’ll be fine to leave the options as they are. Click Next to continue.
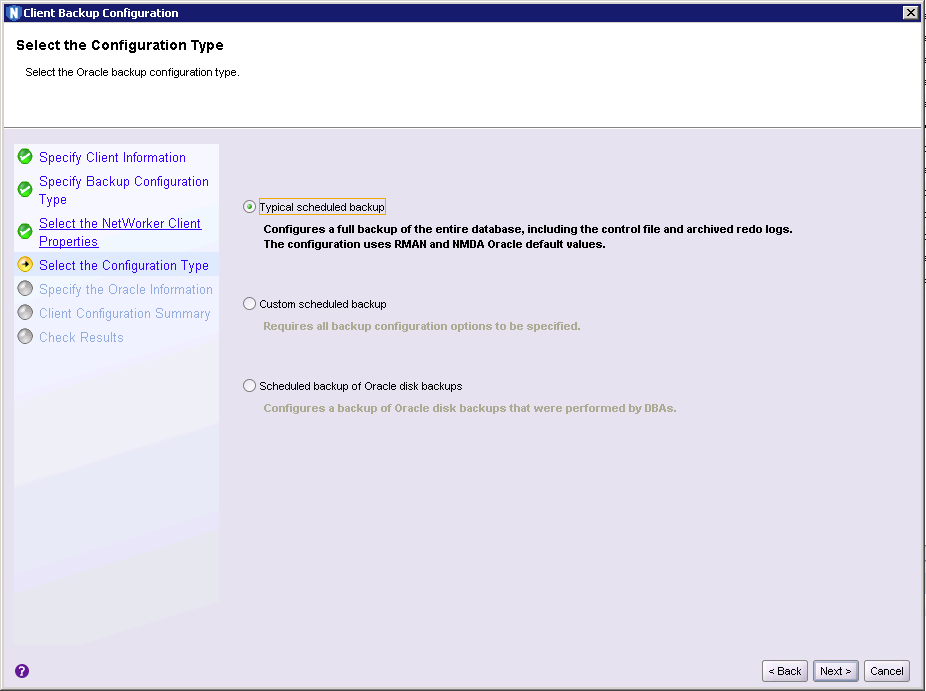
Here you get to choose between the three different backup options – a normal scheduled backup, a custom scheduled backup or a scheduled backup of disk backups – effectively allowing you to sweep up RMAN backups executed by the DBAs. In this case I wanted to go with the basics and kept it on Typical scheduled backup. Next to continue.
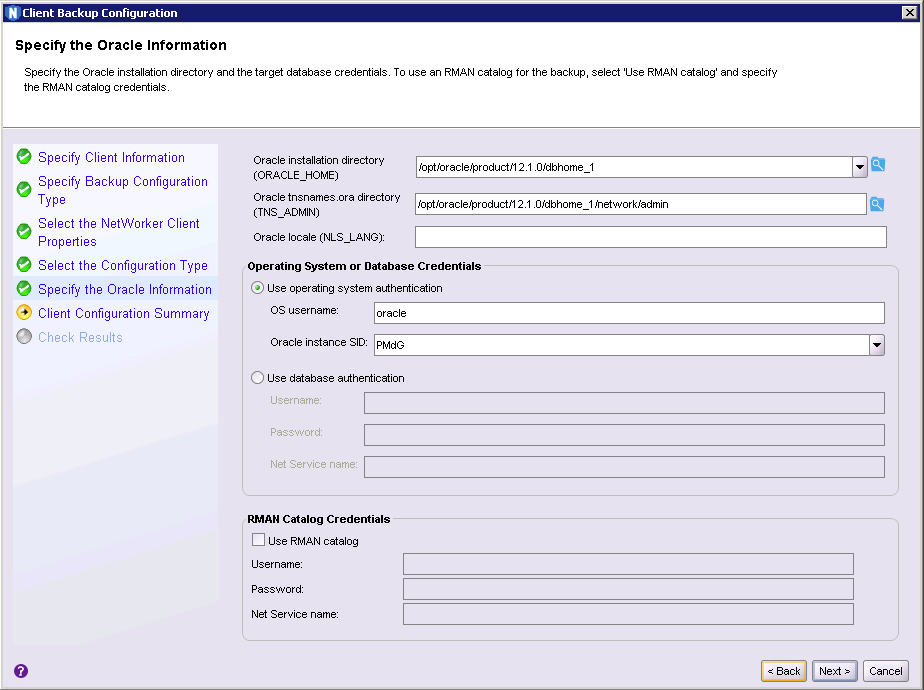
It’s on this form that you’ll definitely need a bit of an understanding of the Oracle setup. NetWorker managed to extract the Oracle home directory (presumably by interrogating /etc/oratab), but it needed me to specify the path to the tnsnames.ora directory. (That’s going to depend on your install of Oracle of course.)
The wizard uses two different forms of authentication – OS authentication or database authentication. Because I’d just setup the database in a pretty basic way I went with OS level authentication. (The alternative is to ensure there’s a fully configured backup user within the database and to use the database authentication. This is actually the more appropriate way if you have DBAs on staff. If you’re working on your own you might want to stick with the more basic OS authentication.)
So I supplied the username for Oracle (remember the base NetWorker client software runs as root/administrator, so it can su to the appropriate account), and the SID for the database instance I was configuring backups for. Next.

You then get confirmation of the options that are going to be configured and the choice between going back, cancelling the wizard or creating the client instance. I clicked Create. At the end of the creation you’ll get information as to whether it was done successfully or not.
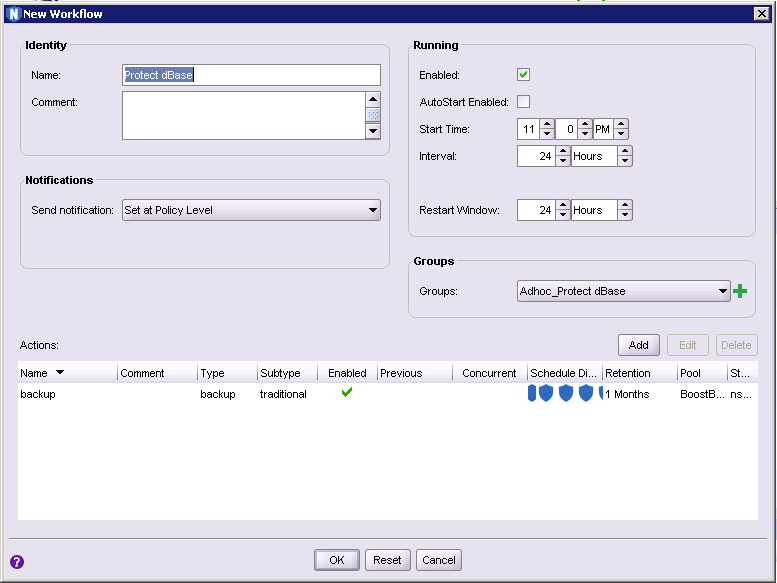
Next up, it was necessary to create a new workflow for Oracle backups. I went to an Adhoc policy I have defined for backups I don’t automatically run each day in my lab, and started the creation of a new workflow. The first dialog is as follows:
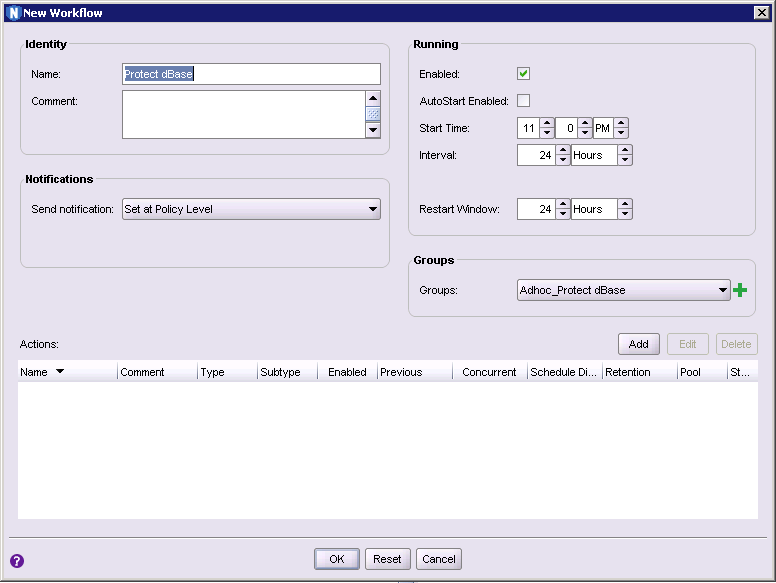
This gives you the core details of the workflow – workflow name, when it executes, whether it automatically executes, etc. Name it how you need to, configure a Group consisting of the Oracle client(s) database backup instances, and then click Add to add the backup action.
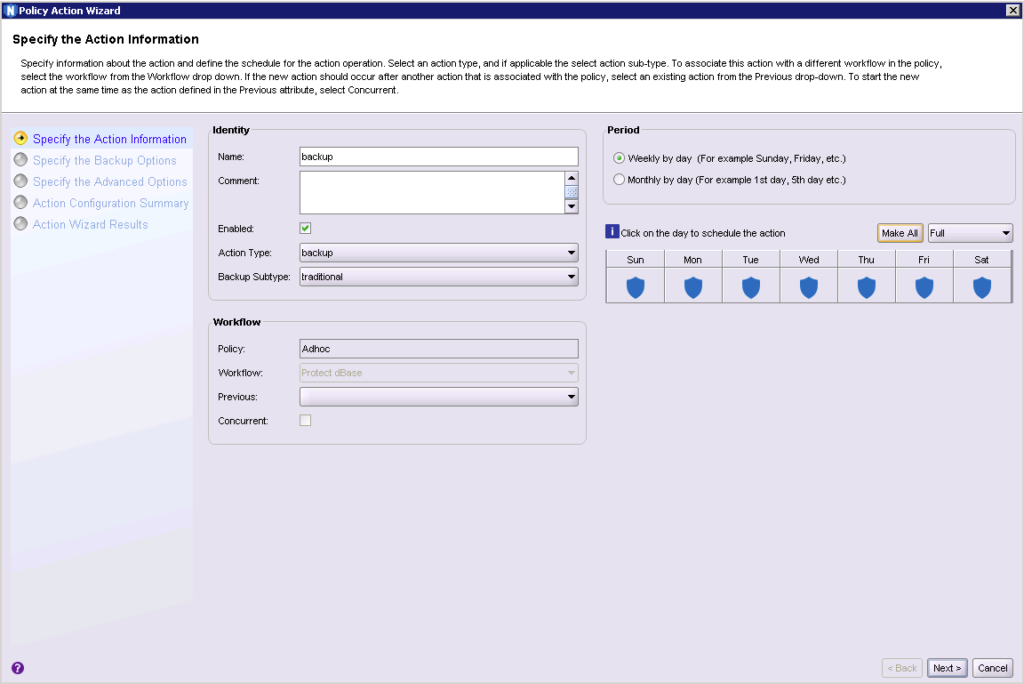
Because this is a small database I elected to make every backup a full. If you talk to most DBAs you’ll find there’s a tradeoff between the space savings on incremental backups and the change of procedures for recoveries. (While most of those procedural changes are mitigated by backing up to disk, it’s quite common to have specific breakpoints in most environments between database backups that are full every day and those that get an extended fulls+incrementals configuration.)
With the levels/schedule set, I hit Next to move onto the next page of the dialog:
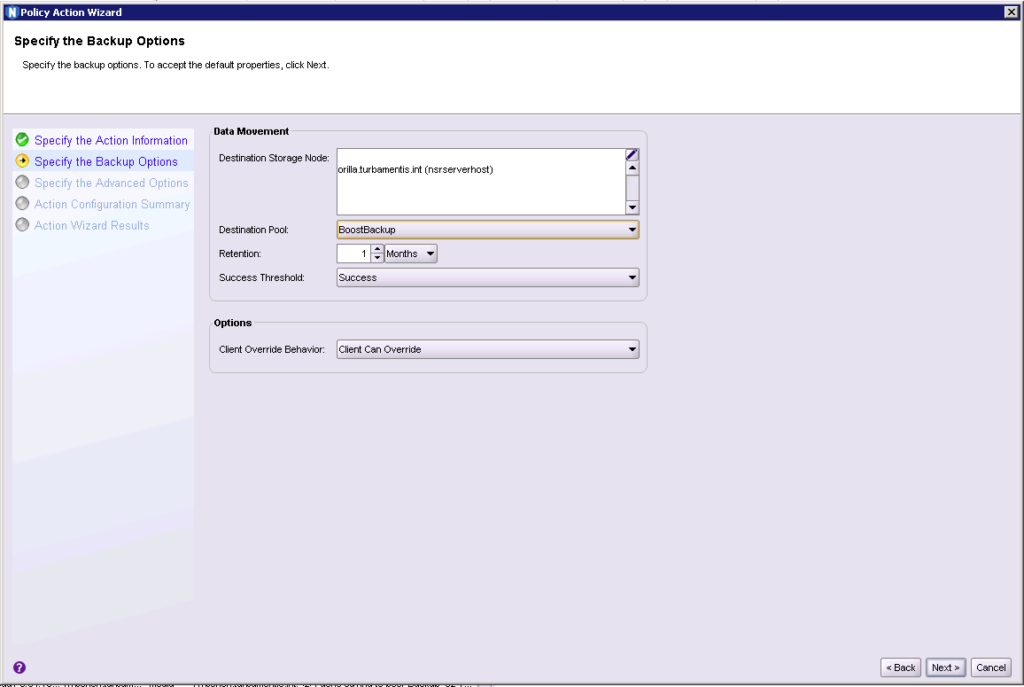
It’s on this dialog you’ll choose what storage node will handle the backup, how long it will be retained for, and most importantly, what pool is will be sent to. I wanted mine to go to my DDVE system, so I switched the pool over from Default to one I’d created called BoostBackup.
Moving on by clicking Next:
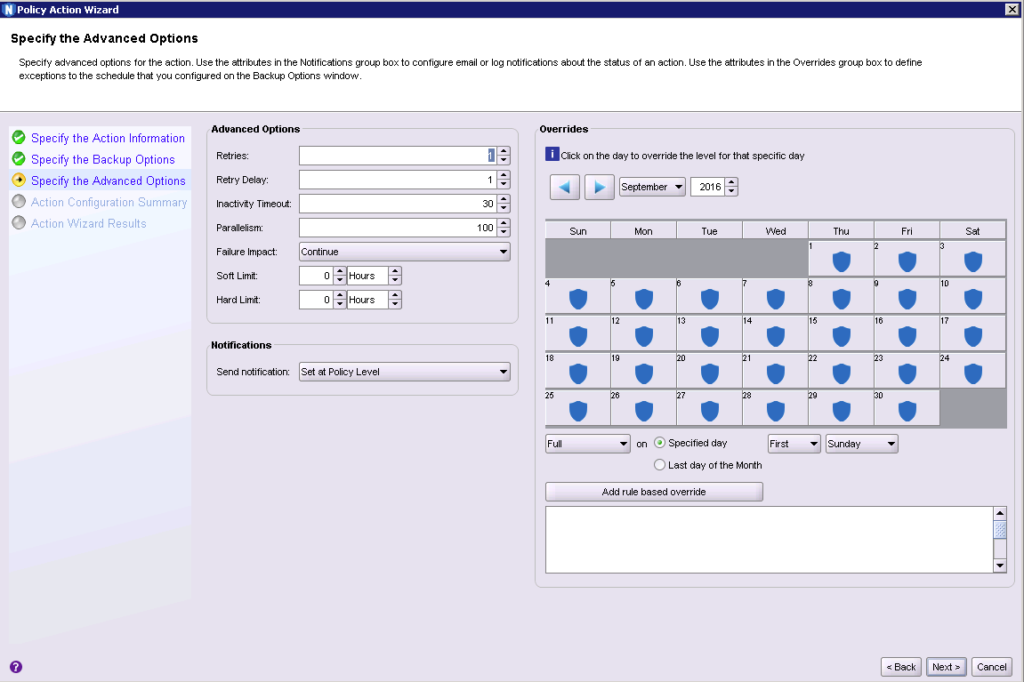
On the above dialog form you’ll get to define some more granular details about the backup process – how notifications are handled, number of retries, and overrides. I didn’t need to change anything here for what I was setting up, so I clicked Next to continue through the wizard to the Summary form.
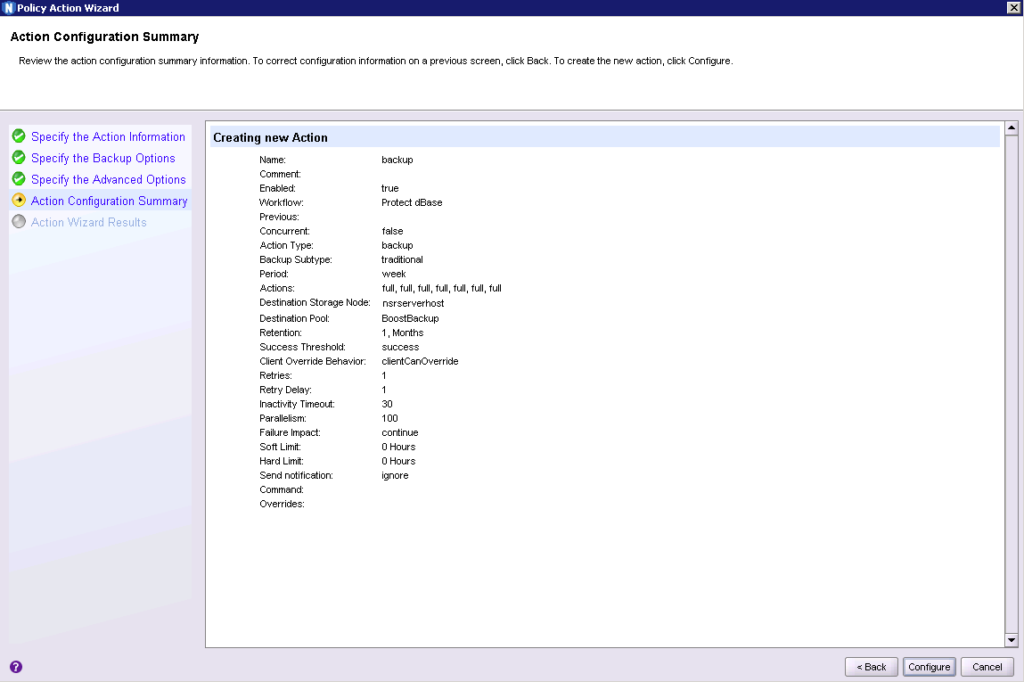
The summary of the new action was pretty much what I was expecting so it was time to Configure.
With the action successfully created I could click OK to finish working on the Workflow and jump across to the Monitoring tab to start the new workflow:
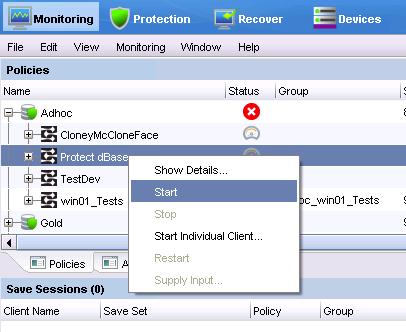
Right clicking the workflow and choosing Start will have you prompted for confirmation that you do want the job run now; once you’ve given that confirmation your backup should kick off.
Except! Remember that bit where I said I was a bit of a doofus and didn’t do the post-install configuration step? Well, I forgot to link the NetWorker module library to Oracle’s libobk.so file, meaning the job failed. Since however NetWorker saves the output of RMAN it was pretty easy to jump into the policy logs and see exactly what went wrong, viz.:
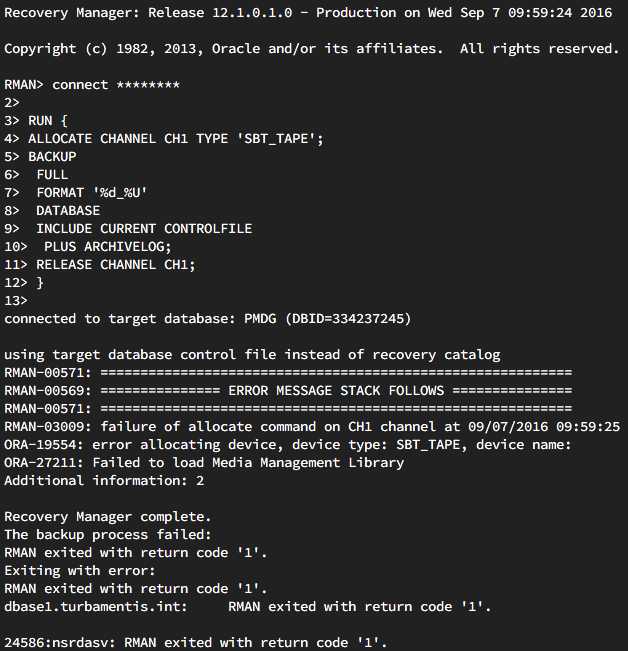
That RMAN/Oracle error code and text tells the whole story there – unable to allocate a backup channel because there’s no linkage to an SBT_TAPE device type. (Remember with Oracle any external plugin: NetWorker, Avamar, DDBEA, NetBackup, etc. all slot in using Oracle’s SBT_TAPE device type. A legacy name from how we used to backup.)
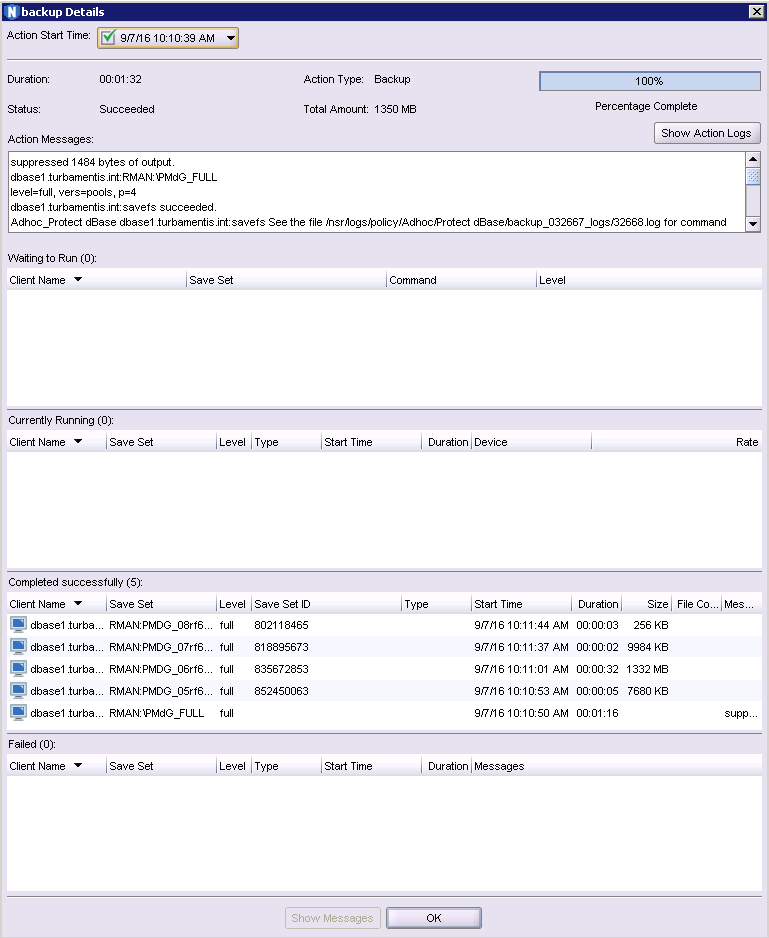
With that corrected by creating the appropriate symlink (which is of course completely documented in the NMDA install guide that I didn’t check!), the backup ran to completion, quickly:
Now a backup is one thing, but recoveries are the real crux of the matter! And Oracle recoveries can be completely performed within NMC these days using the NMC Recovery interface. While your DBAs might want to run the recovery from the Oracle server if they’re available, empowering backup administrators to craft recovery processes when there are no DBAs available is just as useful.
Warning: I’m working through an example recovery scenario. You should not follow this blindly if you’re using it in your environment. This is a lab test only. Always adapt your recovery process to the activities and recovery requirements at hand, and always work with the appropriate documentation, processes and know-how!
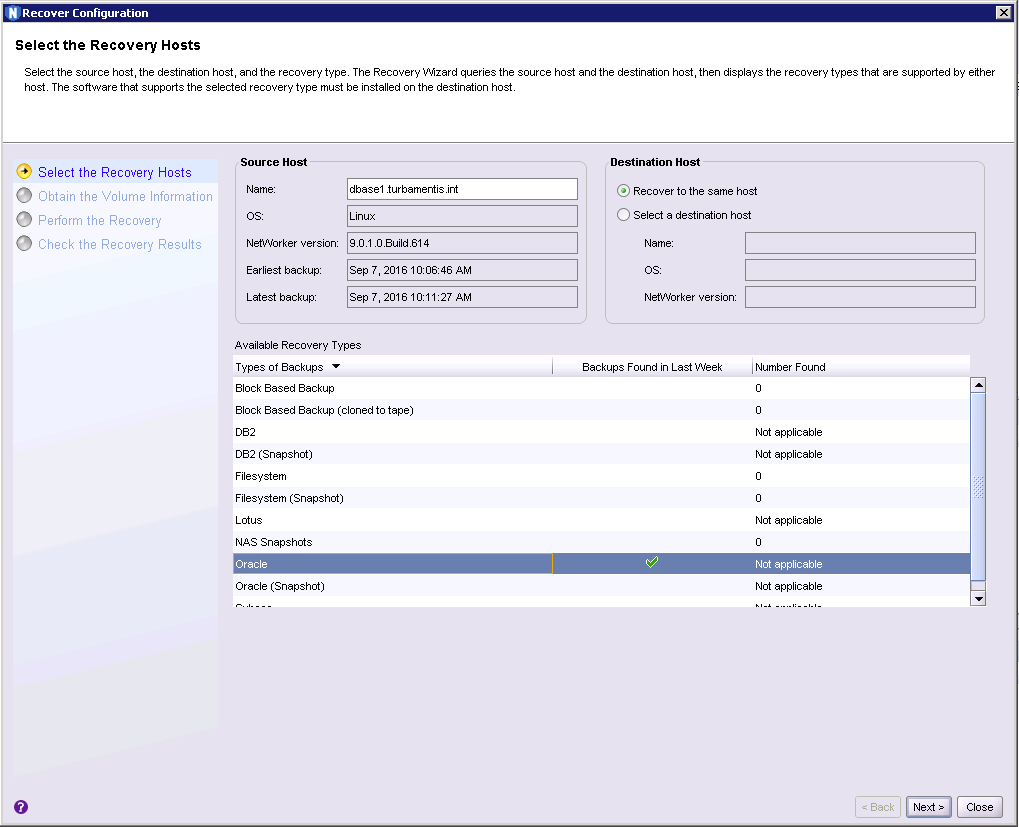
The first step is to choose the host you want to recover (in my case, dbase1), and choose the type of recovery you want to configure (Oracle). Hit Next to continue.
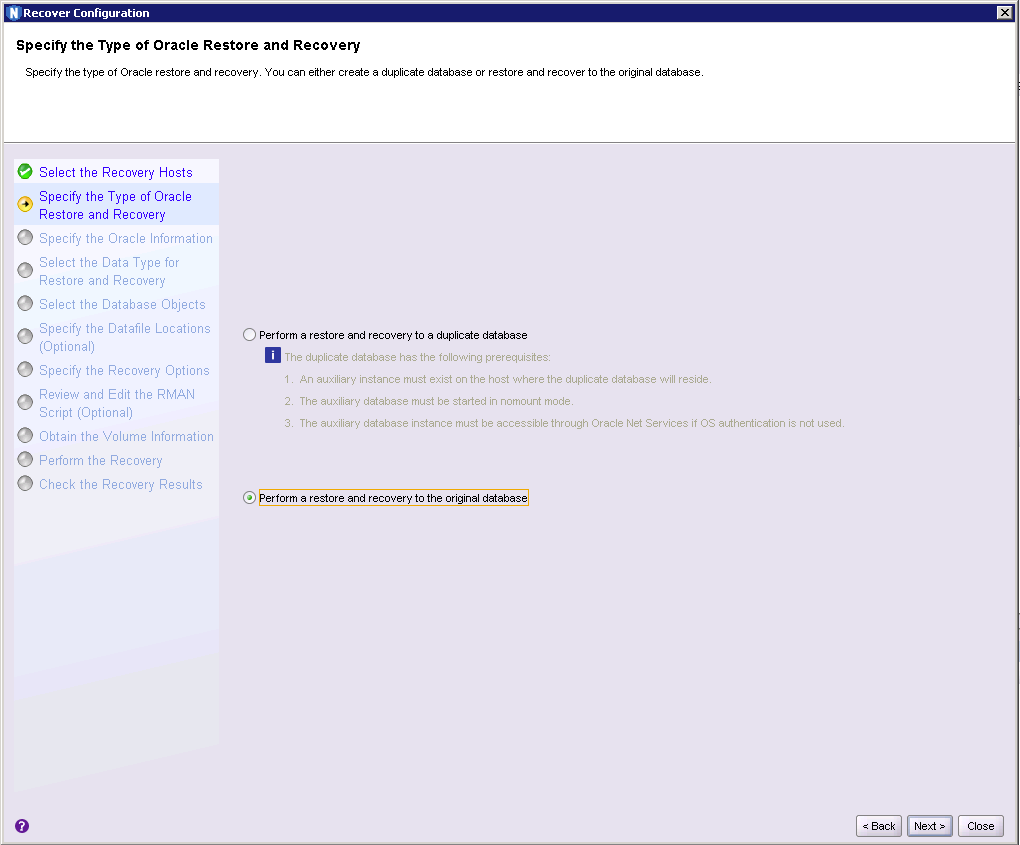
Your options are pretty straight forward here – recover to a duplicate database instance, or recover to the original database. I chose to do an original database recovery and clicked Next.
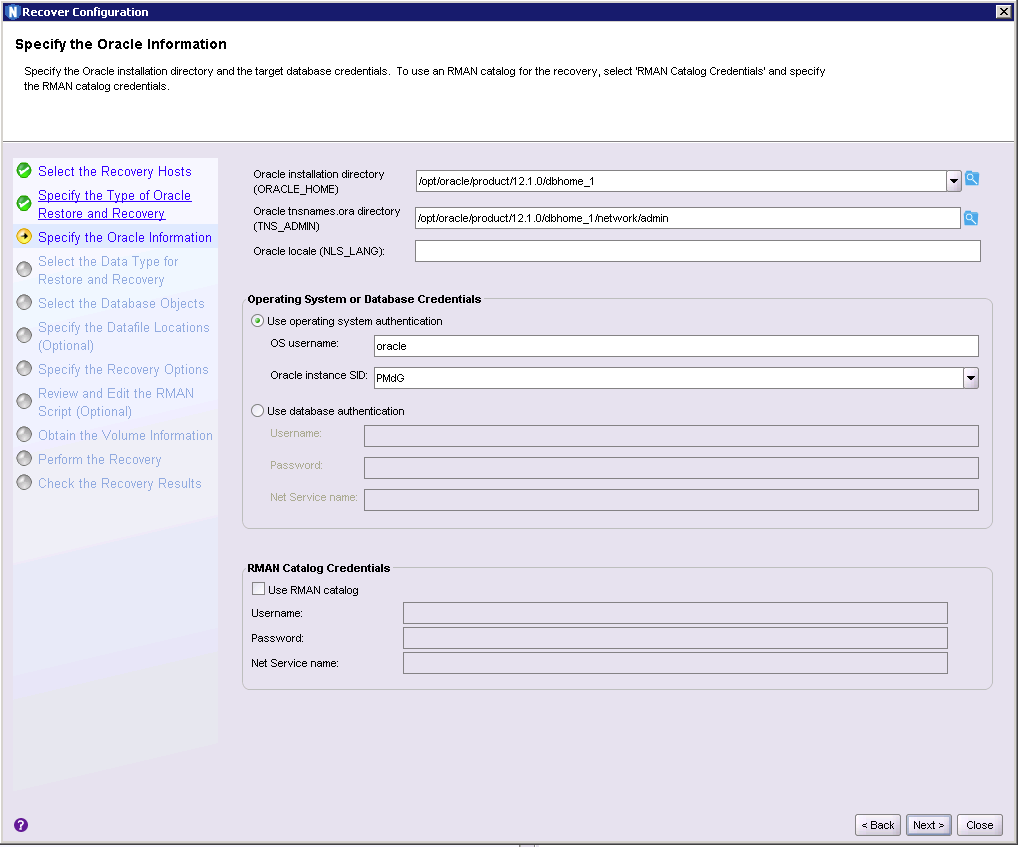
This dialog is pretty similar to that backup configuration dialog I showed earlier – provide the appropriate configuration details for the database and the authentication method required.
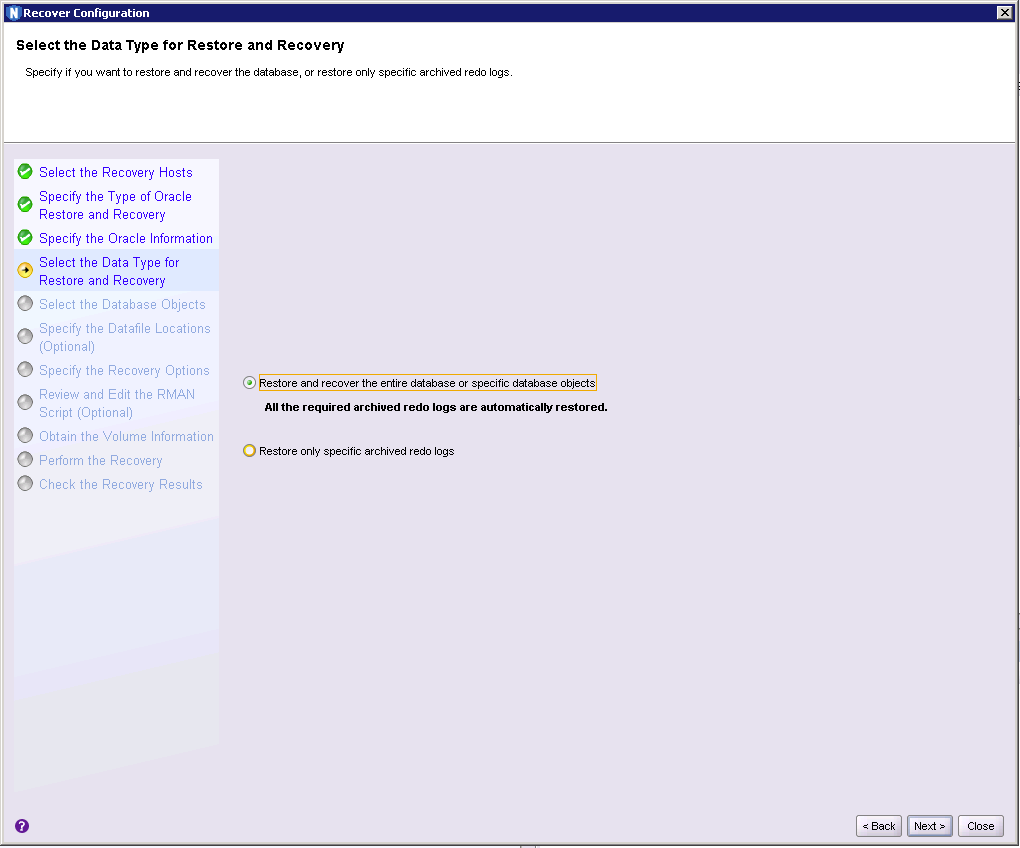
You get an option between just recovering specified archived redo log files, or the entire database/specific database elements. I was doing a full recovery so I kept with the default selection and clicked Next.
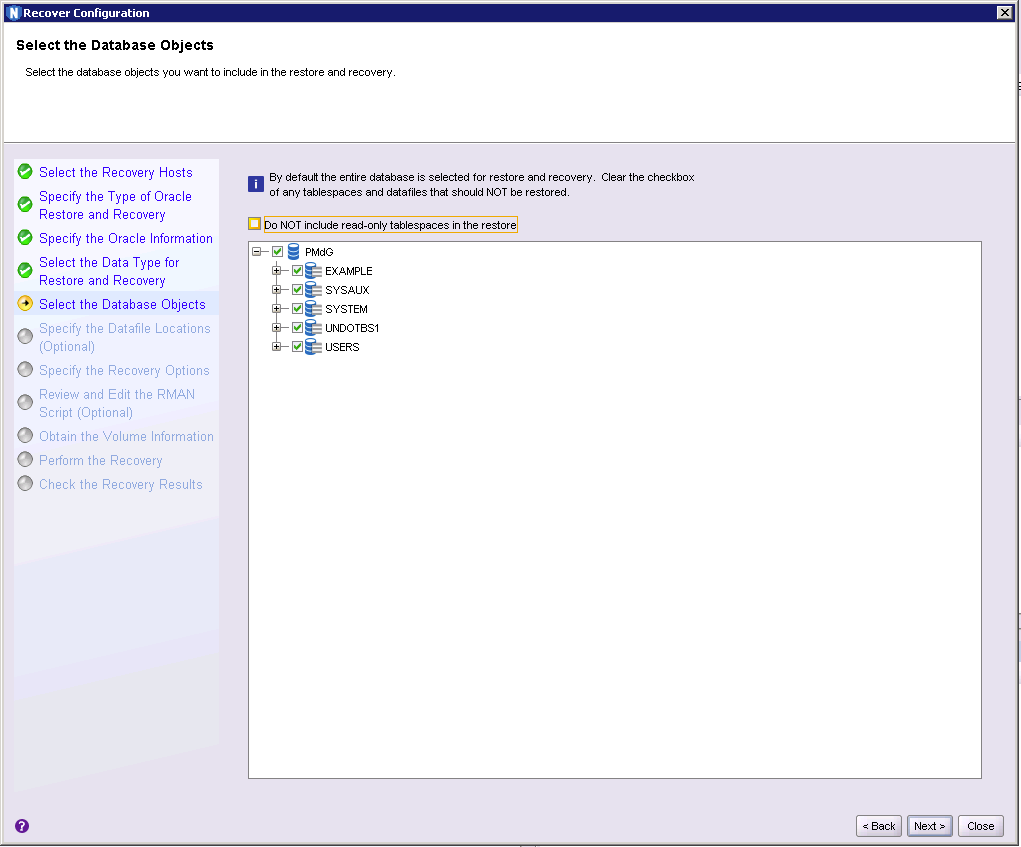
Here you get to choose what specific tablespaces/data files you want to recover. This is particularly handy if you’ve say, had a single tablespace accidentally deleted and just need to recover that. Again, I wanted to recover everything so I clicked Next to continue.

Unless you’re working with a DBA who says otherwise, or have already got the database in a startup/mount mode, you’ll likely want to click Yes here to have NetWorker handle that for you.
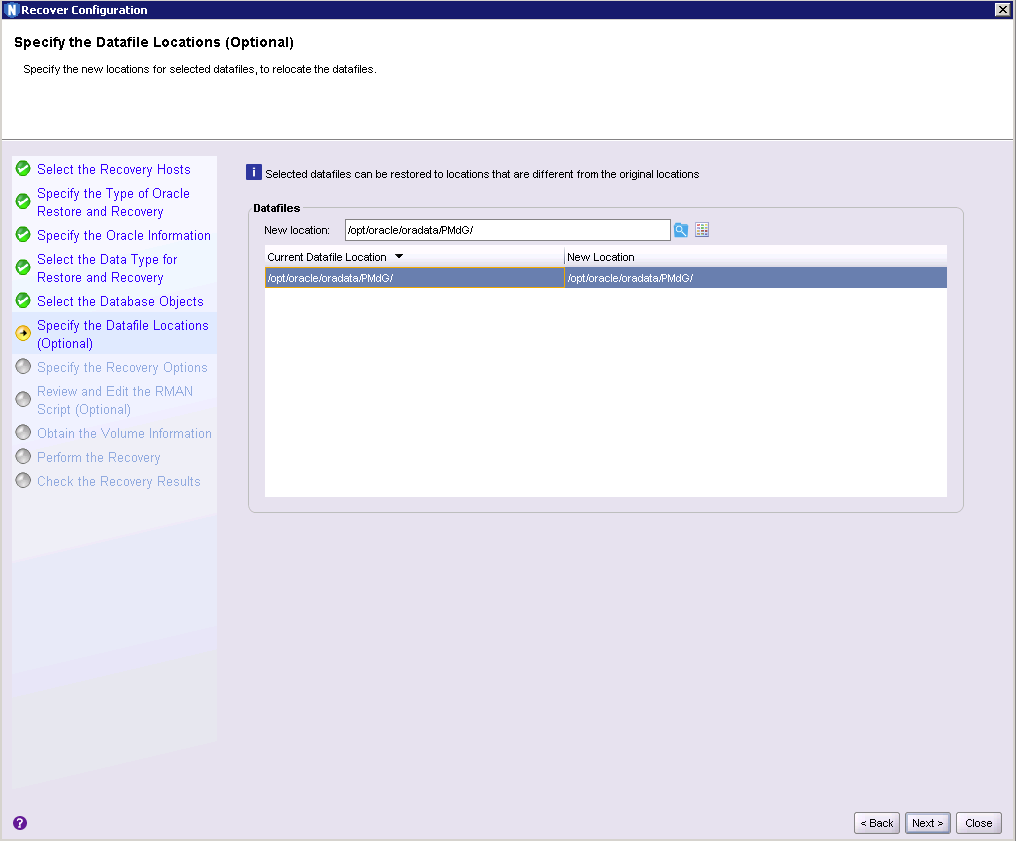
Here I got the choice to recover datafiles to alternate locations; I left them as-is and clicked Next.
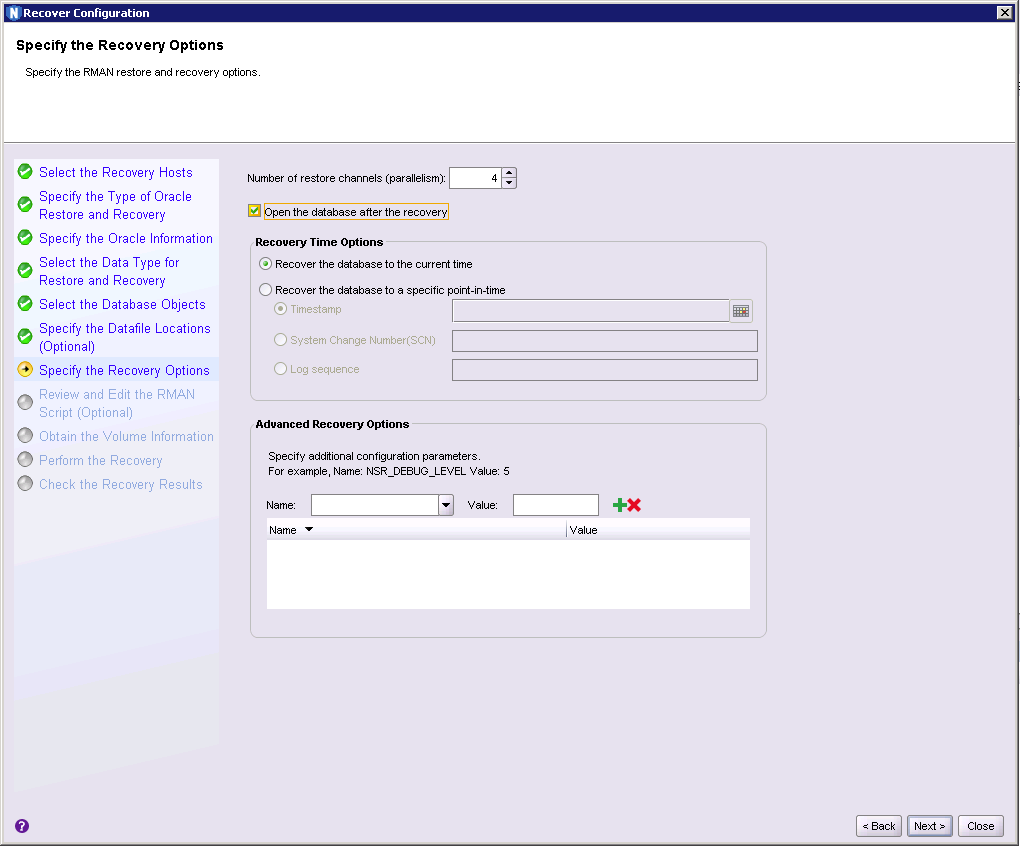
Here’s where you choose how many channels you want to use for the recovery, when you want to recover to, and whether you want the database automatically started at the end of the recovery process.
Once you’ve worked through those options, NMC will show you the RMAN recovery script it’s created, and give you the option to edit it:
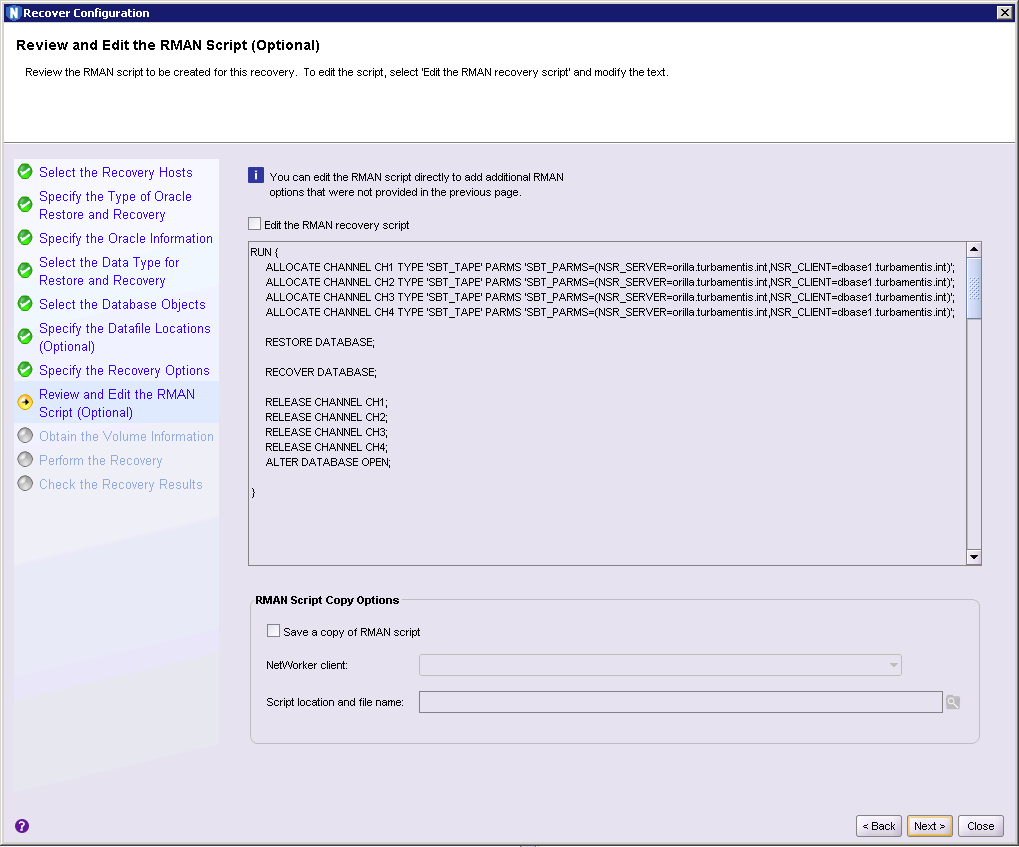
(You can even save a copy of the RMAN script in case you want to reference it later, or hand it over to the DBA to complete.)
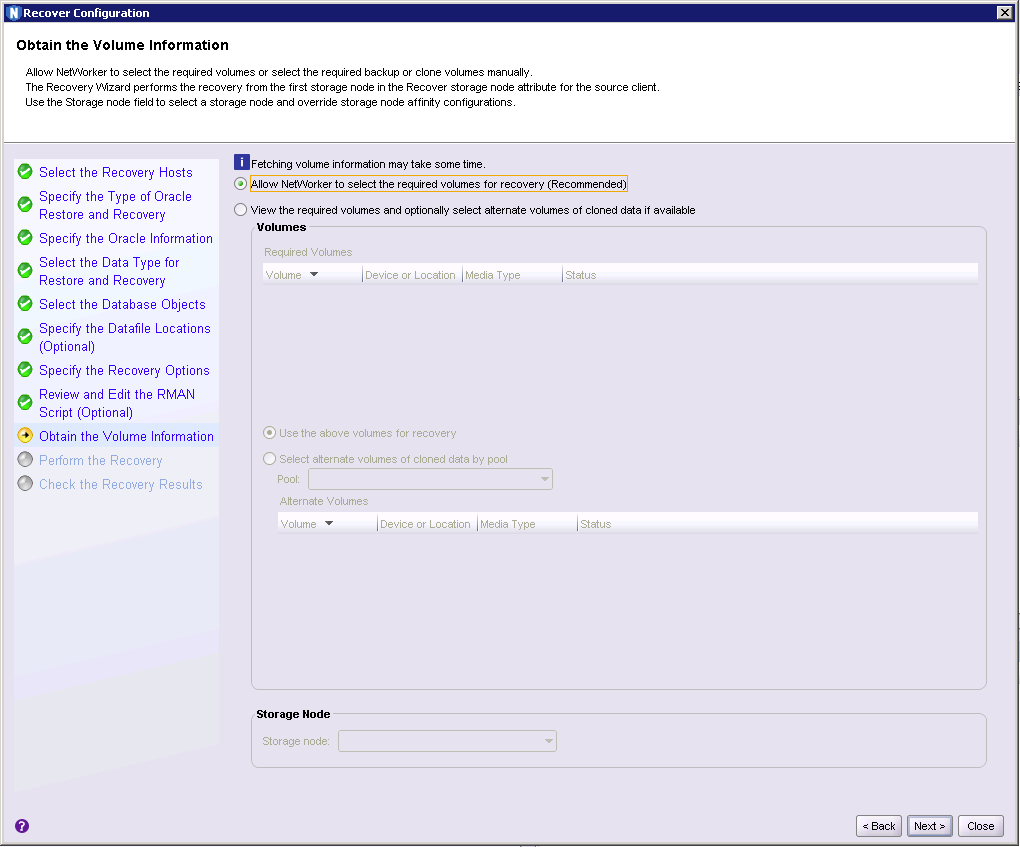
Clicking Next, you’re invited to confirm storage node details and optionally change the volumes to be used for the recovery:
Once you click past here you can give the recovery a name and choose to start it:

As soon as you click “Run Recovery” the recovery process will start. Here’s a few dialogs showing output during the recovery process:
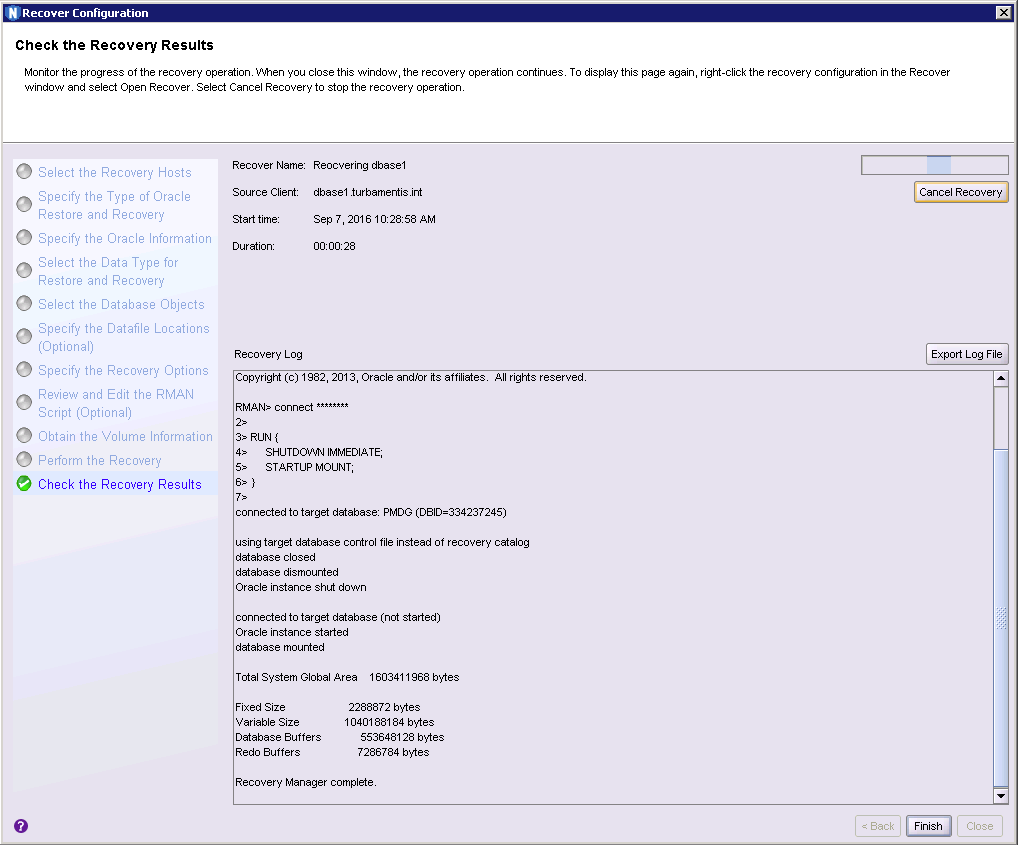
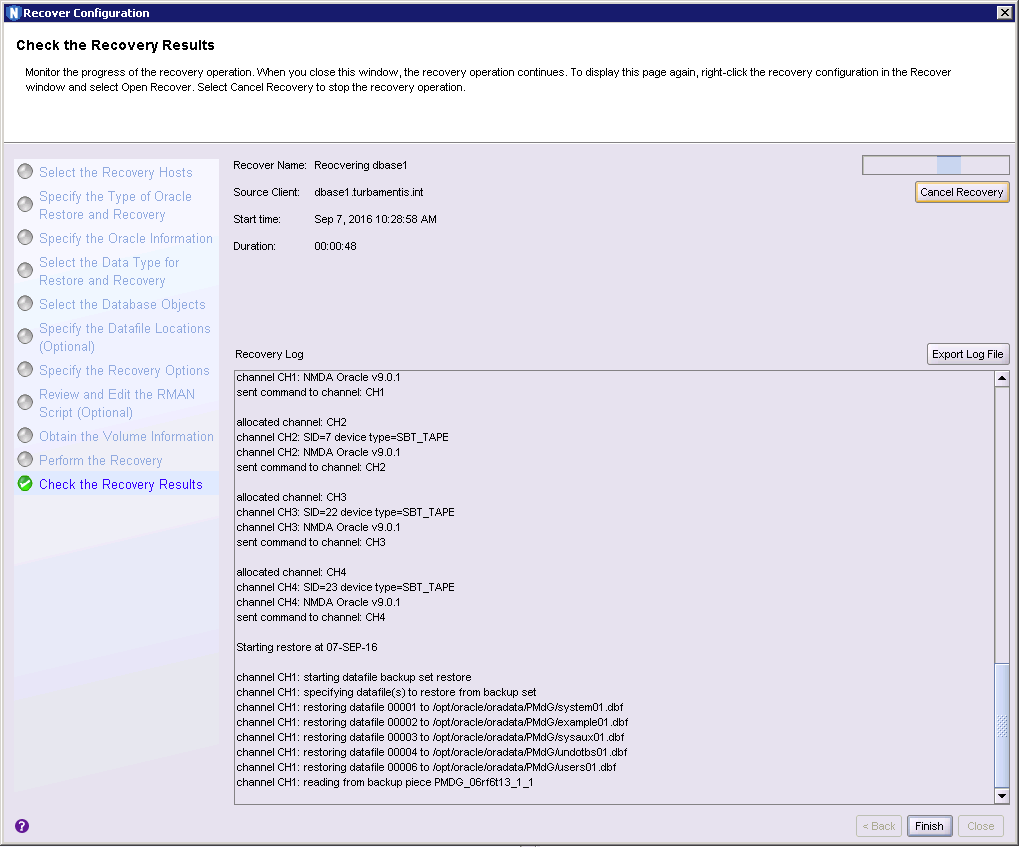
And the completed recovery:
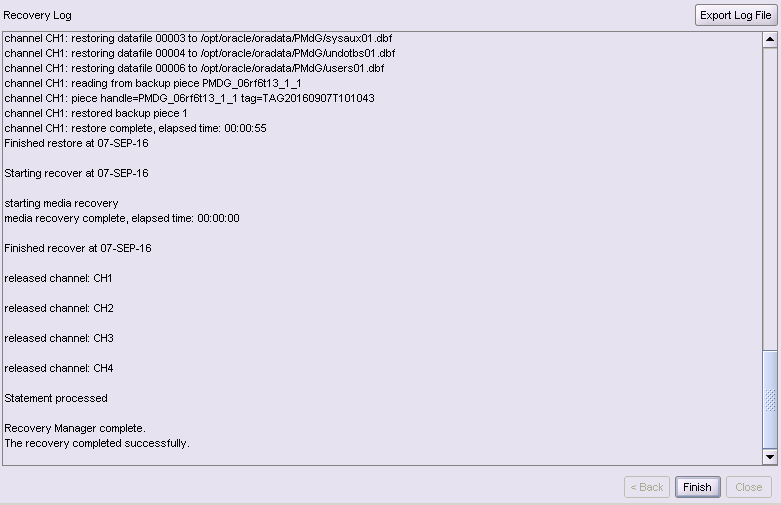
There you have it. A complete Oracle configuration, backup and recovery.
(As I said before, that’s a lab recovery – if you’re actually doing a recovery while the steps may be the same, you still need to customise for your database, so make sure you perform any recovery as appropriate for your environment and circumstances.)
Overall though it’s fair to say that Oracle backup and recovery with NetWorker is simple and straight-forward.
Thanks for your detailed explanation with screen shots it is really helpful us to work on oracle backups and recoveries.i just want to know if we need to restore it to duplicate database as like how we do it on sql copyofDB what is the additional steps need to be followed.Please post that as well so that it will be even more helpful.
This is great, when will this kind of feature be available for Exchange and other databases….