As you might have noticed in other posts, I’m a big fan of using NVP (NetWorker Virtual Proxy – also referred to as vProxy) to backup VMware virtual machines. Introduced with NetWorker 9.2, the new VMware image backup system is lightweight and fast – both for backup and recovery operations.
One of other things you’ve probably noticed, using NetWorker, is that it’s all about giving you options on how to do things. At one point that was simply a choice between using the GUI, doing interactive command line operations, or scripted command line operations. More recently, the REST API was introduced, giving an additional level of interaction, ideal for private cloud or devops style environments.
In VMware environments, NetWorker also gives some flexibility between whether you want to use the vSphere Web UI (ideal for VMware administrators), or the above NetWorker options – GUI/NMC, CLI, CLI-scripted or REST API. But one of the real hidden gems, I think, is the VMware View section in NMC. This lets you start tackling a VMware environment from a “big picture” point of view, and that’s what I want to run through in this blog post.
First, let’s set the scene – you access the VMware View panel under the Protection tab in NMC:
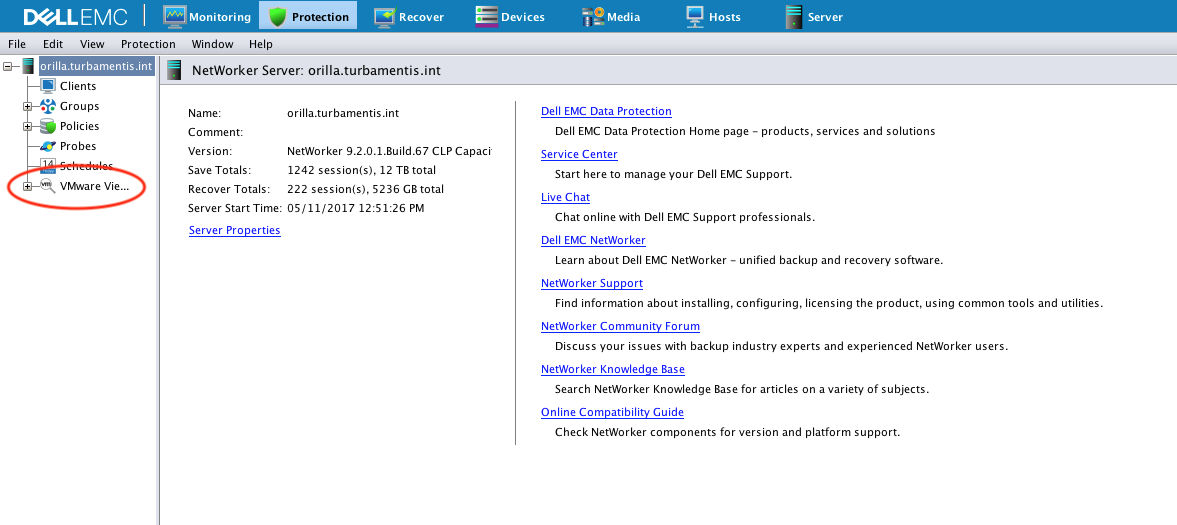
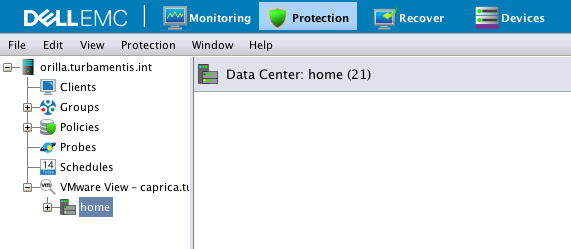
VMware View is in its own area, as you can see there. Now, you can still do VMware policy configuration, etc., as part of the standard Policies and Groups configuration areas, and indeed you’ll need to do at least some preliminary setup via standard policy/workflow management. However, once you’ve got the framework in place, VMware View gives you a fantastic way of quickly and simply interacting with your VMware environment. If you expand out the view, you’ll get details of vCenter servers/clusters and the defined datacentres. For my home lab, it’s pretty straight forward:
Once you’ve selected a vCenter or Datacentre, you can start to visually see your virtual machine layout and the protection policies virtual machines are protected to. Here’s my home lab view, for instance:
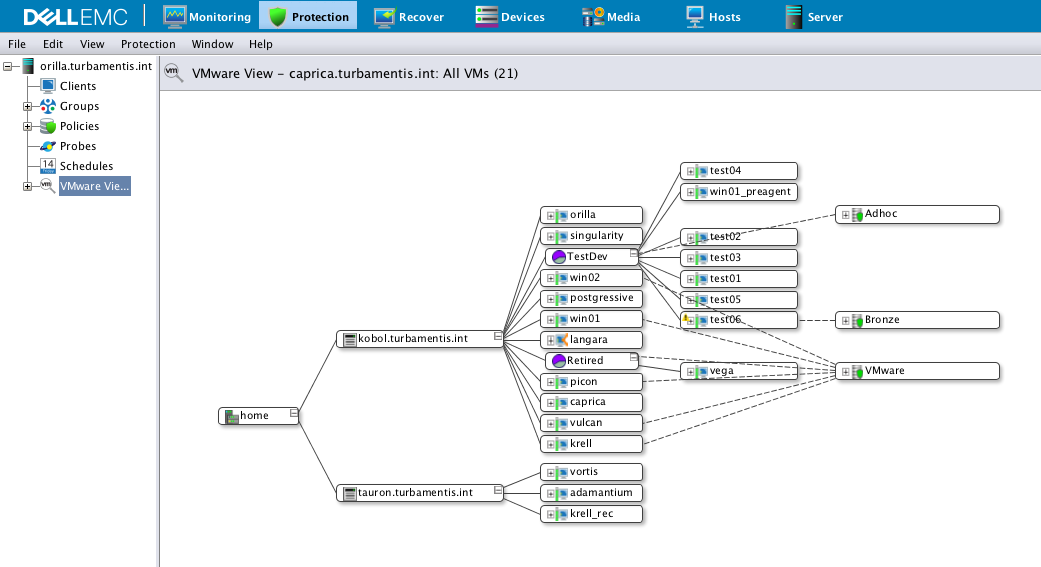
The layout of that is straight forward – home is the virtual Datacentre, and there’s two ESX servers in the environment – kobol and tauron (astute observers will note I have a penchant for (mostly) naming systems after fictional planets, or at least things associated with science fiction. I am, after all, an adherent to RFC 1178).
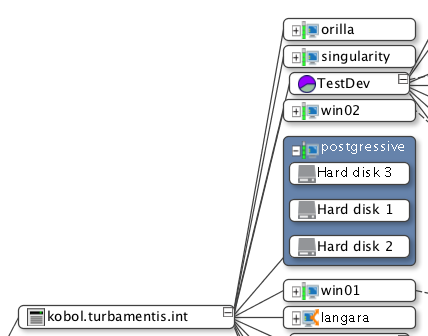
You’ll see the resource groups for virtual machines as well, and over on the right from the virtual machines, you’ll see the individual policies, with dotted line connections running from protected virtual machines to the policies. You’ll also note there’s a [+] mark next to virtual machines and policy names, and [–] options in places as well. The [+] mark lets you expand out details – for a virtual machine, that’ll expand out to show the individual disks contained within the virtual machine (very useful if you only want to backup specific disks in the VM):
The [–] lets you effectively select an area of the configuration you want to focus on – it’ll highlight the entire tree for just that section, regardless of whether it’s a VMware resource group or an individual ESX server. In this case, for a resource group, you see:
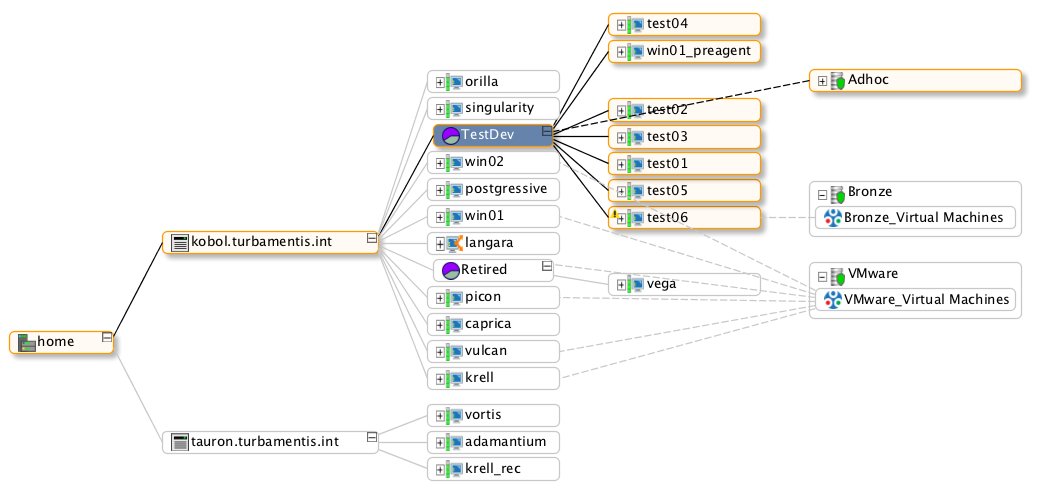
The graphical view (I’ll call it a system tree) is handy in itself, but there’s some options to the right that can help you really focus on things you might need to do:
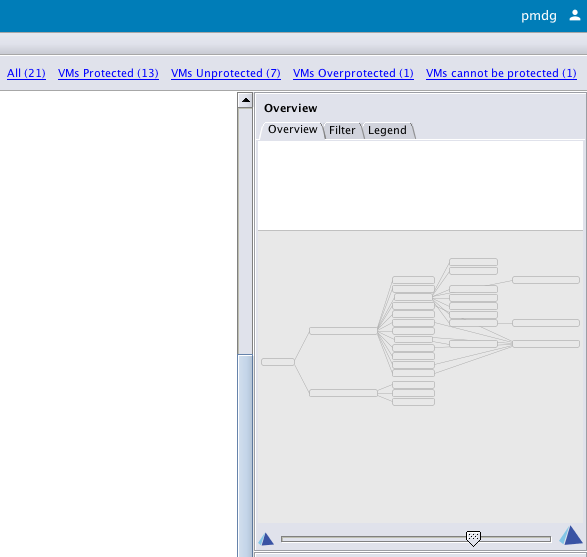
Here you get to see a zoomed out map of the system tree (and can control the zoom level on the system tree proper), but you can also choose to quickly jump between viewing specific things of high interest, viz.:
- All virtual machines
- All protected virtual machines
- All unprotected virtual machines
- All overprotected virtual machines
- Any virtual machines that can’t be protected.
The initial system tree I showed earlier was the ‘All’ option. The most important view you can get in my opinion is the “VMs Unprotected” – this lets you focus only on those virtual machines that haven’t been added to protection policies:

Of course, you don’t have to jump back to the regular protection policies if you spot a virtual machine that you need adding to a protection policy. Any virtual machine in any view can be right-clicked on to expose the option to add or remove it to/from a protection policy:
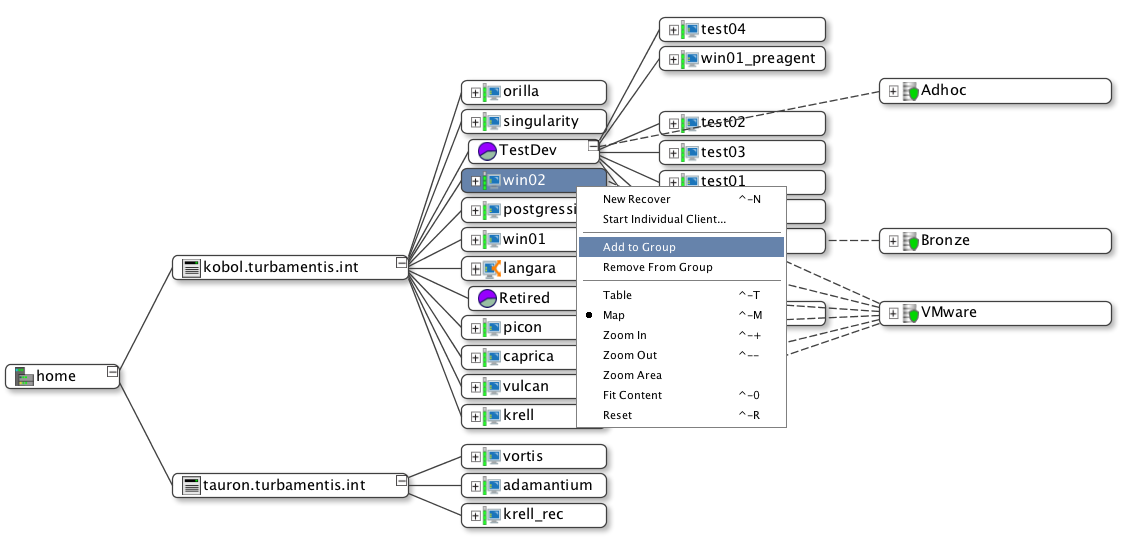
From there you just click ‘Add to Group’ to add a virtual machine into a group, and by extension most likely, into an actual protection policy.
The over protected virtual machine view will show you virtual machines that belong to more than one policy:

The “VMs cannot be protected” view will show you any virtual machines which cannot be added to protection policies. In my environment, that’s just the virtual proxy machine itself:

And finally, you can view virtual machines that are members of protection policies:

The VMware View option in NMC really is quite straight forward to use, but knowing it’s there, and knowing what you can quickly see and do is a real boon for busy NetWorker administrators and operators. Don’t forget to ensure it’s in your collection of tools if you’re protecting VMware!