
I really love adaptive backup processes – that is, NetWorker and Avamar’s functions around defining dynamic selections of resources to be protected. To me, that’s the start of true set and forget data protection. Or rather, if we think of auto-starting backups as being Set & Forget v1, then Set & Forget v2 is all about backups that automatically select what needs to be backed up based on the policies you’ve defined.
To that end, I wanted to work through the process of creating a dynamic VMware backup policy using NetWorker 18.2’s HTML5 UI. It was, to be honest, a really sweet operation, so in this blog post I’ll take you through what that process looks like.
Now, I have on my lab server a bunch of generic virtual machines used for non-specific testing. More like scenarios where I need to have a bunch of virtual machines of similar size concurrently backing up and/or recovering. Each of the machines that falls into that category have a name with test in it, so I wanted to create a dynamic policy that does backups with a 2 week retention time for anything with test in its name.
To start with, you point your browser to the NetWorker UI: https://nsrServer:9090/nwui. From there, enter your login credentials that you would use elsewhere in NetWorker (e.g., same credentials for NMC), and you’ll be presented with the current HTML5 UI components for NetWorker. I want to create a new policy, so I to do I expand the Data Protection section, then click on Policy in the left-hand pane:
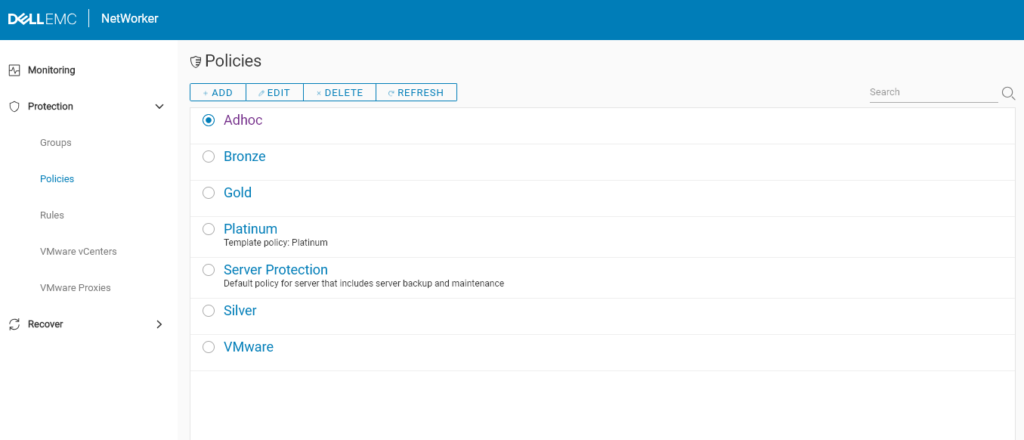
In this case, wanting to add a new workflow to the Adhoc policy, I click the policy name to get to the workflow options. This presents a work area such as the following:

To add a new policy, click the “+ Add” button at the top of the workflow area. This will start the new workflow wizard:
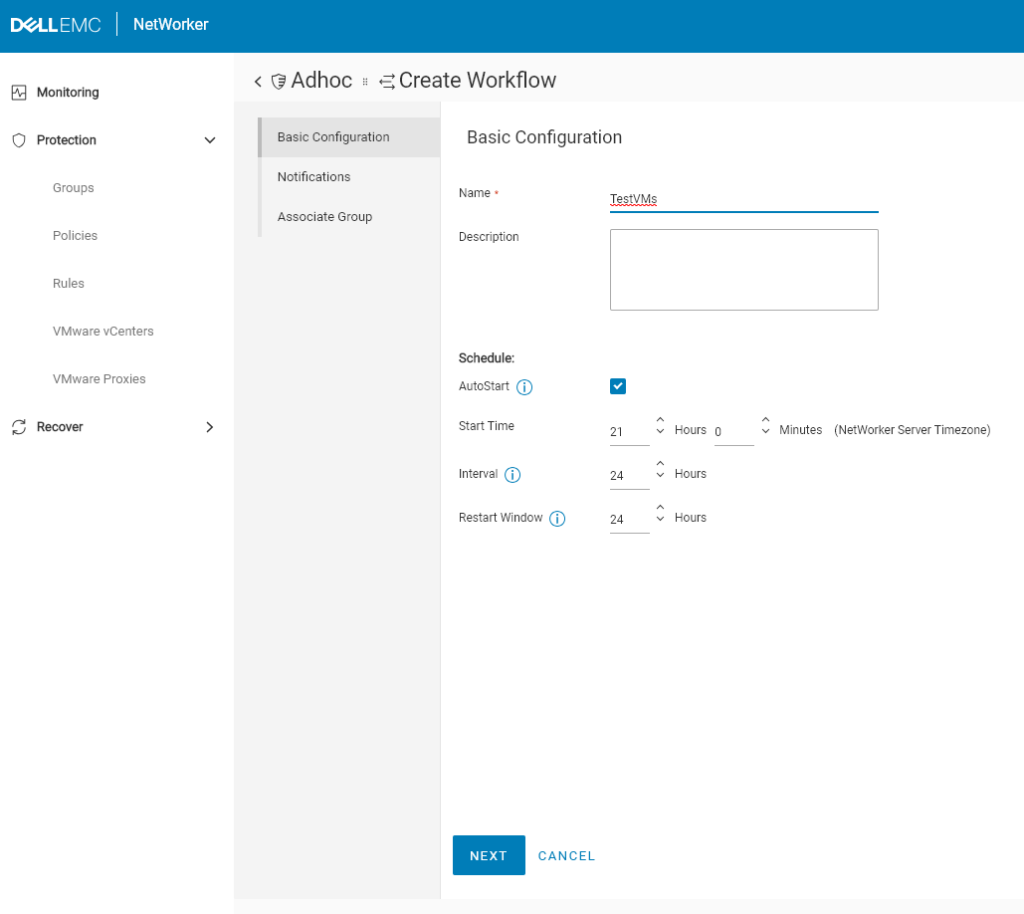
The start of the wizard has you name the workflow and set preliminary details, such as whether or not it automatically starts, is enabled at all, and if it automatically starts, what time it starts at. Once you’ve got the basic details in, click Next to continue to notifications:

In this case, I was happy to leave notifications configured per the policy, and clicked Next to continue to the fun bit: setting up a dynamic group.
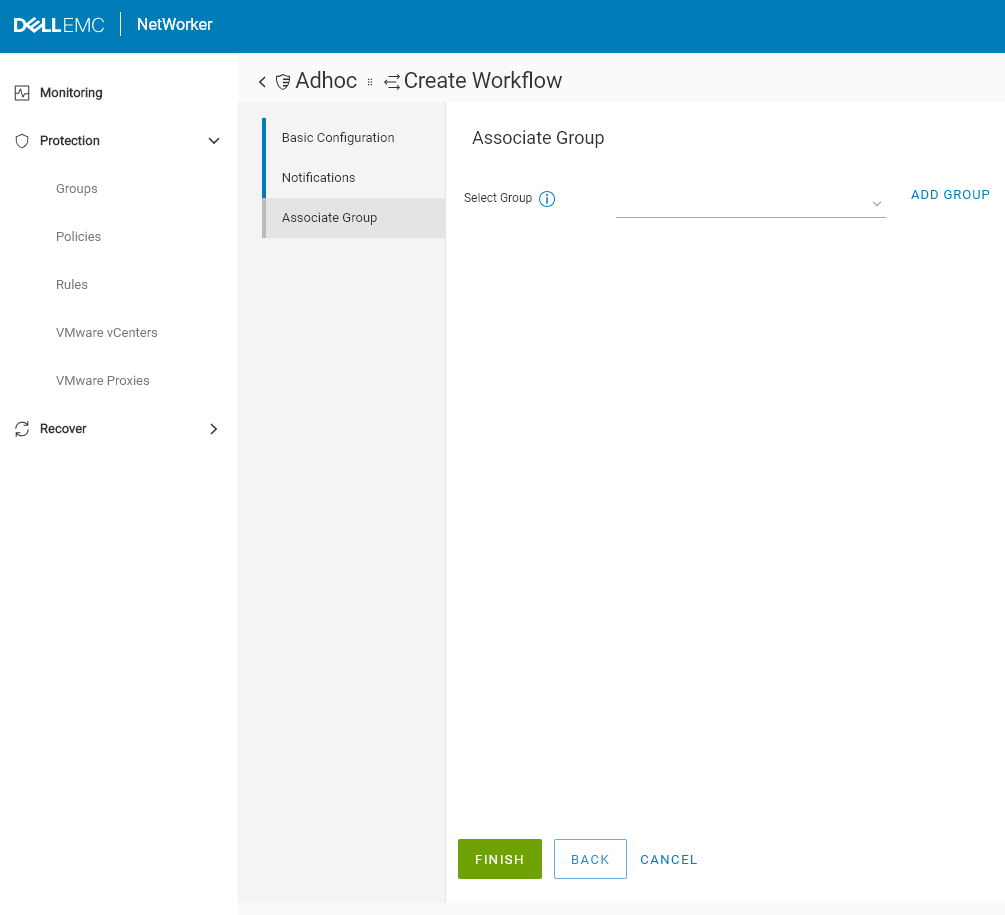
In this case, I didn’t have a group configured yet, so it was necessary to click the Add Group option to start group creation. This side-launches you into the group wizard:
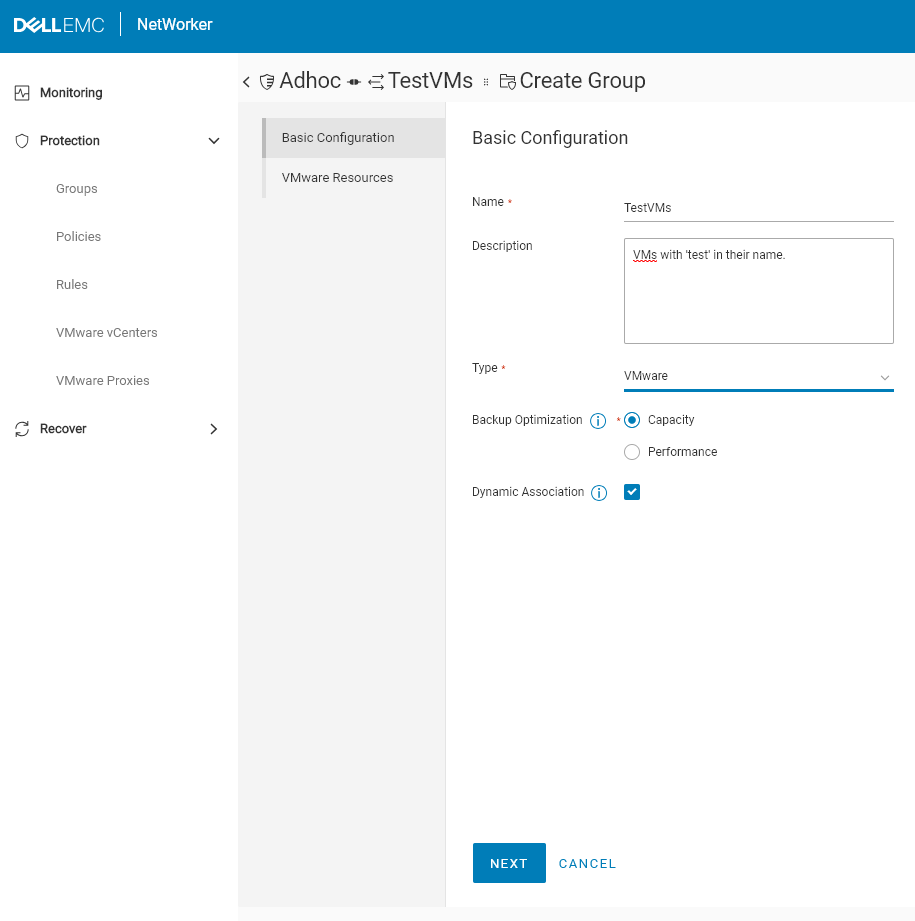
Here I gave the group a name and a description, changed the group type to be a VMware group, and enabled the Dynamic Association checkbox, then clicked Next.

You can create complex rules for virtual machine selection – in this case though I was looking for something basic: the Virtual Machine name contains the word test. That’s it: I entered those details, and gave the rule a name, then clicked Create.
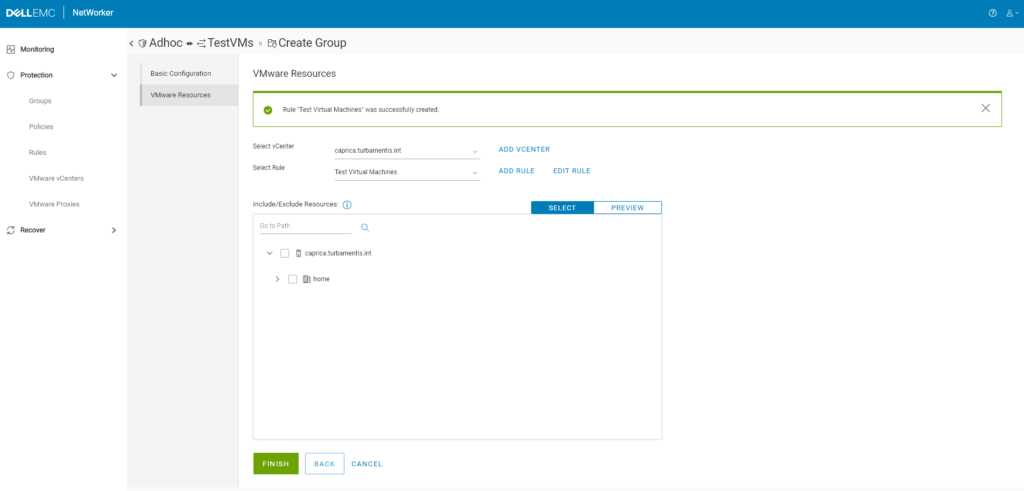
When creating dynamic rules, always make sure you preview the selection criteria. Very straight forward, just click the Preview option in the wizard above and you’ll get a view of which virtual machines in your vCenter server are going to be selected for backup:
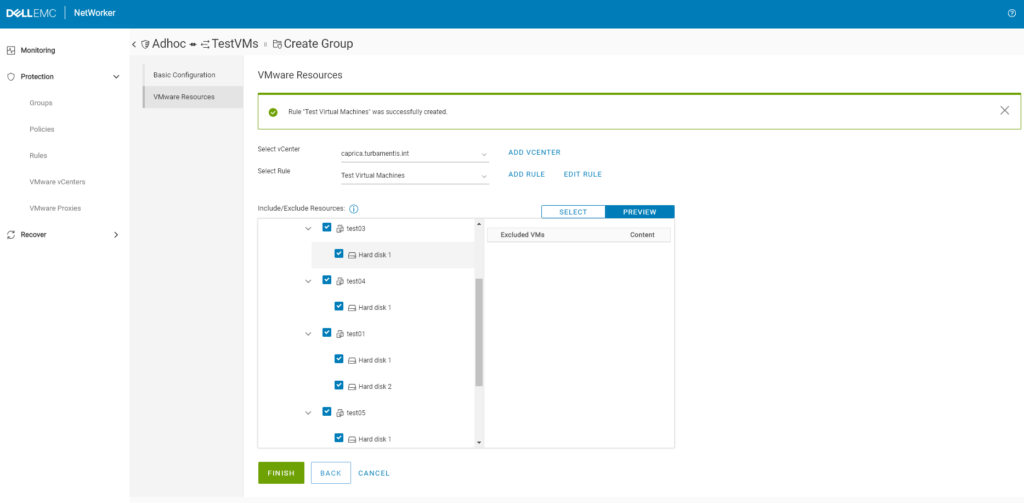
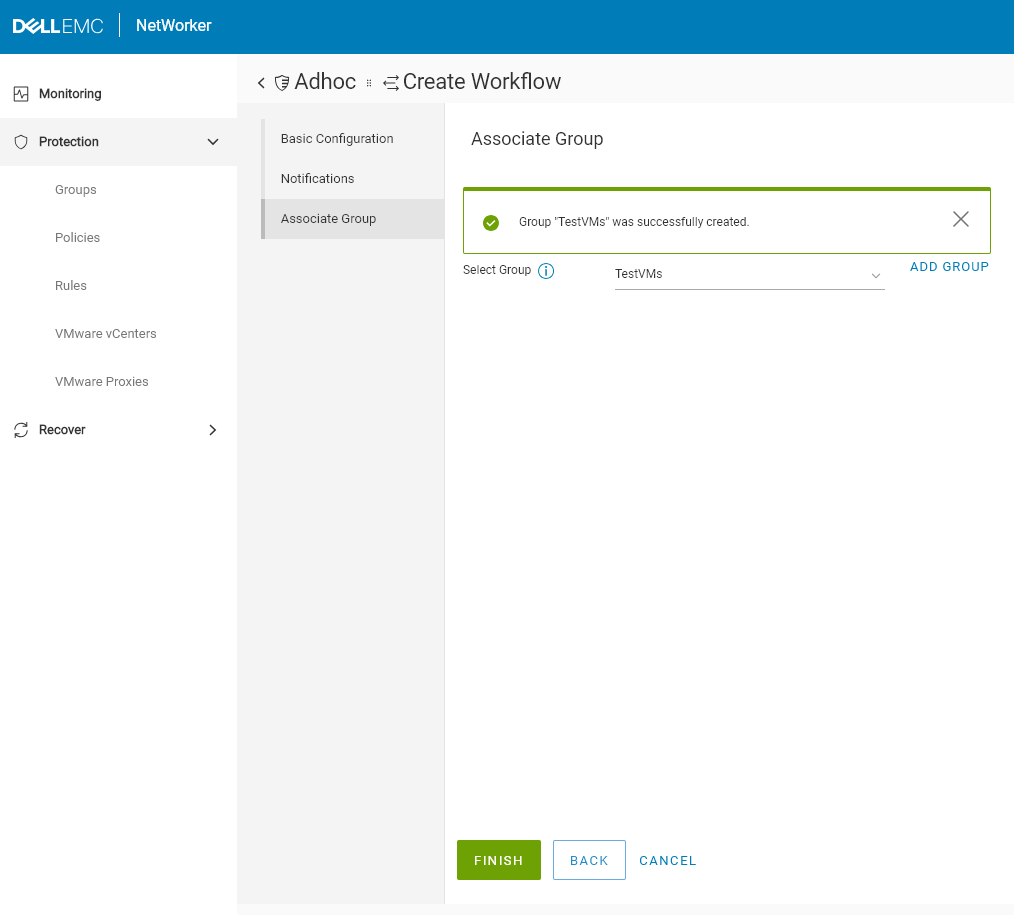
This looked right to me, so I clicked Finish to wrap up the group creation. This then let me associate the group with the workflow so I could finish creating the workflow and move on to the actions.
Now, we move onto the actions:
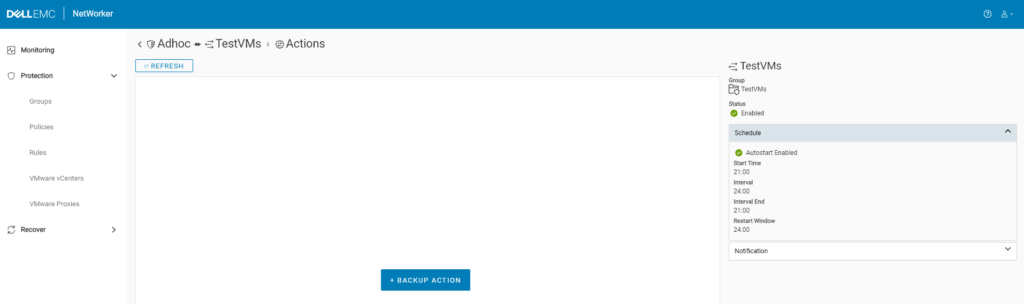
To create a new action, click the “+ Backup Action”, which will lead you to the start of the new action wizard:
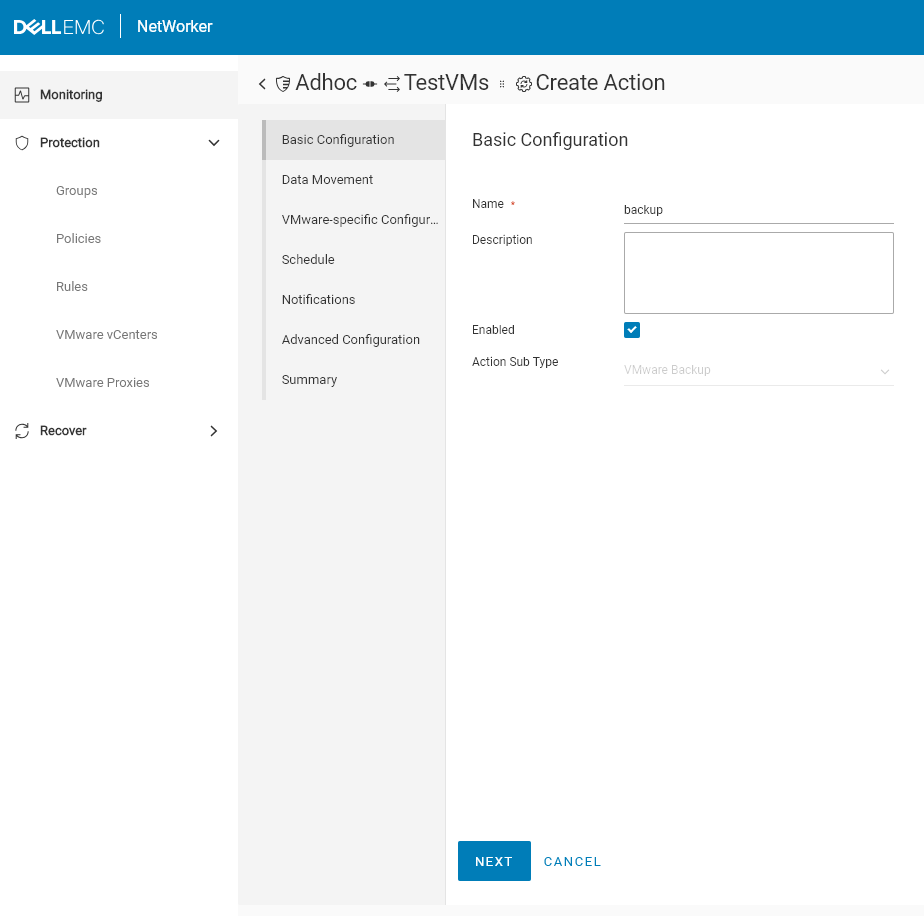
I tend to leave backup actions named backup, and I left the action Enabled, so it was fine to just click Next to continue.
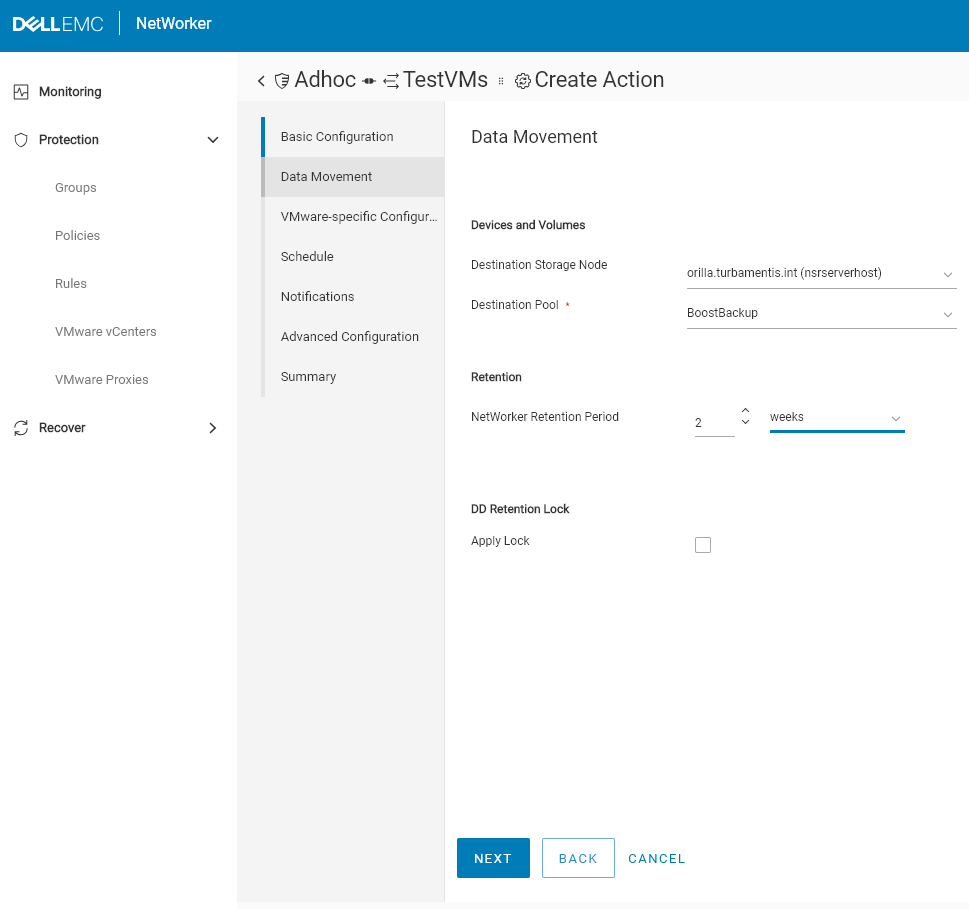
Here, I chose the backup pool, the storage node, and the retention time I wanted the backups kept for. Since these are only backups of test machines, I really don’t need a long retention time: two weeks is more than enough, so I made that change and clicked Next to continue.
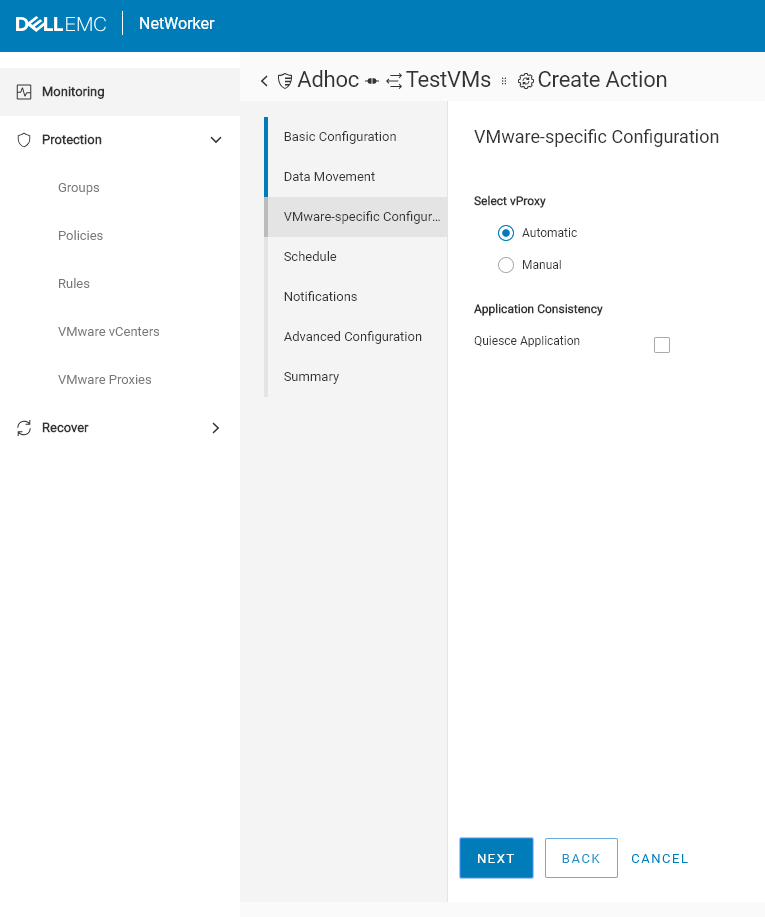
For the above wizard page, I left the vProxy selection setup as automatic, and since there’s no SQL databases on my virtual machines (in fact, they’re all Linux – surprise, surprise), I left the Quiesce Application option unchecked. Next to continue, again.
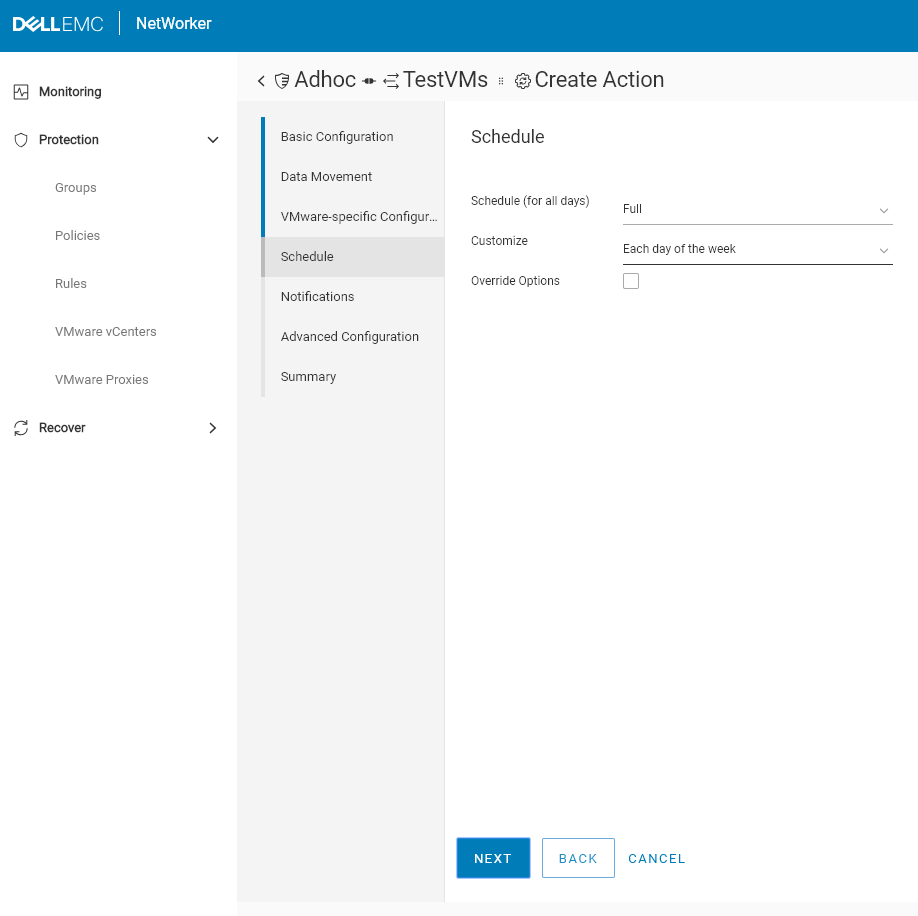
The action schedule for virtual machine backups is pretty simple: full every day. That’s because at the back-end, the Data Domain will handle the virtual synthesis of a new full backup, rather than unnecessarily scanning the entire virtual machine each time. So, Next to continue.
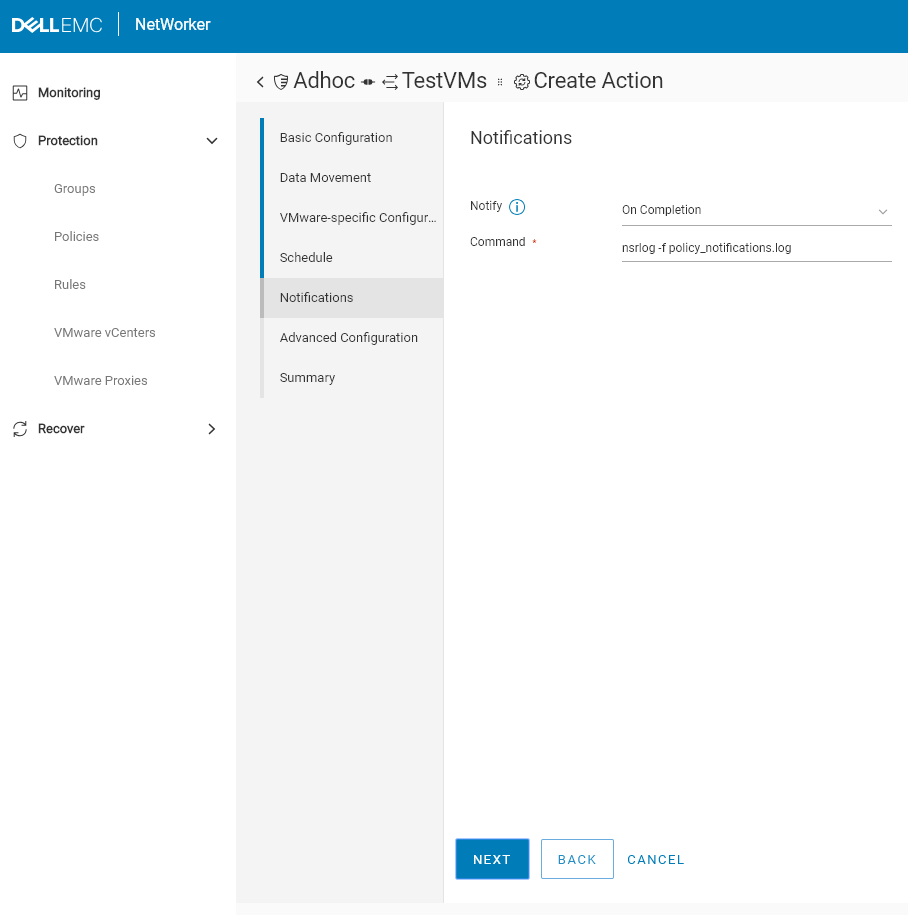
Again you can override the notification settings at the action level, but I left them as-is for the purpose of creating this workflow. Next to continue.
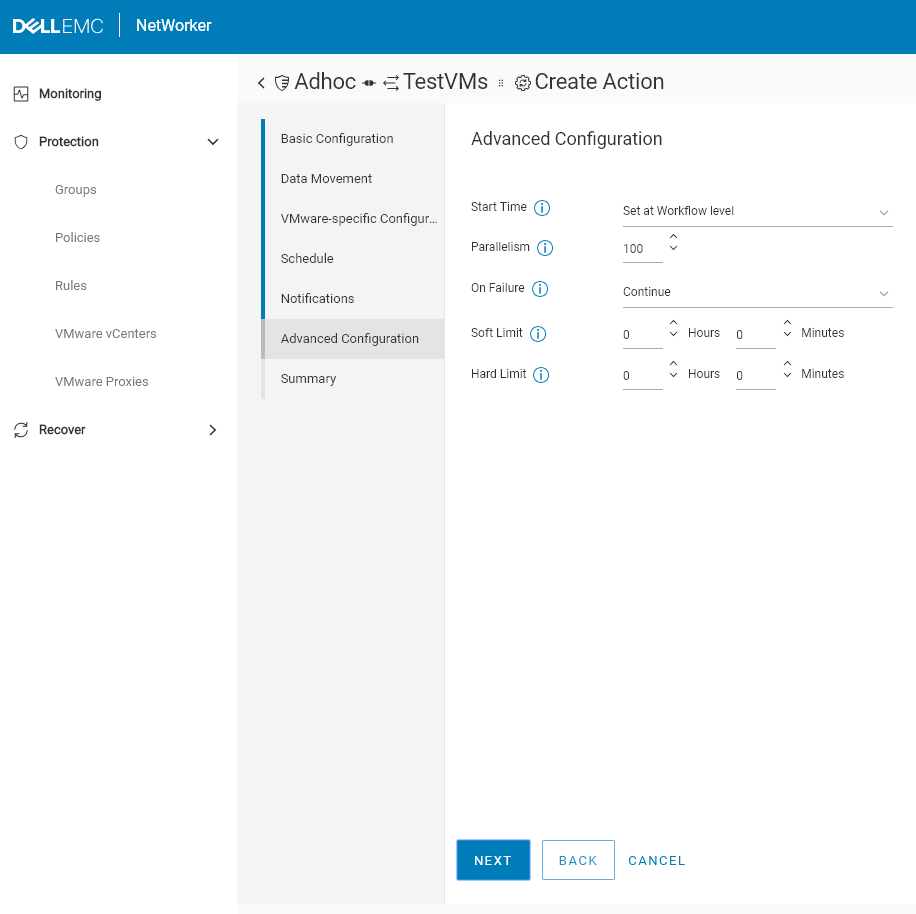
In the advanced configuration you can change the parallelism settings for the action (default is 100) what to do on failures, and run soft stop times/hard stop times. If you’ve not looked at soft/hard stop times, it’s useful to know what they do:
- The soft stop time is the amount of time after the action starts where no new actions will be started (e.g., for a backup, no new savesets are started). If left to zero, there is no soft stop time.
- The hard stop time is the amount of time after the action starts where any remaining activities are forcibly stopped. Again, if left to zero, there is no hard stop time.
I didn’t need to change those settings so I just clicked Next to continue.

Here, at the end of the action wizard, you’re presented with a summary page outlining the details of the action. This is your last chance to review and go back/cancel before creating the action. I was happy with the summary so clicked Finish to have the action created.
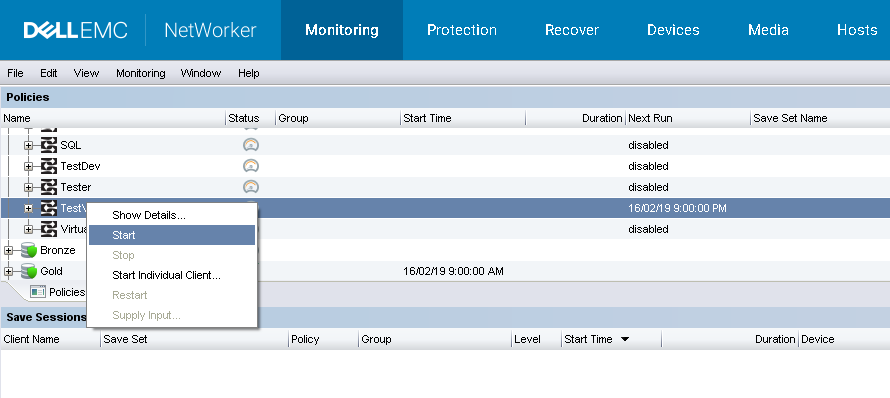
At this point, I jumped across to NMC to see the workflow was available in the Monitoring section, which it was, so I started the new workflow:
30 seconds or so after the workflow was started, I could see savesets starting to progress for the virtual machines with test in their names:
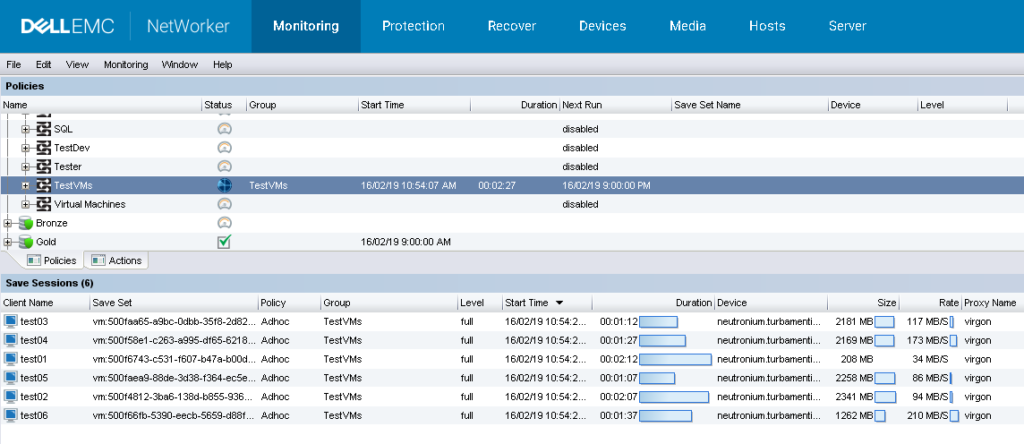
As you can see, the overall process is very straight forward.