Introduction
What with it being wrapped around easter and ANZAC day, I took last week off to get some writing done. But during that time, I also wanted to upgrade my VMware lab as well – it was running vSphere 5.5 which as we know, is getting a little bit old these days. What’s more, by moving to v6.5, I could do away with the Adobe Flash version of the vSphere Web Interface.
The vSphere upgrade went largely OK. With vCenter though, it turned out I’d done a bit of a half-arsed job setting up the vCenter appliance in the first place, and eventually after a couple of upgrade attempts, I decided it would be easier to just deploy a new vCenter server and set it up correctly.
When I went through the process of re-registering virtual machines though, I mistook one virtual machine as not being needed and deleted it. Whoops: that was my Avamar VMware backup proxy. I found that out after I logged into Avamar a few days after the upgrades and realised the VMware backups had been failing. I mention this because you’ll see some errors relating to that in subsequent screen-grabs.
Avamar
So my first step in the new goodbye-Adobe-Flash world of VMware was to deploy a new Avamar proxy. Thanks to the Avamar deployment wizard of course, that’s very straight-forward. Here’s the deployment in progress:
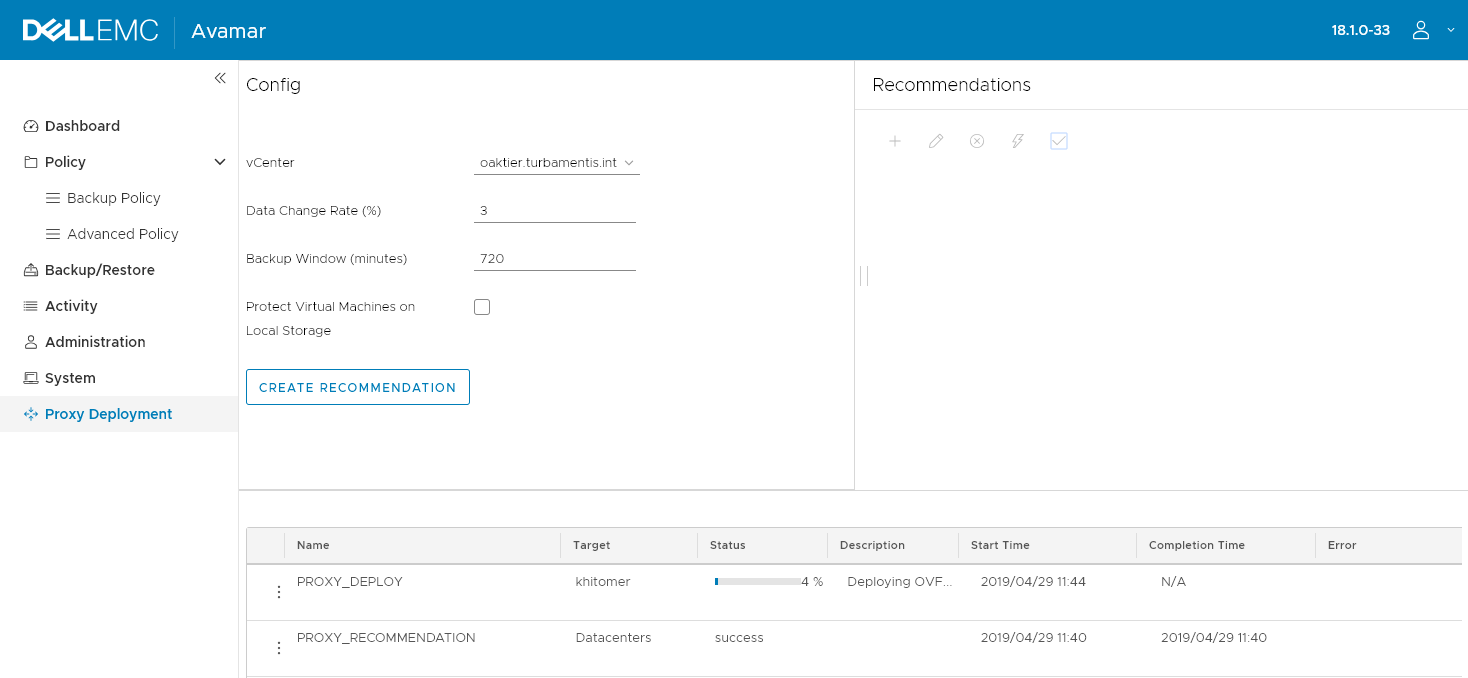
By the above stage I’d had Avamar create some recommendations, then I pared them down given my system is a lab. (It wanted to deploy proxies on more VMware servers than I needed because there’s no central storage. I solve that problem by only running VMs that I want to backup on a single area.)
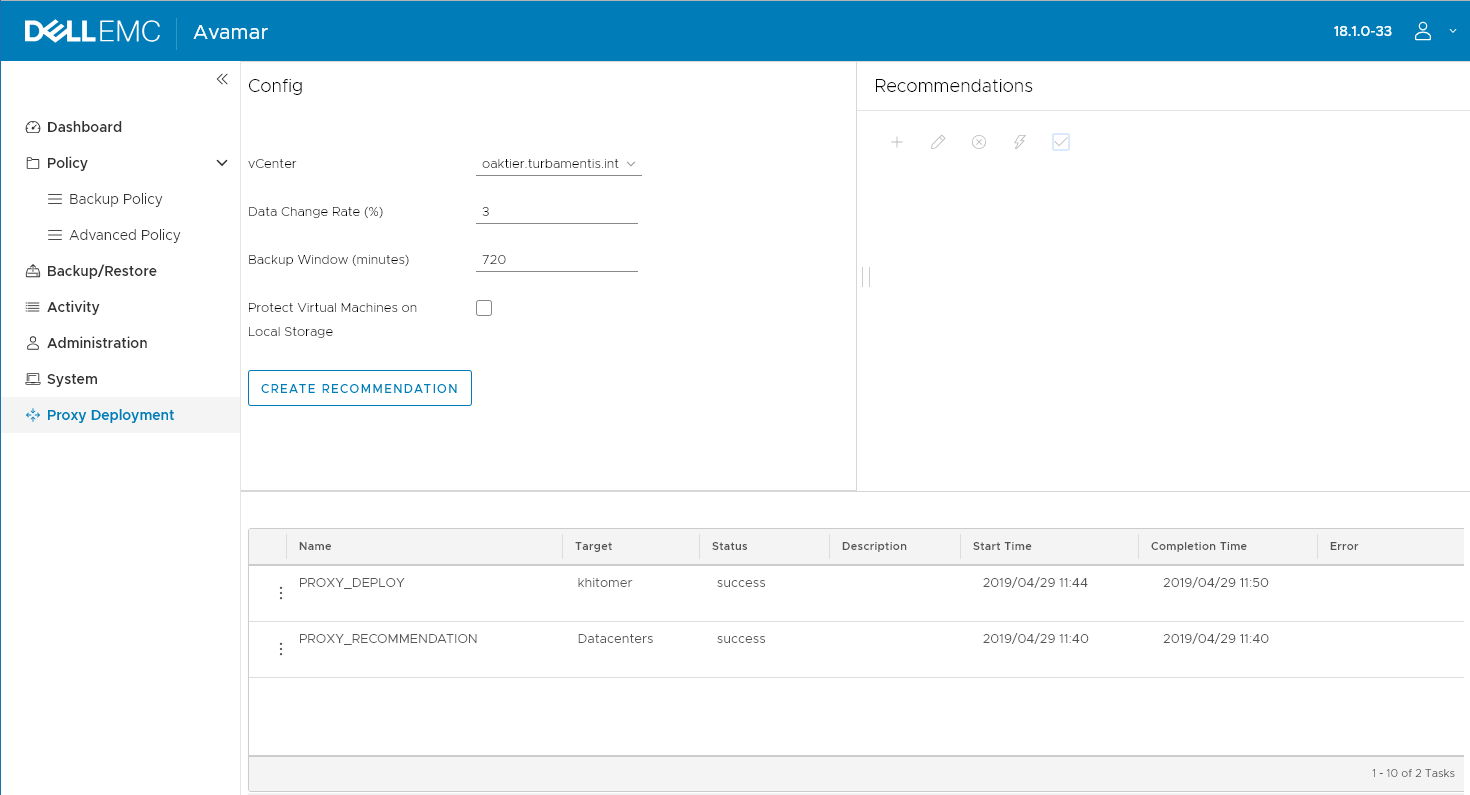
That’s a completed proxy deployment. The great thing is you can do this from either within the Avamar UI, or from the embedded Avamar UI presented to vSphere – so it can either be the Avamar or VMware administrator who takes care of deployment. Given it’s just a lab environment I was pretty happy with a 6 minute end-to-end deployment.
Next, it was time to give the Avamar plugin a workout. (I’d installed that when I did the upgrades and registered the new vCenter server, I’d just forgotten the proxy bit…!)
Your vSphere Web Interface login looks pretty similar in the HTML version to the Flash version:

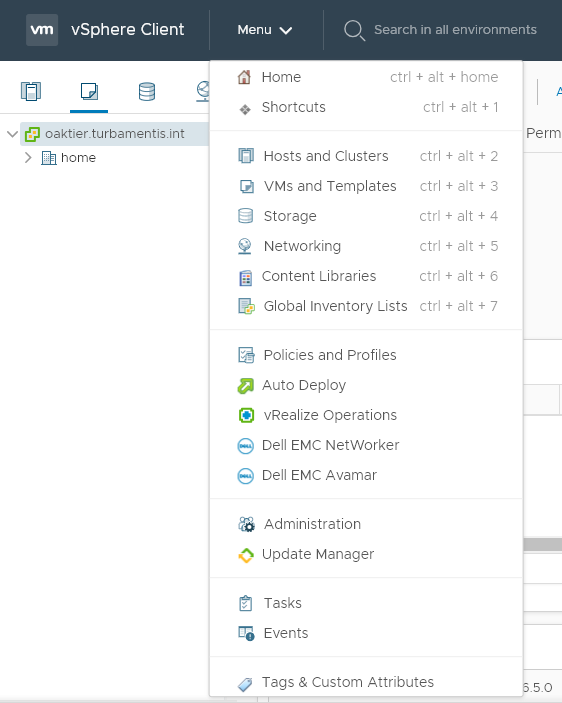
Once you’re into the vSphere Web Interface, you can invoke the Avamar plugin by going to the main menu at the top and choosing the plugin:
Once you’ve logged into the Avamar plugin, you basically get the Avamar HTML5 UI presented through the vSphere Web Interface, which makes things so much simpler. So planning to do an ad-hoc backup is straight-forward:
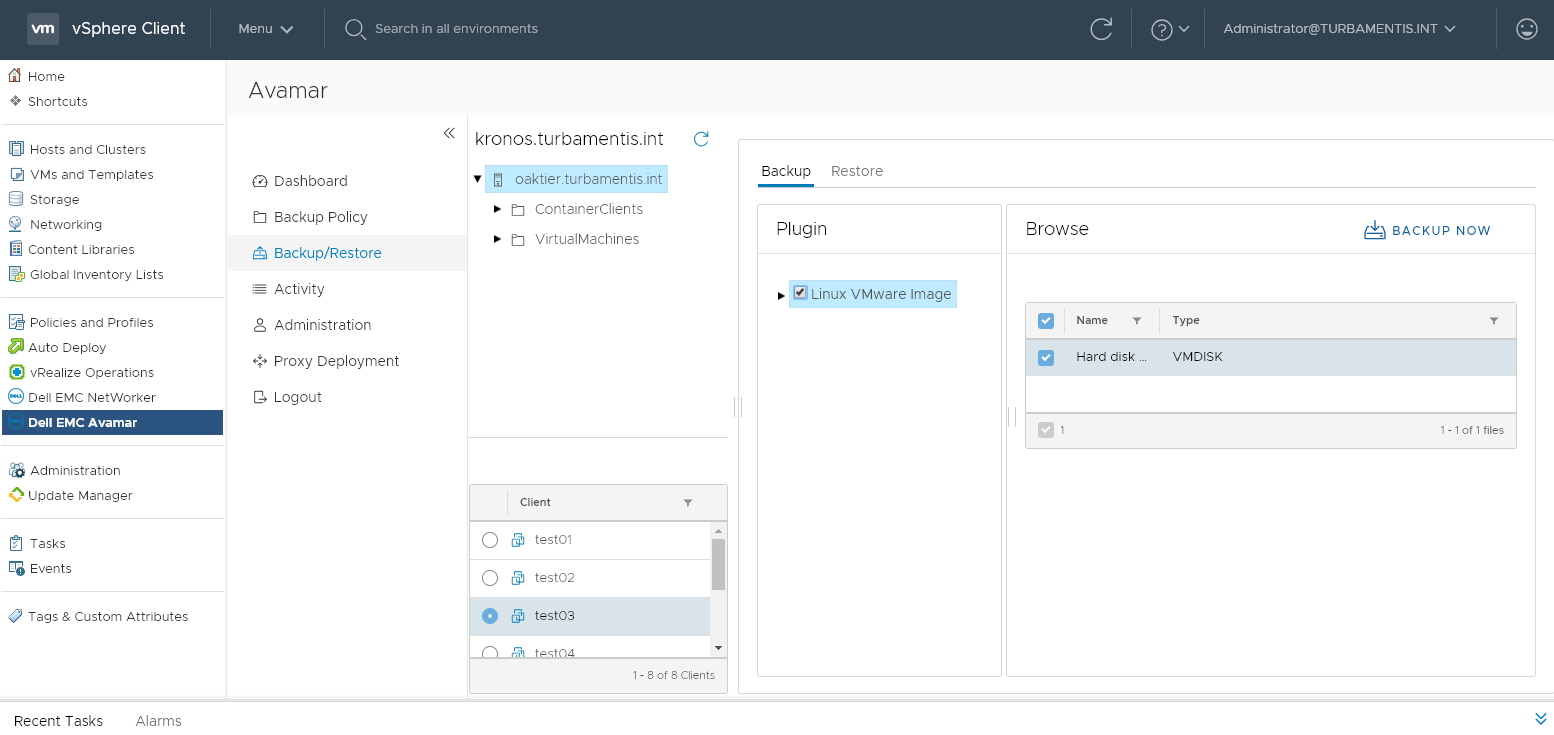
That’s pretty straight forward – choose Backup/Restore, select the vCenter server (when you’re logged in via the vSphere Web Interface, you get the view of just the VMware aspect of the configuration), the virtual machine you want to backup, and choose the backup details before clicking Backup Now to run through the backup dialog.
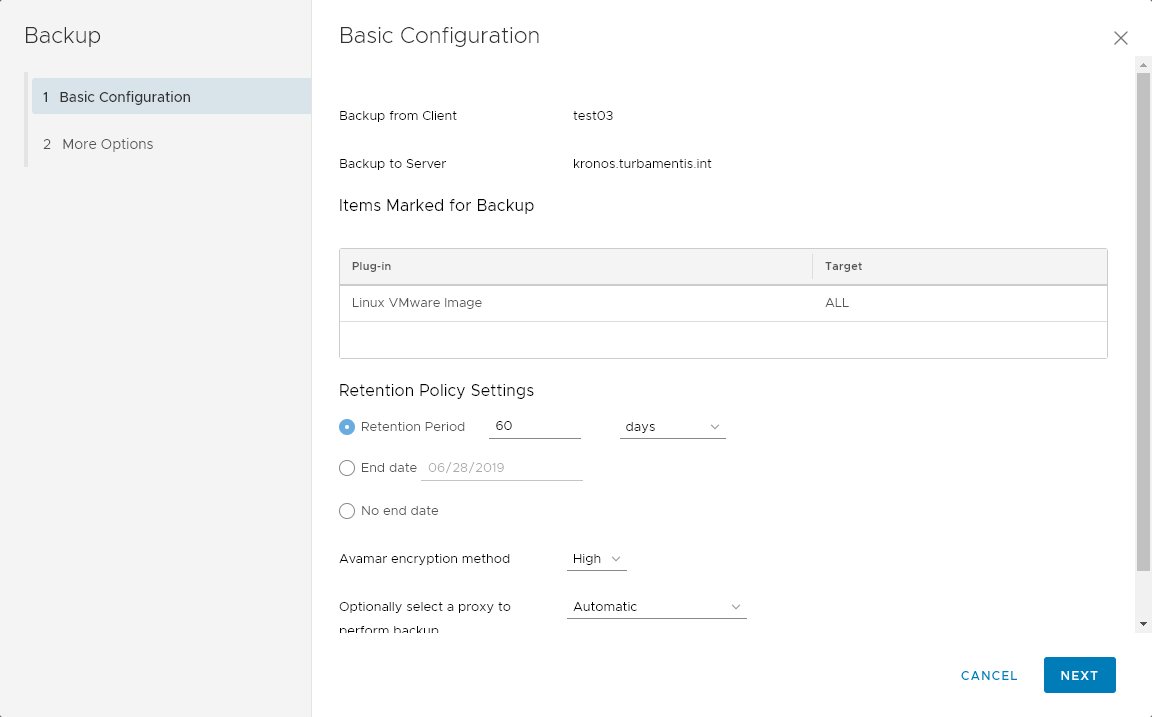
All of this of course should look familiar if you’ve seen the Avamar UI before, and that’s the important thing here: it means as an Avamar administrator you can quickly step the VMware administrators through the interface knowing it already, but because it’s so straight forward, you probably wouldn’t even have to do that.
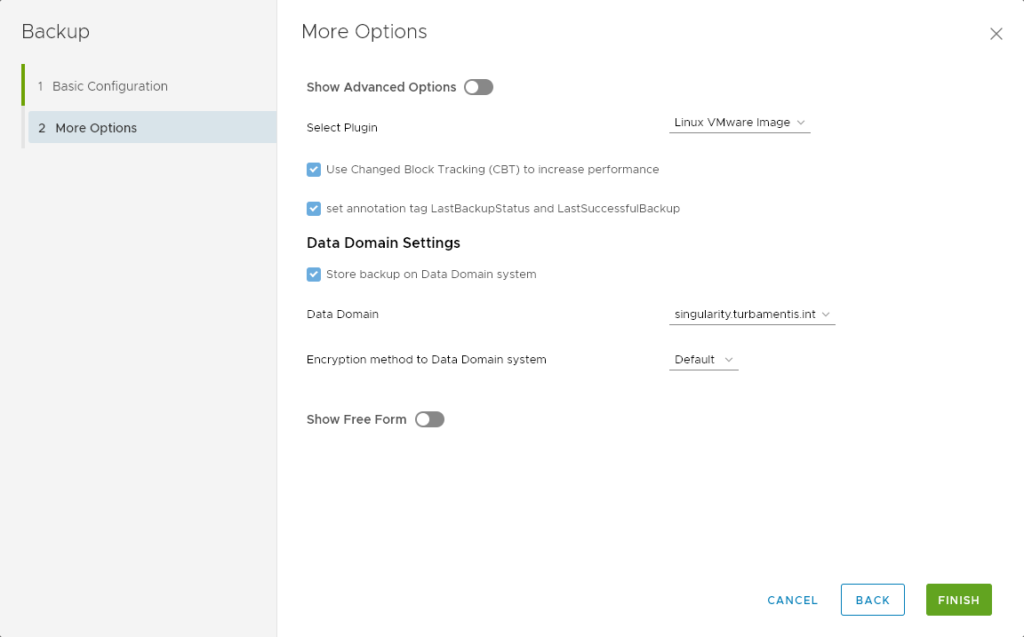
My Avamar server is configured to only backup to Data Domain, so it automatically populated the Data Domain setting, and I didn’t need to change any other details before clicking Finish.
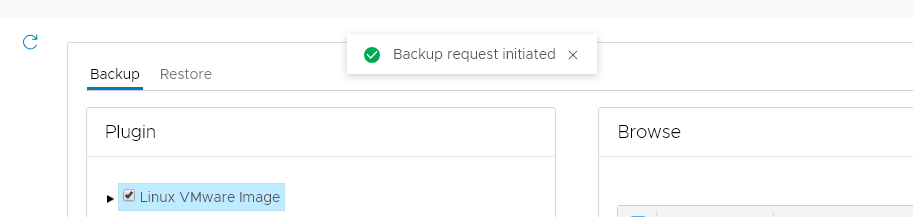
Once a job has been submitted you’ll get a notice at the top of the screen – if there’s a critical error that prevents the job from running (e.g., not having a proxy), you’ll get an error straight away.
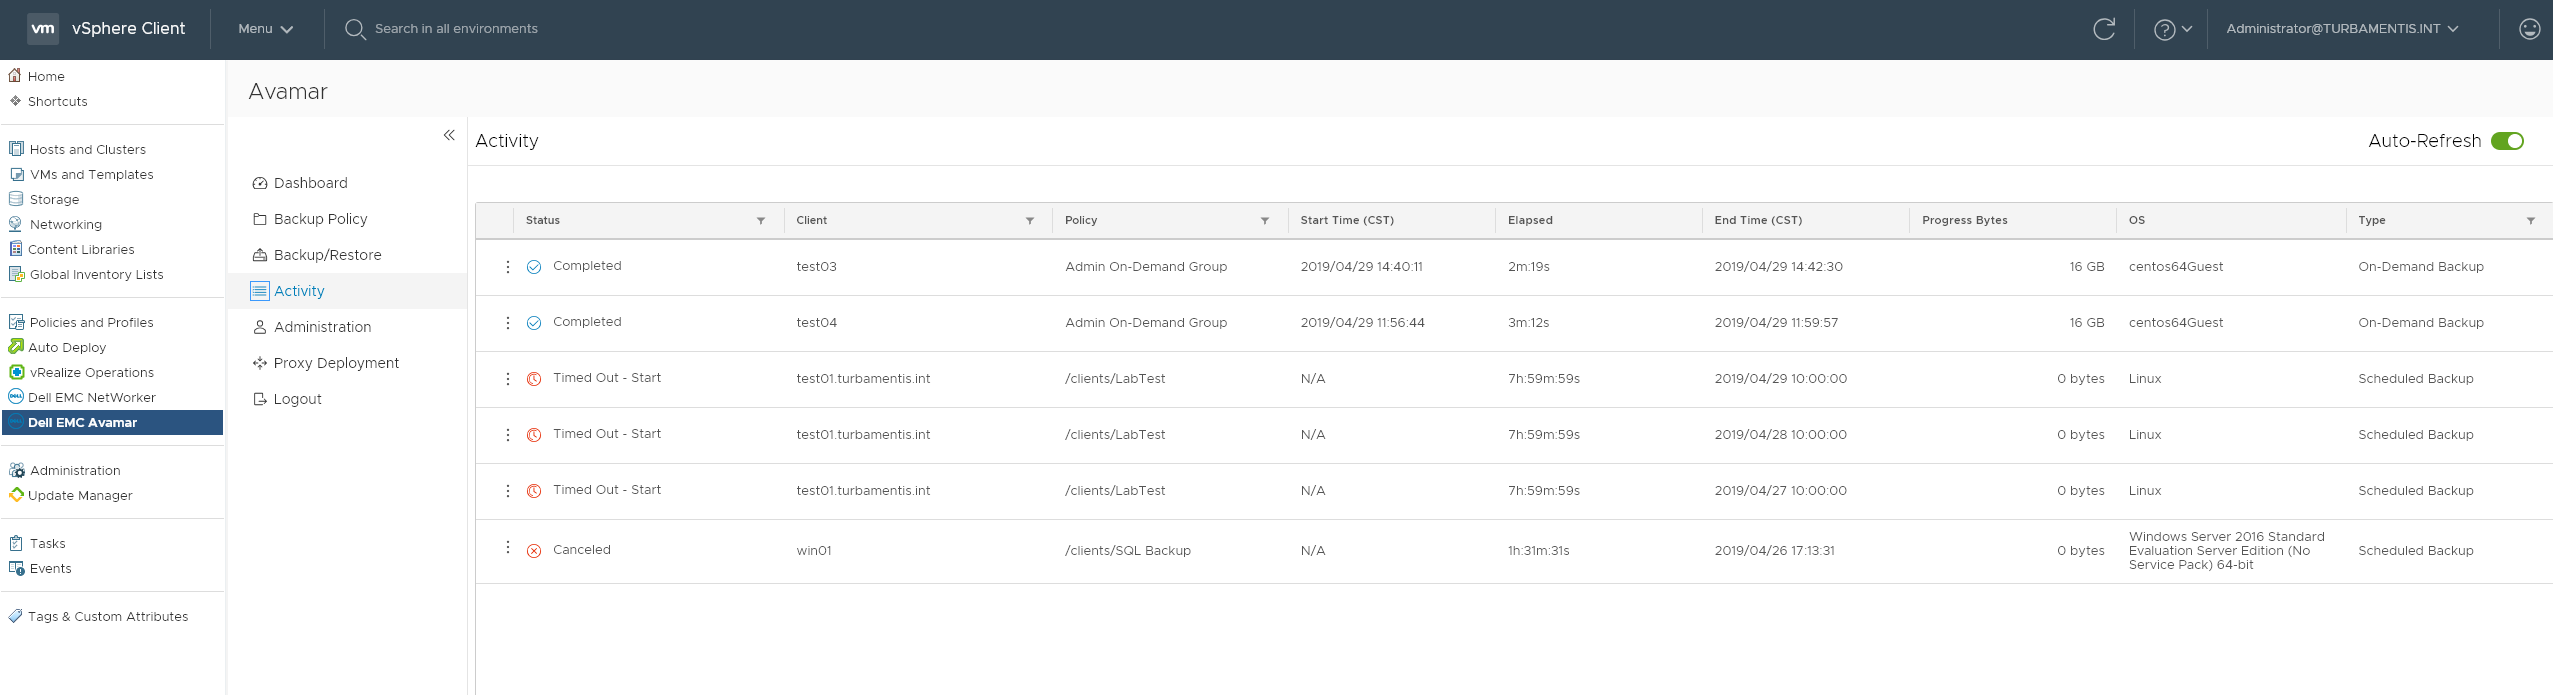
You can see the completed job above.
Next, I wanted to test out a restore. In this case, an instant access restore.
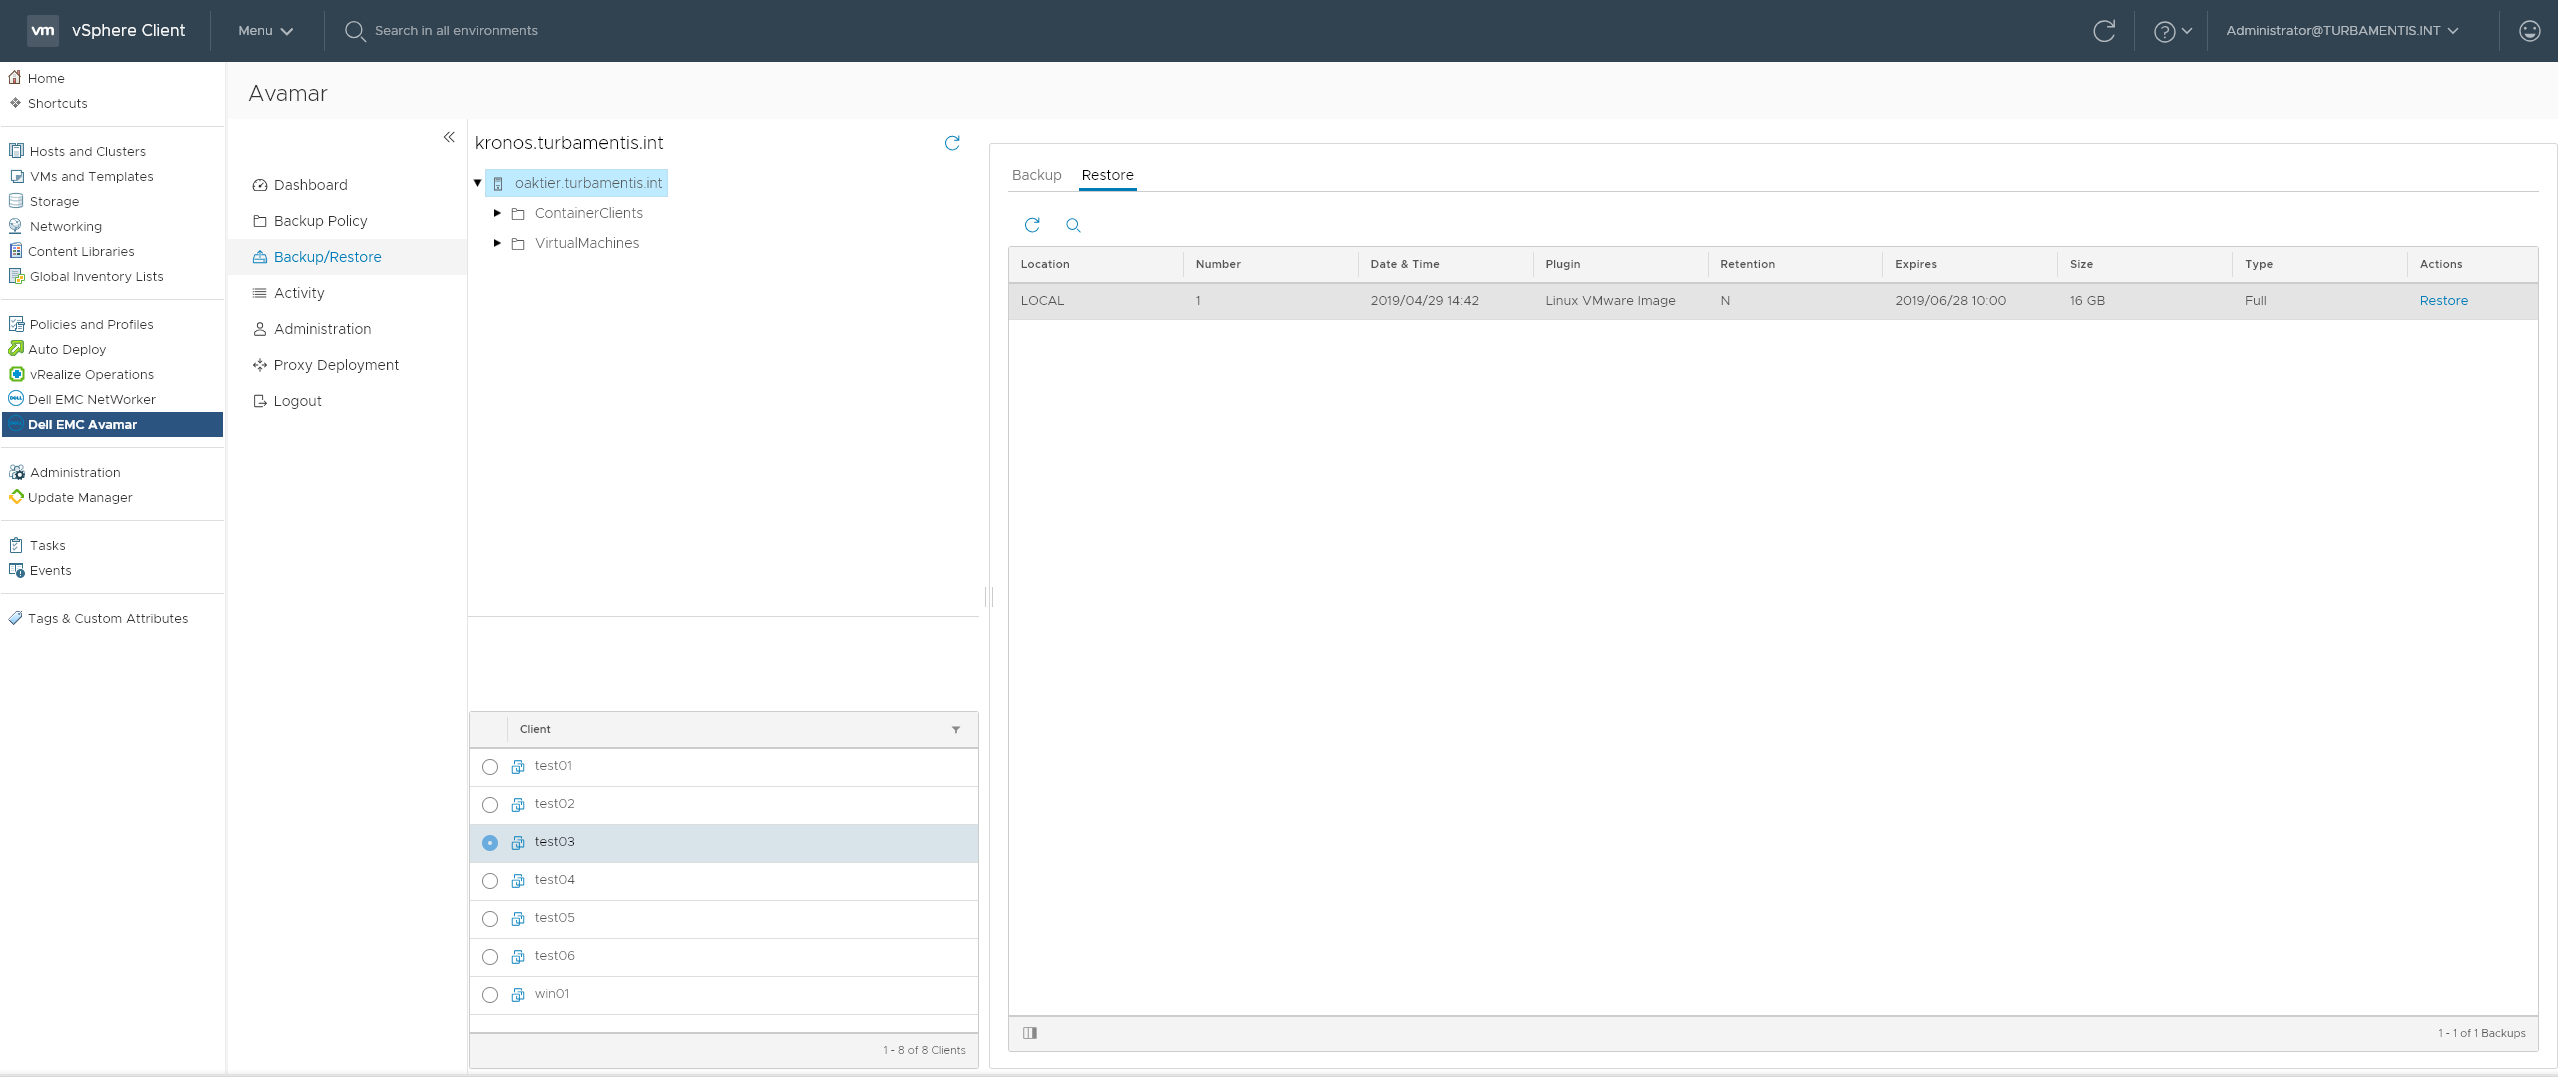
To do the restore you go to the Backup/Restore section again, but choose restore. In this case I wanted to do an Instant Access restore of the virtual machine I’d just backed up.
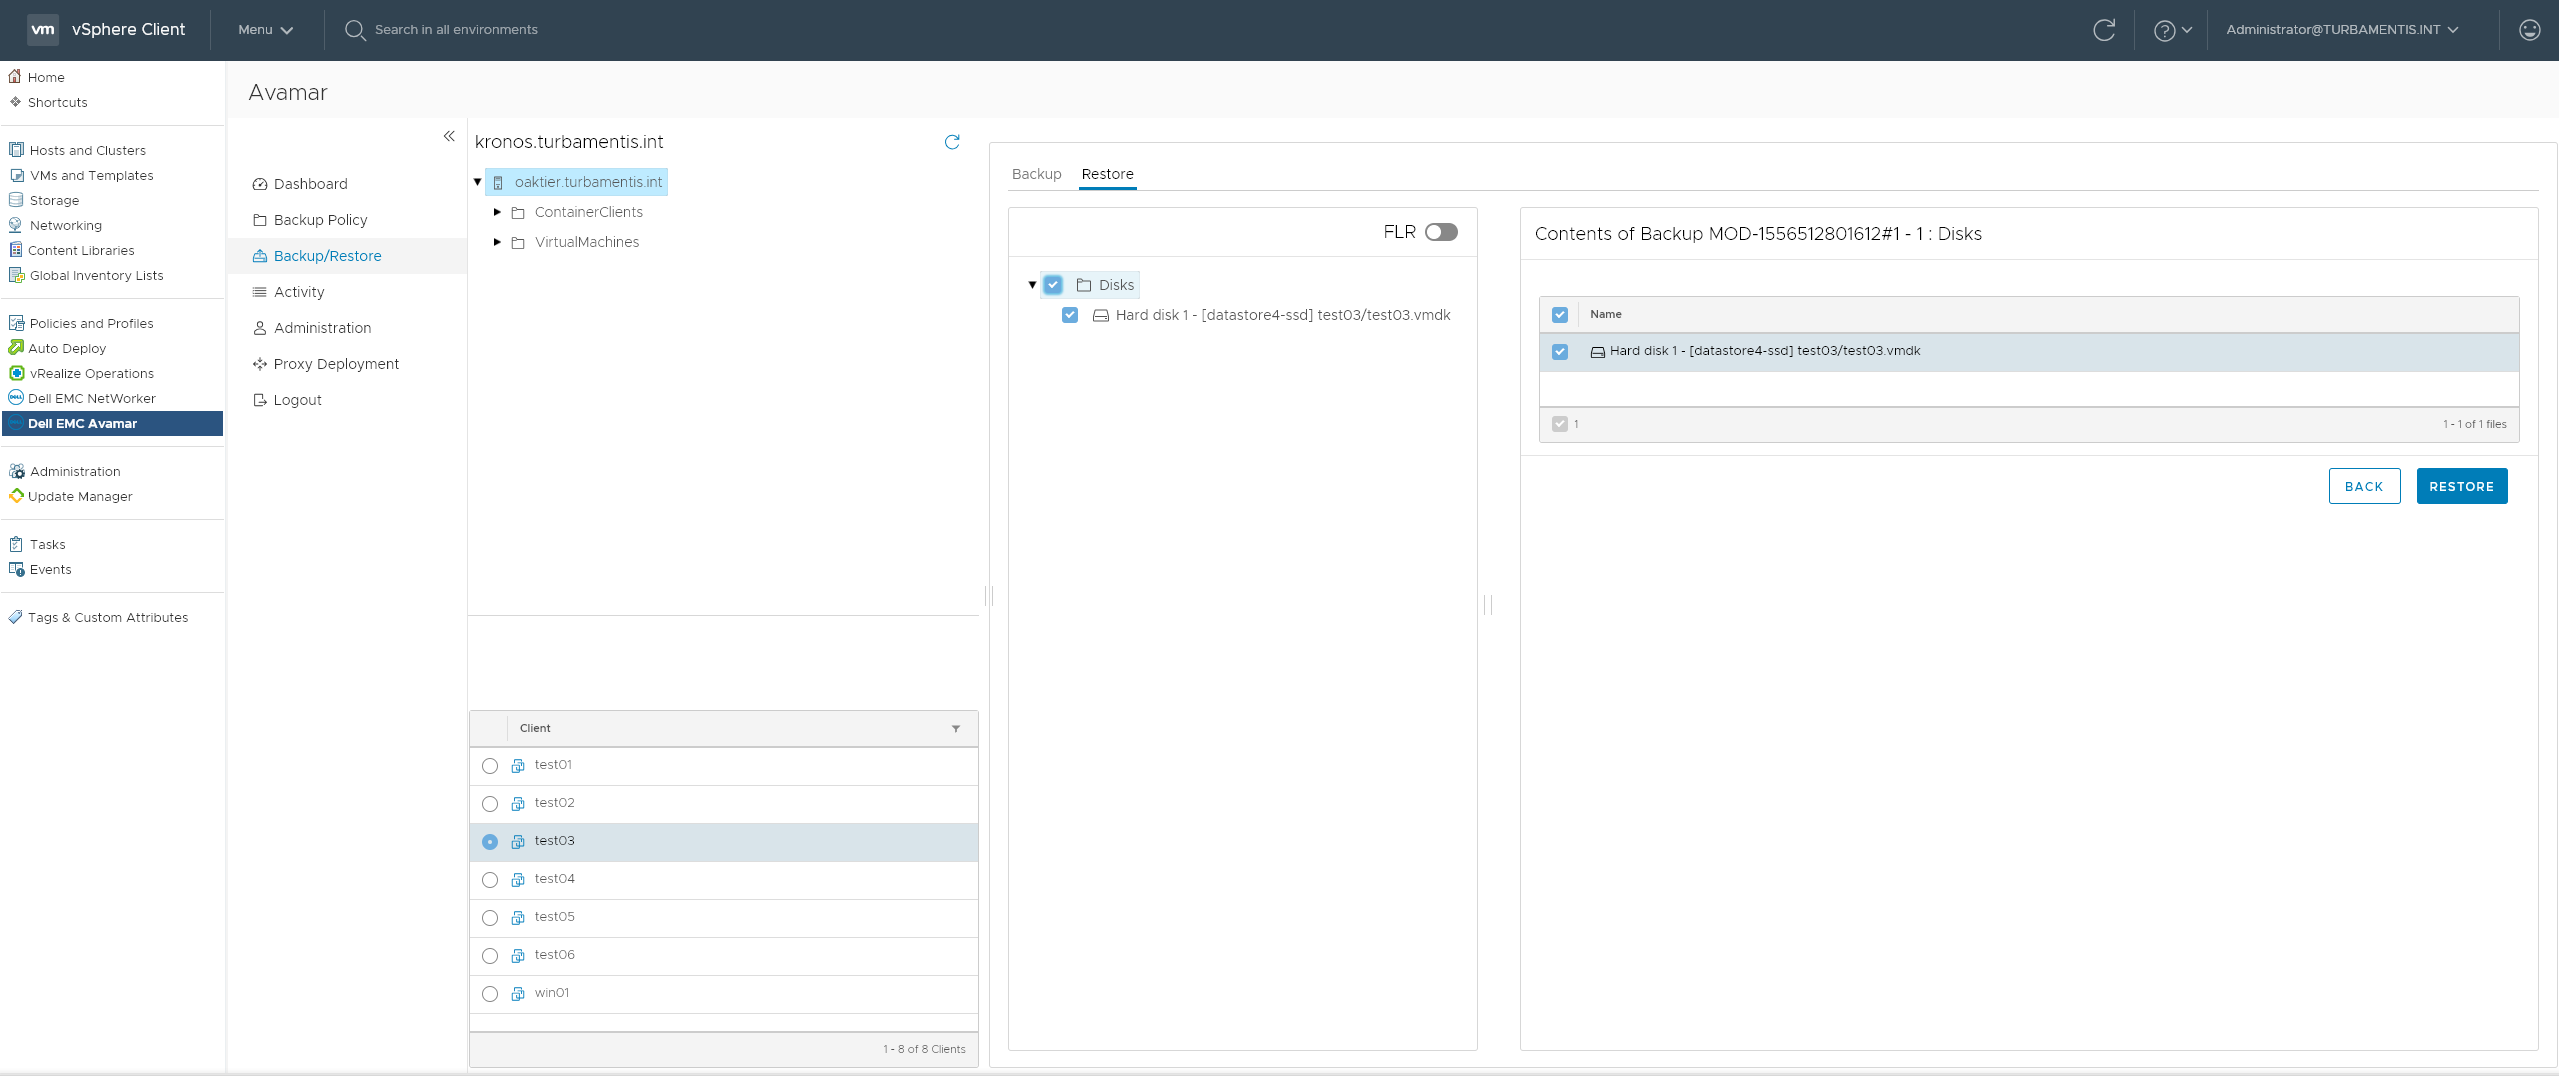
If you want to do a file level recovery, you just flick the FLR tab at the top; here, I wanted to do a virtual machine recovery, so I selected the VM and clicked the Restore button, which lead me to restore wizard:
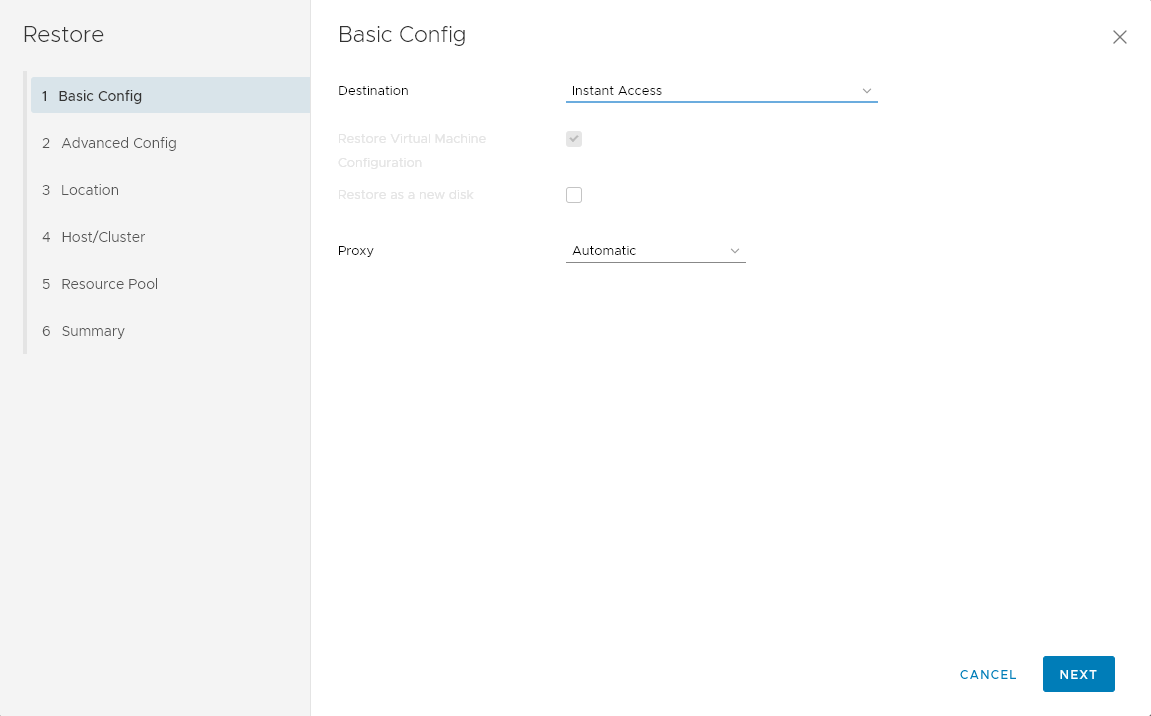
There’s a few dialog panes for an instant access restore, we’ll go through them here.
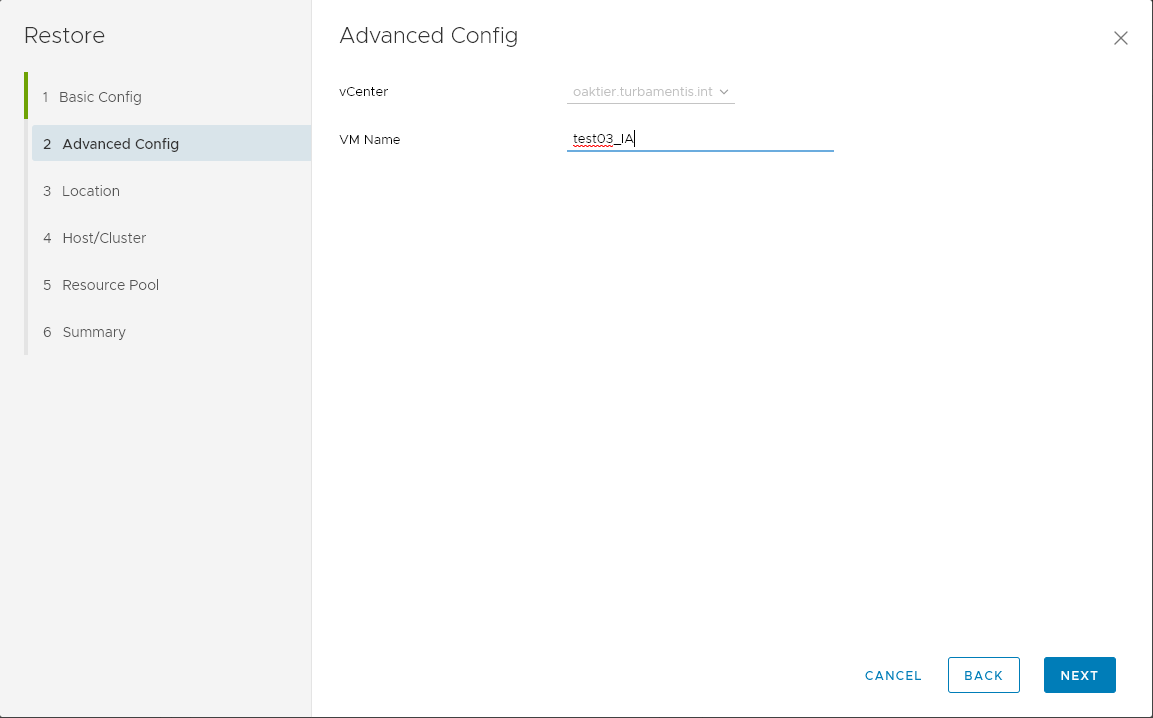
You’ll need to give a name to the virtual machine you’re going to register as part of the instant access operation. I just appended the _IA string to the end of the hostname and clicked Next to continue.
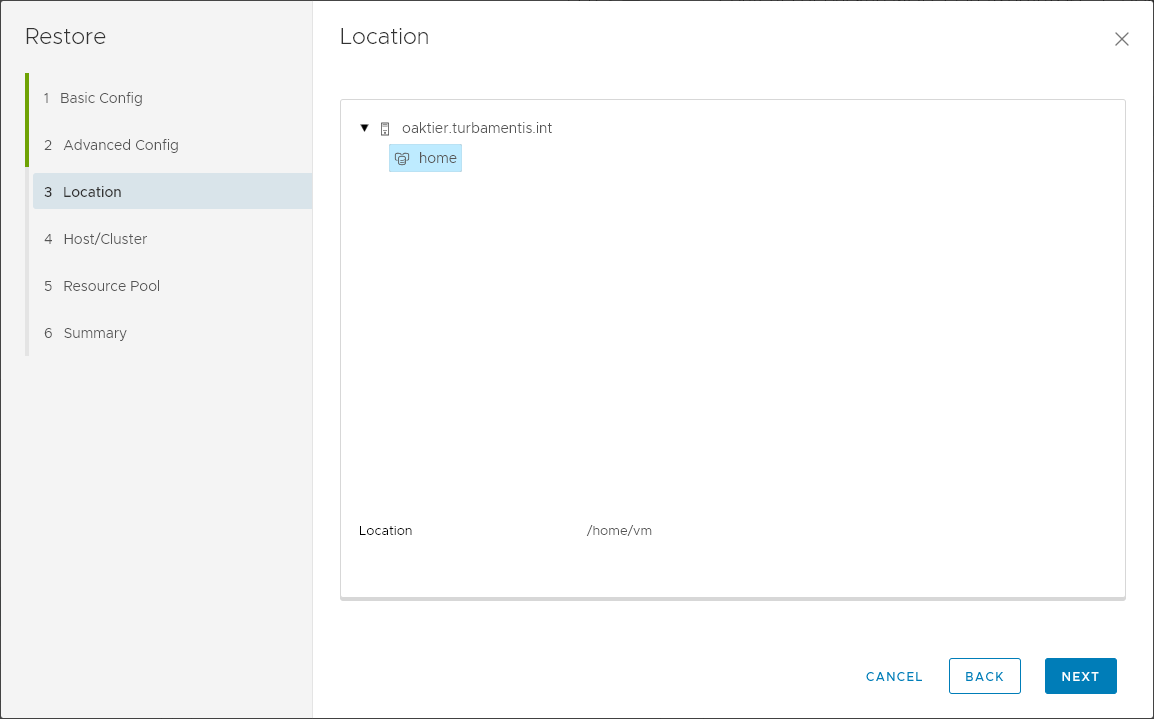
Your first step is to choose the vCenter/Datacenter you want to recover to – next, you’ll choose the Host/Cluster:
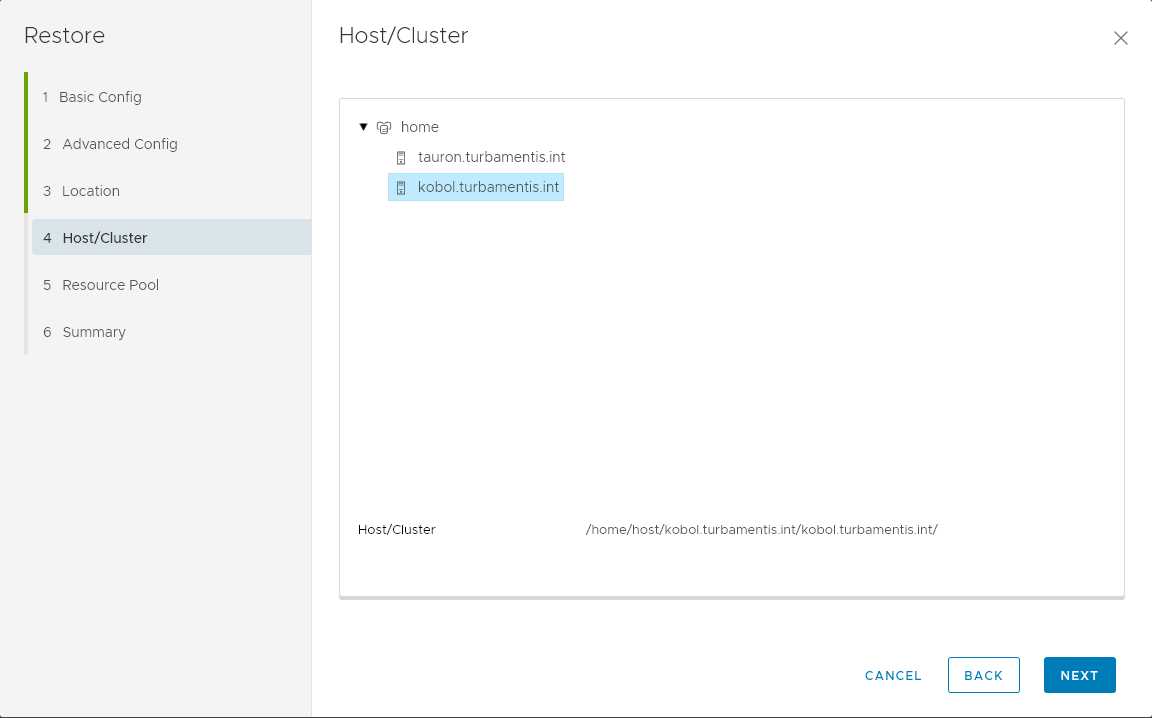
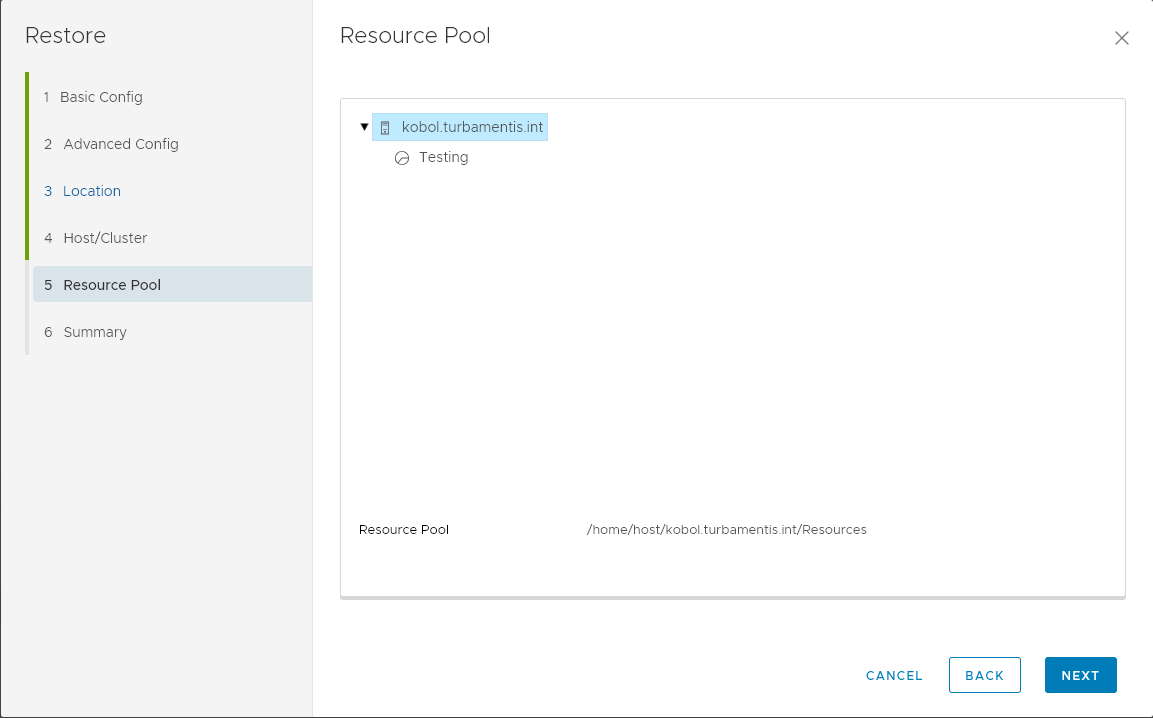
Here I selected to do an instant access restore back to the VMware server that holds the original VM. In the next pane, I’m prompted to select the resource pool, but I just dropped it into the default resource pool for the environment.
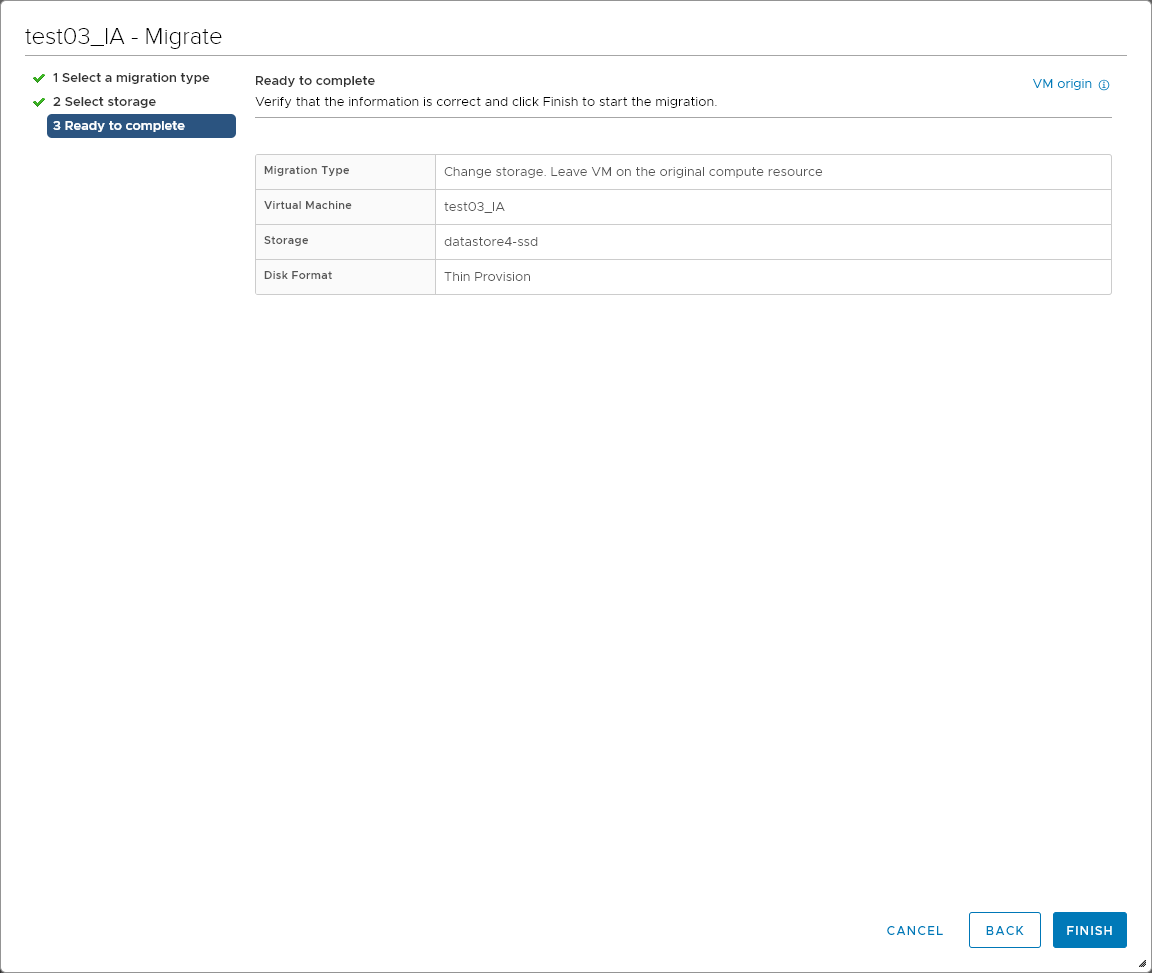
Finally, you’ll get the summary view:
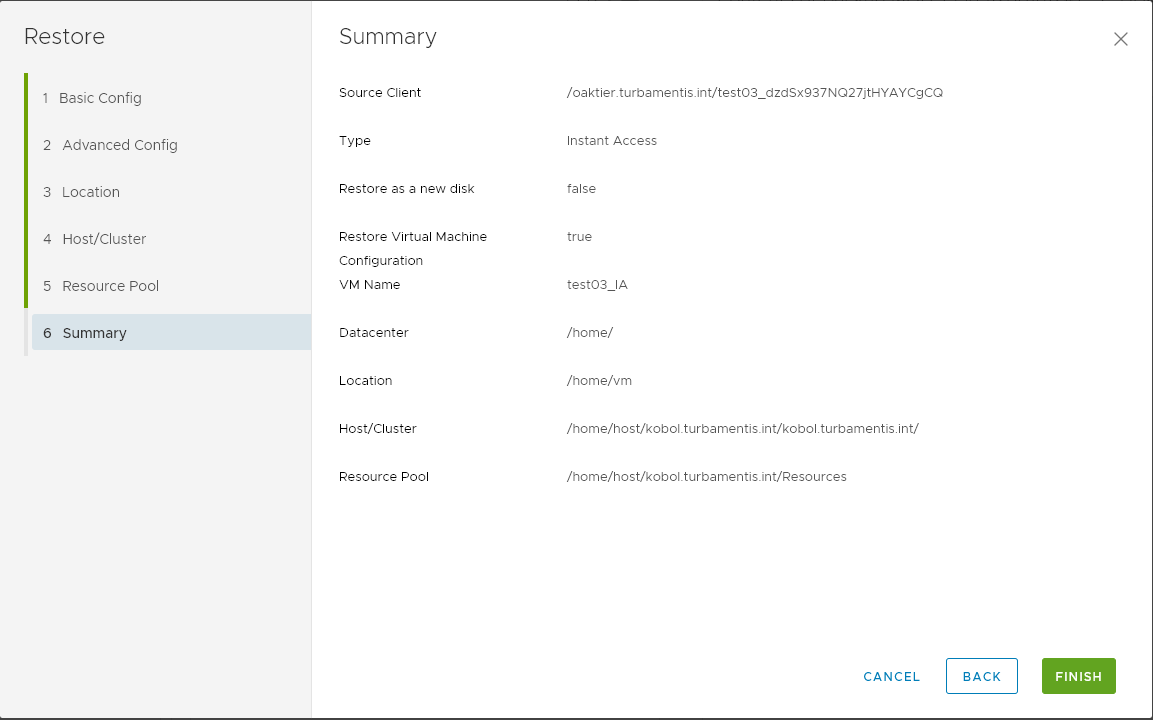
Once you click Finish, the instant access will commence: there’ll be an NFS datastore presented up into the VMware environment from the Data Domain the virtual machine backup resides on, and a read/write copy/snapshot of the selected virtual machine backup will be registered and activated.
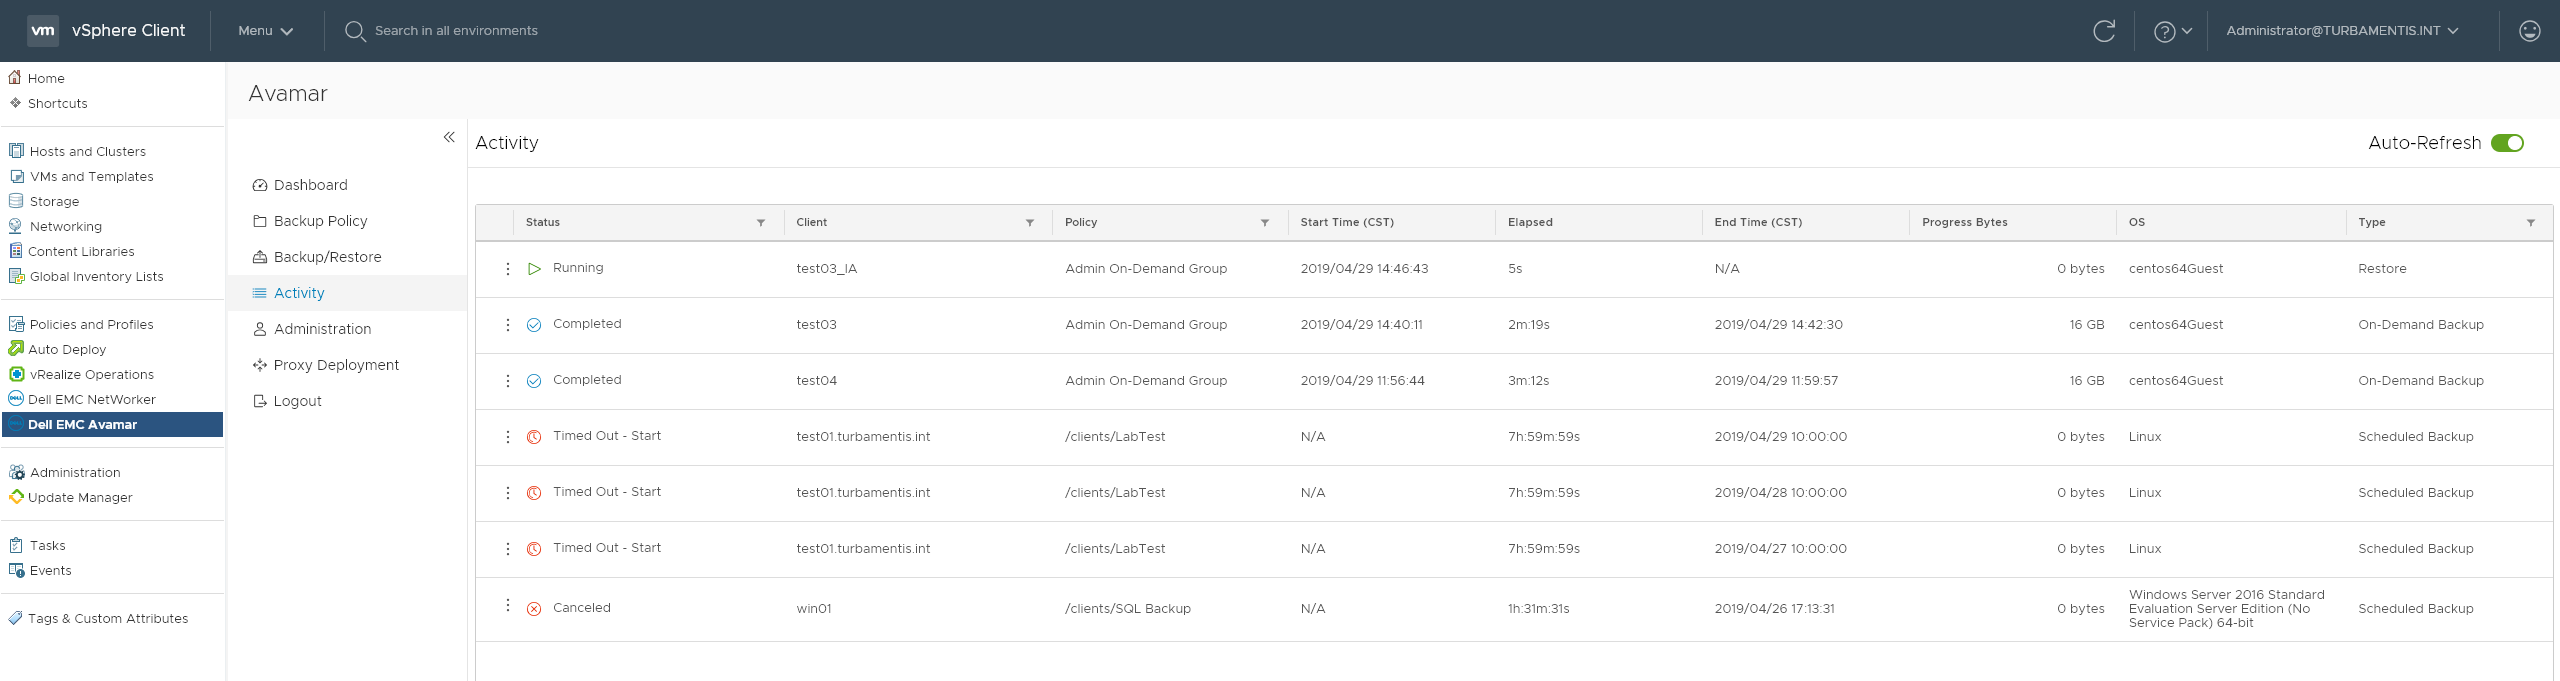
Under Activity, it’ll look initially like this:
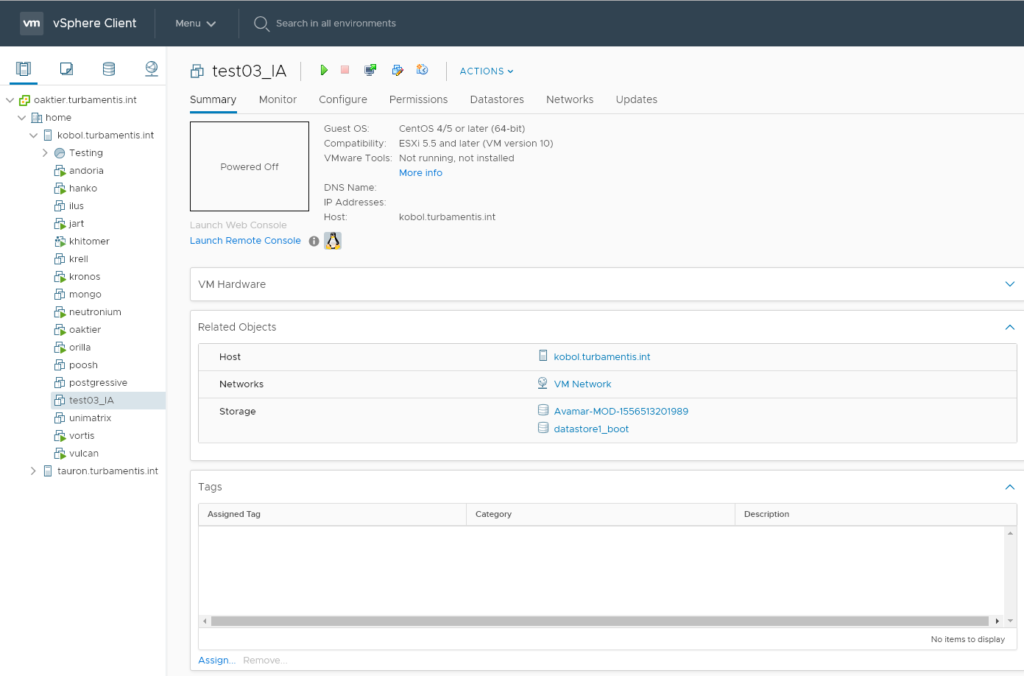
In the VMware Recent Tasks view, you’ll want to watch for the virtual machine being registered – that’s your sign it’s ready to power up:

With the virtual machine registered, here’s what the Summary tab looks like:
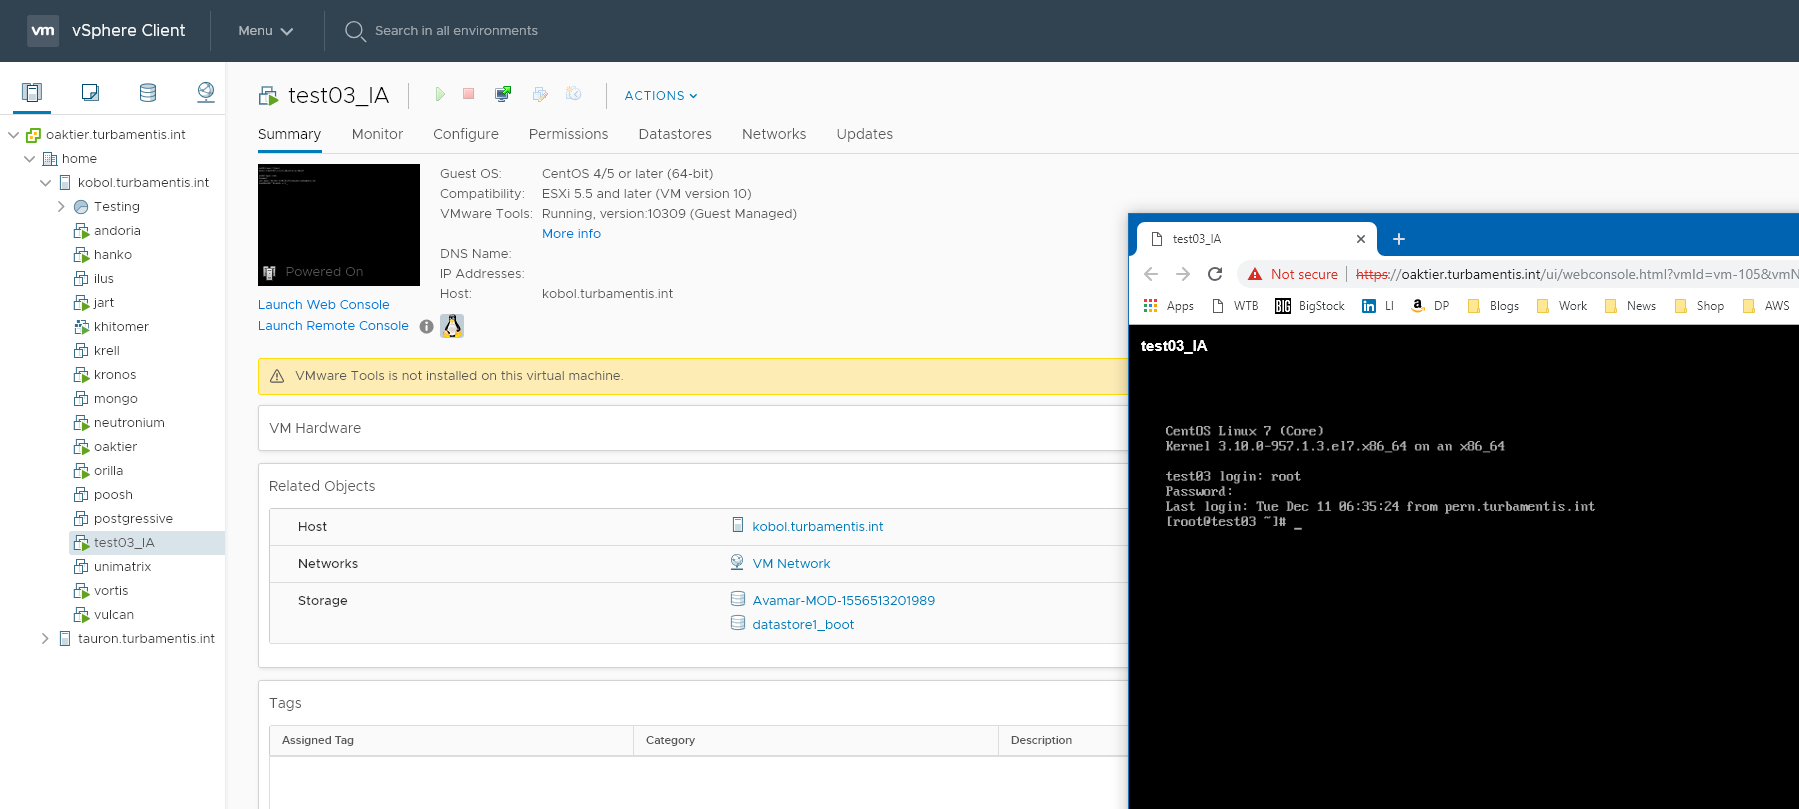
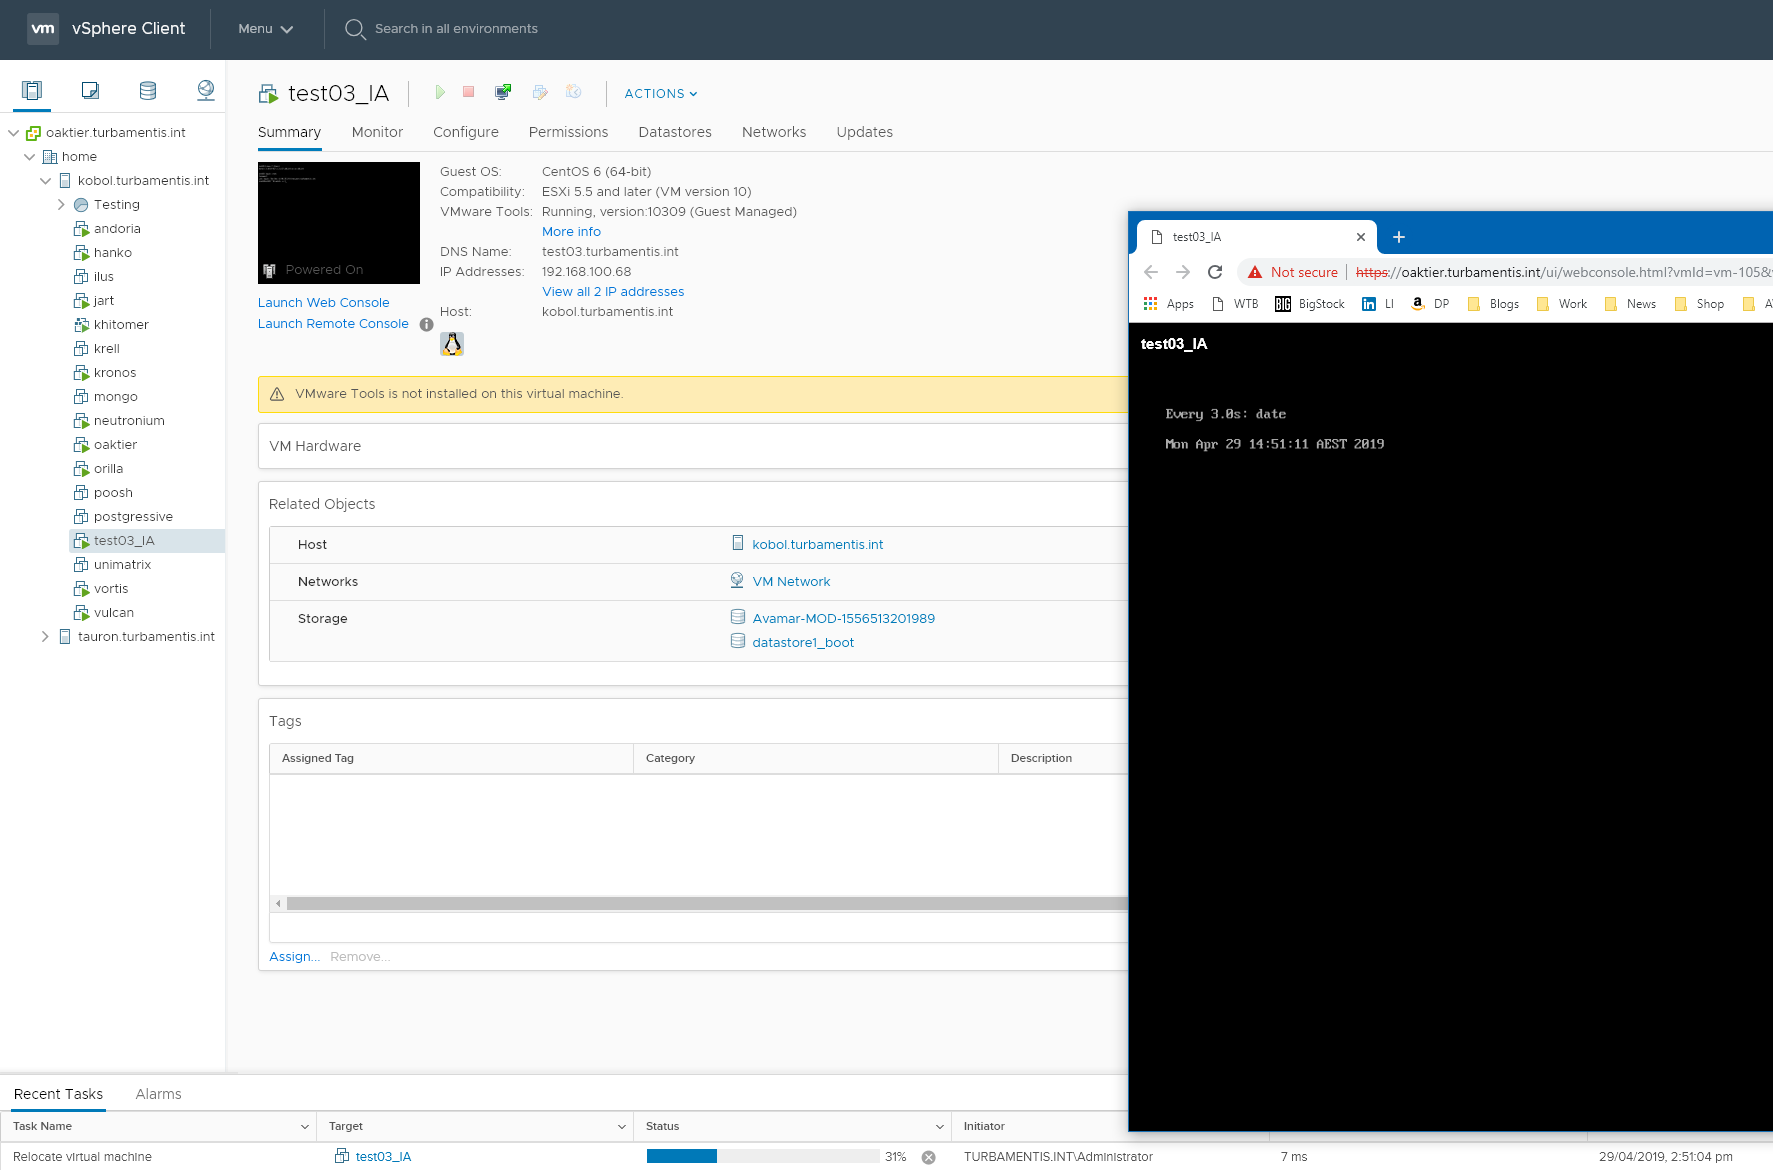
Since my test03 virtual machine was powered off, I could simply power on the Instant-Access virtual machine and launch its console:
The cool thing of course about Instant Access is while the virtual machine is running from the Data Domain, you can vMotion it back to your traditional storage:
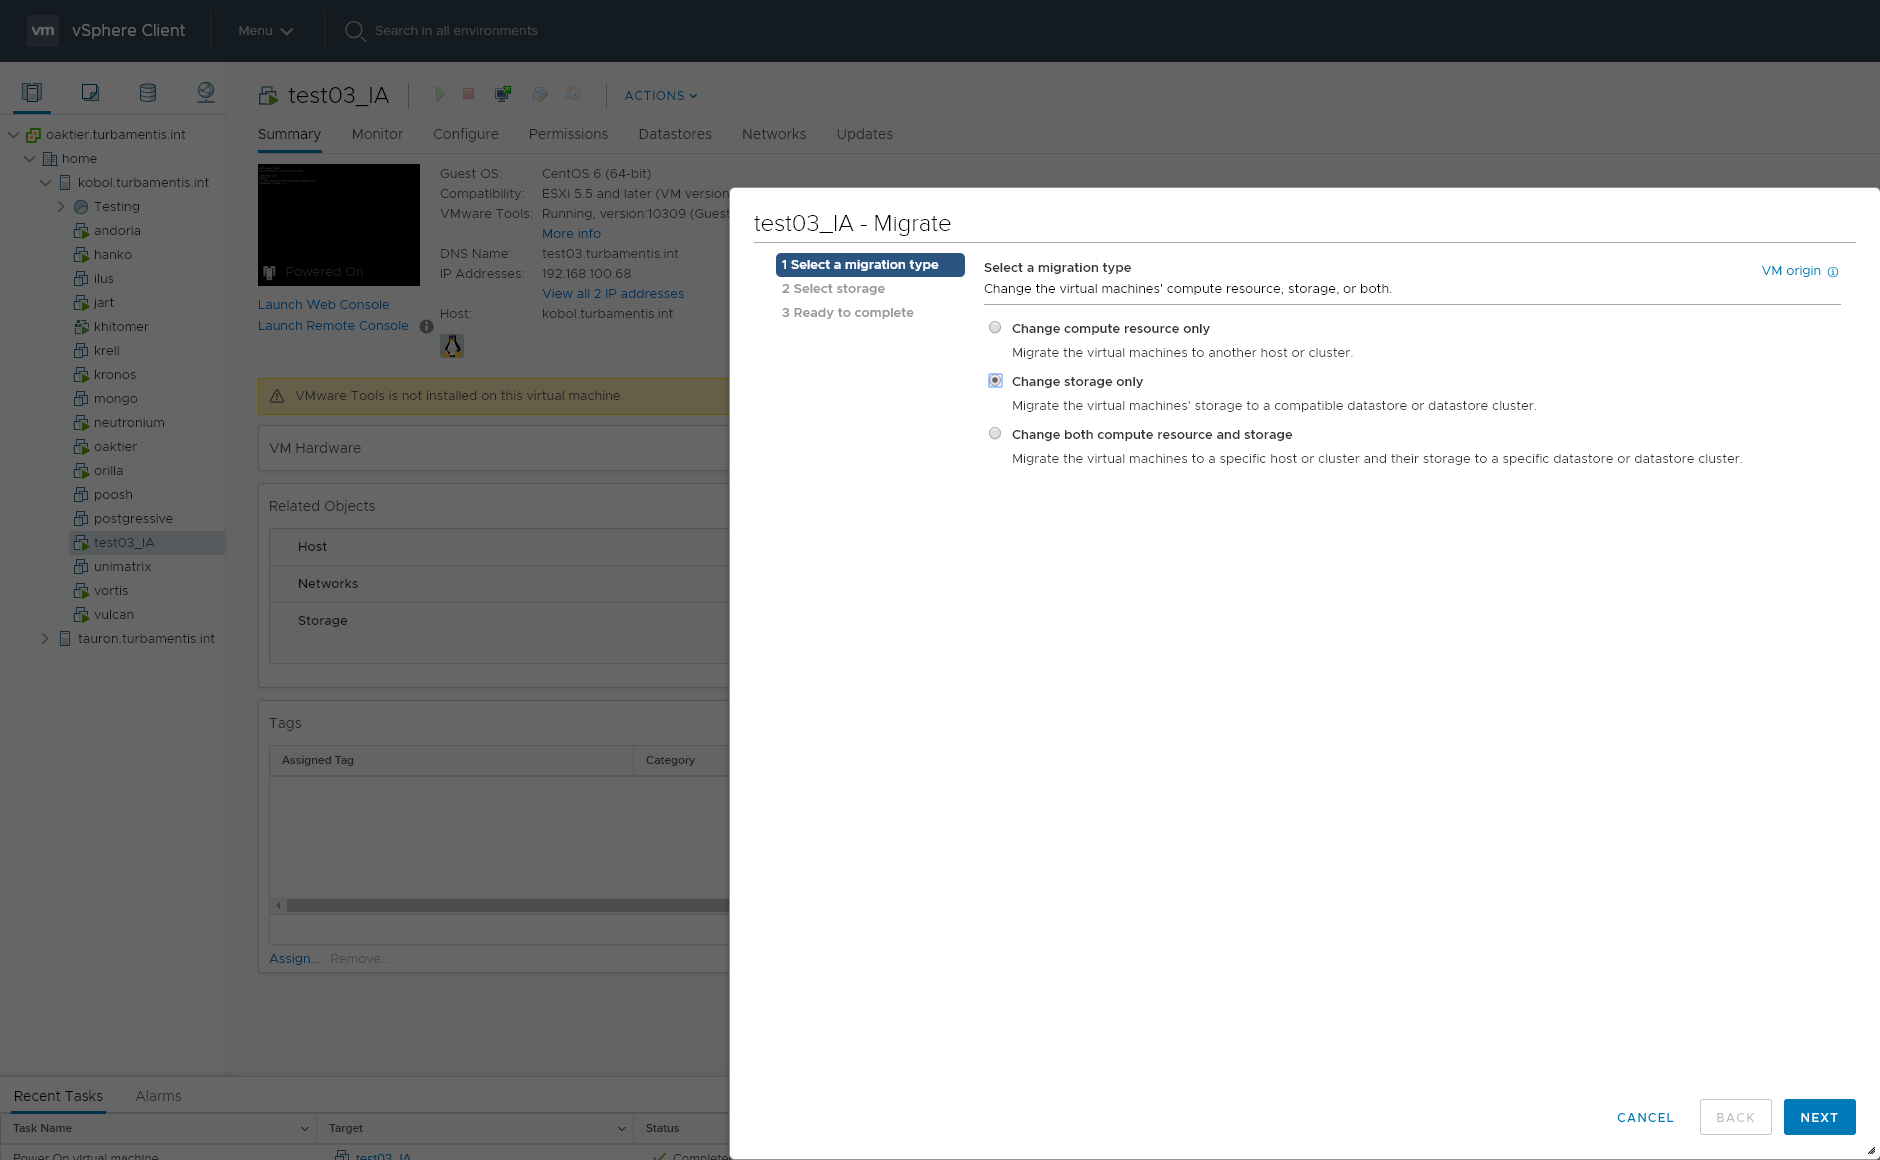
This of course is where the marriage of the interfaces really comes into the fore: the VMware administrator is able to do all of this without leaving the comfort of the vSphere Web Interface.
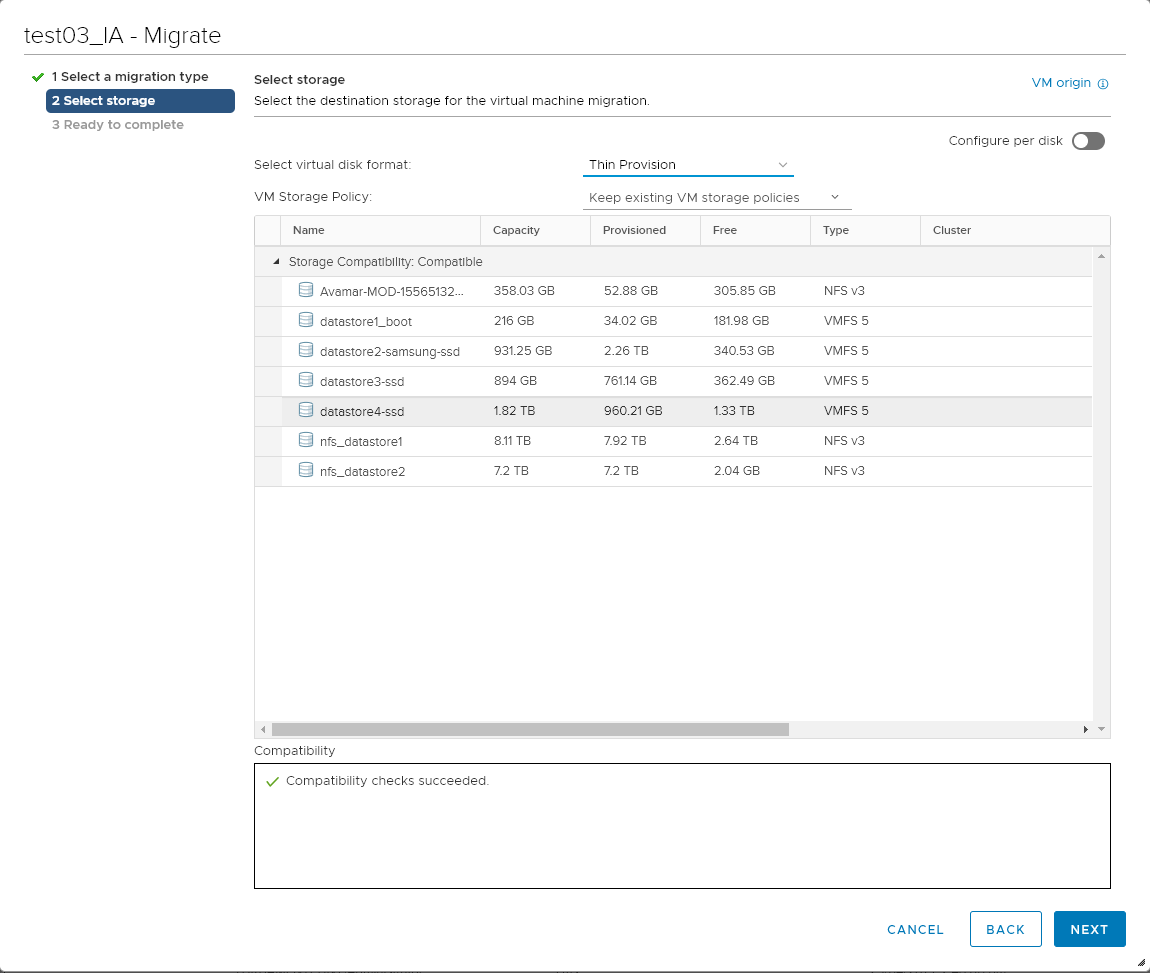
With the settings complete, it was time to start the vMotion:
At that point, your storage vMotion is off and running – and like any good storage vMotion to the same VMware server, you can still use the virtual machine while it’s running:
And when the entire process was complete the NFS mounted datastore could be removed:

Pretty straight-forward stuff.
NetWorker
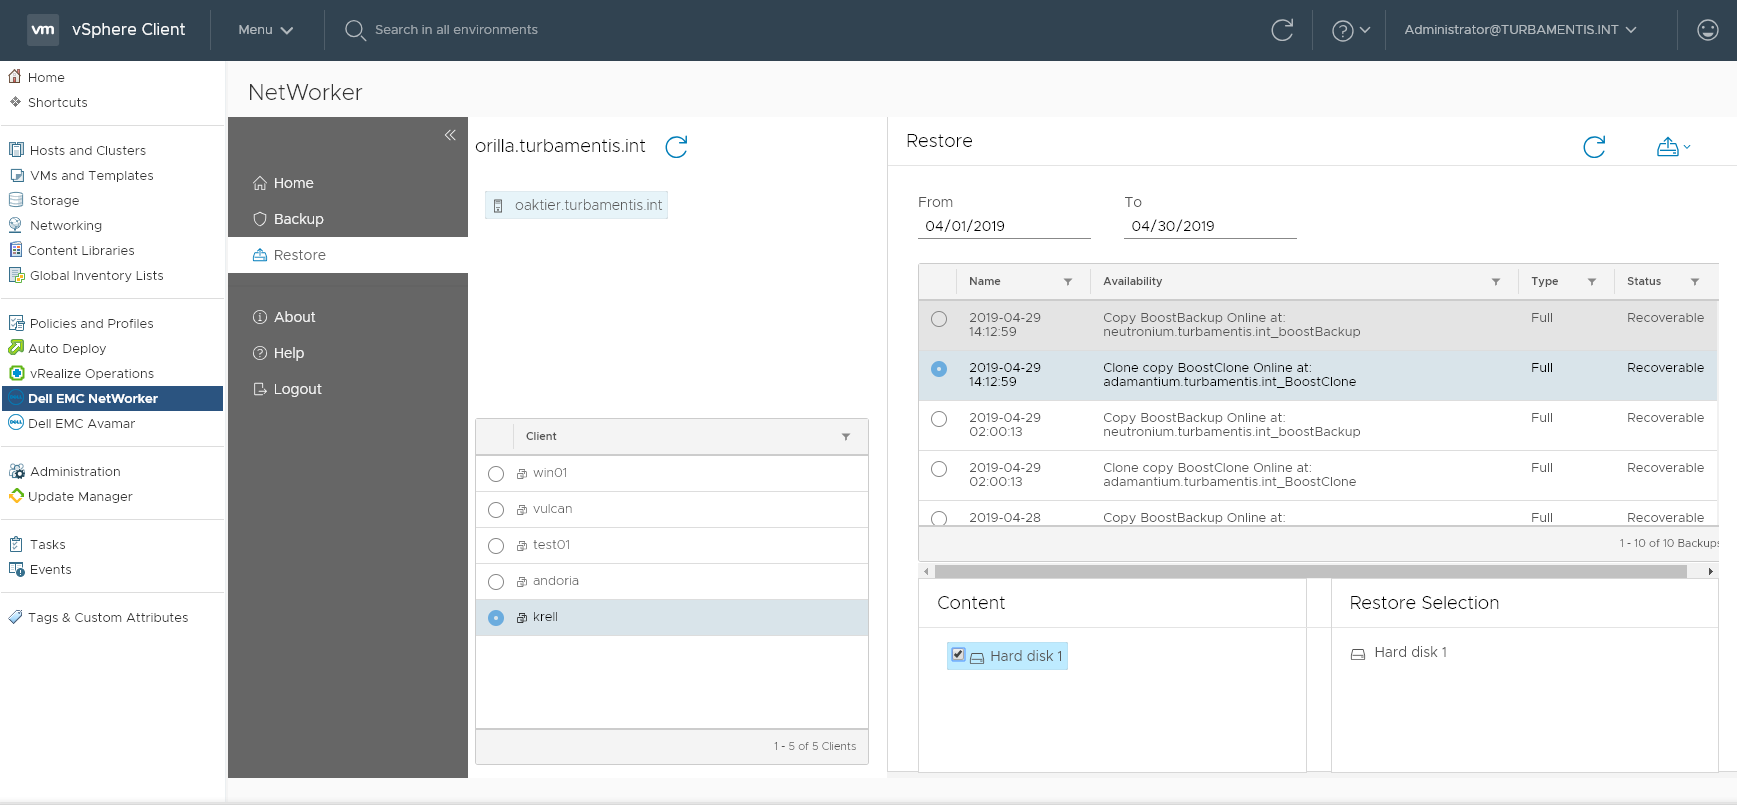
NetWorker’s HTML5 user interface is still coming along, but its HTML5 plugin still allows the VMware administrator to conduct image based restores, initiate backups, etc.

Once you log into the NetWorker server via the vSphere Web Interface Plugin you’ll get some basic options:
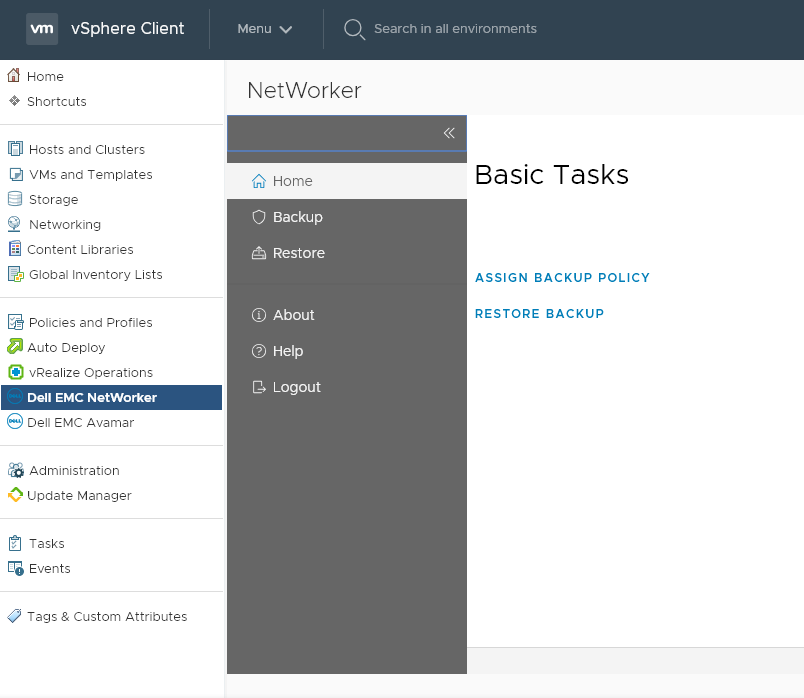
You can eschew those options and go to Restore if you want:
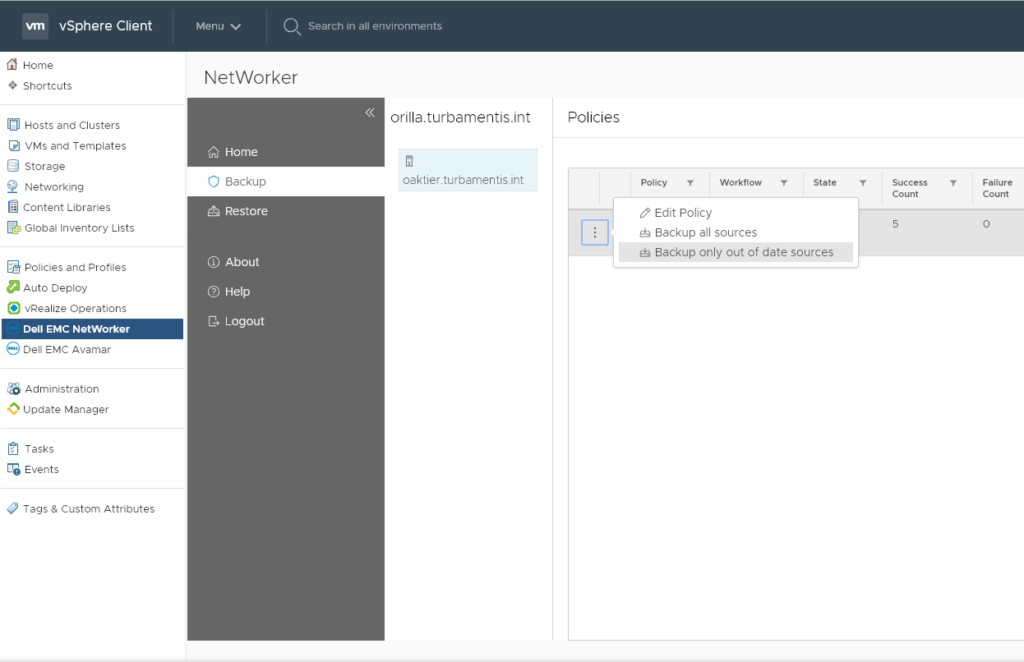
Equally, you can tell NetWorker to backup either all virtual machines in a policy, or only those that need to be backed up:
Summary
The most important thing about the HTML5 plugins for NetWorker and Avamar in vSphere 6.5 is that there’s nothing different about them. The joy of the plugins is that you drive directly into the backup product interface to do what you need to do. That’s a win for backup administrators who want a consistent process, and it’s a win for VMware administrators who want an interface that’s consistent with the vSphere Web Interface.
And without Adobe Flash, it’s pretty flash.