The HTML version of the NetWorker interface introduced file-level recovery options in 19.3. With 19.3 you got the option to do a file-browsed recovery from block-based backups and a named-file recovery from traditional filesystem backups.
If you’re new to NetWorker: This refers to the functionality within the NWUI, not NetWorker’s overall functionality. NetWorker has always offered among the most comprehensive file recovery options possible. While NWUI’s features are developing, don’t be afraid to check out the CLI or even the legacy NMC console.
NetWorker 19.4 has continued the evolution of the HTML NWUI with the introduction of indexed file recovery from standard filesystem backups as well. So let’s take a look at that:
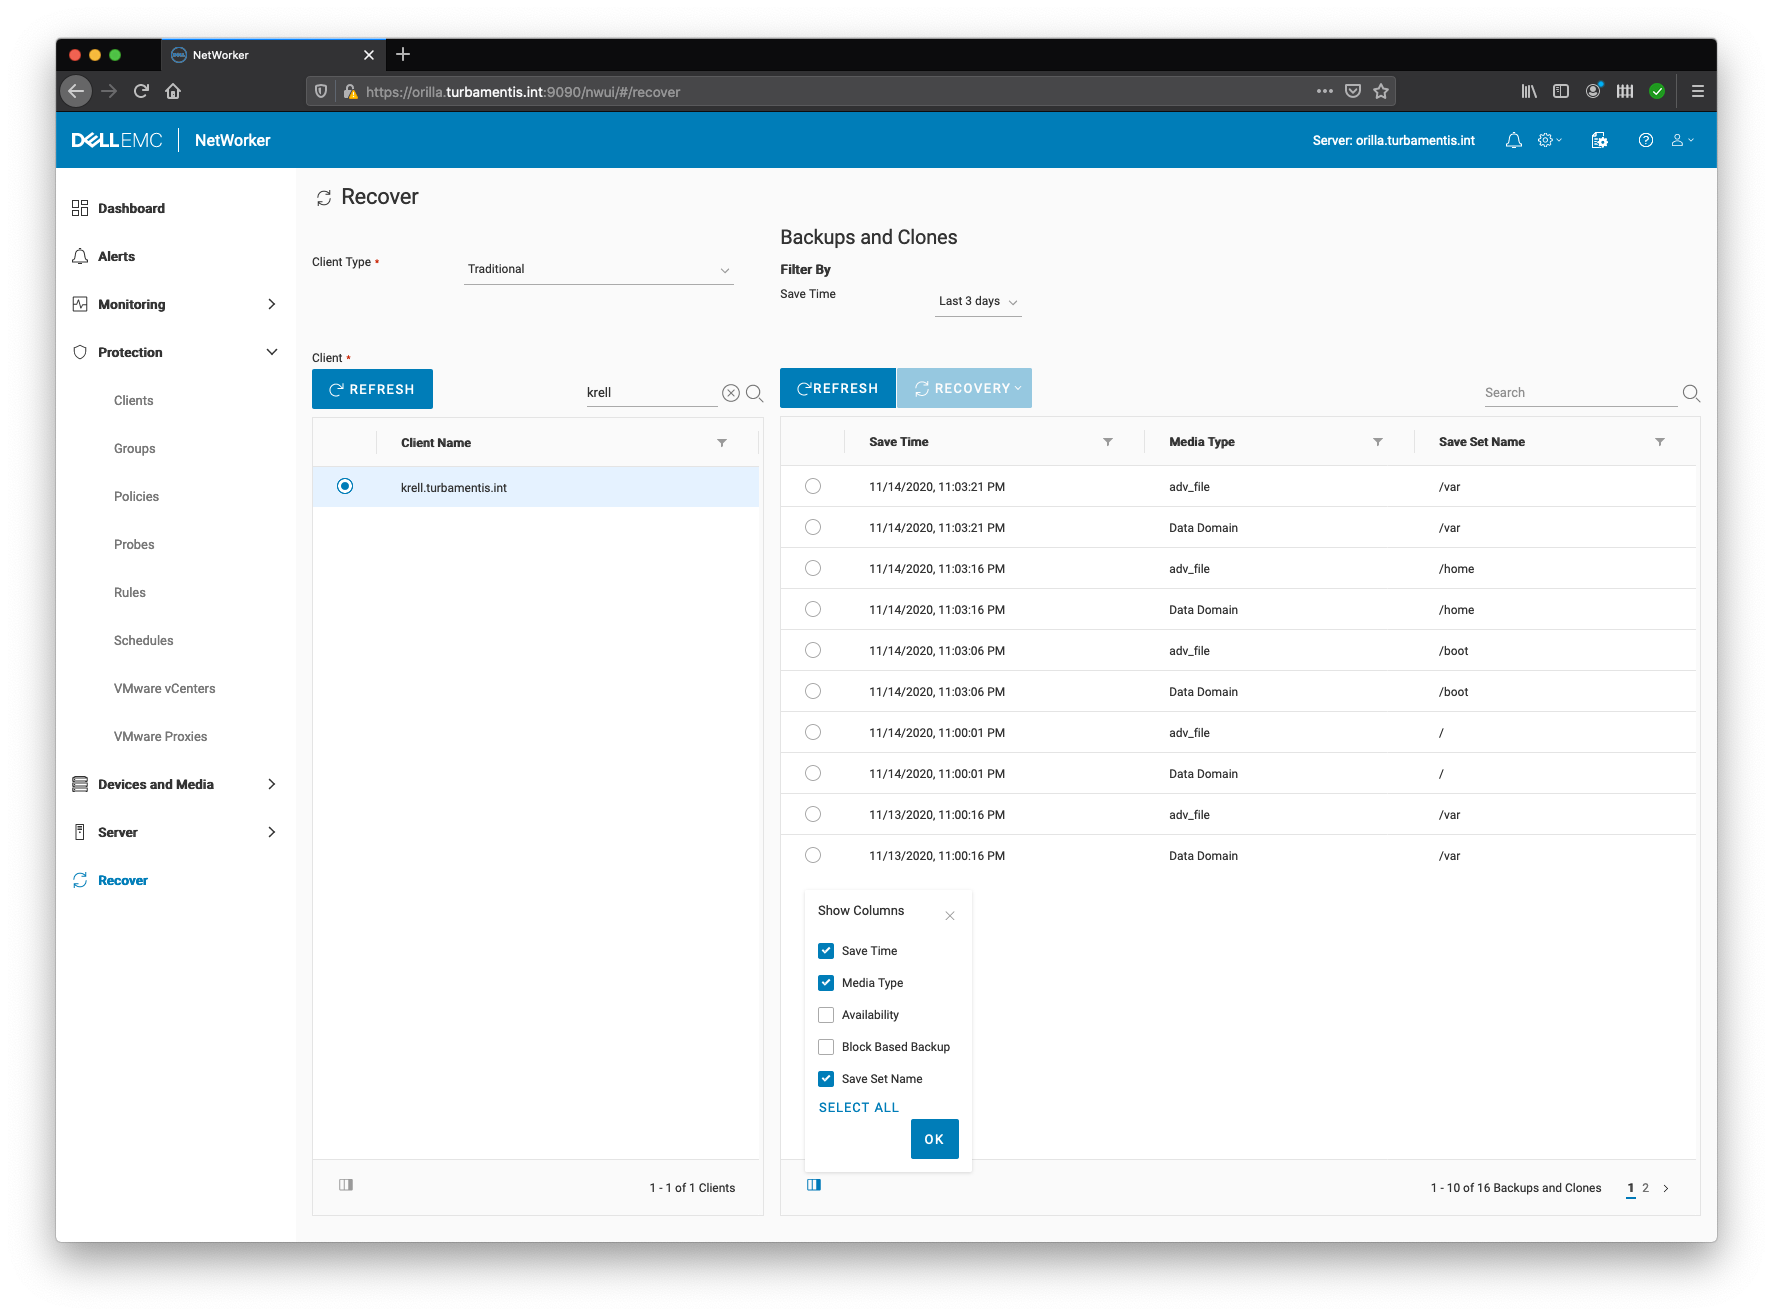
As shown above, once you’ve logged into the NWUI, navigate to Recover in the left-hand bar and:
- Set Client Type to Traditional.
- Choose the Client to recover from – you can either browse through a list or search for it
- Select the Save Time to be the number of days you want to look back
- Find the Save Set you want to recover from.
You’ll see in the above that I’ve changed the default columns to view. By default, you’ll see columns of Save Time, Media Type, Availability and Block Based Backup. I switch it to Save Time, Media Type and Save Set Name.
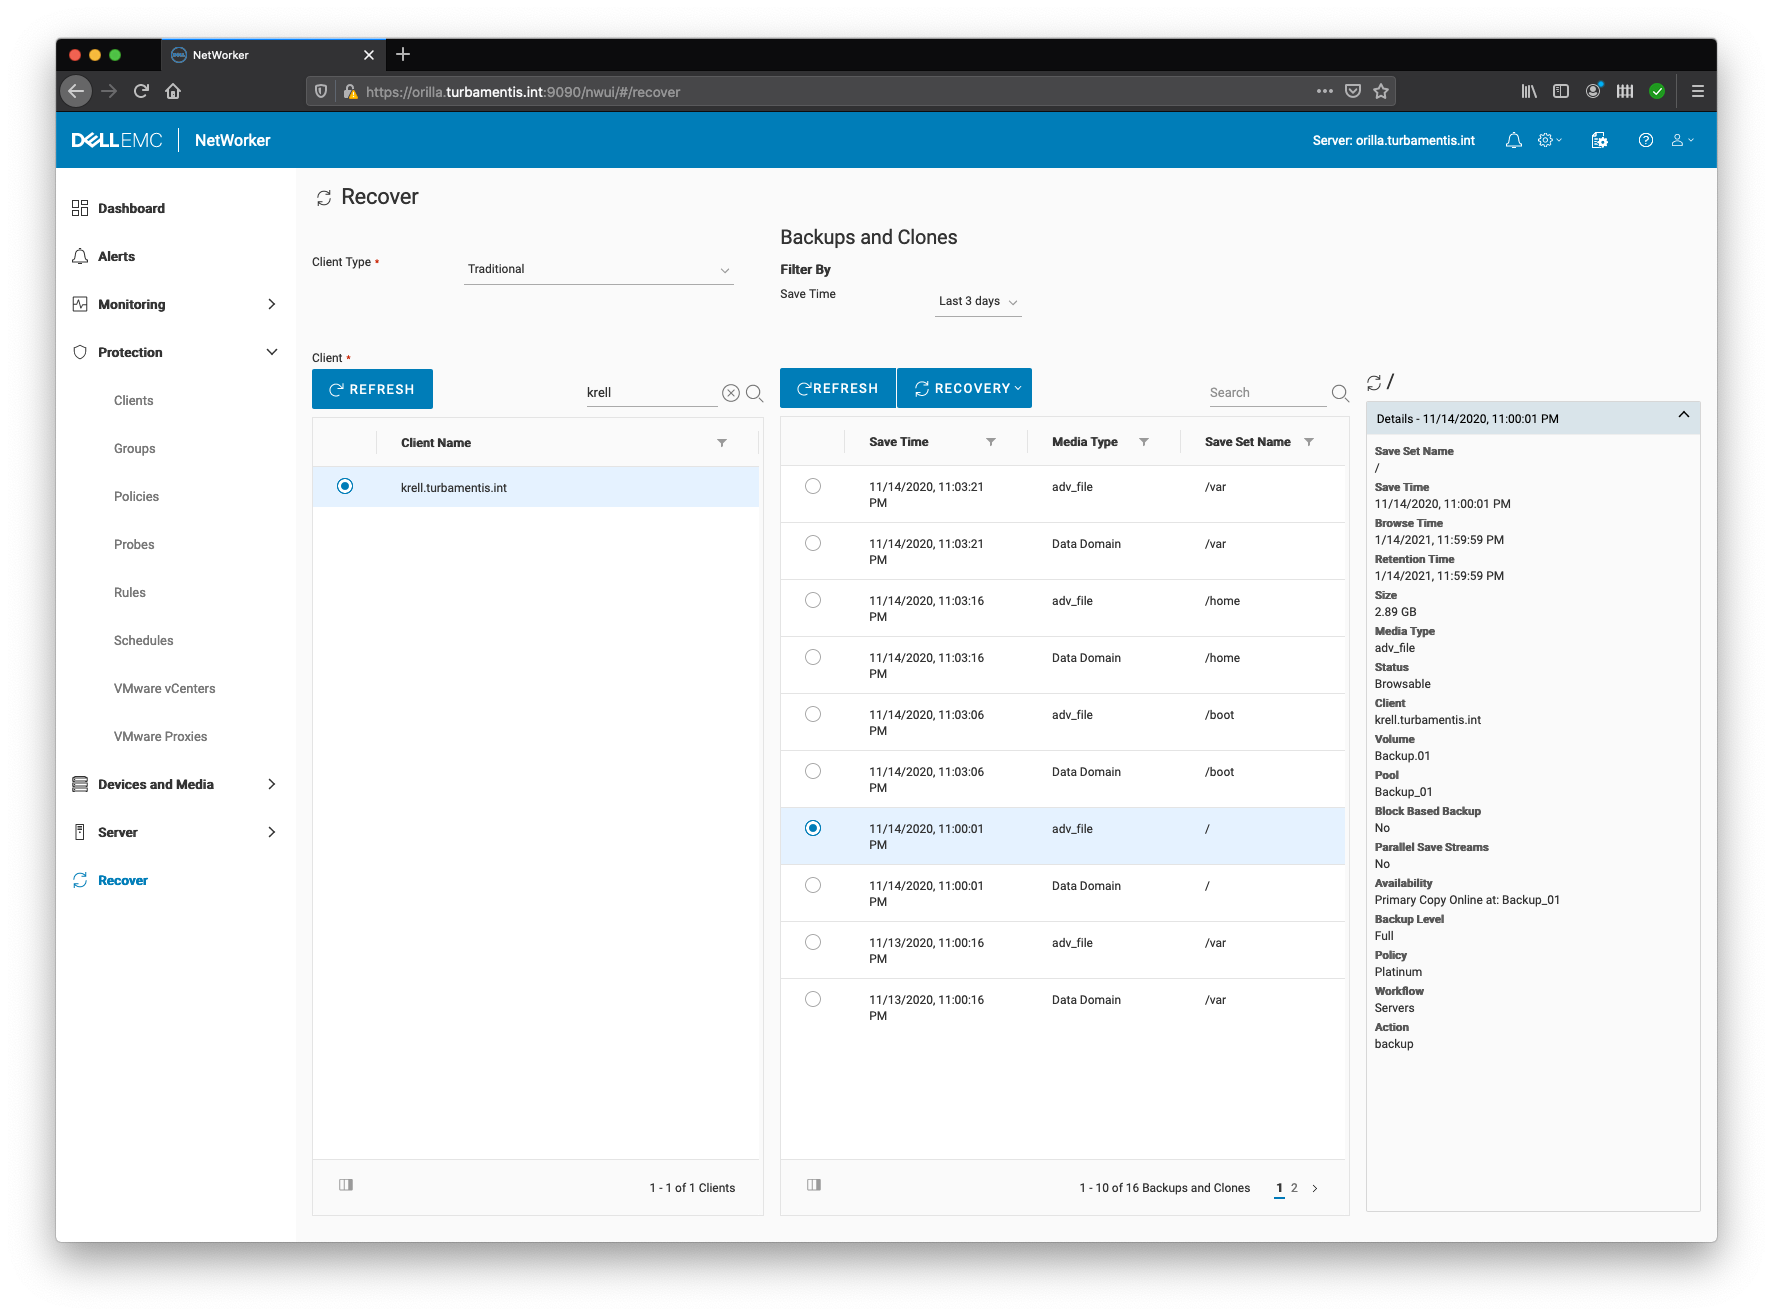
When you select a saveset you want to recover from, NetWorker will show you some details about the saveset in the right-hand of the screen:
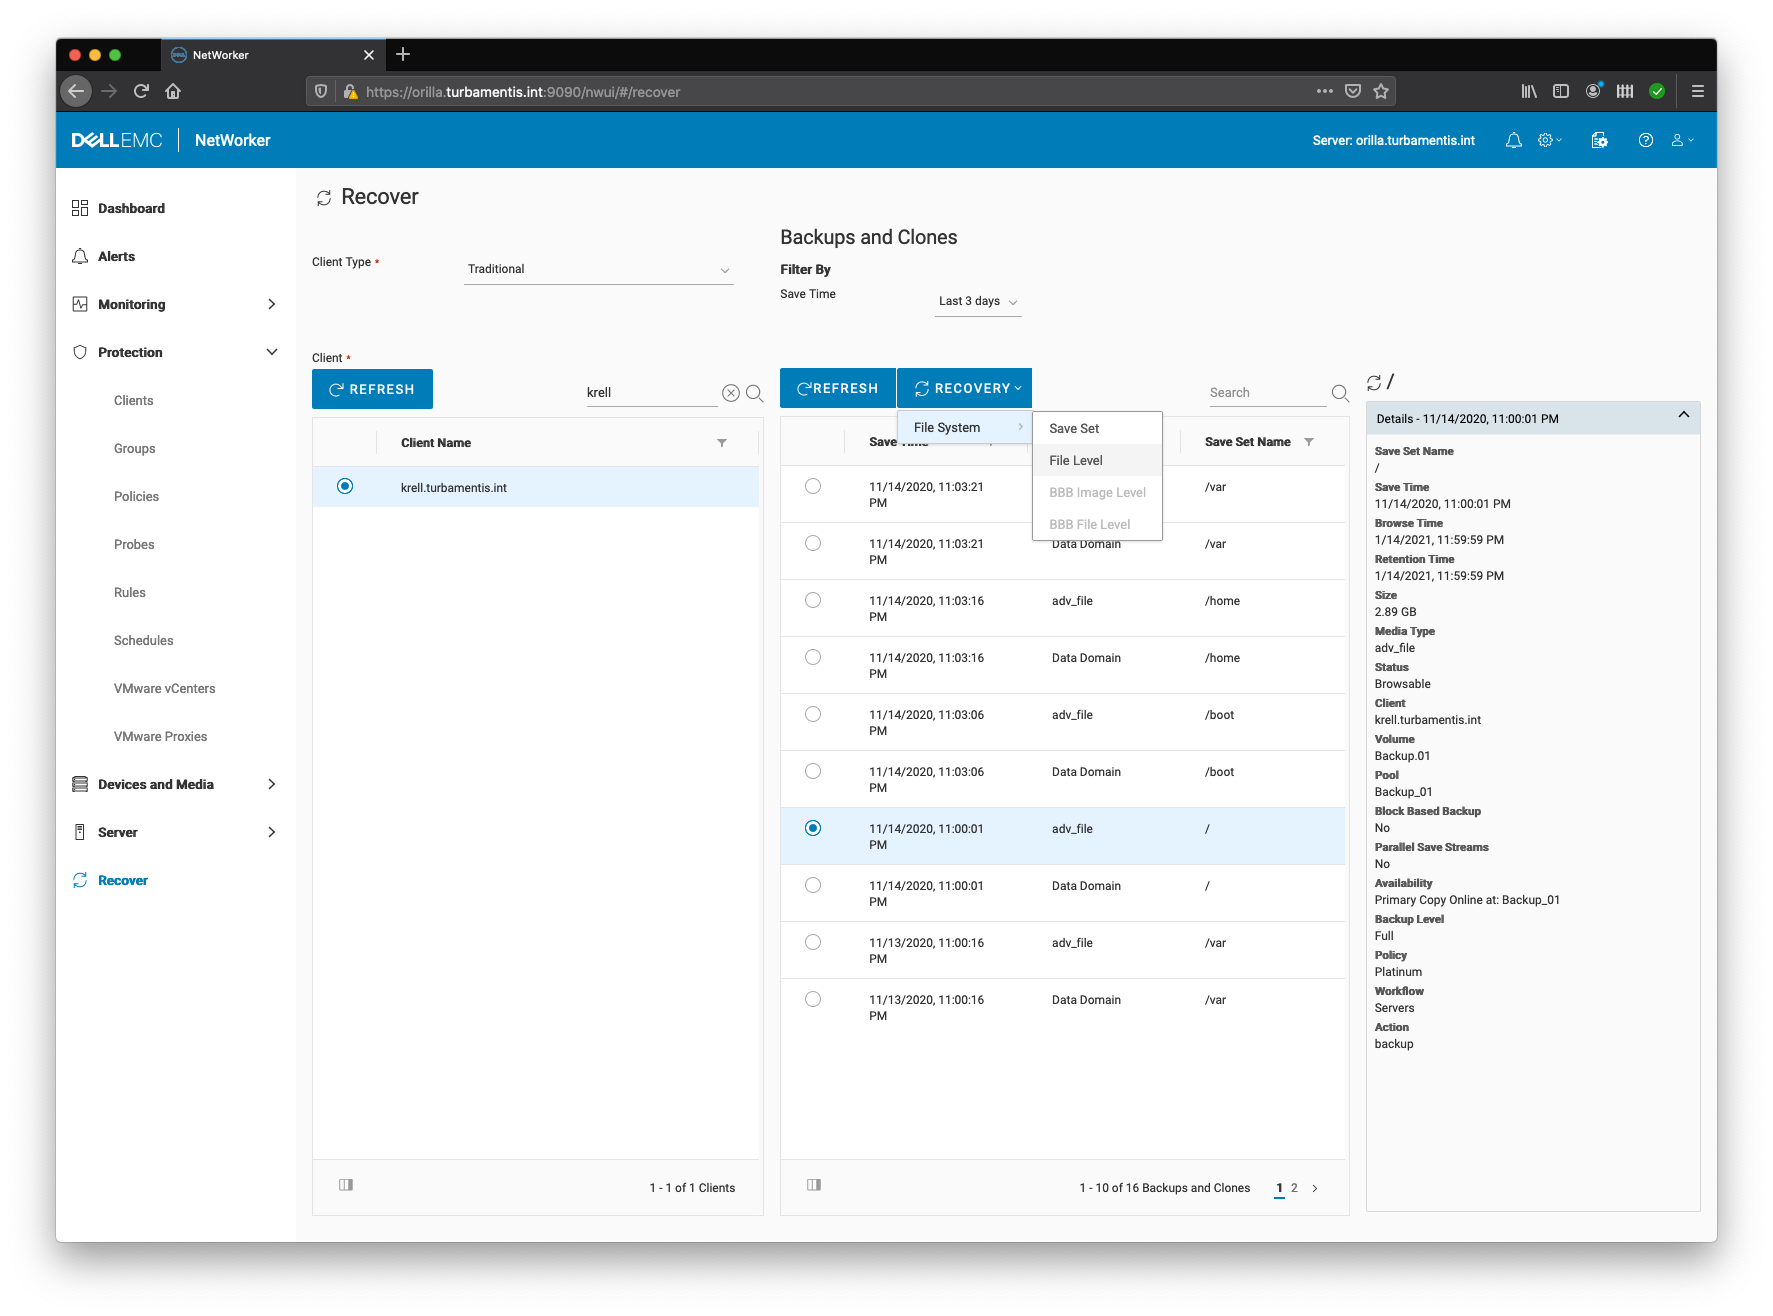
Once you’ve chosen the saveset you want to recover from, go to the Recover button and click Filesystem>File Level from the drop down menu:
Choosing Filesystem>File Level will start the recovery wizard, with the opening screen resembling the following:
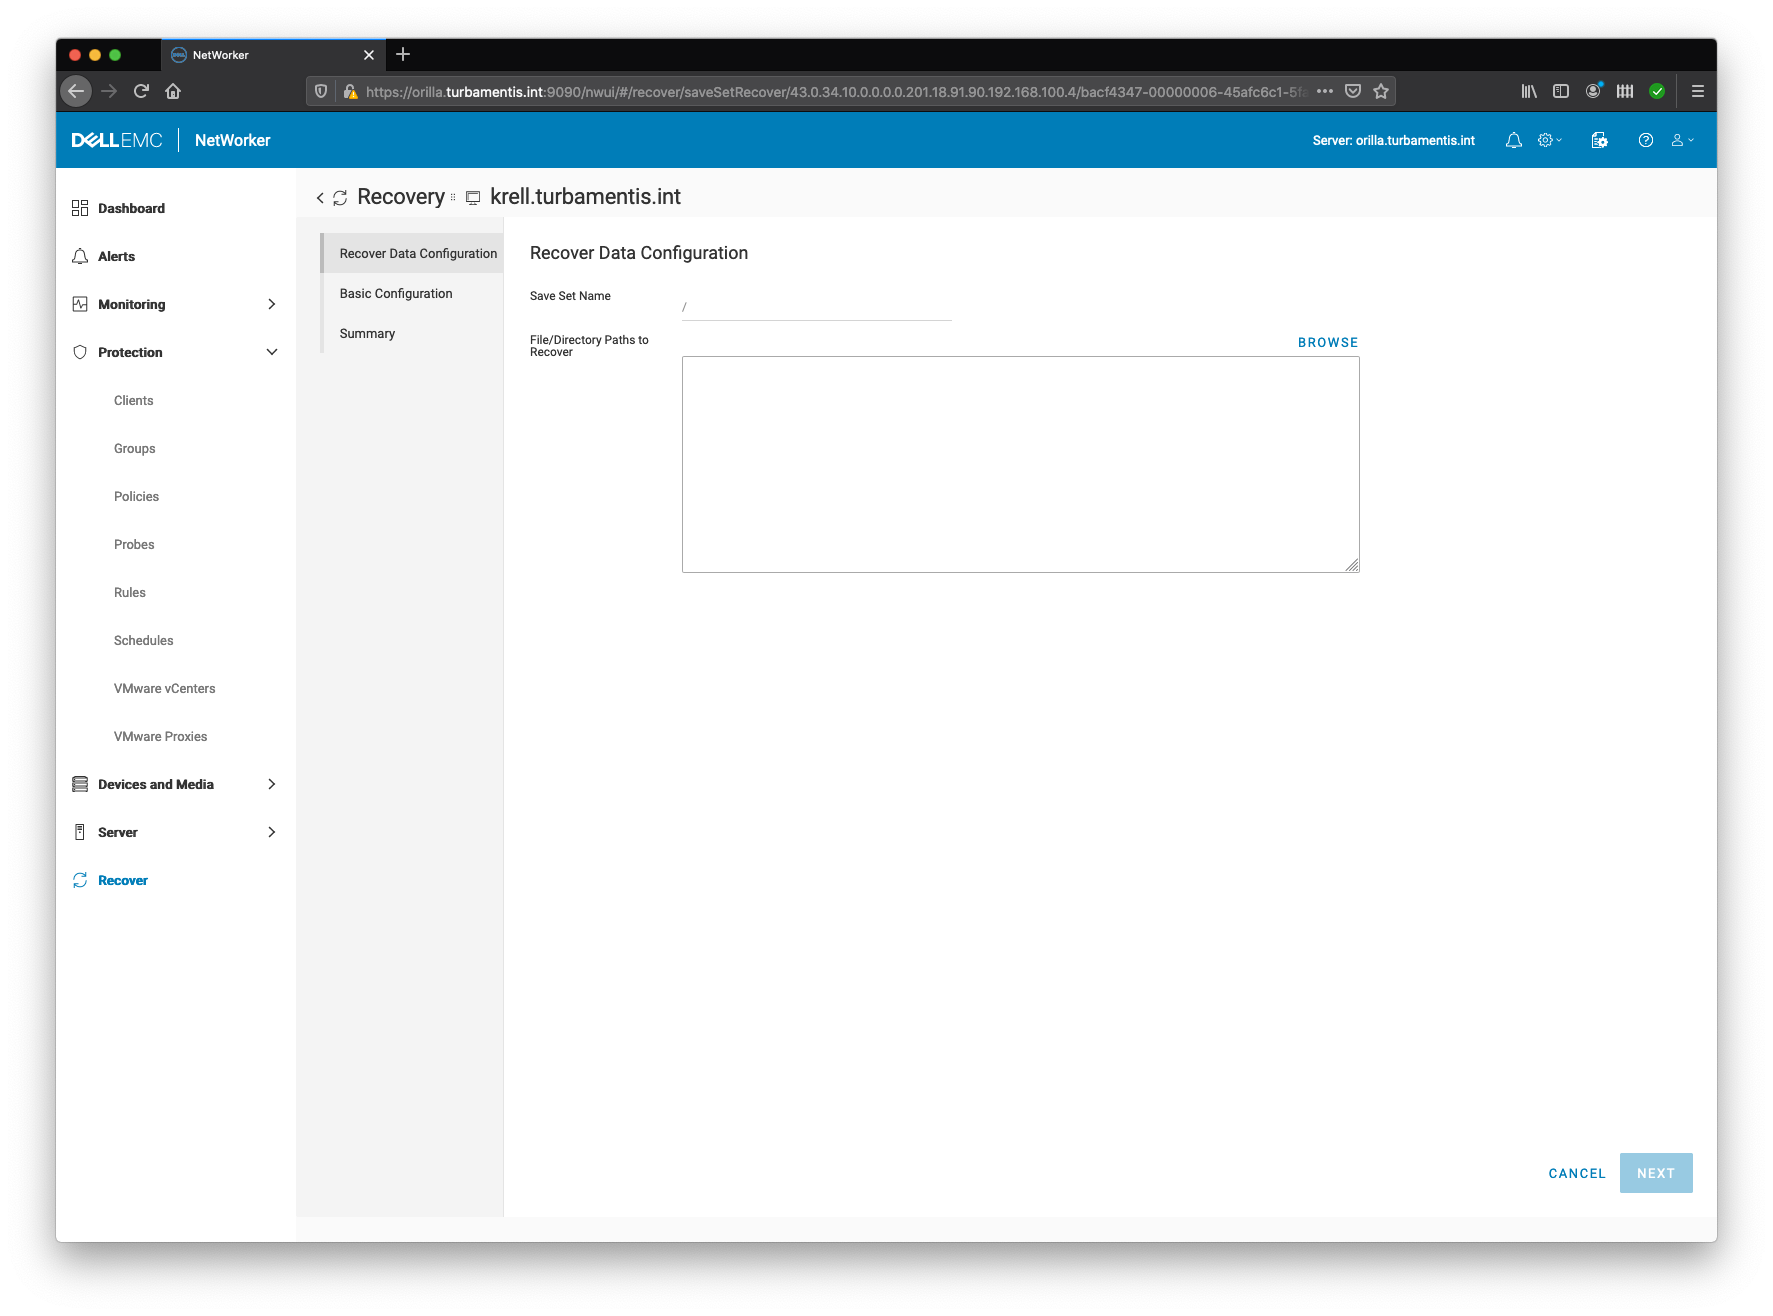
This shows the saveset name you’re recovering from and a dialog box where you can enter a list of files/paths that you want to recover. But, most importantly – there’s a Browse button you can click at the top-right of the dialog box, which will let you browse through the saveset and choose files/directories you want to recover from:
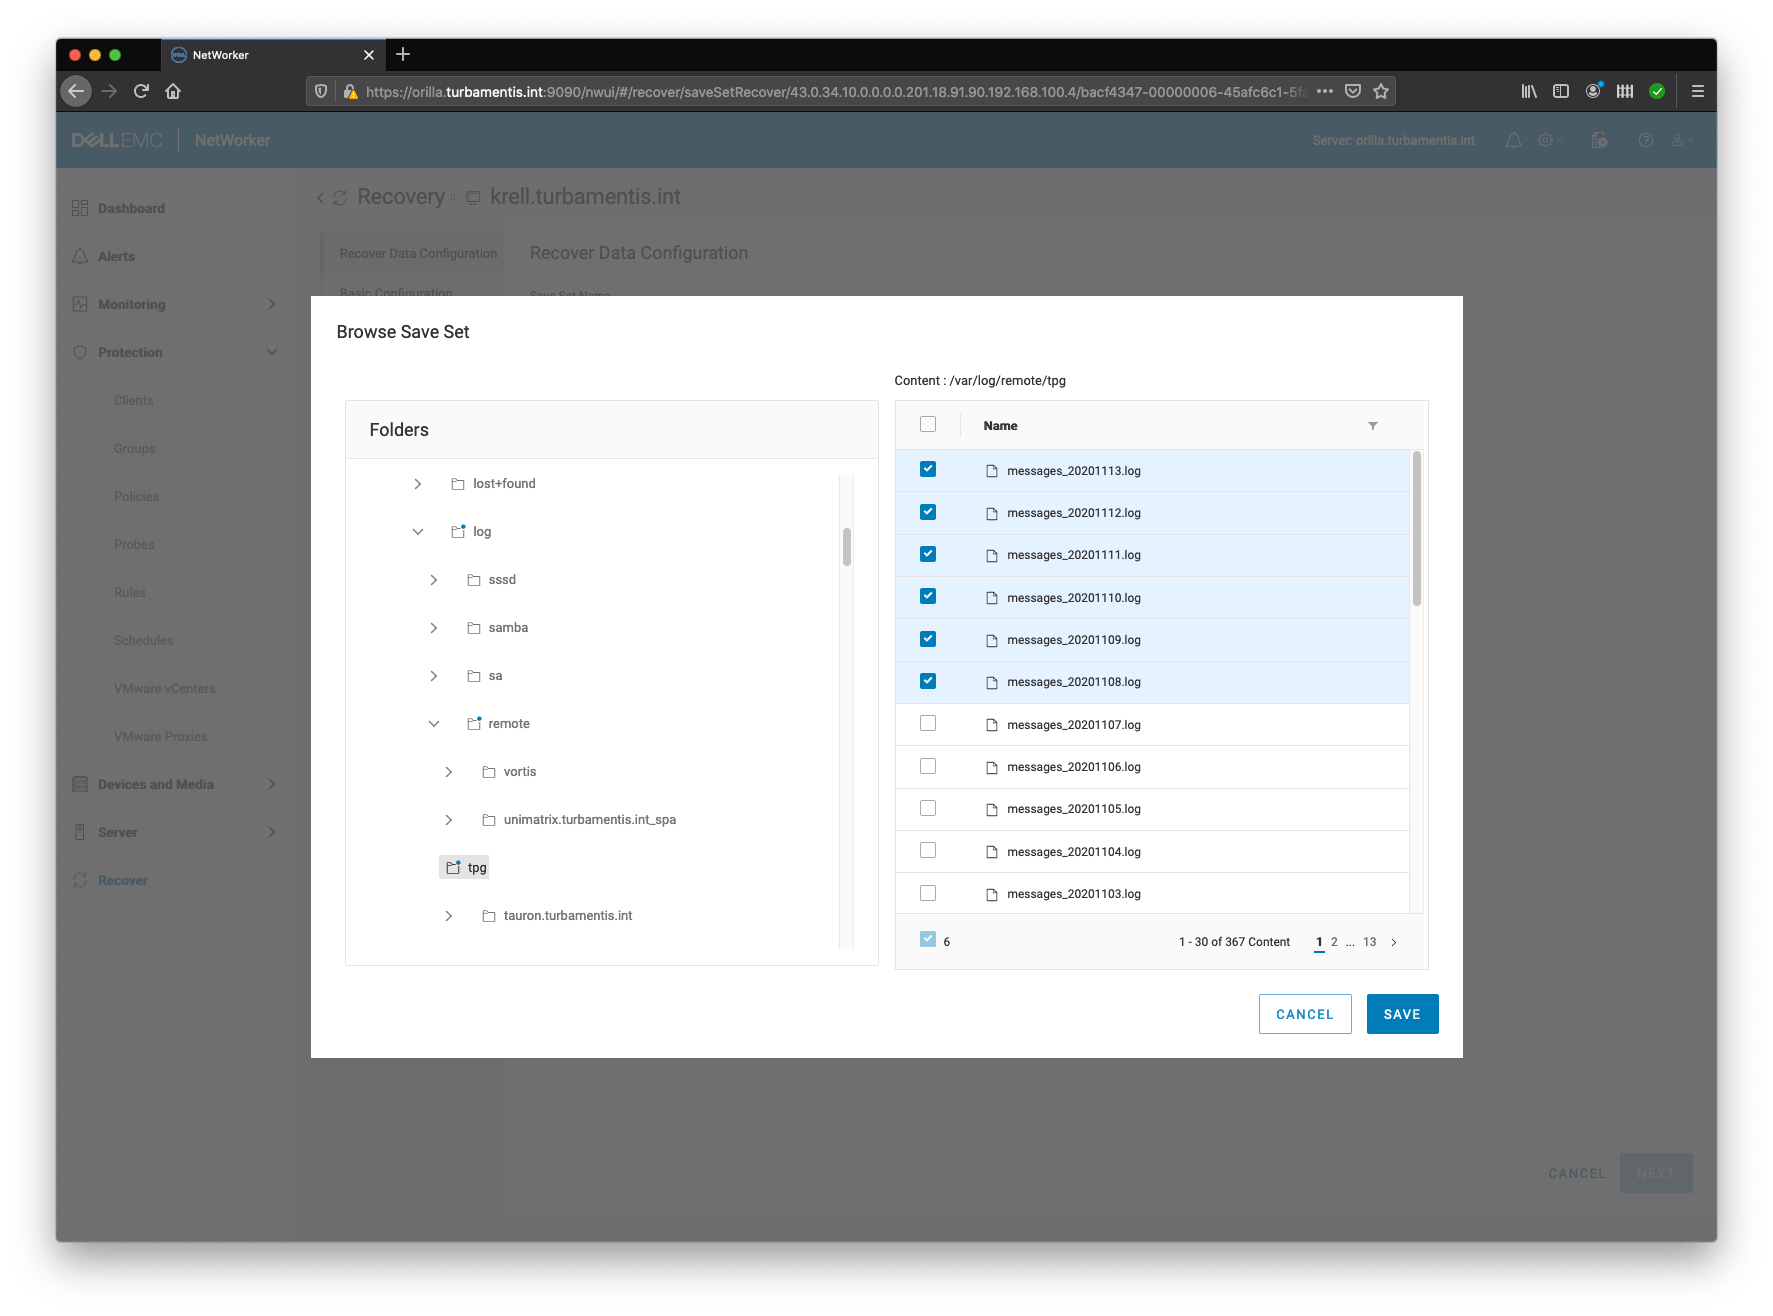
In the above, you’ll see I’ve browsed to the directory /var/log/remote/tpg, and added several files I want to recover. But, you can browse/select multiple areas:
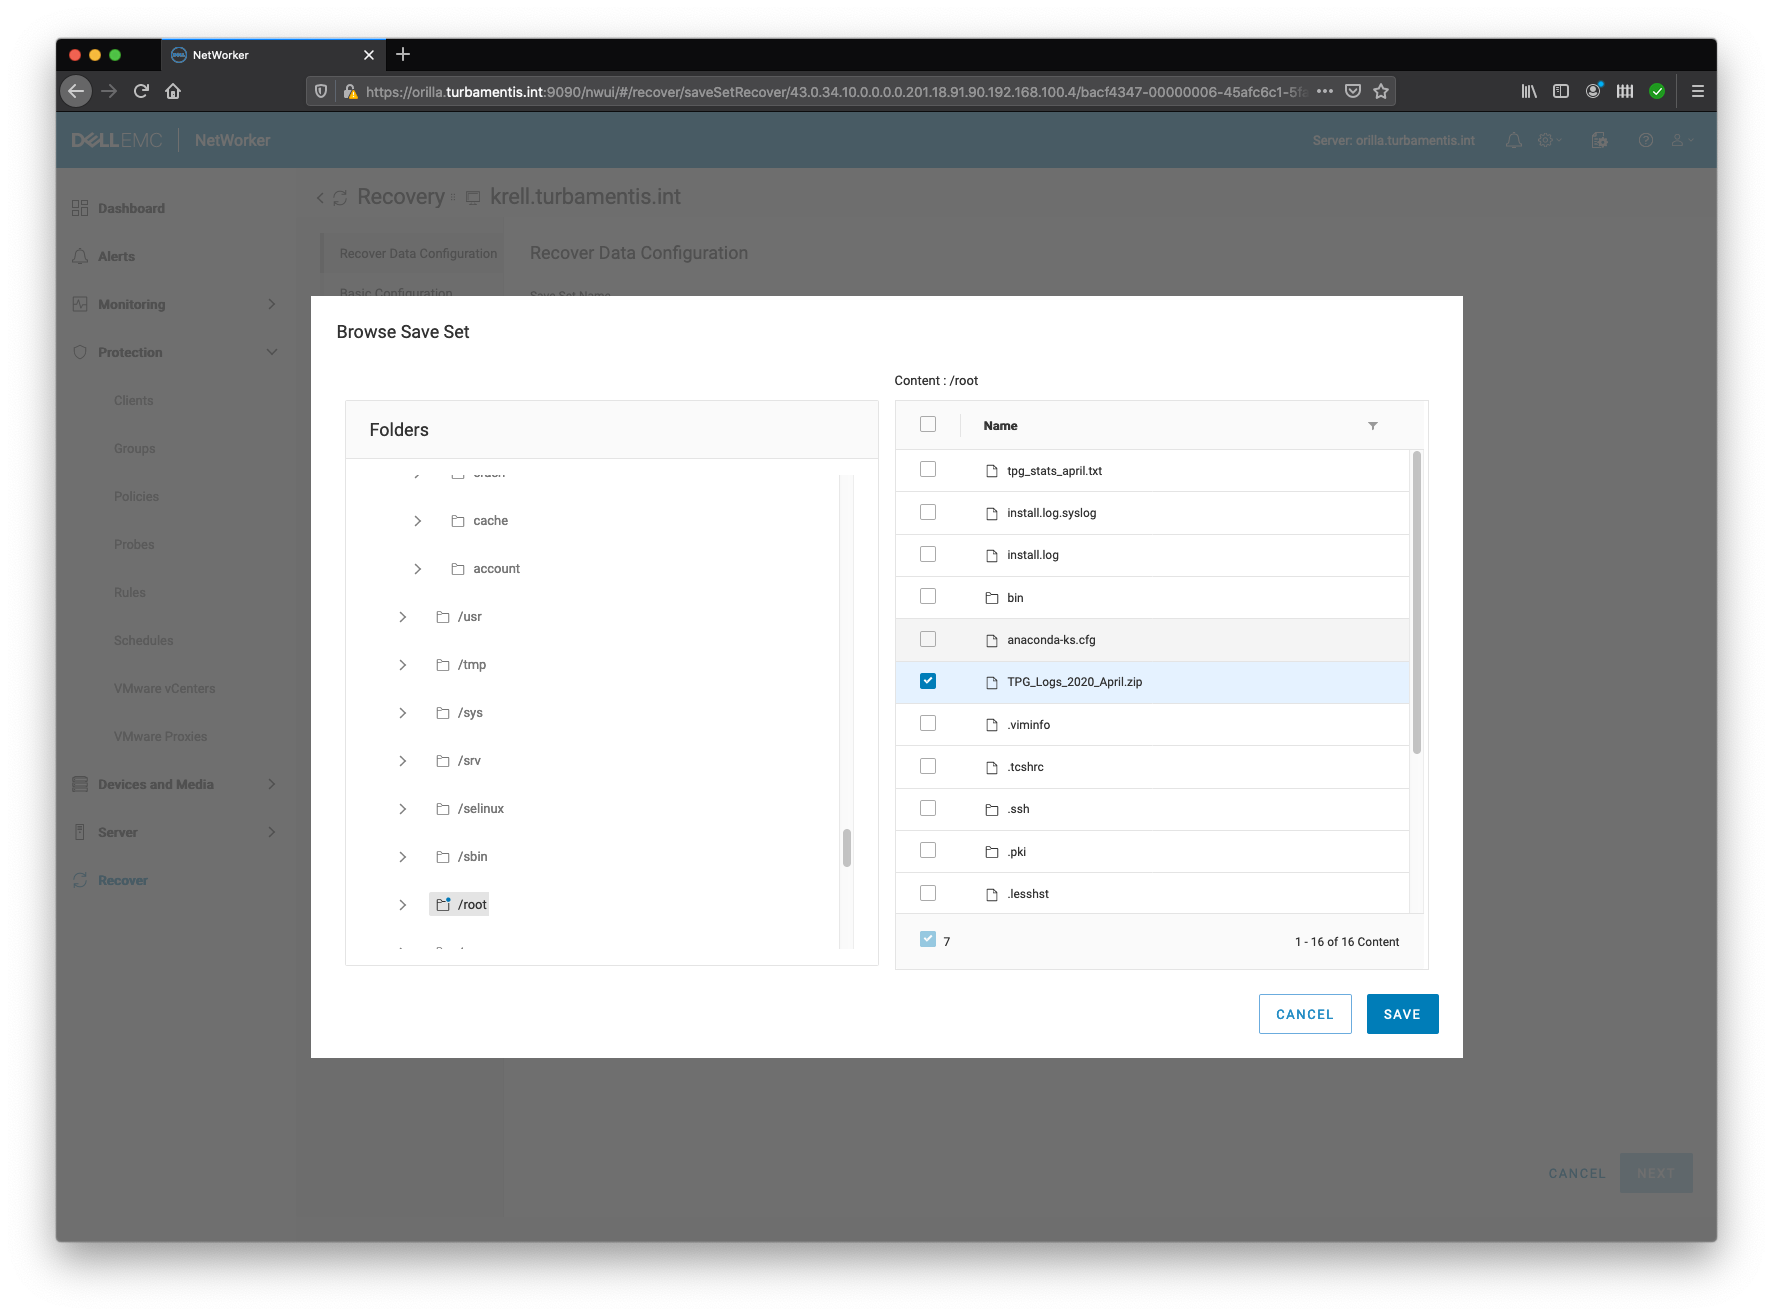
So in the above I’ve navigated to my /root directory and added a zip file that was in there as well. When I’m done selecting files, I can click Save to confirm all the files that I want to recover, which brings me back to the wizard’s first dialog box, now populated:
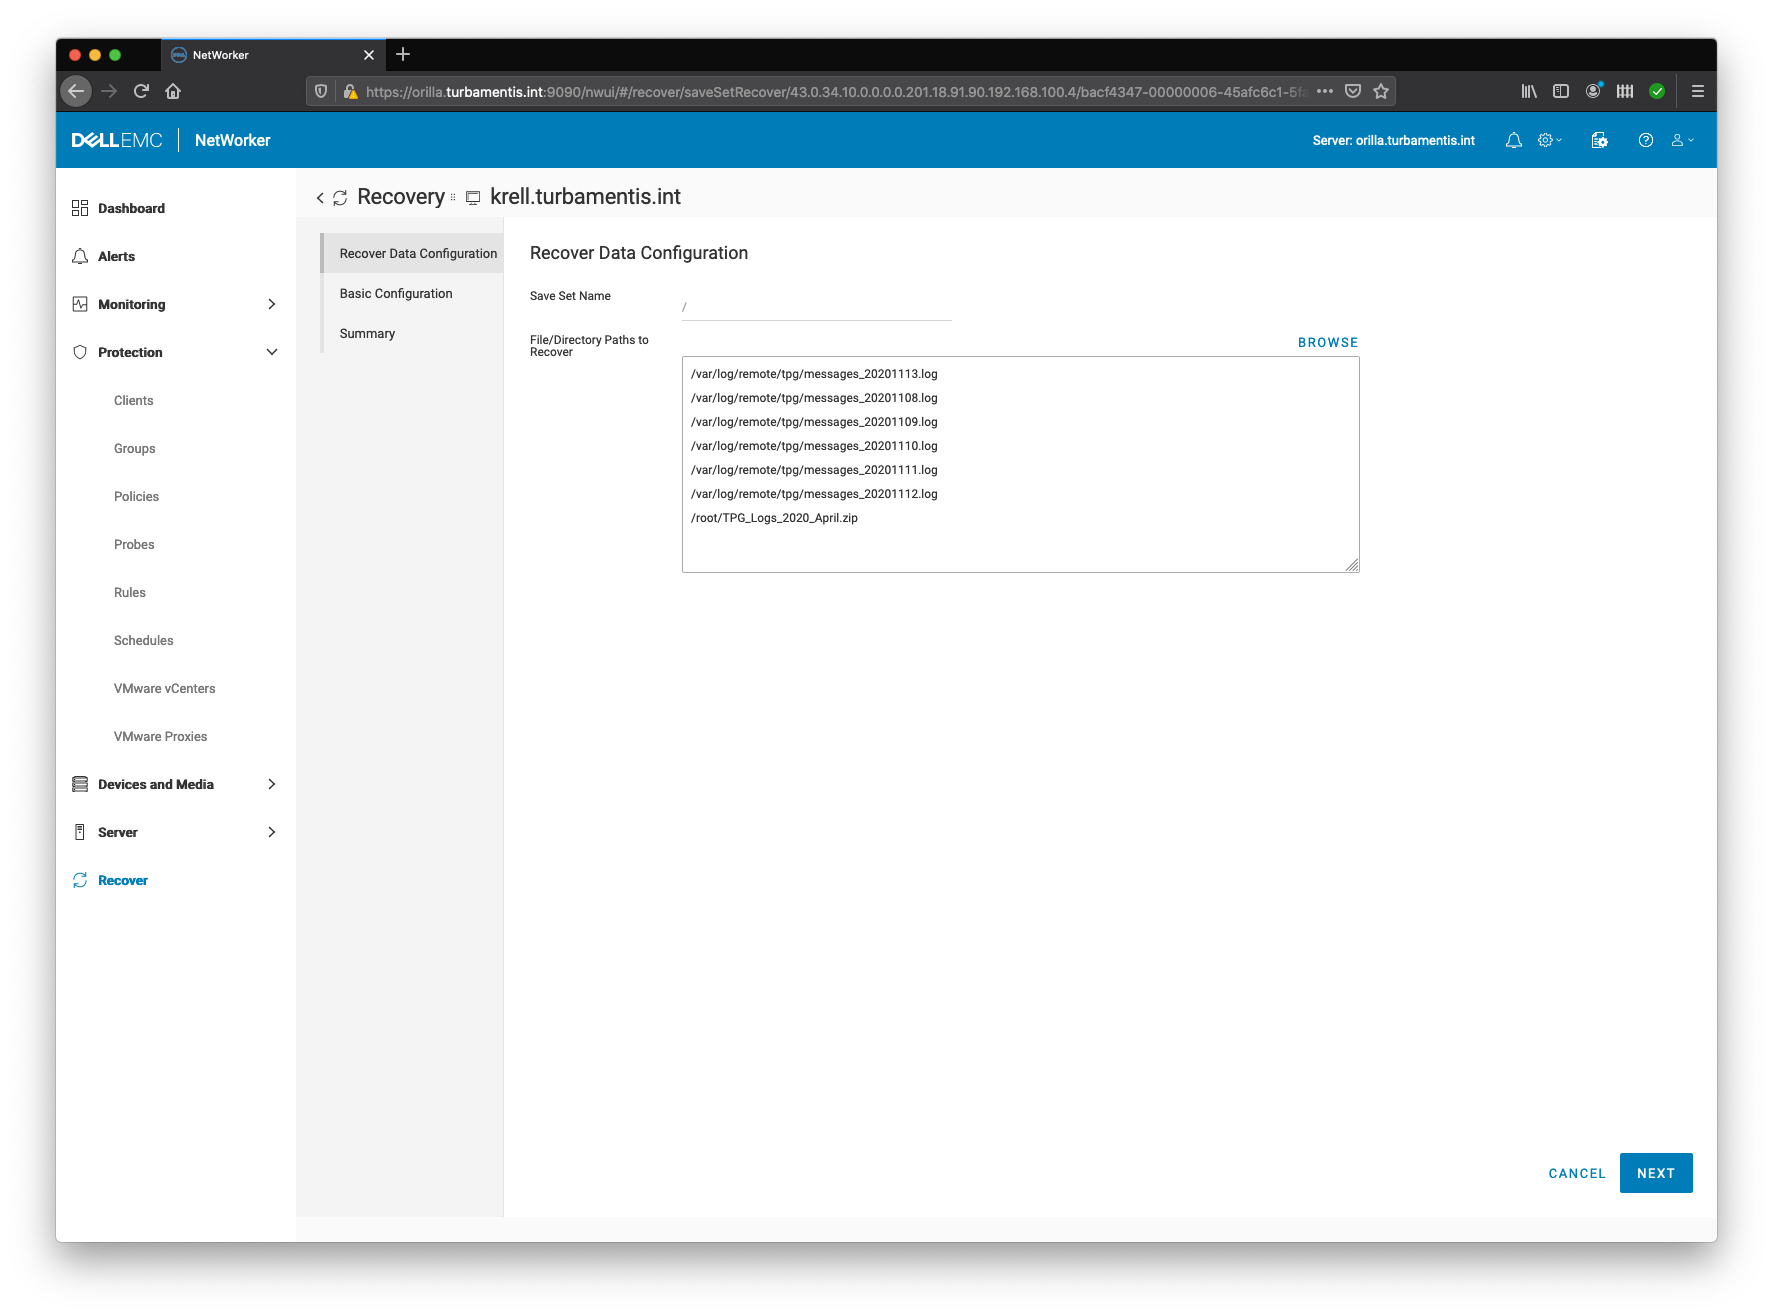
With the files listed, I can click Next to continue to the recovery destination details:

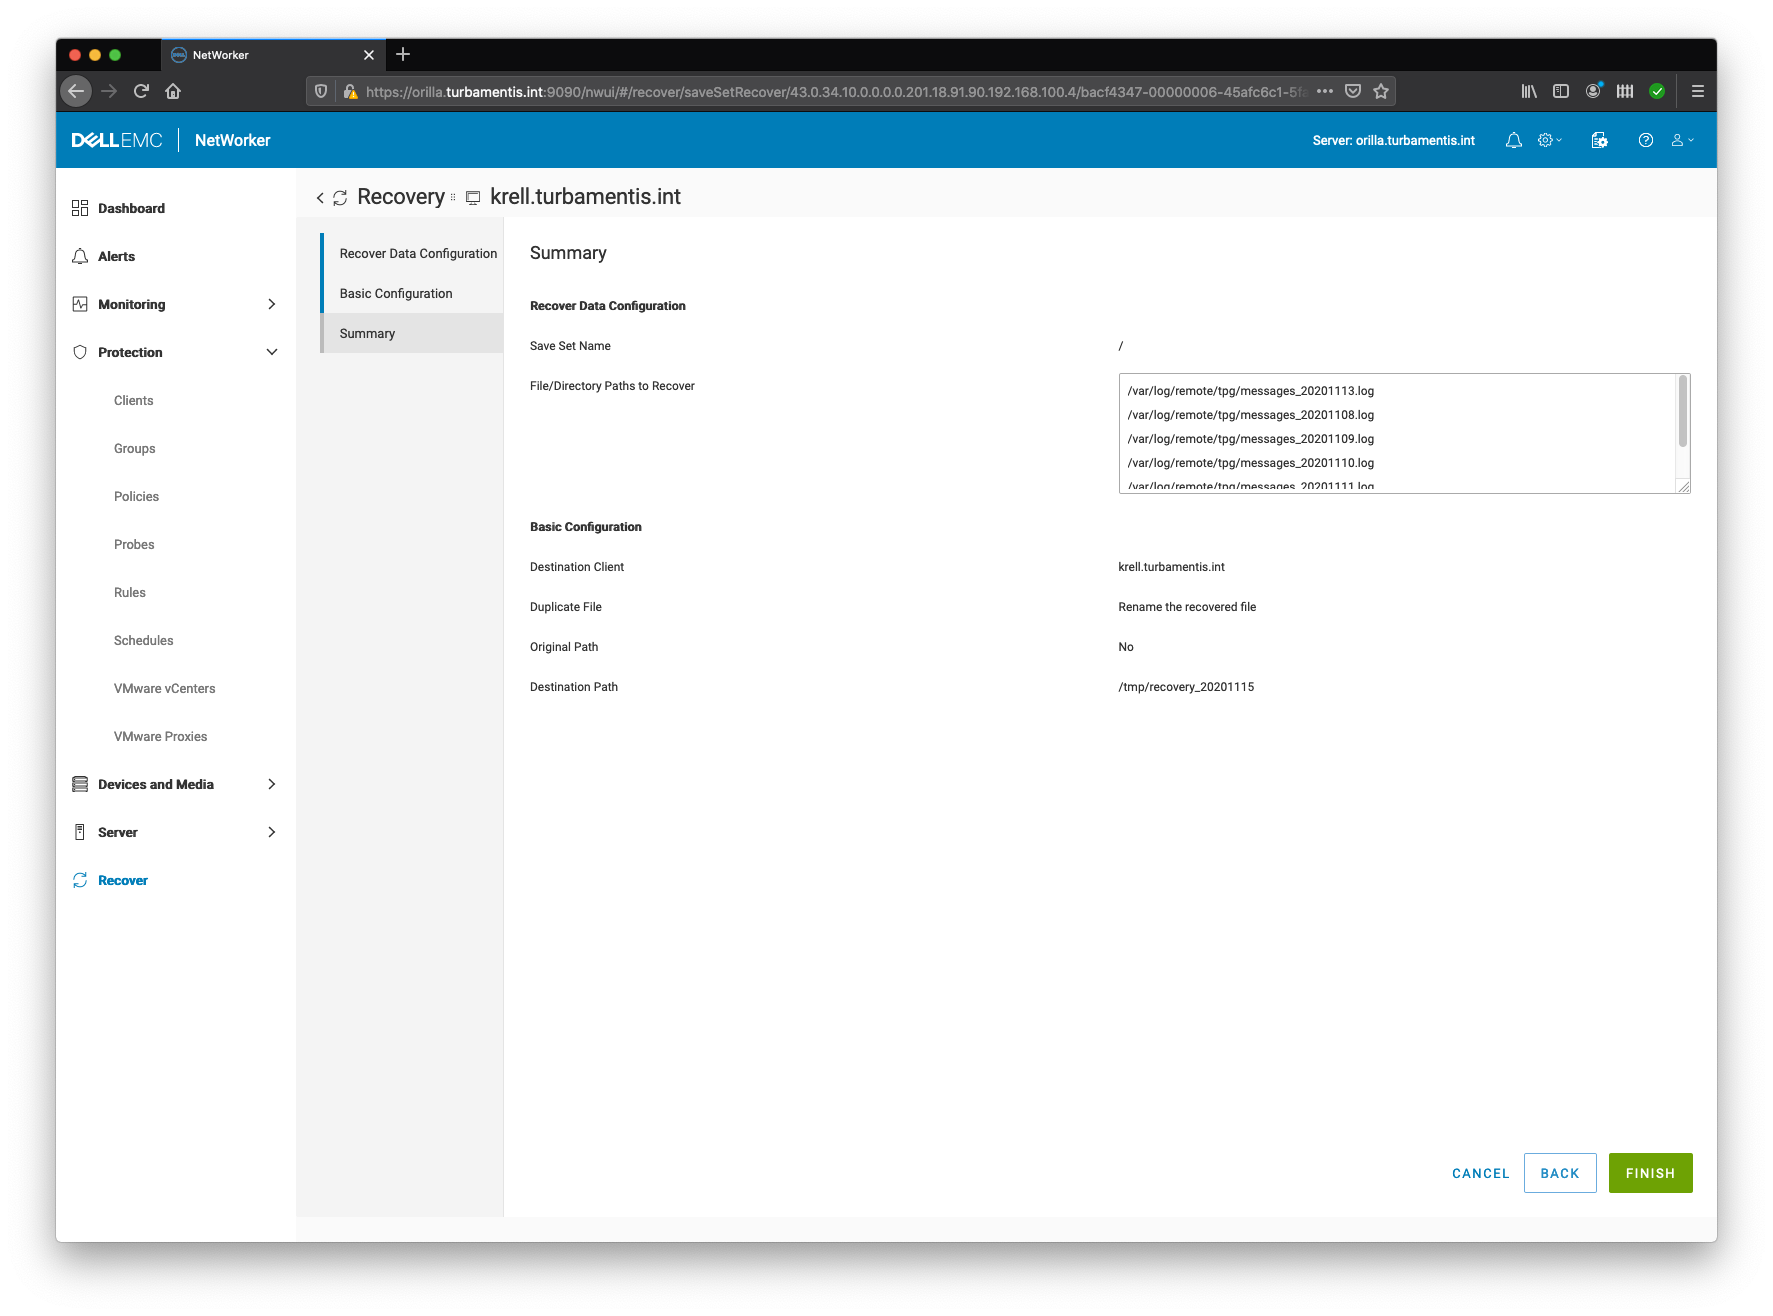
There are numerous recovery destination details you can choose here:
- Destination Client – The host you want to recover the files to.
- Duplicate File – What to do if a file being recovered matches a file that’s already in place.
- Original Path – Checkbox for selecting whether you want to recover to the original path, or an alternate one.
- Destination Path – If you don’t recover to the original path, you need to nominate what path you want to recover to. Here you can either just type a path, or browse to one. If you type in a path that doesn’t exist, it’ll be created for you for the recovery.
There are advanced recovery options, should you need them, but in this case I didn’t, so with the recovery destination details supplied I clicked Next. This brings you to the summary page:
If everything looks OK, you can click Finish to close out the wizard and have the recovery initiated:
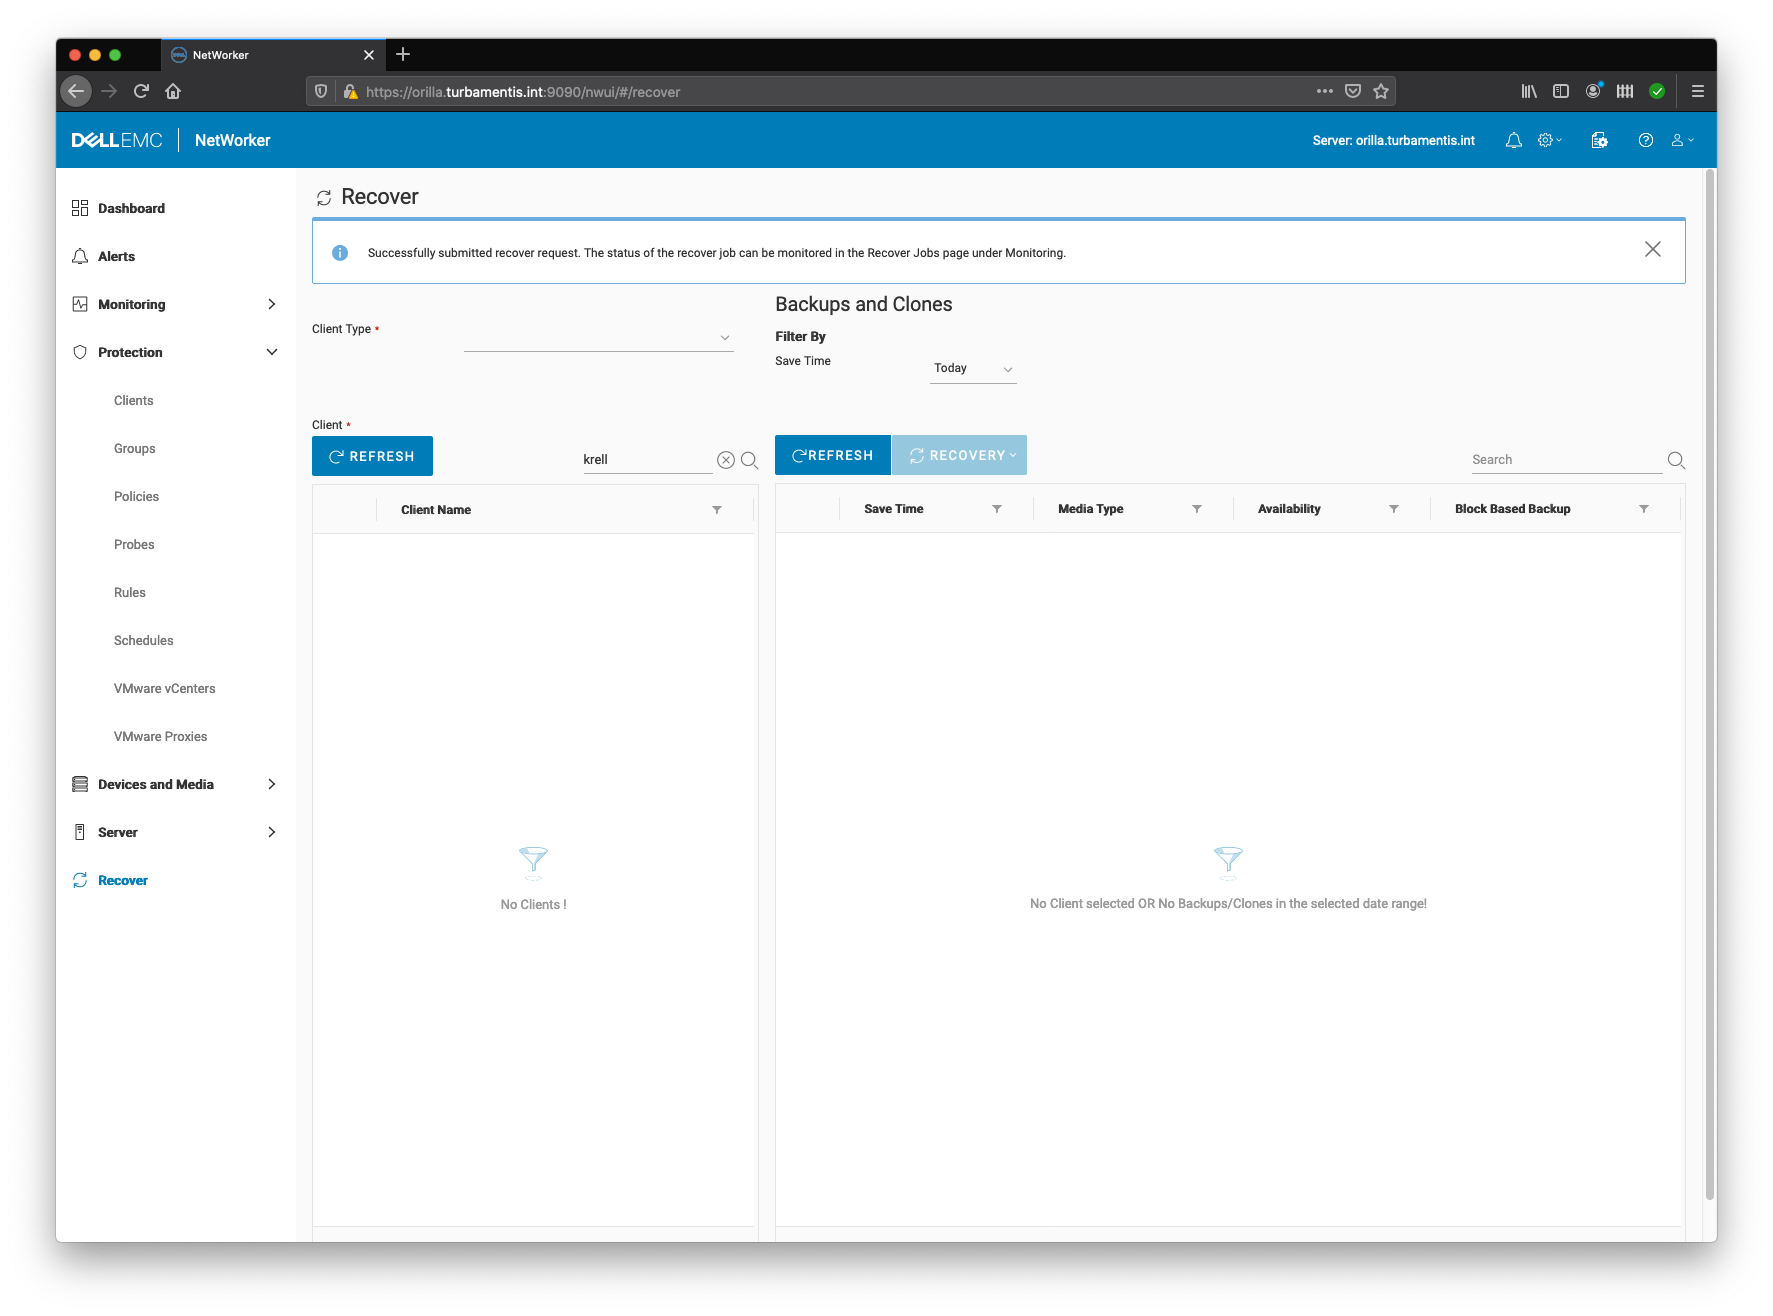
The wizard will return you to the recovery interface, but you’ll see a popup alert in the GUI indicating whether the recovery has been successfully initiated. In fact, by the time I jumped across to the monitoring view, my recovery had already been completed:
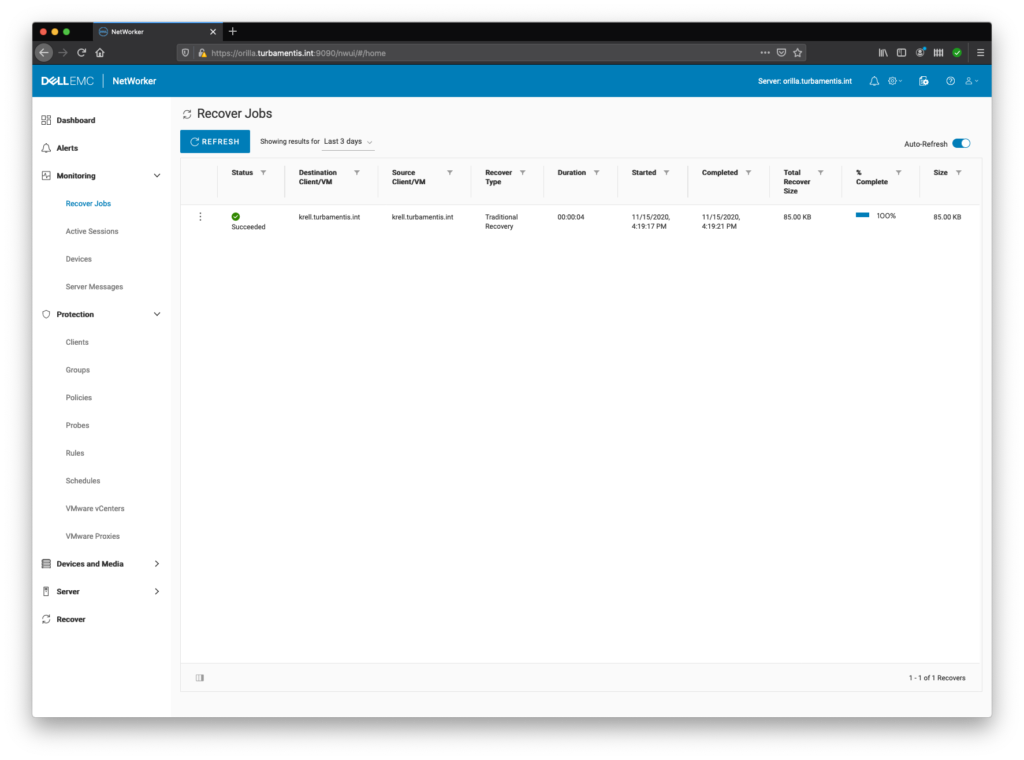
And there you have a completed file-indexed recovery from a selected saveset using the NetWorker HTML5 user interface.
Don’t forget – if you want to get some really deep perspectives on data protection, covering processes and people as well as technology, check out my latest book, the second edition of Data Protection: Ensuring Data Availability.