
One of the new features introduced in NetWorker 19.4 is the concept of a NetWorker client state. A client can either be:
- Active
- Retired, or
- Decommissioned
An active client is one which continues to receive regular backups. That means, when you start your NetWorker services, or run certain checks, NetWorker will perform DNS polling against the client.
That’s all fine, but some environments have policies where hosts are removed from DNS once they’re decommissioned. However, traditionally, if a client doesn’t have a DNS entry, there’ll be a delay of a few seconds during startup and some other checks when NetWorker tries to resolve the hostname. If over time you end up with hundreds or thousands of unresolvable clients you never backup any more but need to recover from, you can get delayed startups.
The good thing is, NetWorker 19.4 has introduced an update to handle this. The client states refer to:
- Active: Host receiving ongoing backups
- Retired: Host is no longer backed up, but still has recoverable backups
- Decommissioned: Host is no longer backed up and has no recoverable backups
Let’s see where to find the client state, and change it.
As you can see below, the client state is visible through the client “Globals (2 of 2)” configuration panel:
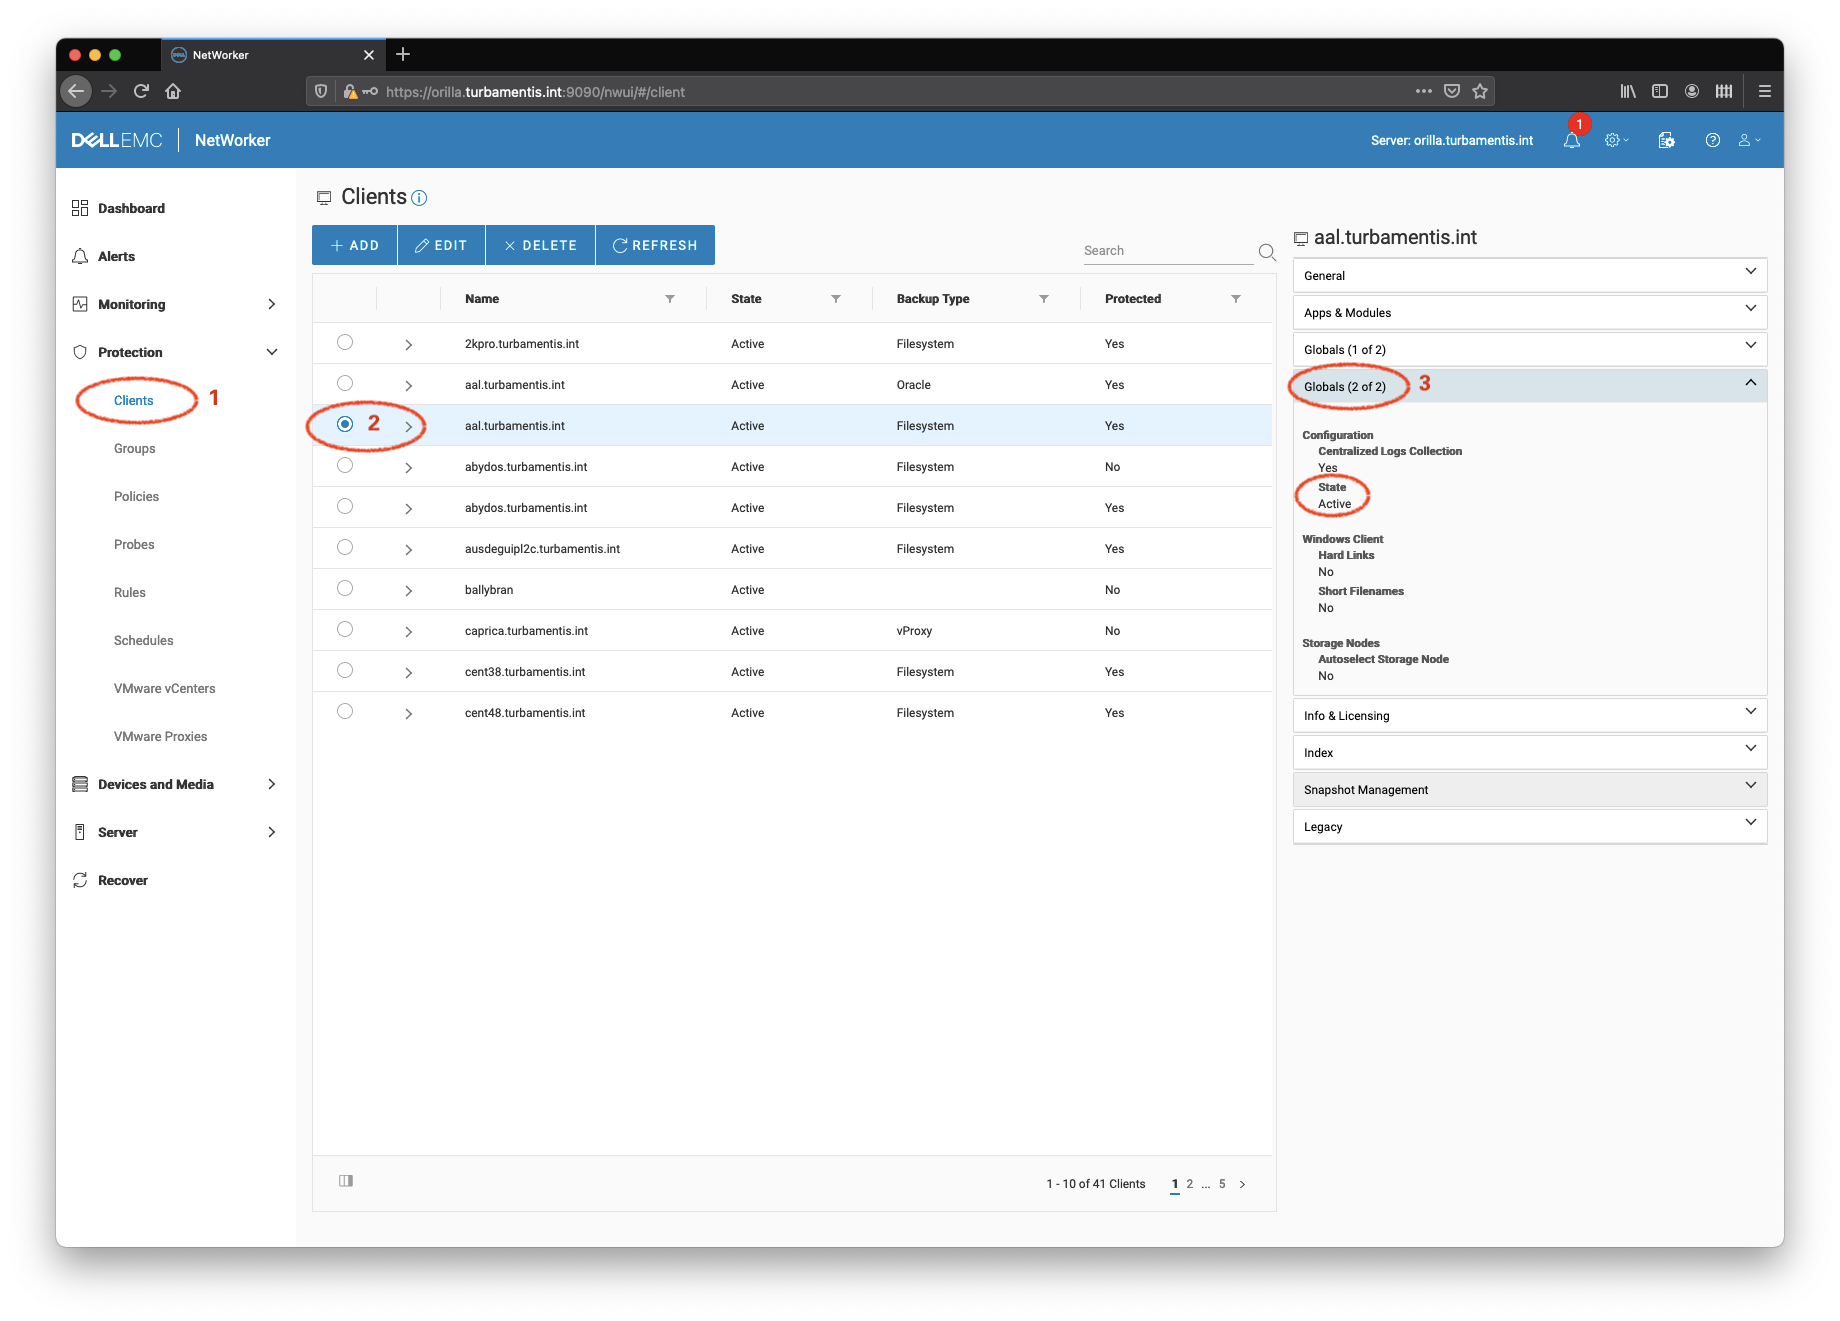
In the NetWorker User Interface, click (1) Protection > Clients, then find the client (2) you want to inspect in the list. Select the client, then (3) click the “Globals (2 of 2)” section in the right-hand details pane. You’ll see the current client state (4) in this section.
[Edit: It’s been pointed out to me that State is in fact a column in the display, even in the screen-grab I posted. Sometimes, you don’t notice that which is directly in front of your eyes!]
Now, you don’t decommission clients. NetWorker will automatically decommission clients that have been retired and no longer have any recoverable backups. So, if you want to remove the client from startup and other checks, you’ll want to edit and retire the client:
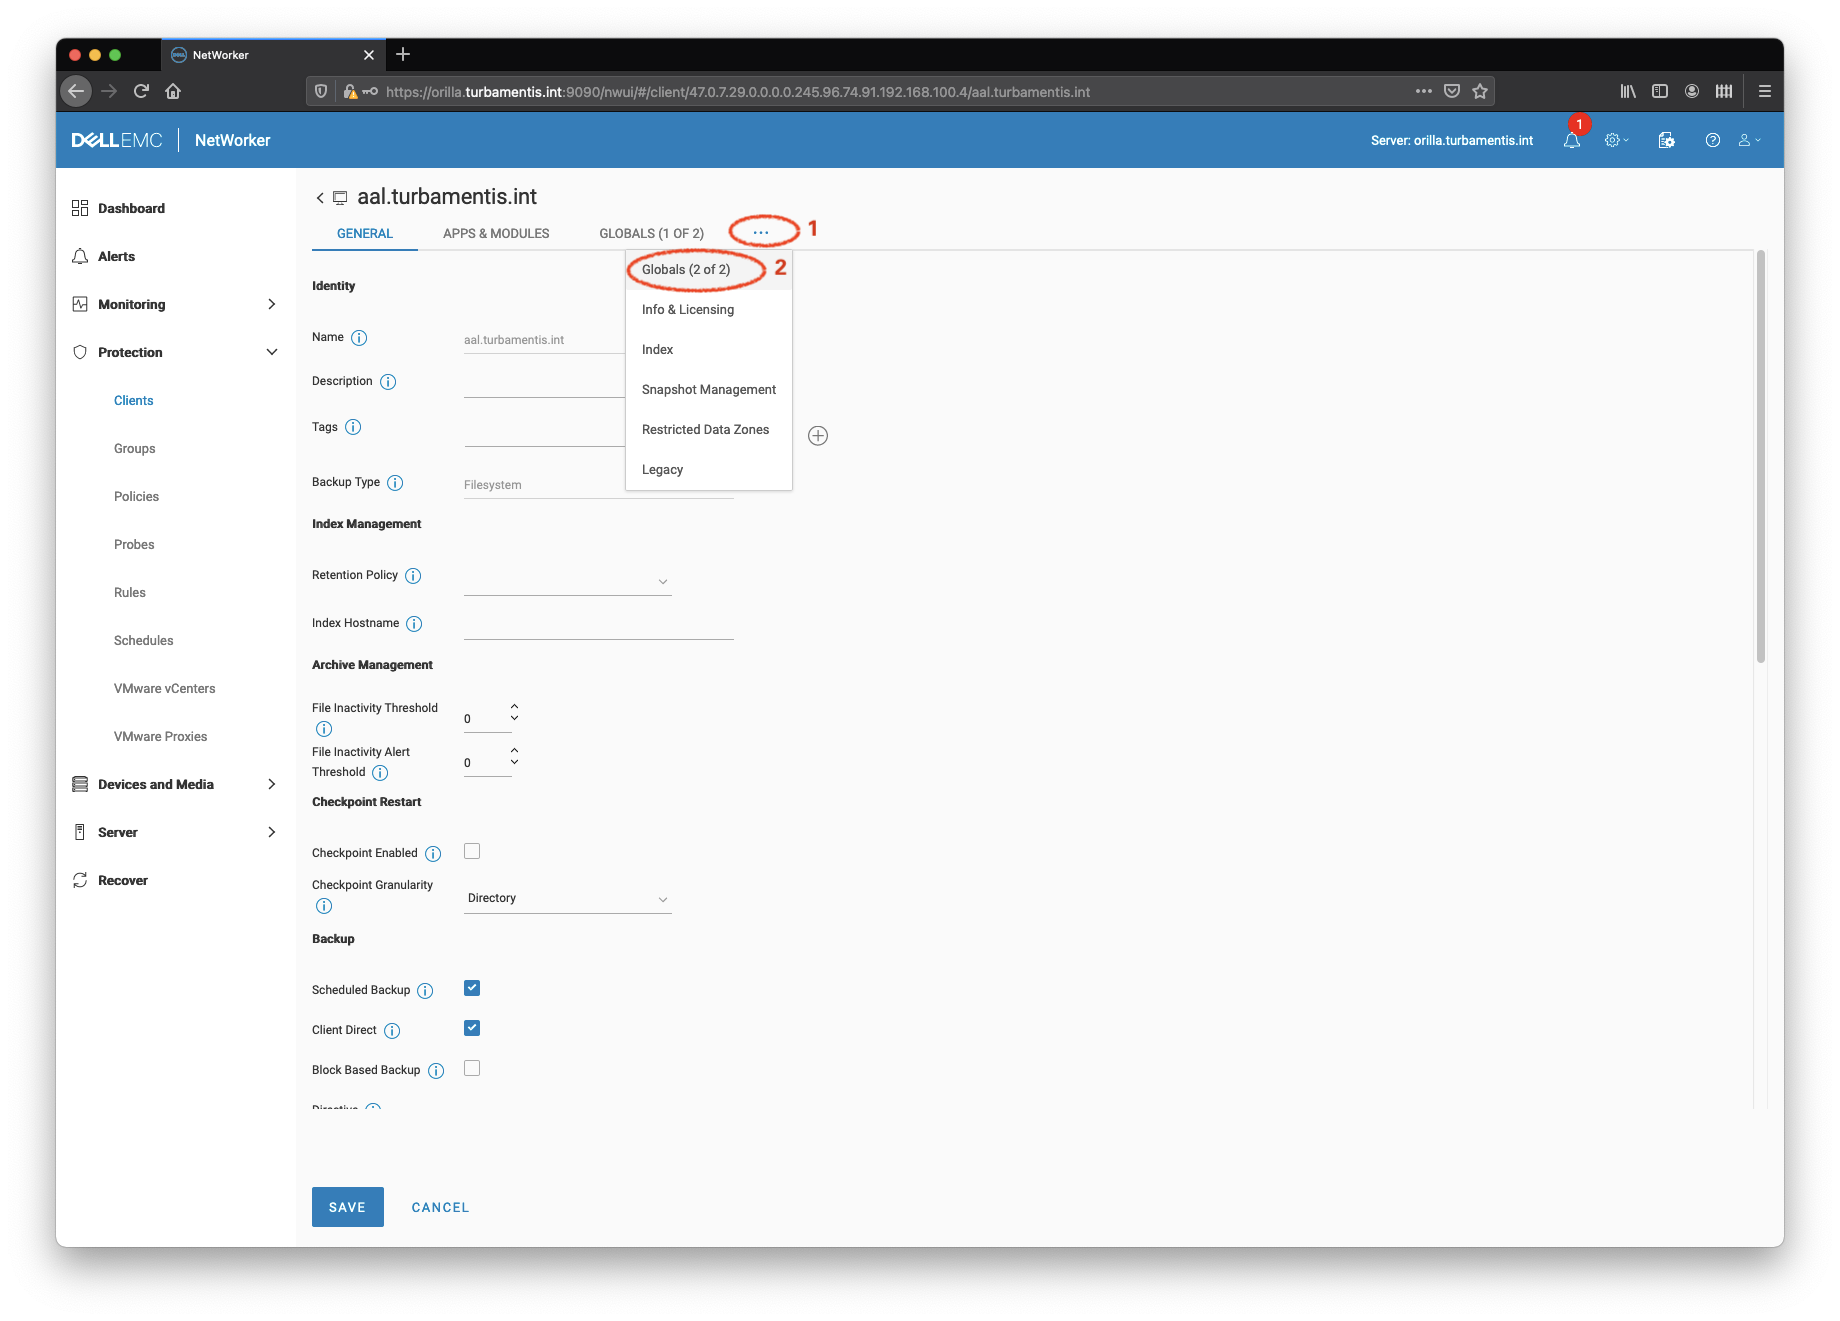
After you select the client and click the Edit button, you’ll be shown the General edit window for the client. The client State, as we observed, is in the “Globals (2 of 2)” area, so (1) click the ellipses and (2) choose “Globals (2 of 2)” from the drop-down. This will give you a view such as the following:
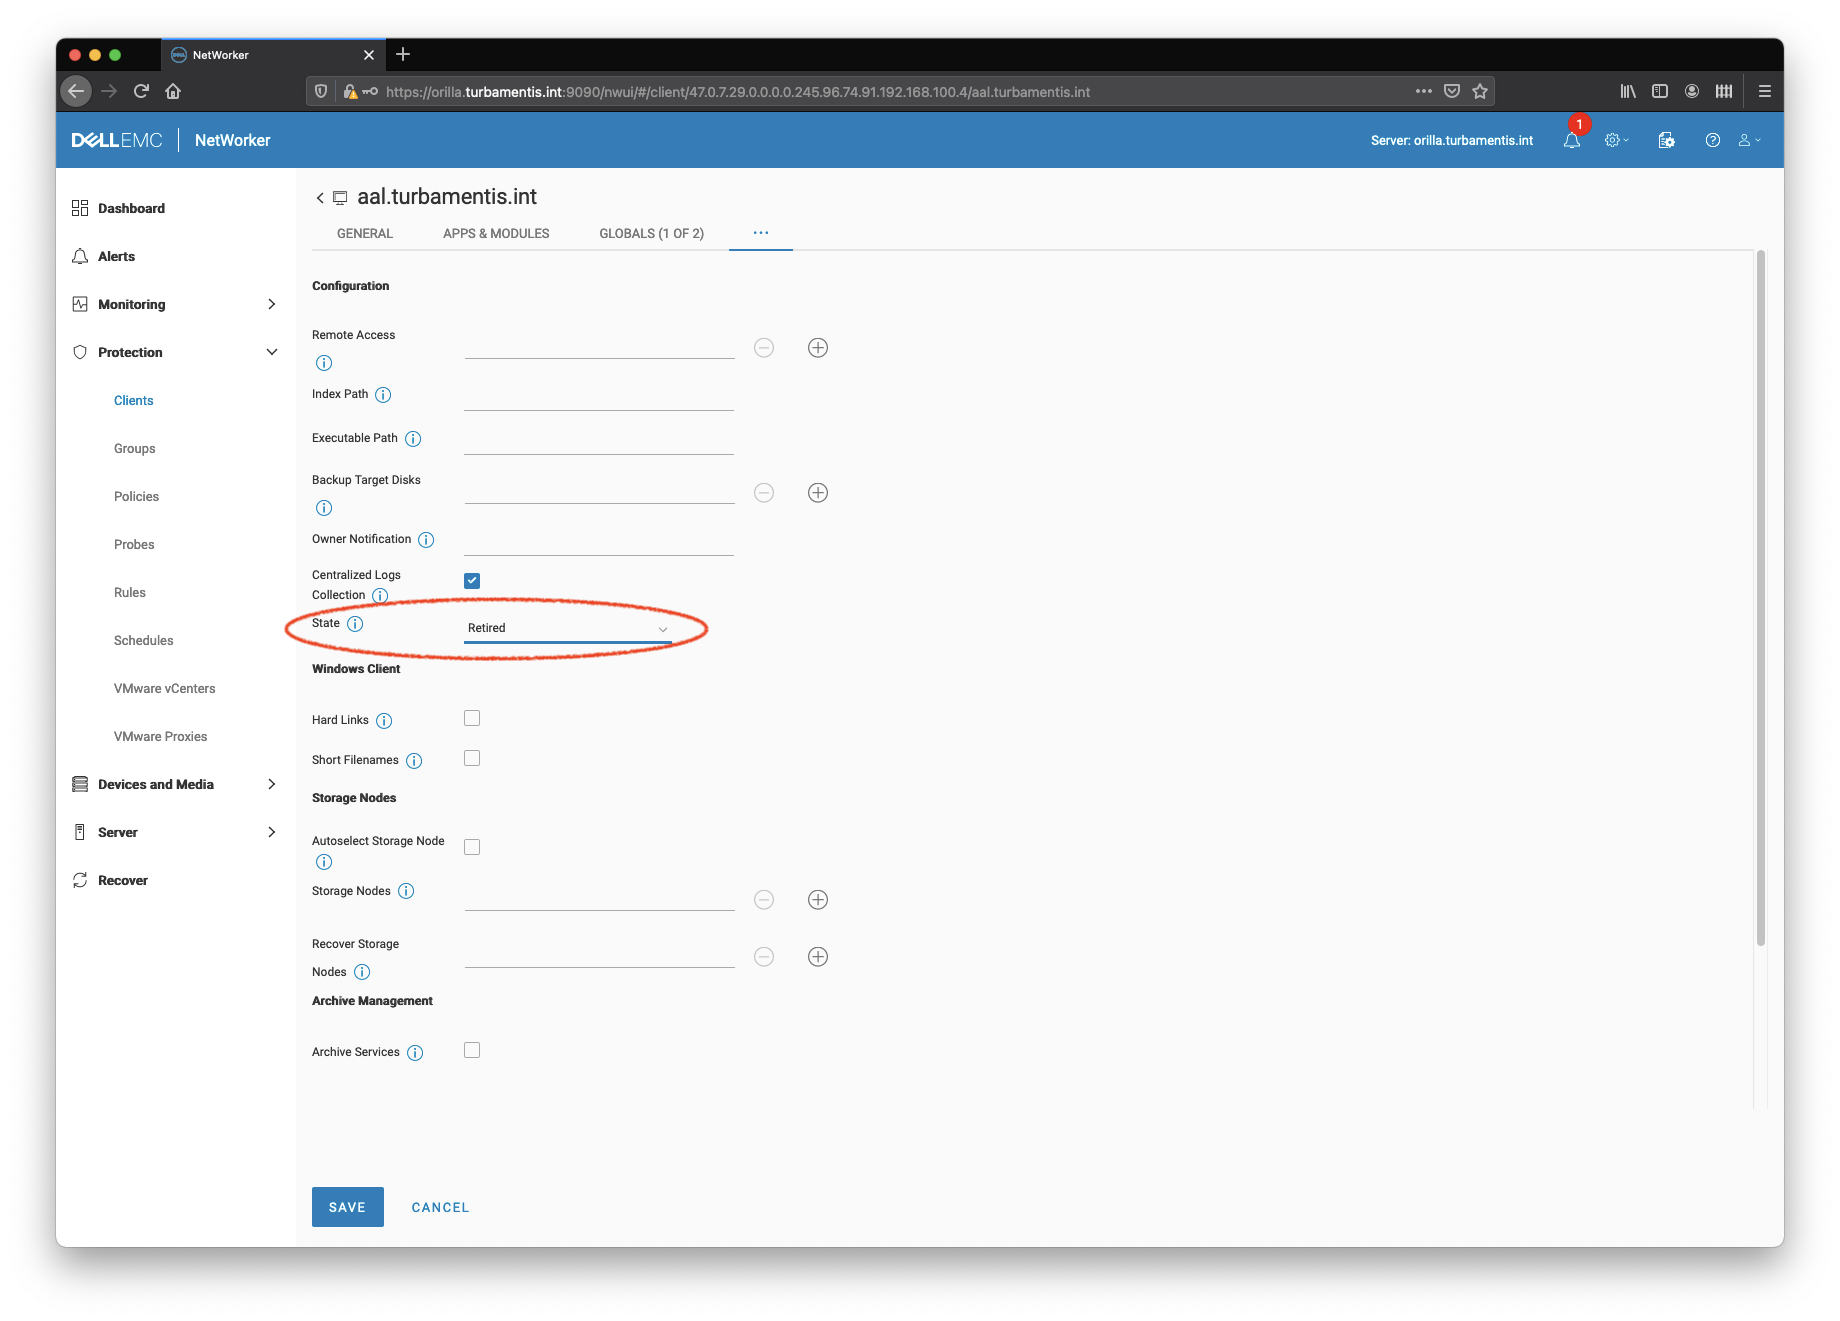
In the circled State area, you can can click the drop-down and change the state to retired. Now, before you do this, make sure the client isn’t part of any group! Otherwise, when you click Save, you’ll get the following alert:

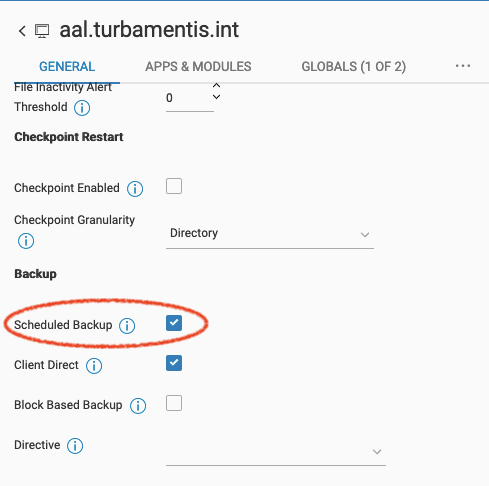
A reminder – if you simply want to exclude the client from backups for a while, you’re probably looking for the Scheduled Backup option, in the General tab:
That’s really all there is to retiring clients!