
I’ve been tidying up my lab of late and when the latest version of Data Protection Central (DPC) came out, I decided to start a new deployment.
Data Protection Central is something you can add to your Dell data protection environment to provide a single pane of glass dashboard with easy visibility to and access of your backup and recovery environments.
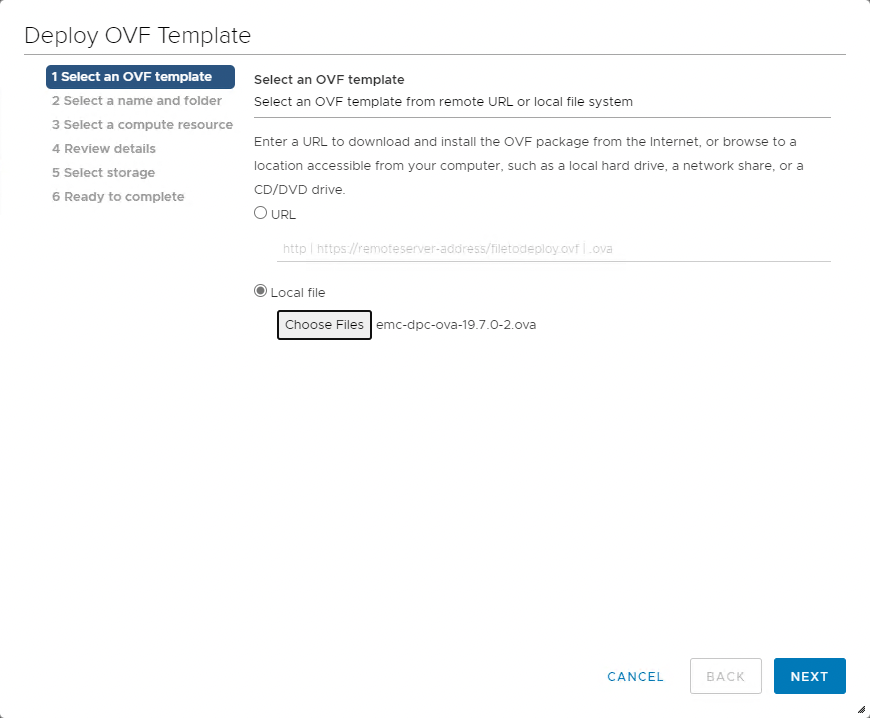
To start the process, I downloaded the OVA for DPC 19.7 from its home on the Dell support website, here.
In terms of updates, Data Protection Central 19.7 includes:
- New enhancements for launching NetWorker actions from the job activities page
- Search and filtering options for systems based on system type and system name
- IAM integration is updated to use Keycloak IAM, replacing PingFederate IAM.
- Security and other issue resolutions.
So, moving on to to start the deployment within vSphere:
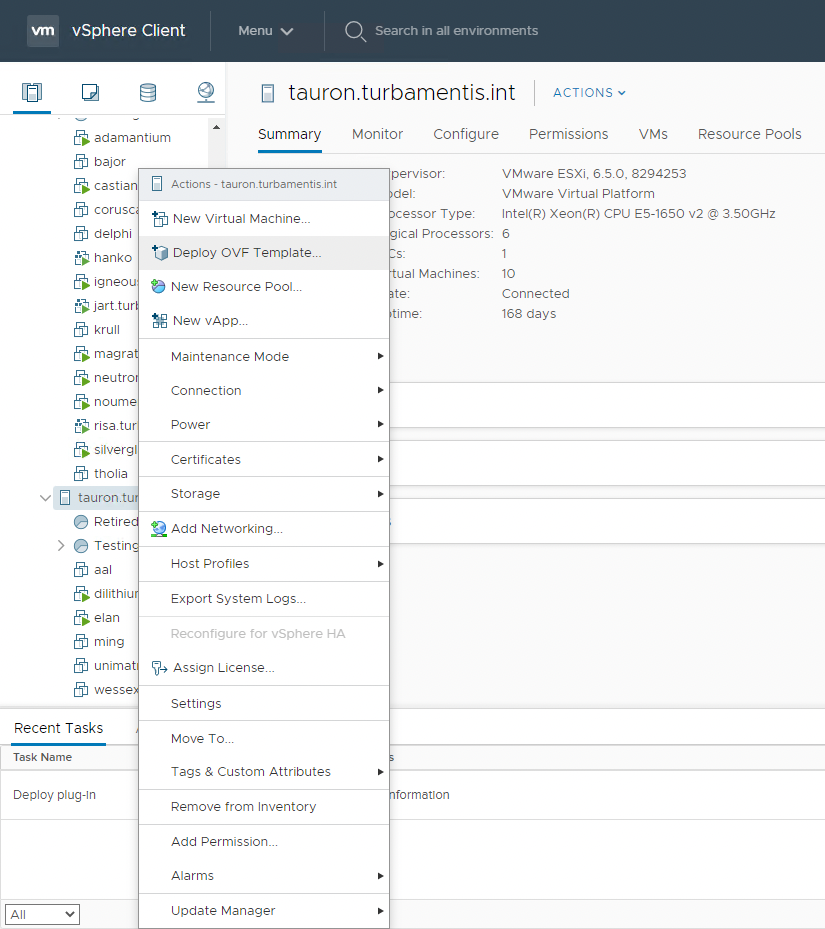
I selected the OVA for deployment:
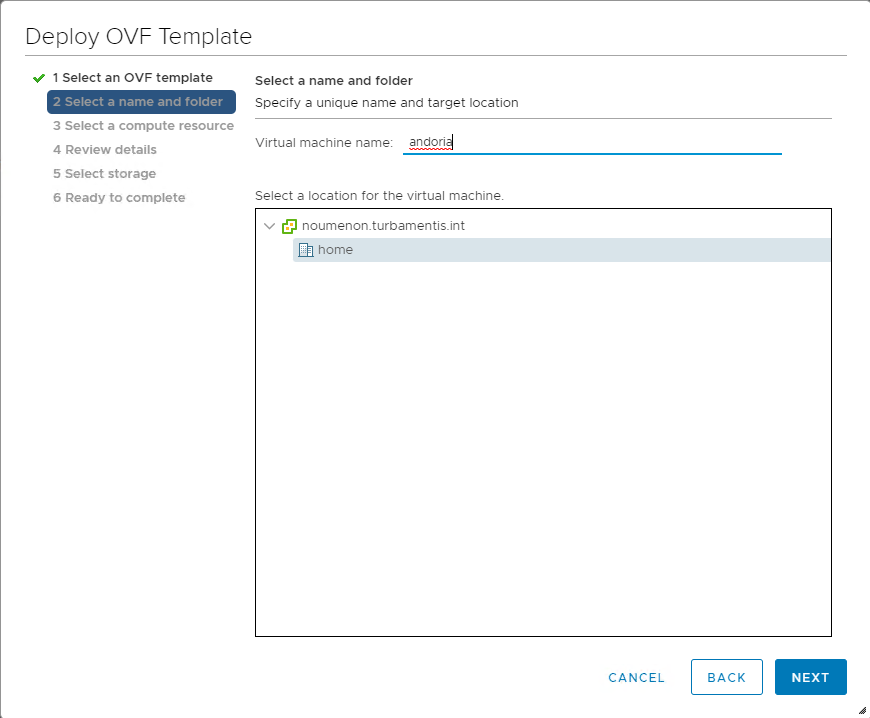
Deploying DPC follows a fairly standard VMware OVA template format. So the next step is to name my virtual machine:
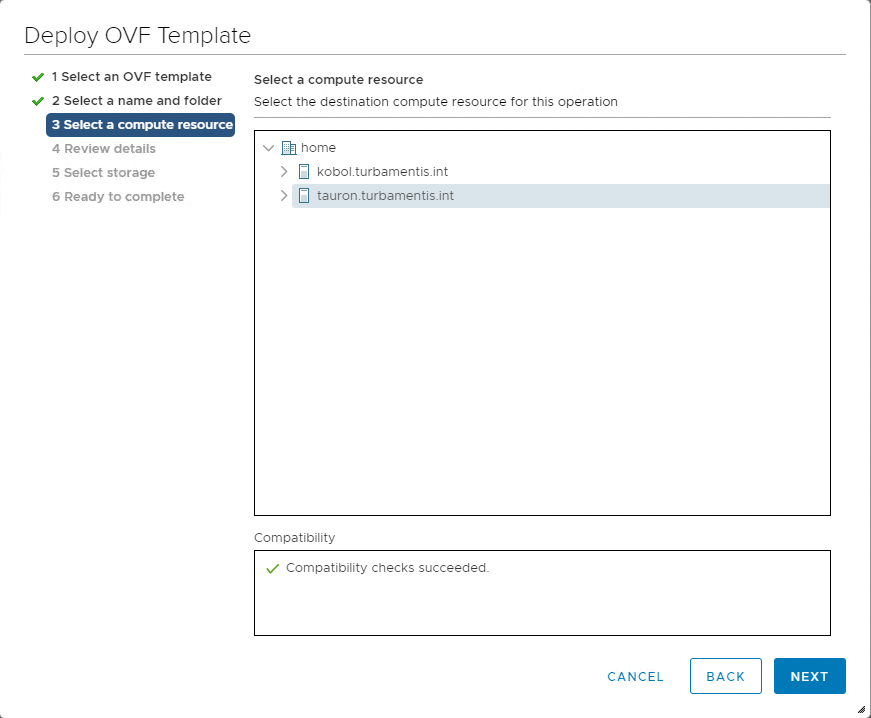
Then, pick the ESX server that DPC will reside on. A standard DPC deployment uses 4 vCPU, 8 GB of RAM and around 550 GB of storage, which unless you’re running a big environment, you can keep thinly provisioned.
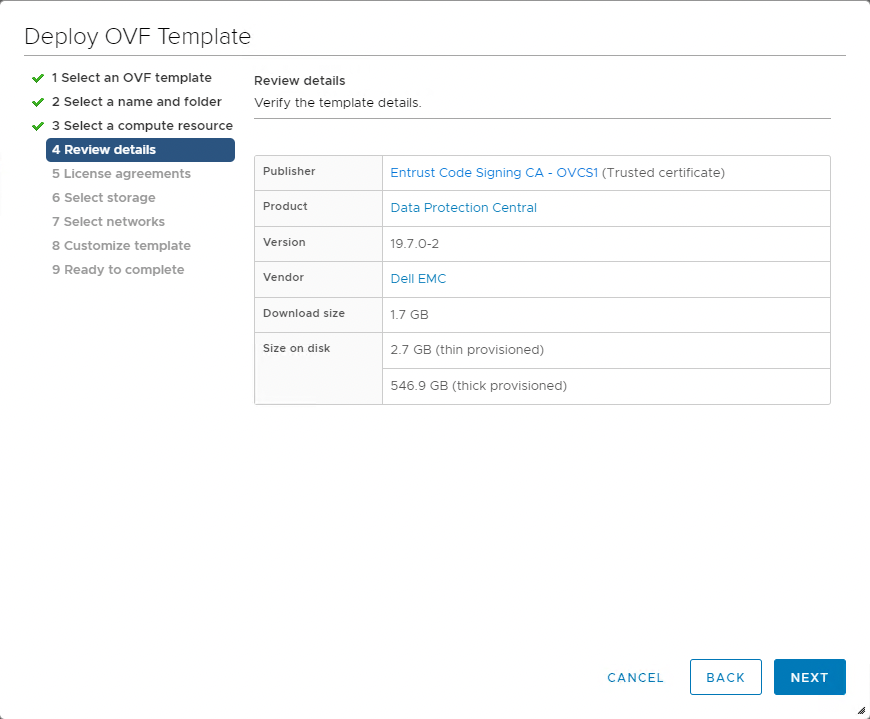
There’s some standard details about the nature of the image and its authenticity:
Then, accepting the licensing conditions for the OVA:

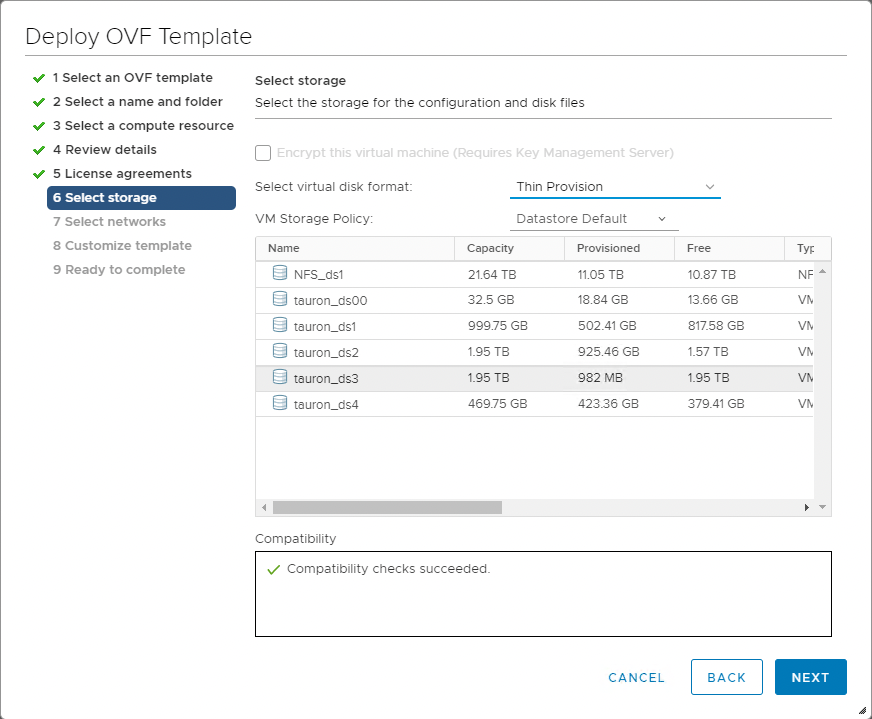
Next, pick the VMware datastore you want to use, and the storage options applicable to your environment:
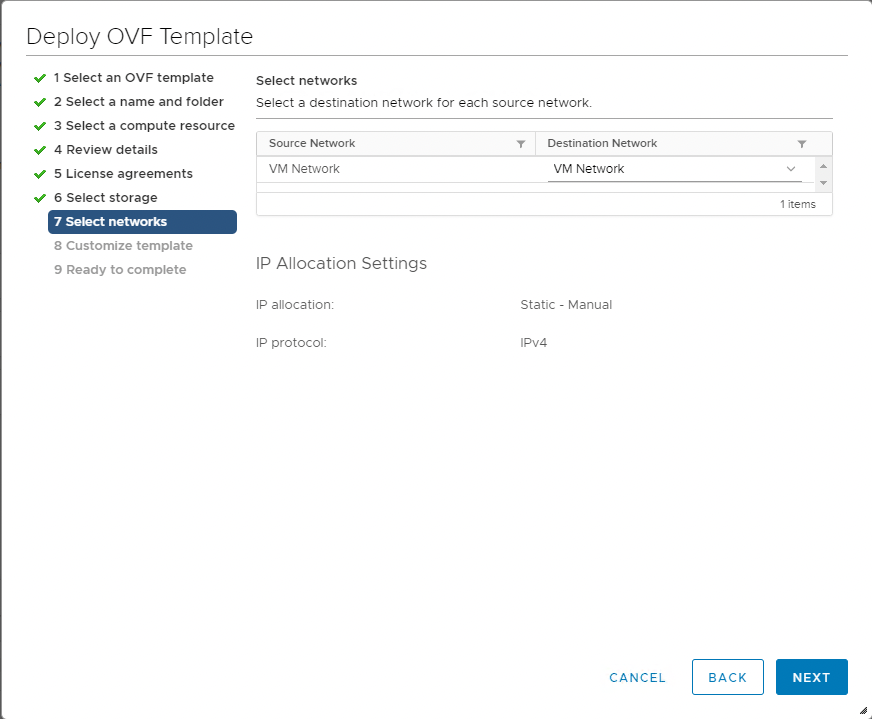
Next, confirm the virtual network you’ll be assigning to the appliance:
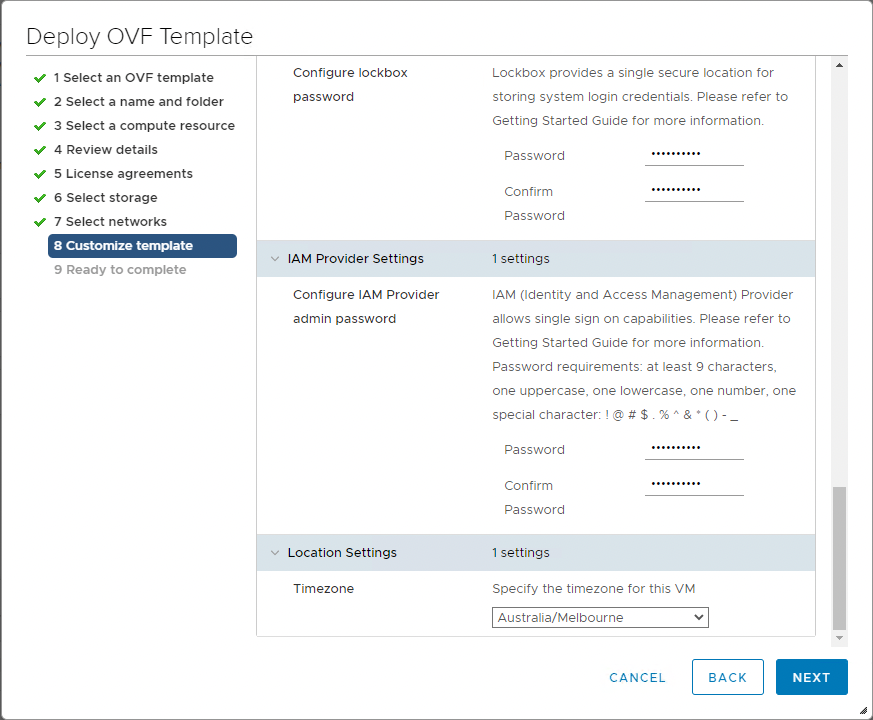
Next, customise the template by providing IP addressing details, DNS, NTP, and also the passwords and passphrases for DPC:
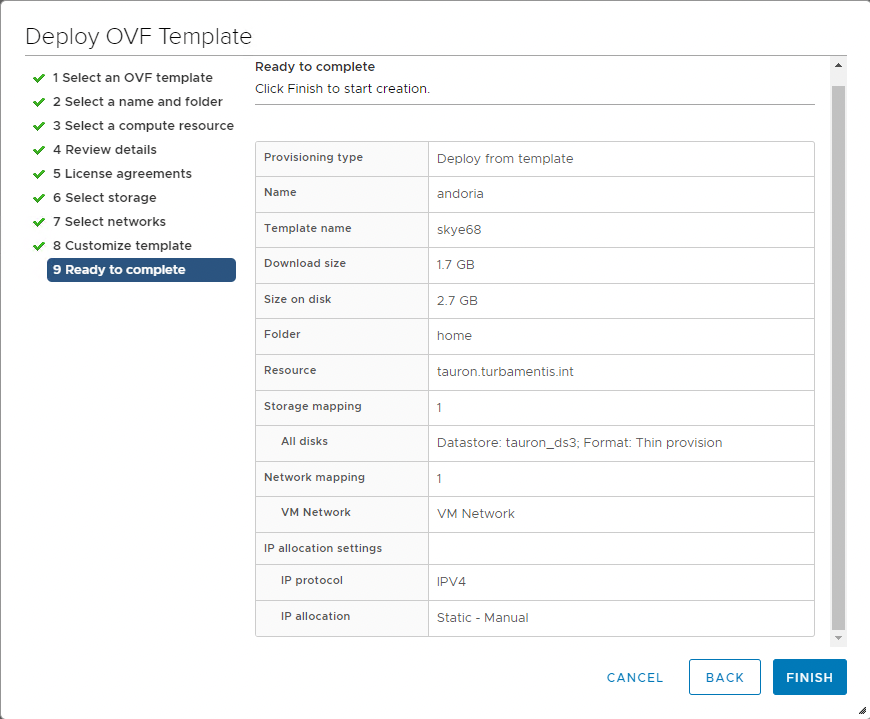
Finally, confirm the details you’ve established and click Finish to start the deployment running:
Once the deployment starts, you can track its progress within vSphere’s Tasks pane:

Once the deployment finishes and you start the virtual machine, you’ll want to give it a little while to boot and run its initial configuration processes. Once it’s ready, you can log on to it via a HTTPS connection to the hostname you established in the configuration:
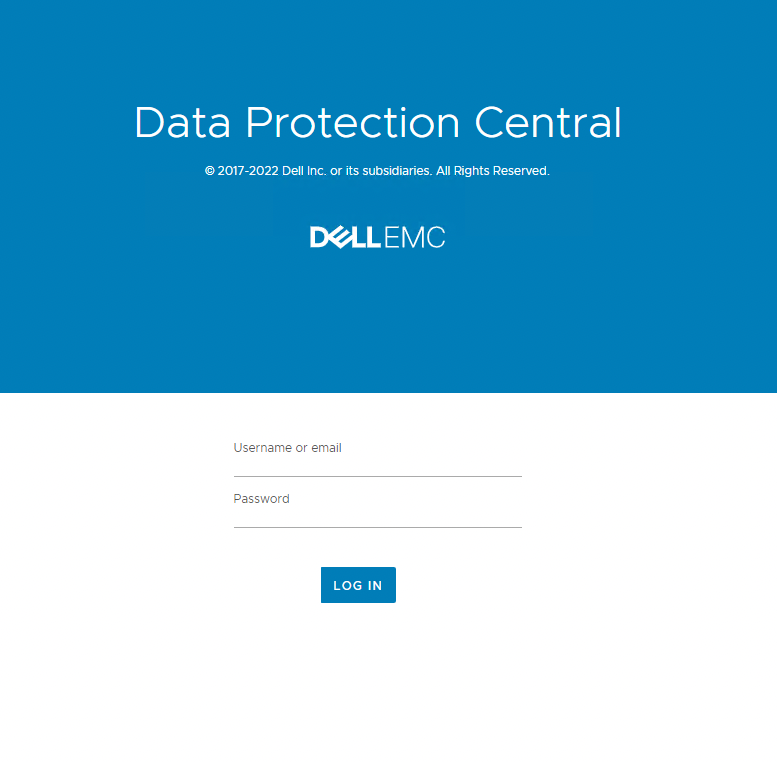
The default user account will be “administrator@dpc.local”, and you’ll use the password you configured in the deployment. (You can add an external identity source once you login.)
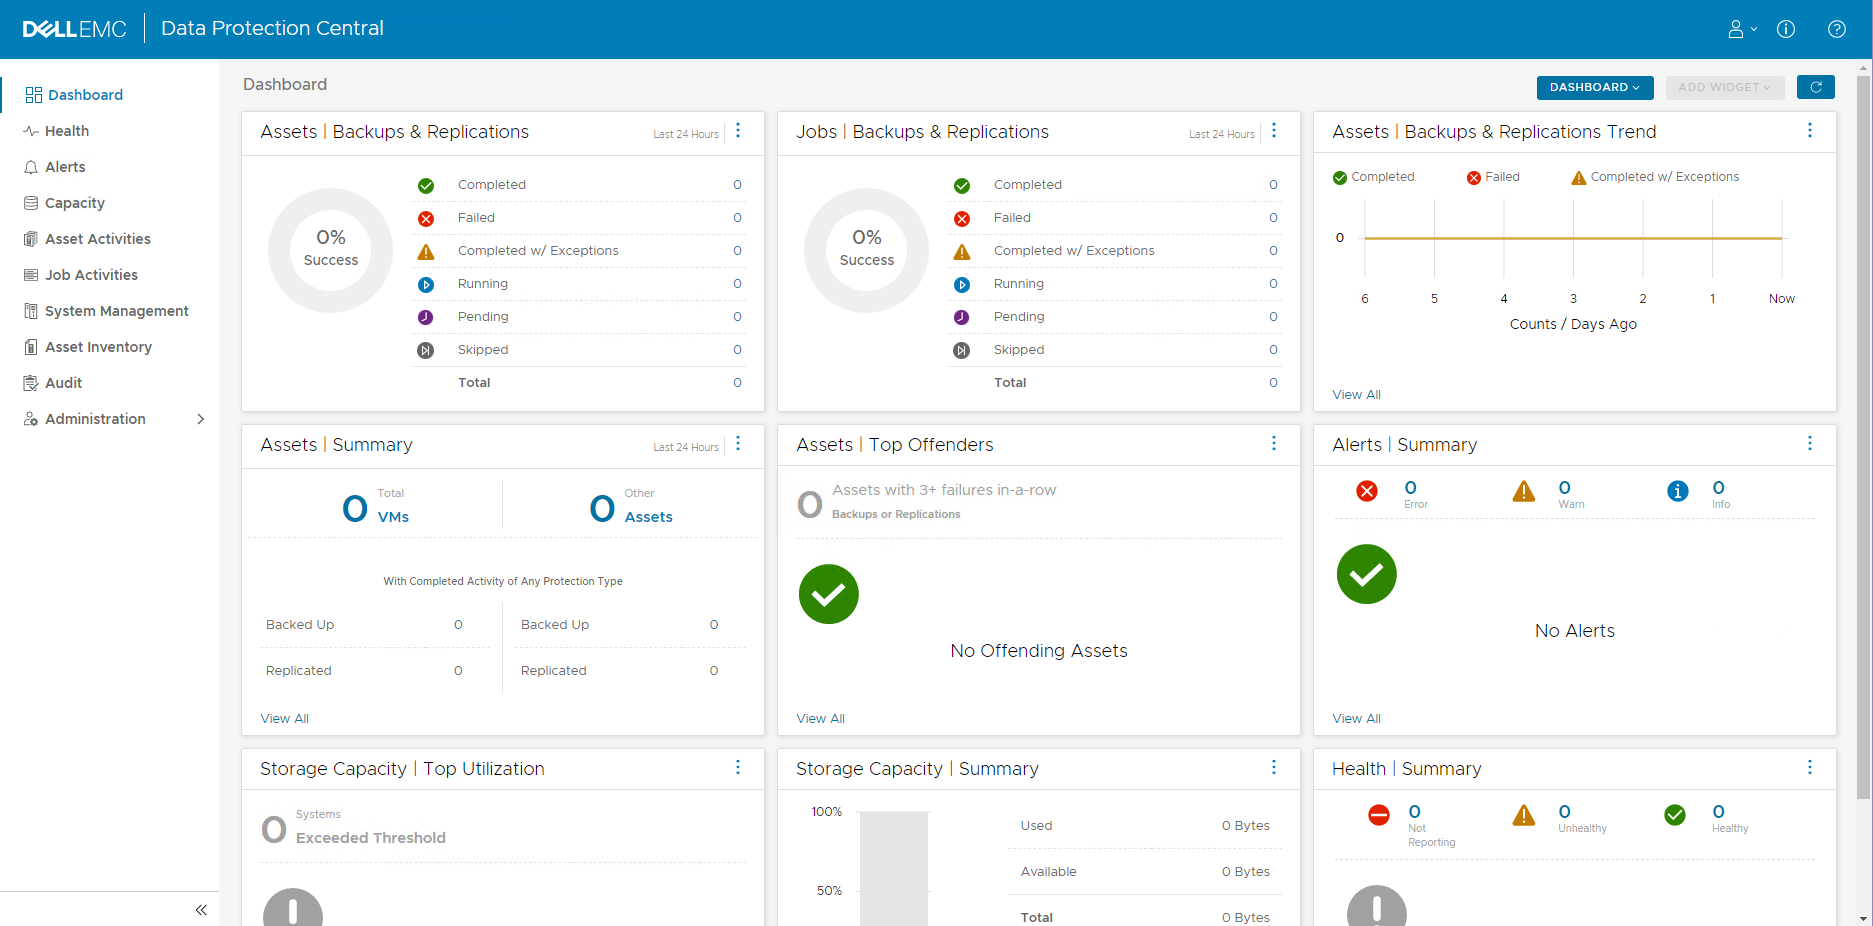
When you log in for the first time, you’ll see some blank dashboards:
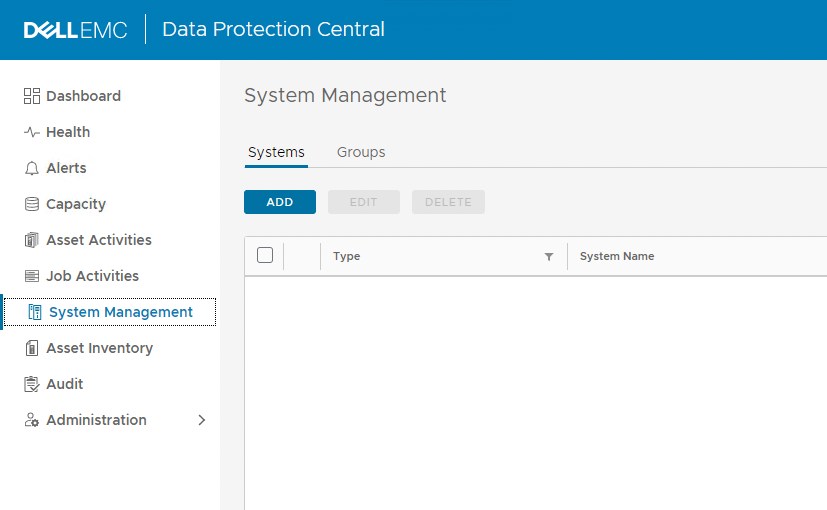
At this point, you’ll want to start populating systems you’re going to monitor, which you can do under System Management:
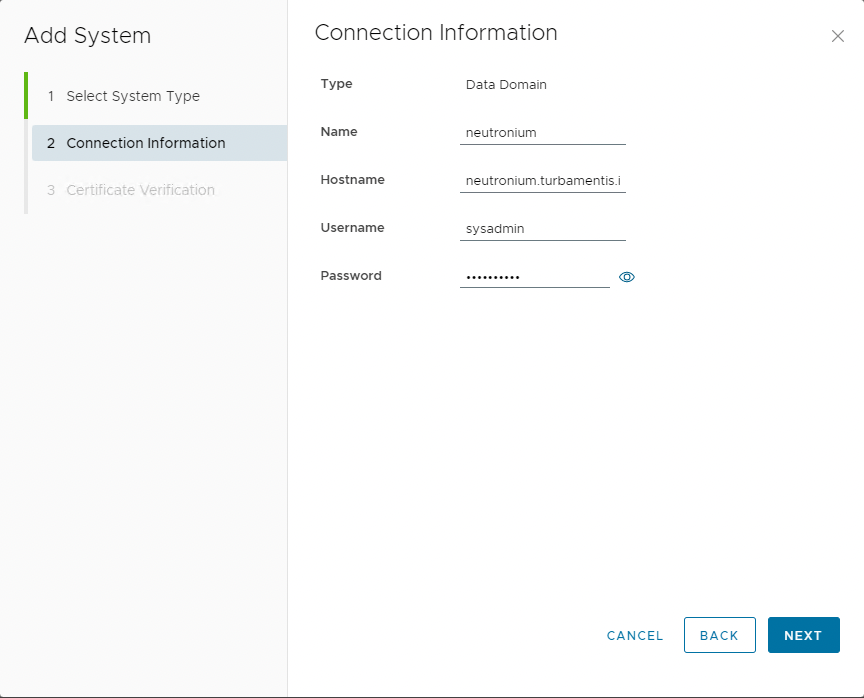
To complete my setup, I went through the process to add 2 x DDVE and a NetWorker server. The first Data Domain setup is shown below, which starts by clicking the Add button and choosing what system you’re going to add to DPC:

Having chosen Data Domain, the next step is to give DPC the details it needs to connect to the Data Domain:
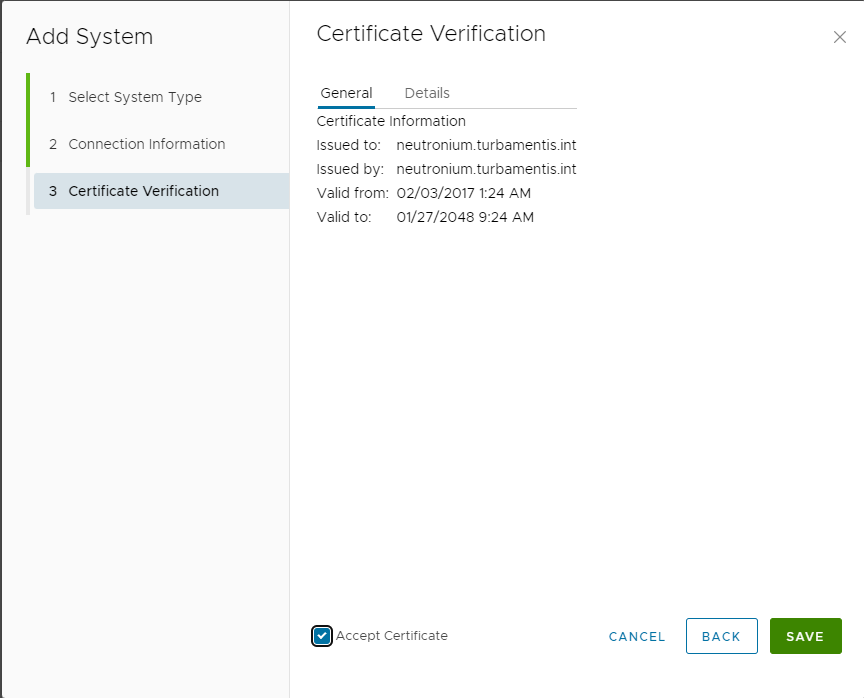
Next, verify the Data Domain’s certificate:
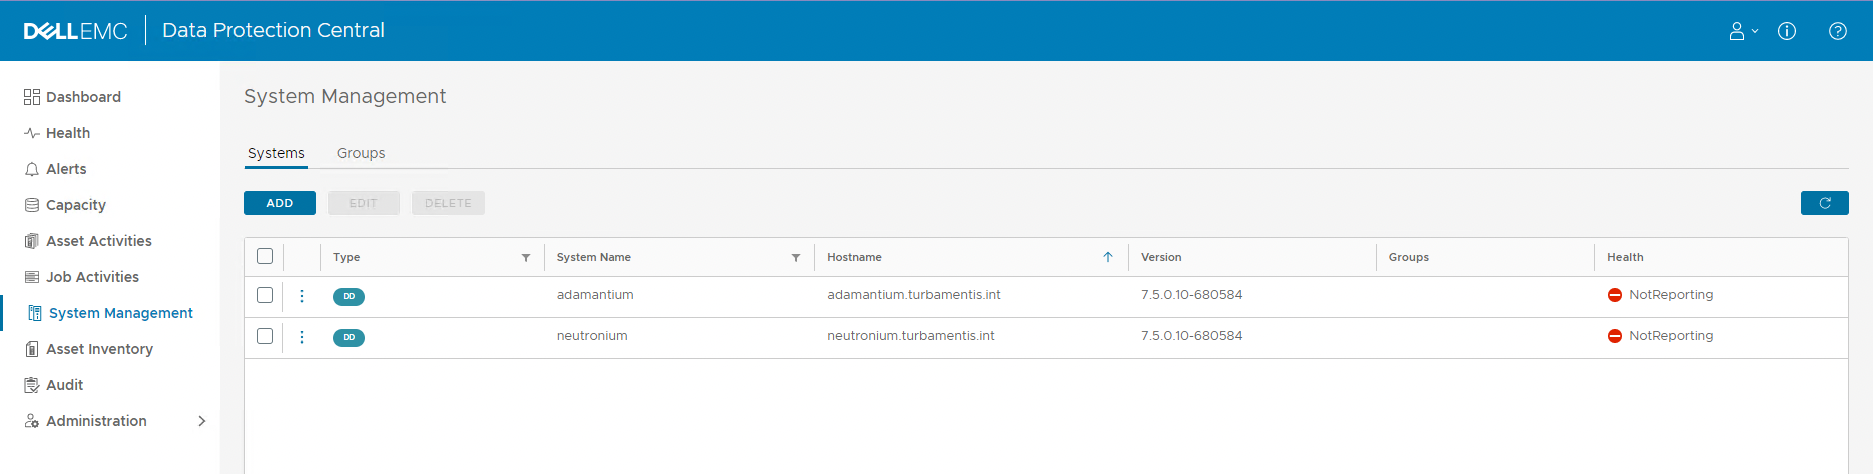
After clicking Save, I added the second Data Domain. After that, my system management area showed up as follows:
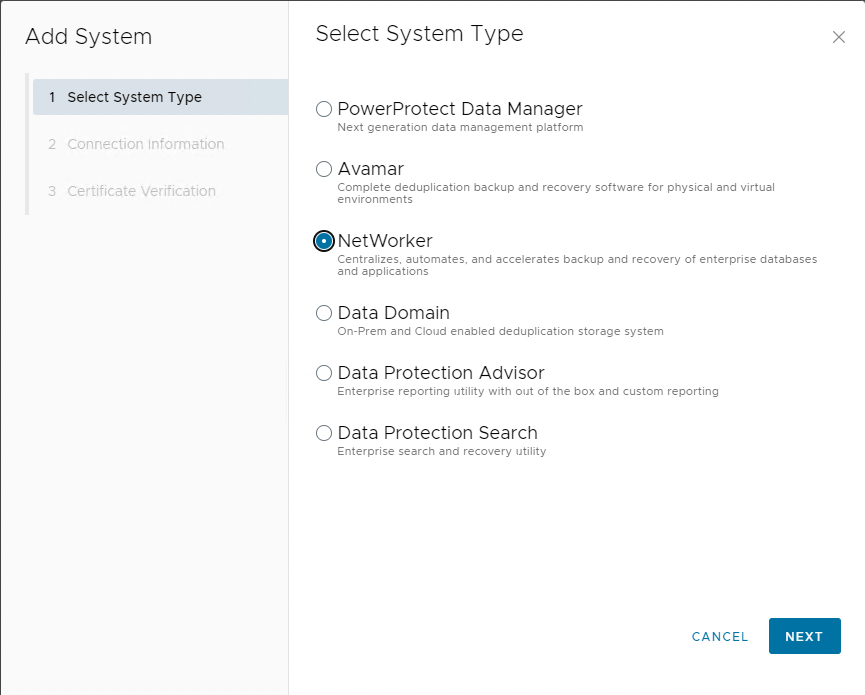
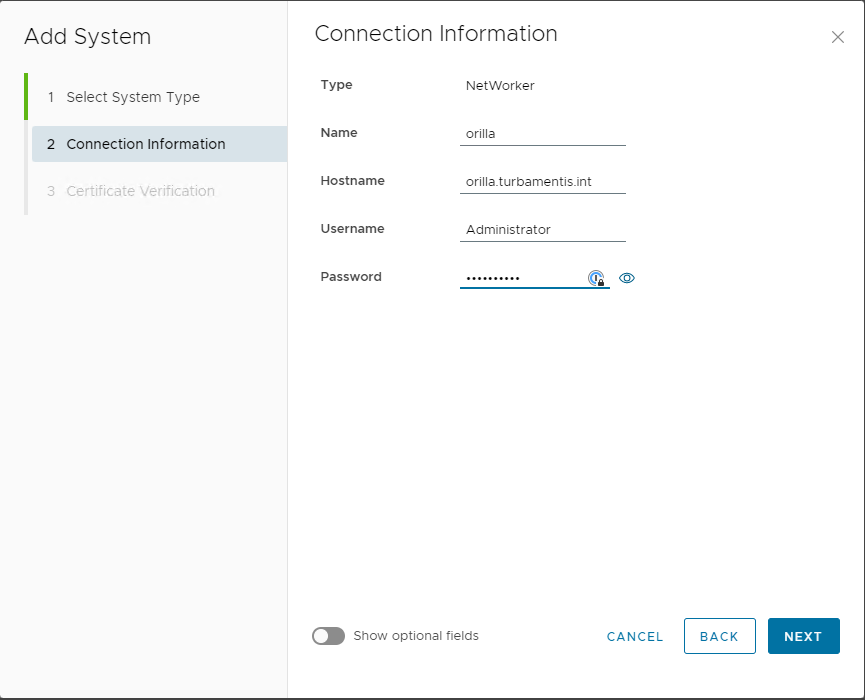
Finally, it was time to add my NetWorker server. Again, clicking add, and choosing NetWorker as the option:
Next, input the details of the NetWorker server:
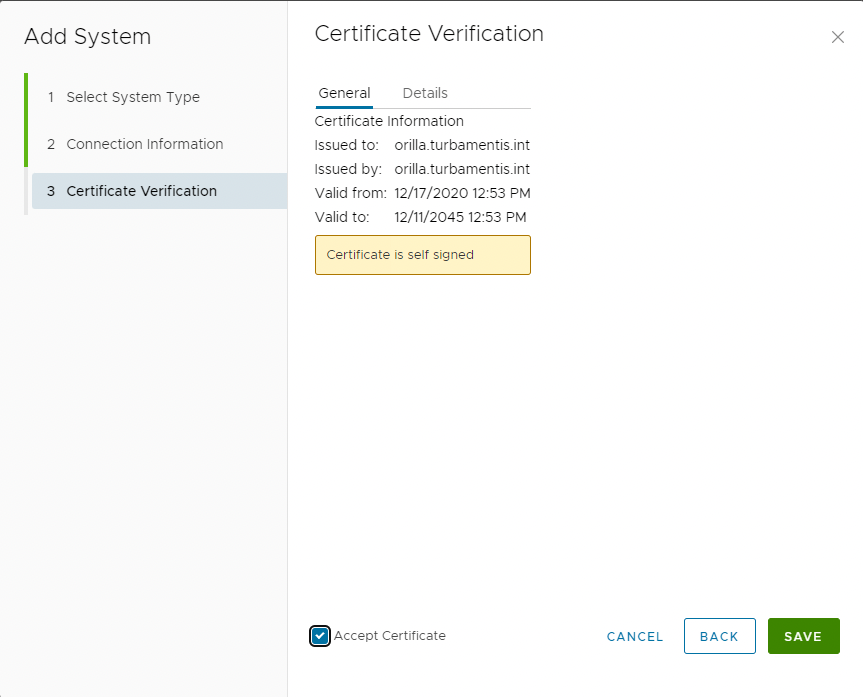
Then, review the certificate and click finish:
That was the end-to-end deployment process.
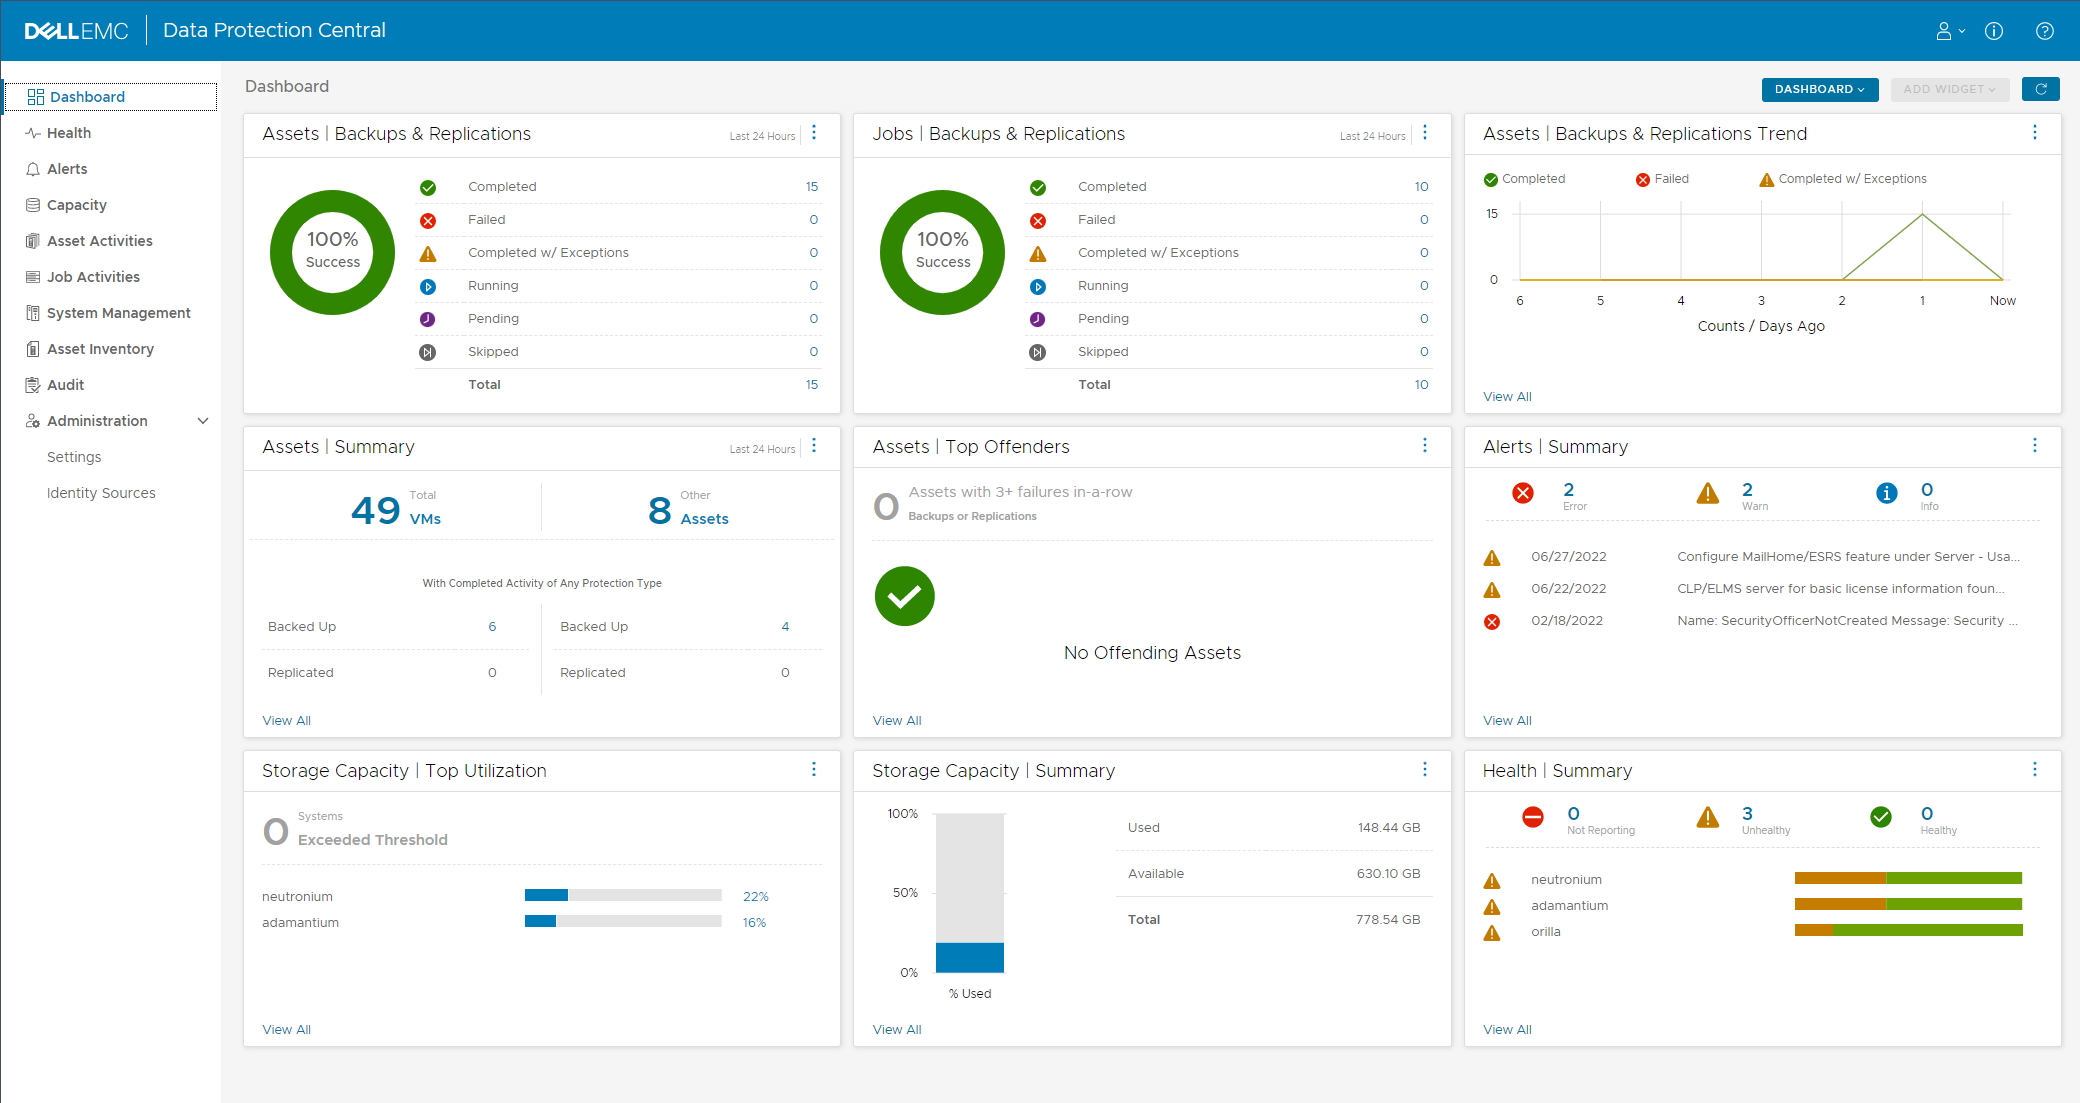
Now, a day later, my dashboard is up to date with backups having run overnight, and gives me a single pane for viewing job status and health details of the environment:
Good afternoon,
Thank you for the very detailed explanation. But I have one question, because I see that you also have the status “unhealthy” after the renew. I have the same situation and I can see that it is related to the SSO, which has the status “healthy” at the data domain. Before the upgrade I saw that the dpc-sso service is running on the dpc server. After the upgrade it was no longer there, the service was deleted and now there is a dpc-iam service instead. Could this be the reason why the SSO status of the data domain is “healthy”?
Translated with http://www.DeepL.com/Translator (free version)
I don’t use any SSO within my lab so I couldn’t say, I’m afraid. I’d suggest filing a support request on this.
Hi, please sent a link, where you download Data Protection Central in .OVA format (emc-dpc-ova-19.7.0-2.ova), because on official website we have only update in JAR
Check out the main landing page. You should also be able to find the OVAs for 19.8 now. Note that you’ll probably need to be a logged in user to see the vSphere deployment OVA. https://www.dell.com/support/home/en-us/product-support/product/data-protection-central/drivers