
Have you seen Good Omens? I haven’t read the book but watched the TV series last year, and there was a character in it I sometimes relate to. He was someone who loved computers, but his mere presence seemed to break them.
Sometimes, I definitely feel like him. I sat down on Sunday morning to do a screen recording demo of using the PowerProtect Data Manager plugin for vSphere, but as I was about to get started, I had another reminder from SoftRAID that v6.0.4 was out and I should update to it. “It’ll only take a few minutes”, I noted to myself (famous last words), and told it to go ahead.
More than five hours later, I finally had my desktop back in usable order but only after booting into recovery mode and restoring the system drive from a snapshot taken yesterday. (Hey, trust me, I appreciate snapshots.)
(A side note here to Apple: telling me the times/dates of a bunch of snapshots in GMT-7 when I’m in GMT+10 is inferior UX design. Surprise, surprise, GMT-7 is US Pacific Daylight Time. That’s handy when I live in Melbourne, Australia.)
By the time all that was sorted, I’d lost my mojo for recording videos. If I’d have tried to do a recording, I’d have come across pretty cranky. Screenshots to the rescue!
So, the PowerProtect Data Manager plugin for vSphere works a little different from Avamar and NetWorker’s. While Avamar and NetWorker insert a plugin via the Menu dropdown in vSphere, Data Manager’s appears within the summary page for individual virtual machines:
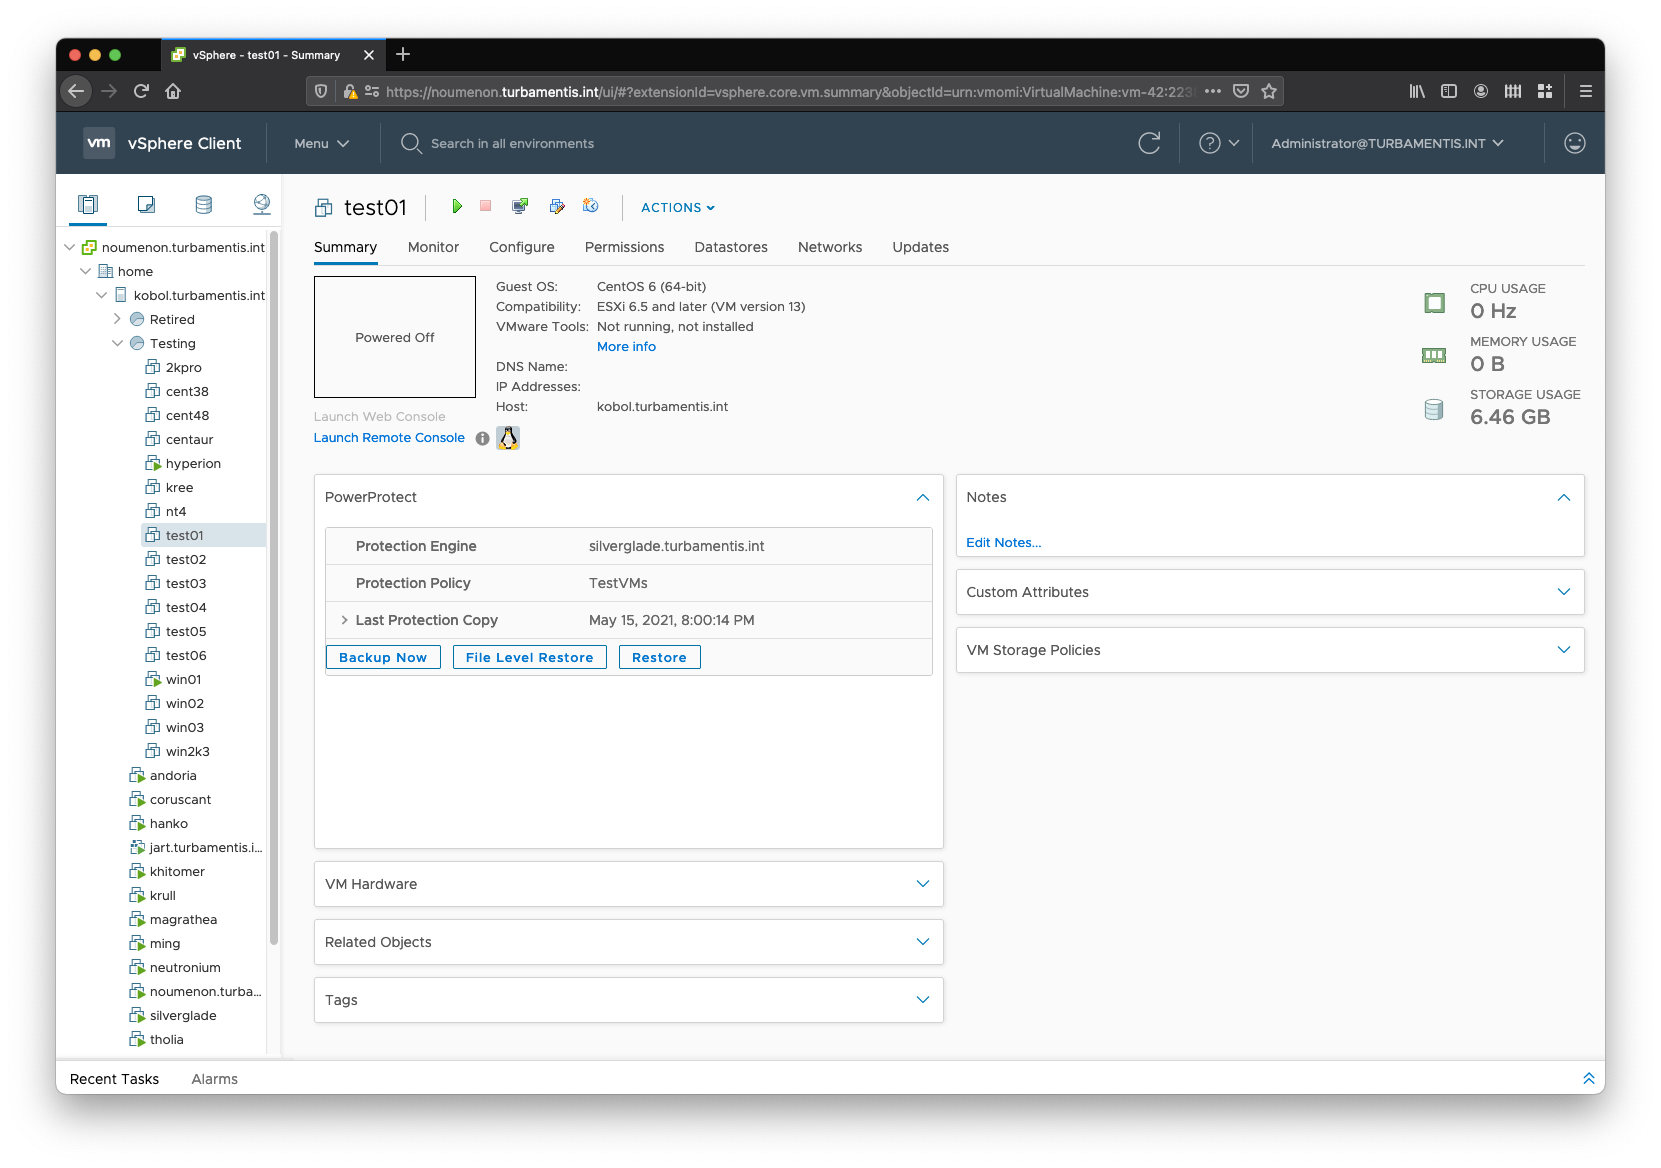
You can see three options in the Data Manager plugin:
- Backup now
- File Level Restore
- Restore
(These options are only available if the virtual machine is a member of a Data Manager policy.)
For this overview, I’m going to do a virtual machine recovery, restoring it as a new VM within my lab environment. To start that process, I clicked the Restore button, which launched the wizard:
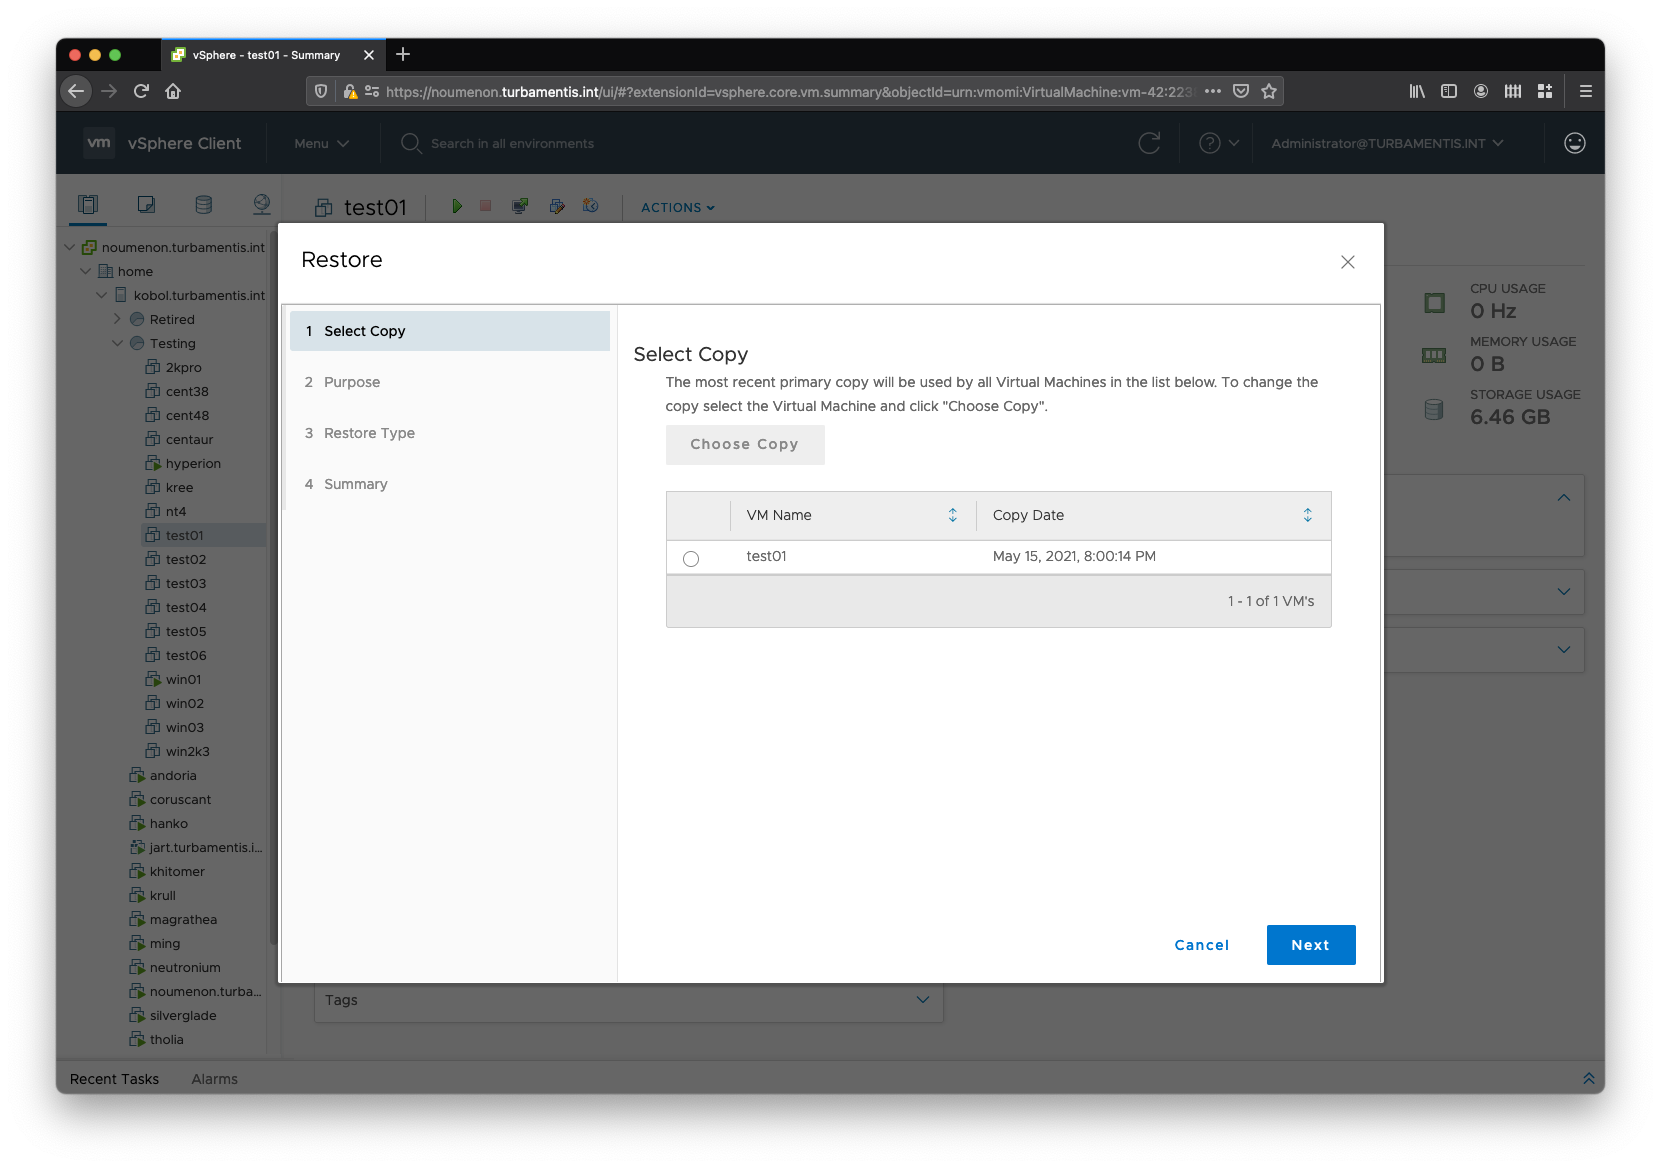
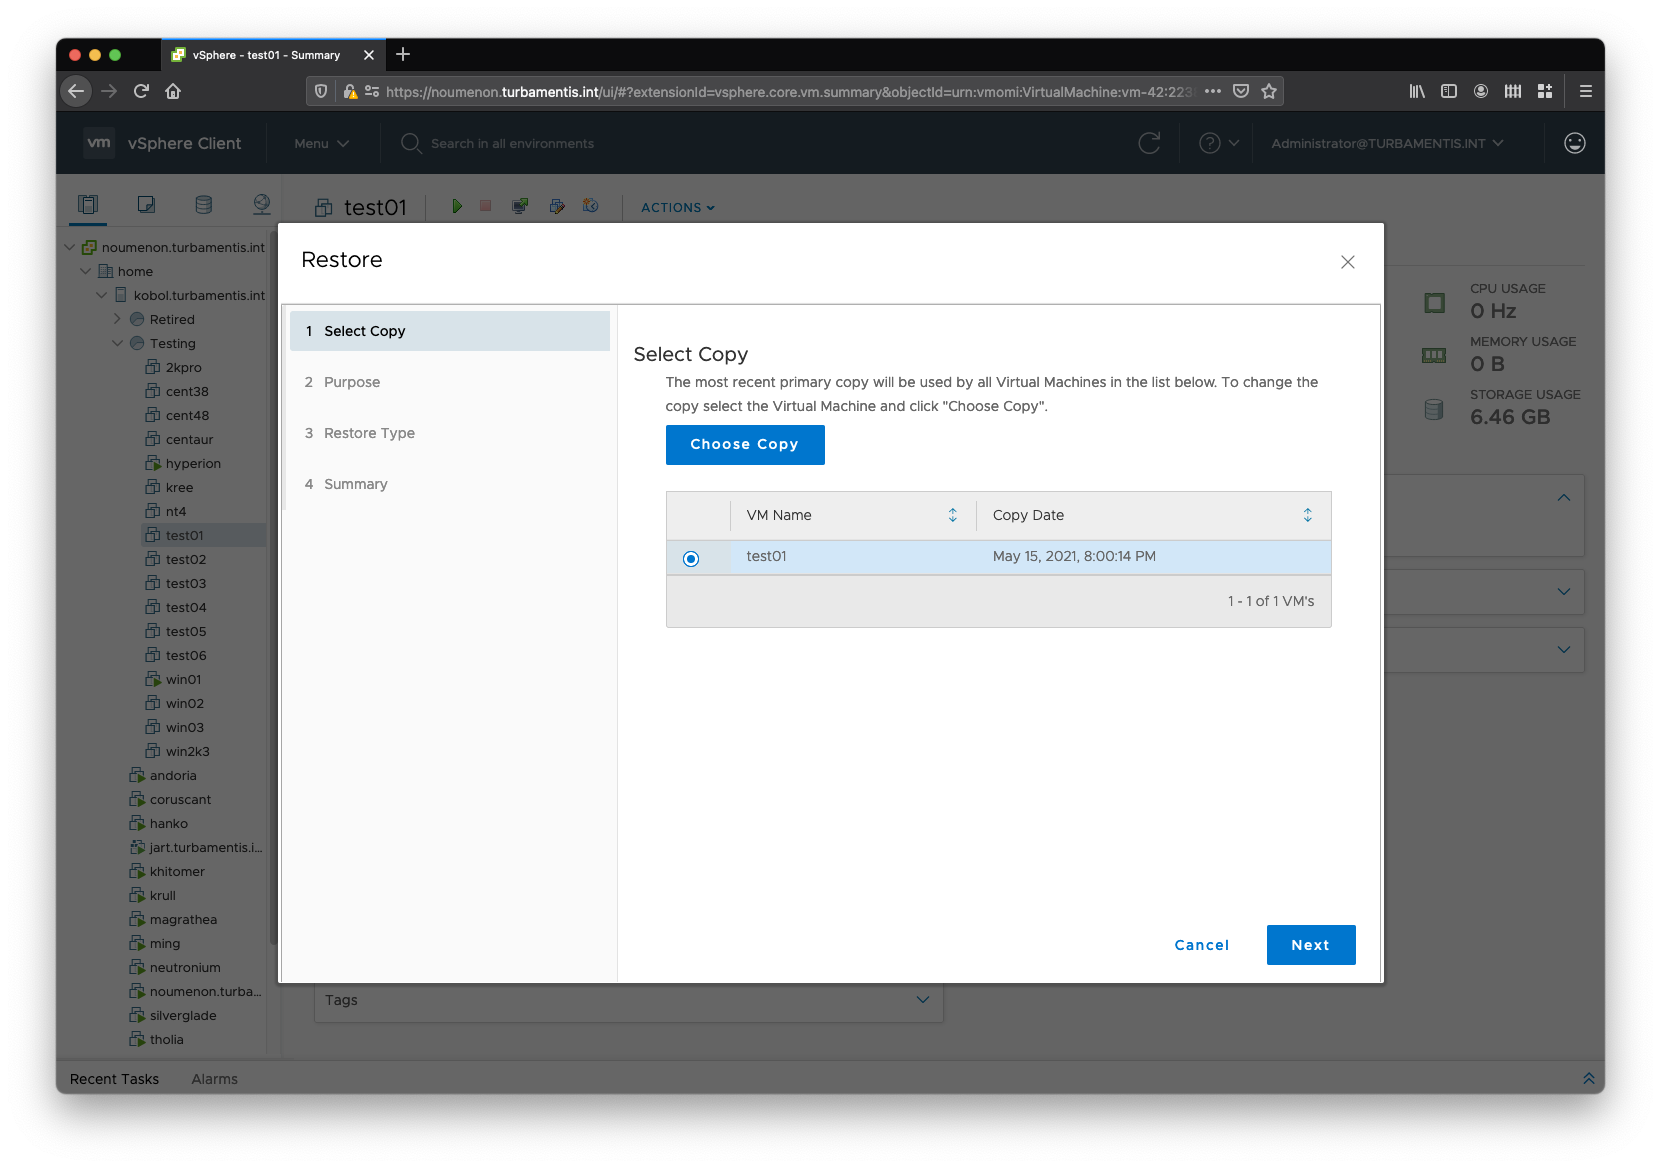
You start by choosing the virtual machine you want to restore, and the copy you want to restore from:
Clicking Next from the above pane moves you forward to choose whether you want to recover the entire virtual machine or individual disks:

I wanted to restore the entire VM, so left the wizard on the default selection and clicked Next. Having drilled down to the restore purpose, Data Manager then let me choose the restore type:
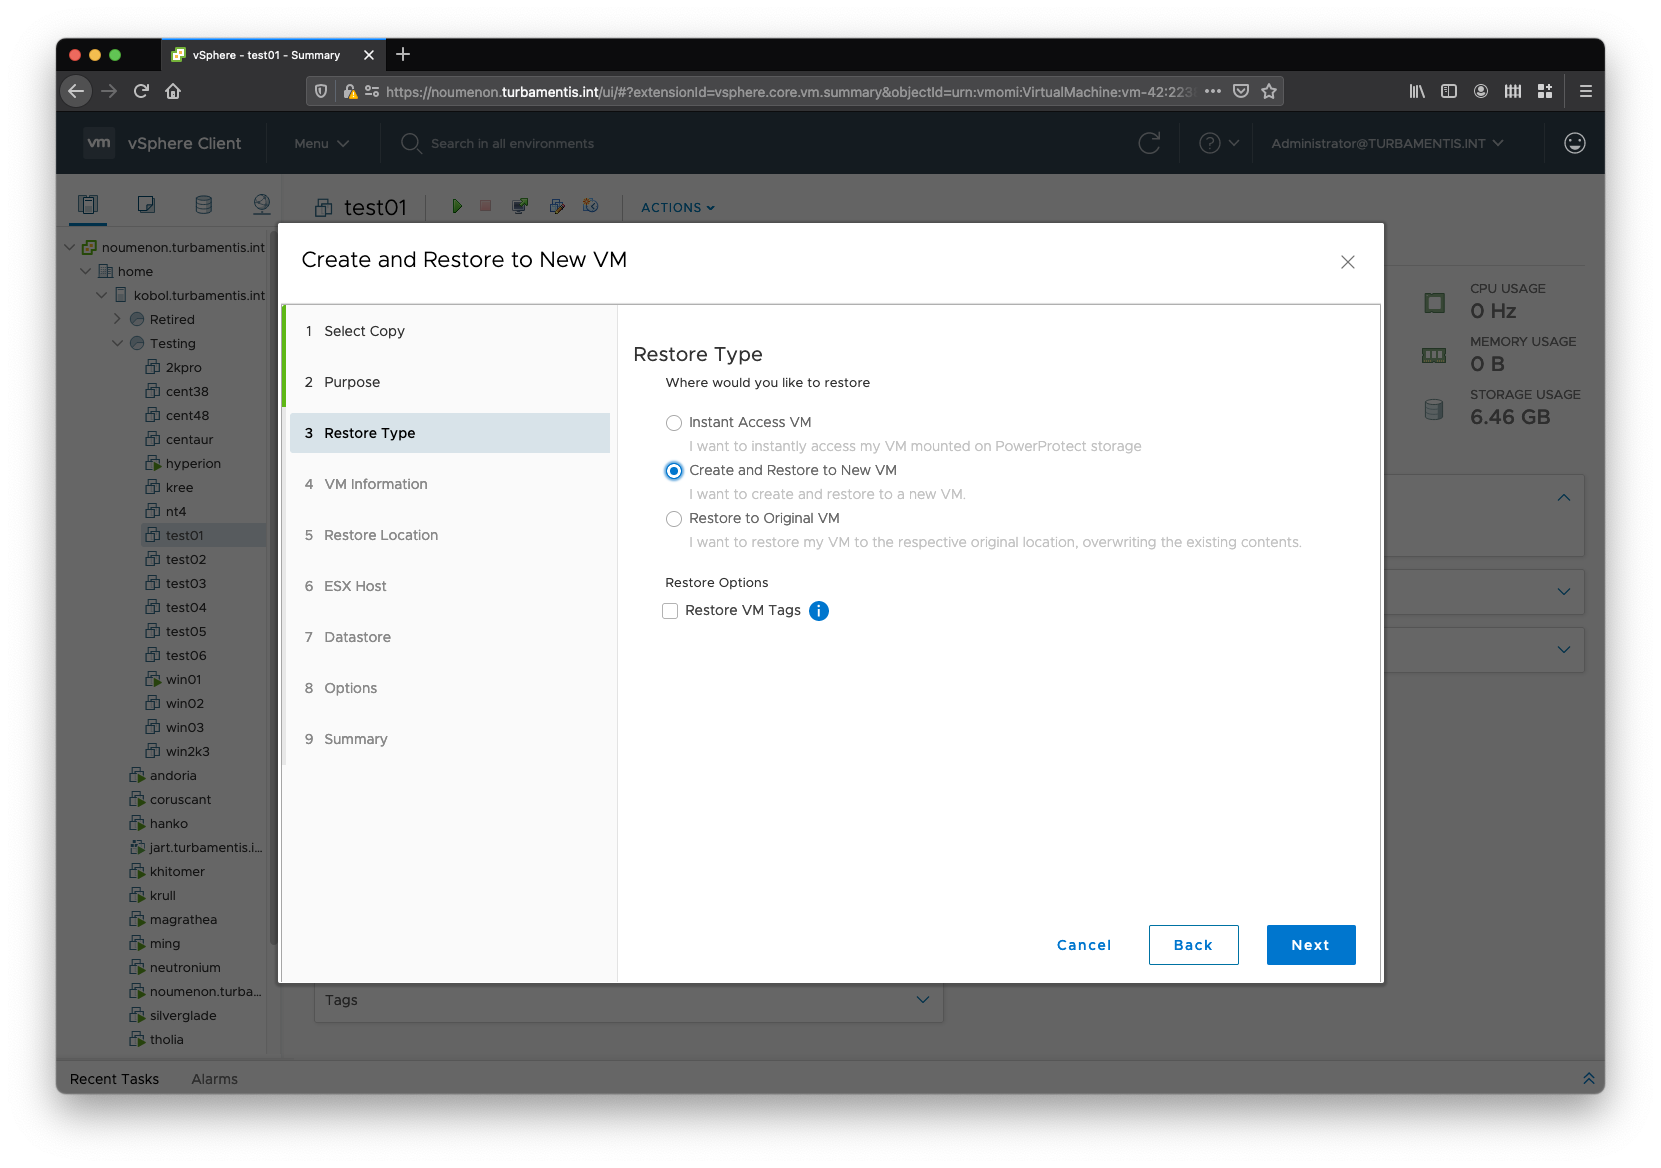
The restore types presented there are pretty obvious:
- Instant access: Present a read/write VM image from the PowerProtect storage platform for access immediately by vCenter/vSphere.
- Create and restore to new VM: Bring the virtual machine back to a new guest registered in the system.
- Restore to Original VM: Overwrite the existing virtual machine for the recovery.
For my recovery, I wanted to create a new VM so I selected the middle option and clicked Next. So the next step was to choose the vCenter and datacentre to recover to:
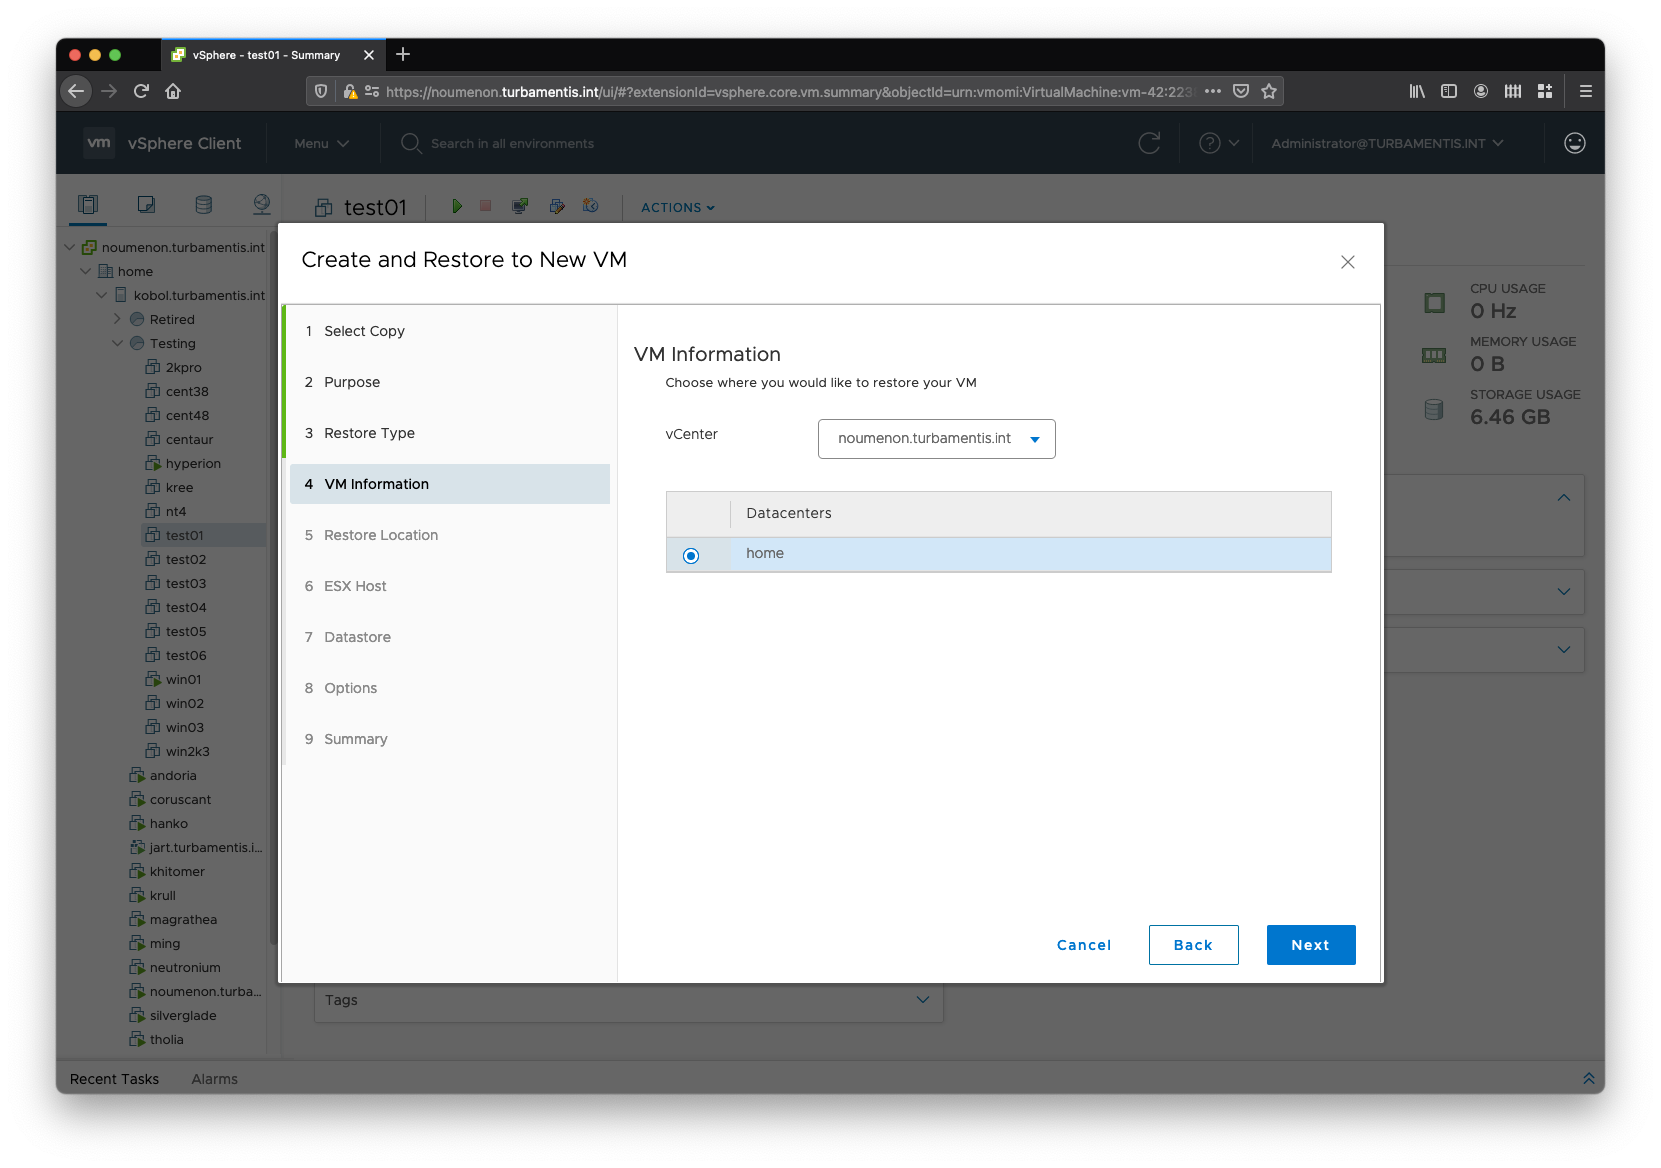
For my lab environment, there’s not a lot to choose there, so I clicked Next to continue.
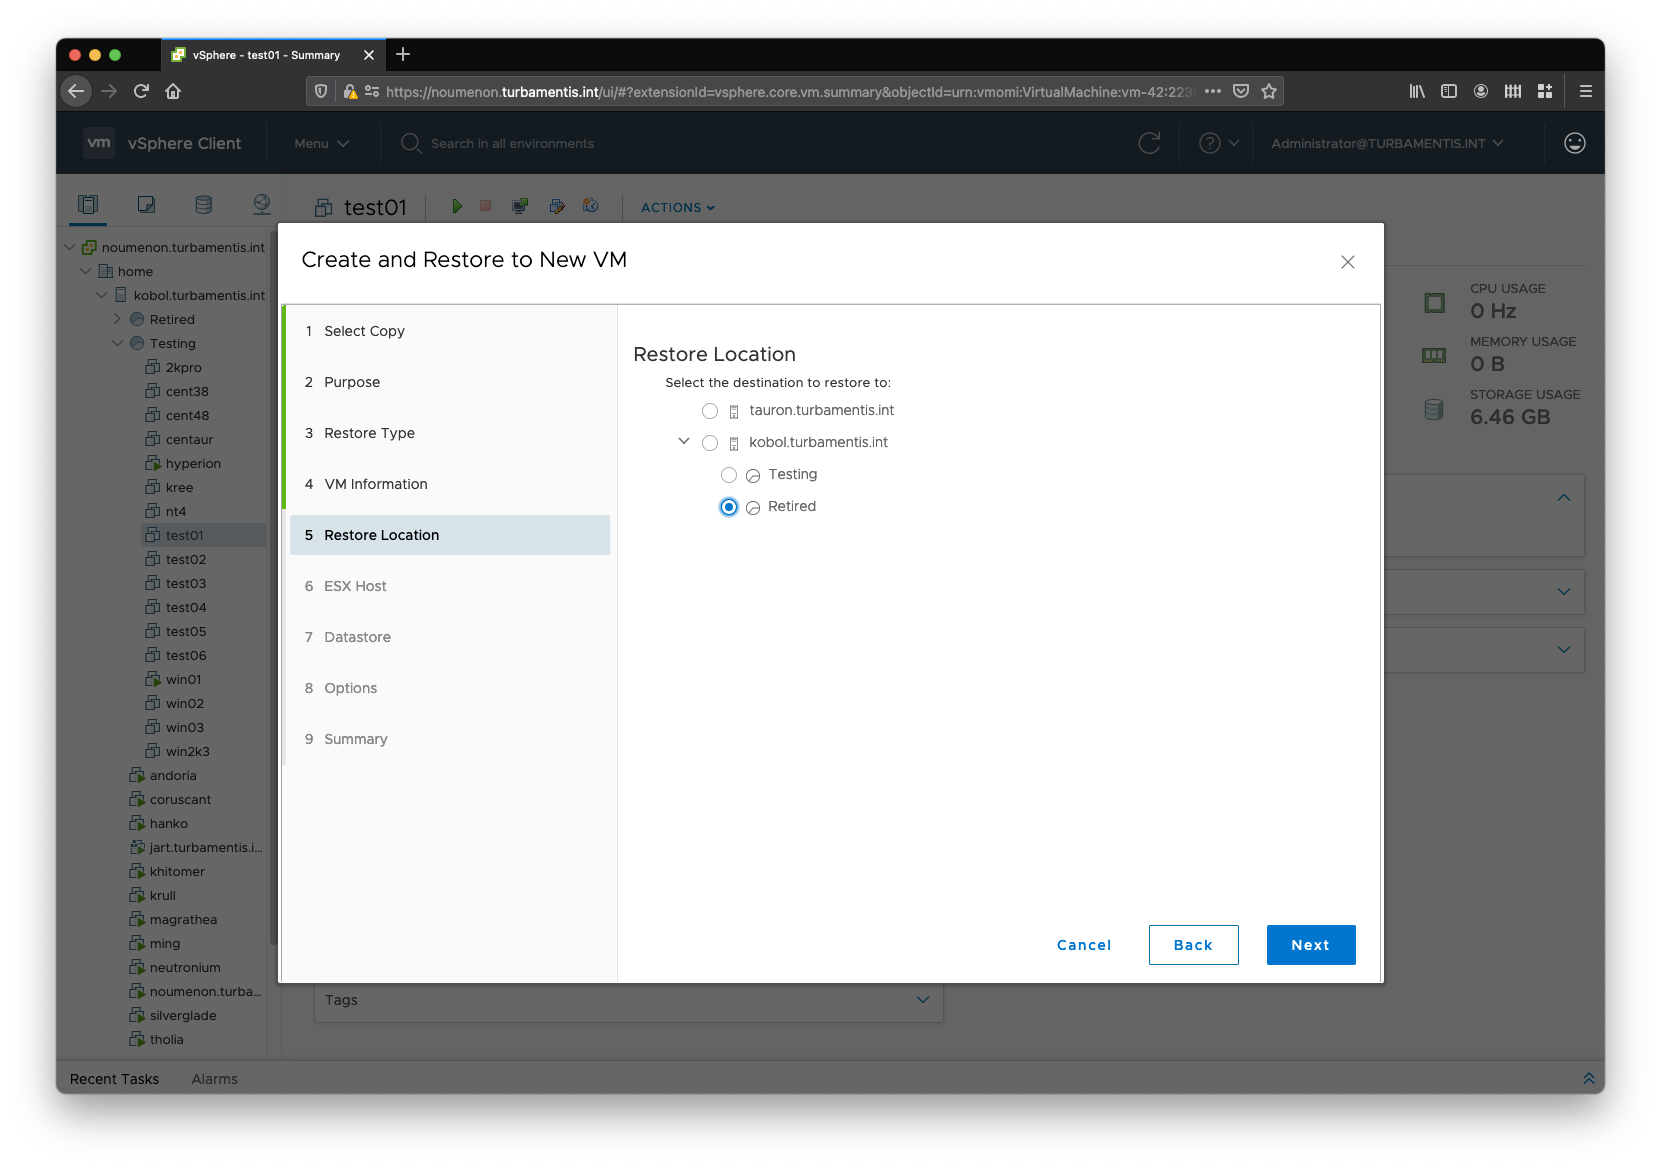
Next up was to choose the ESX host for the restore:

Clicking Next from the above led me to choosing where on the ESX storage I wanted to write the recovery to. I’ve expanded this in the grab below to show the options on a per-disk basis:
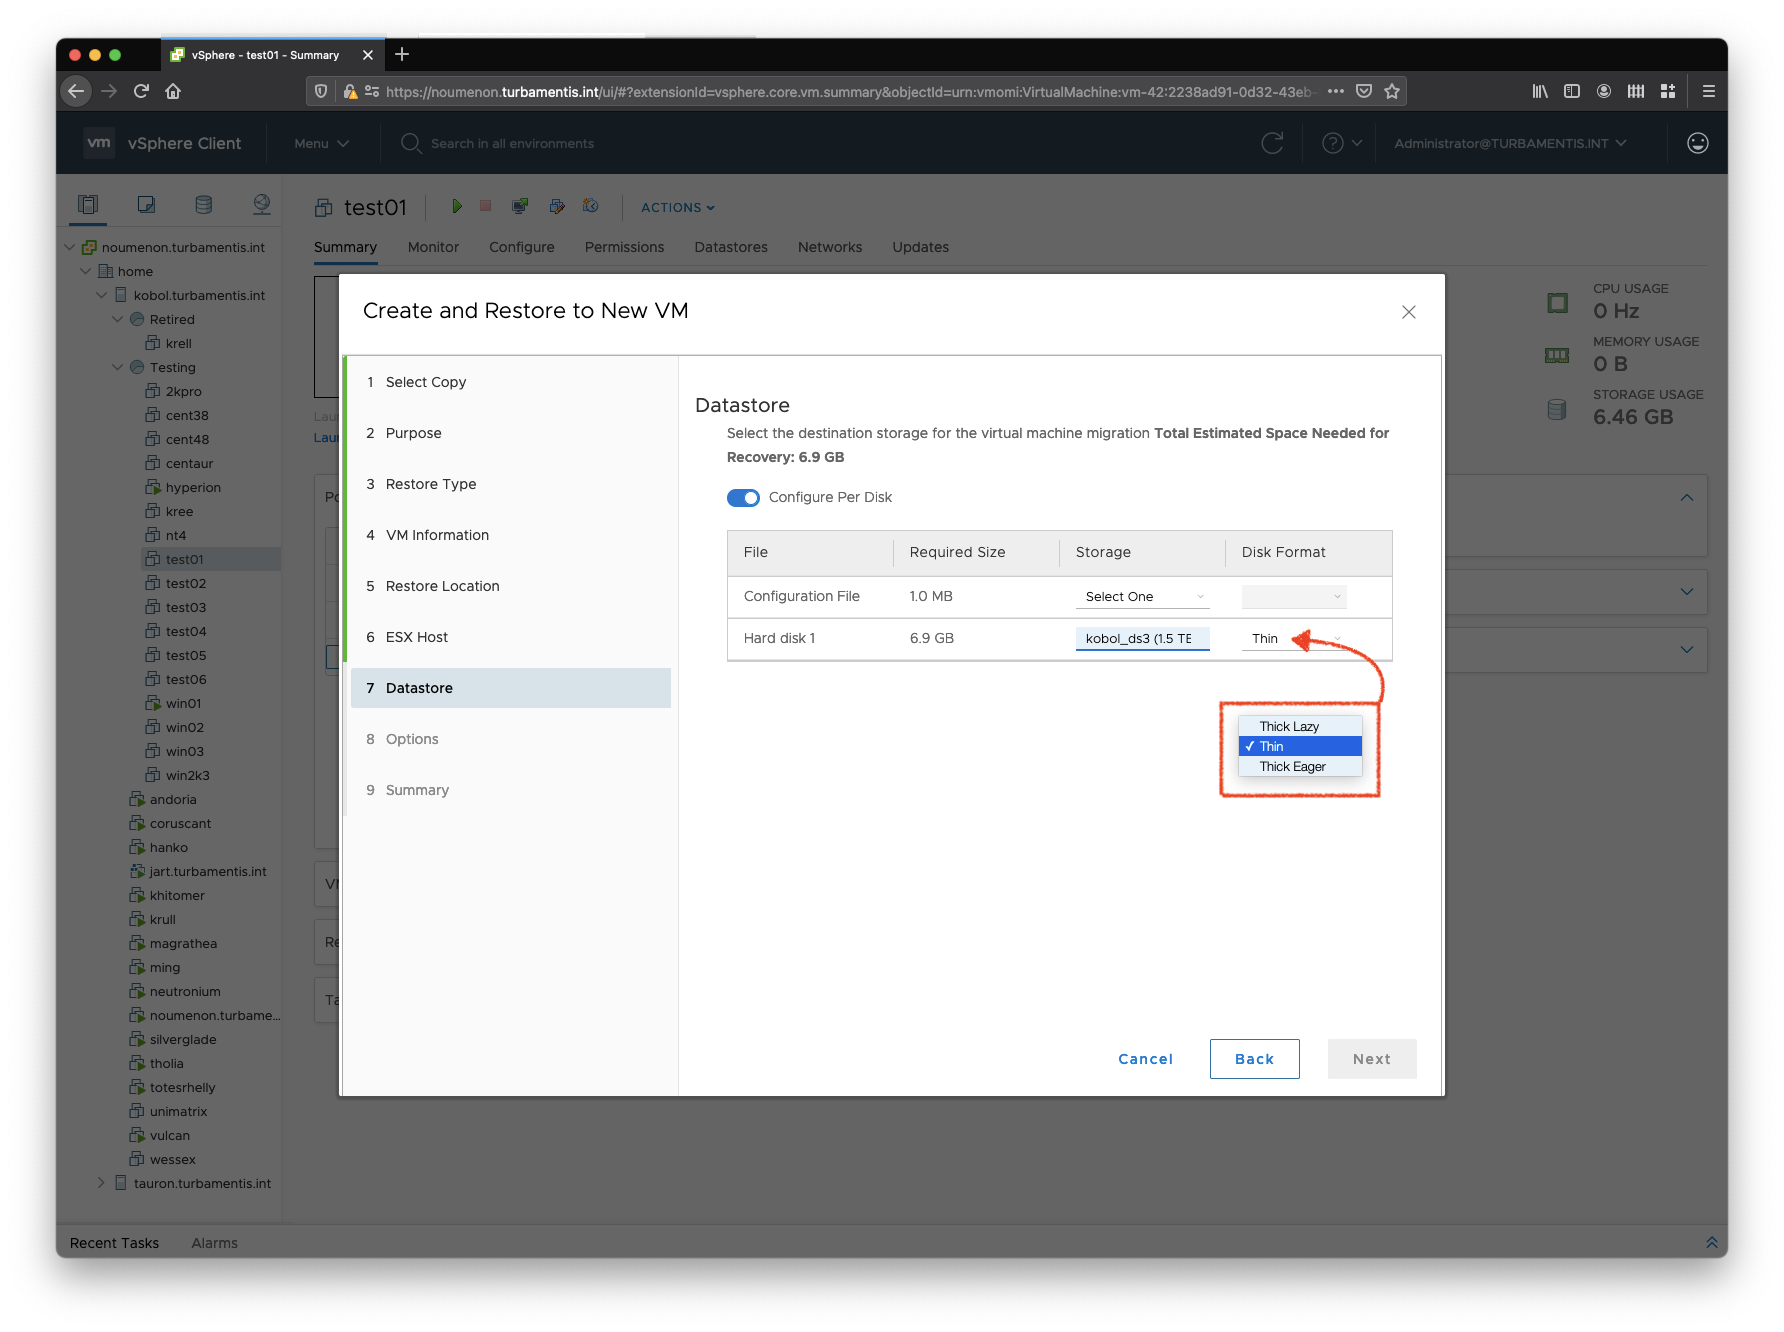
With these details configured I could click Next and then finalise restore options – which includes naming the new VM, and optionally starting it via instant access for the duration of the recovery:
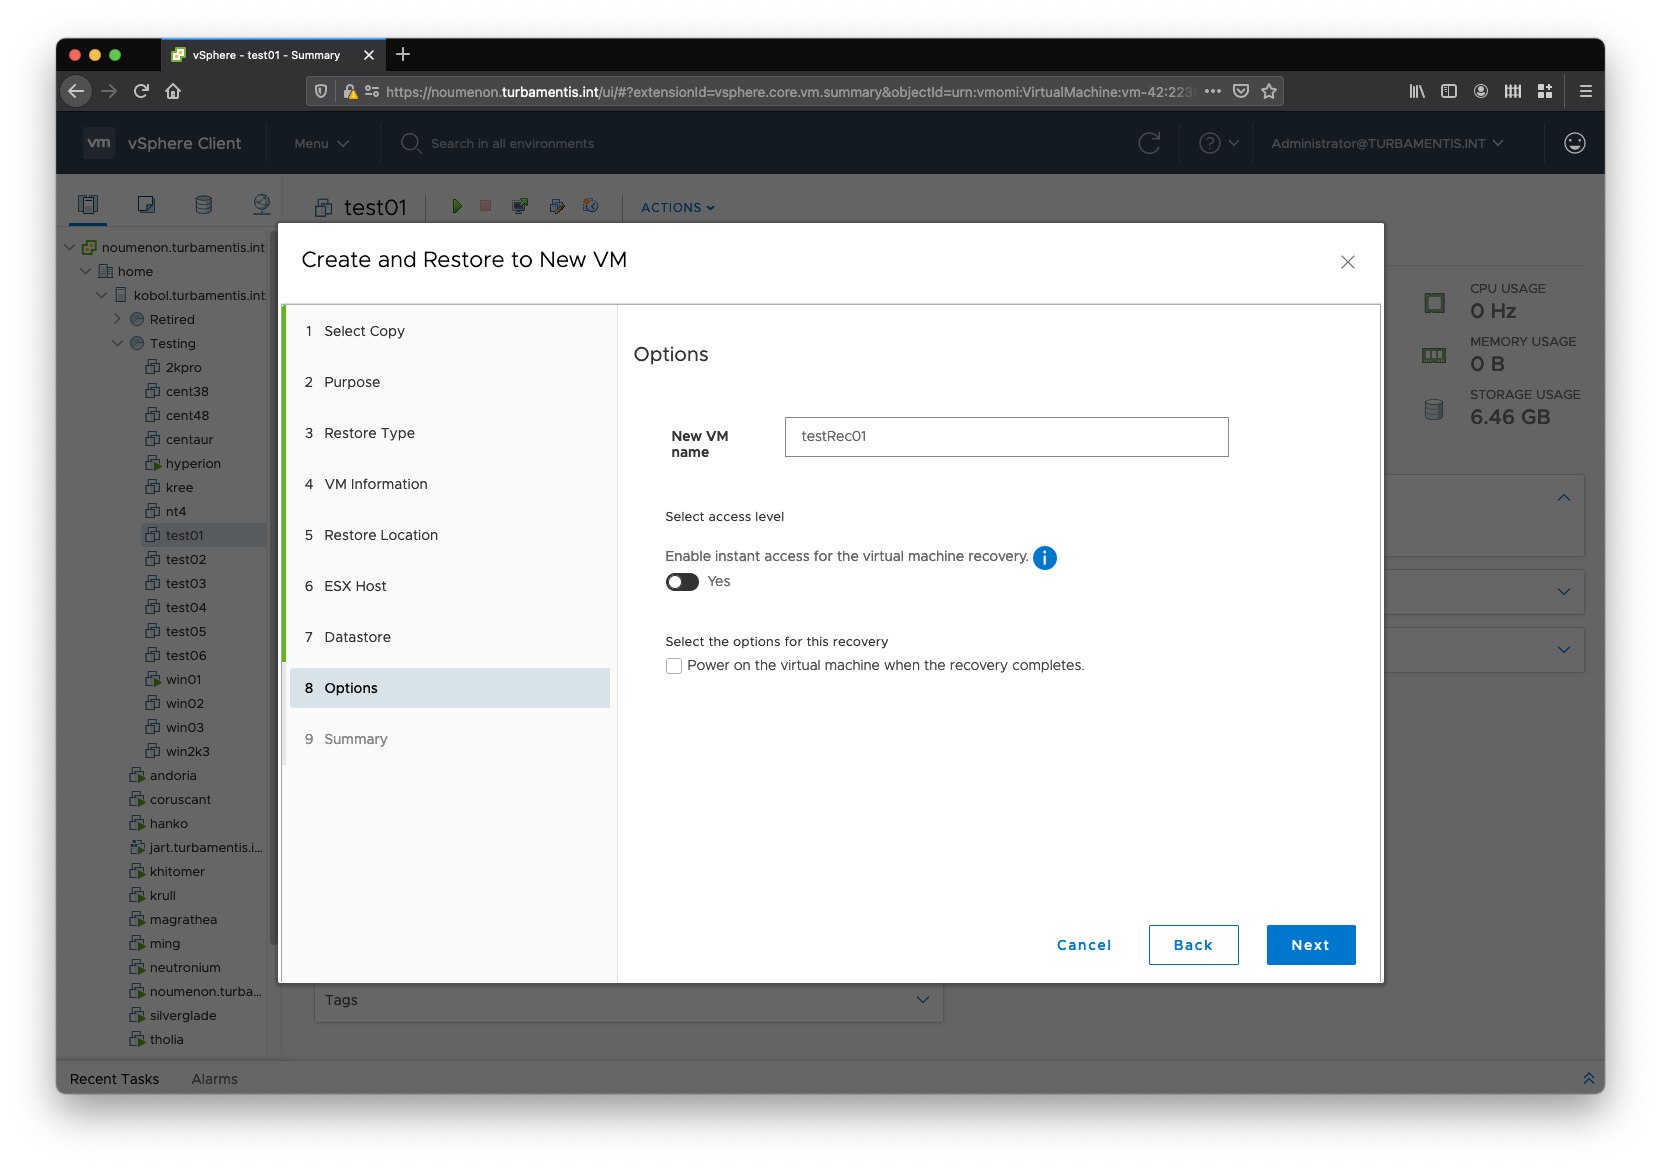
For my restore, I elected not to use Instant Access and wanted to leave the virtual machine powered off after recovery. Clicking Next led to a summary page:
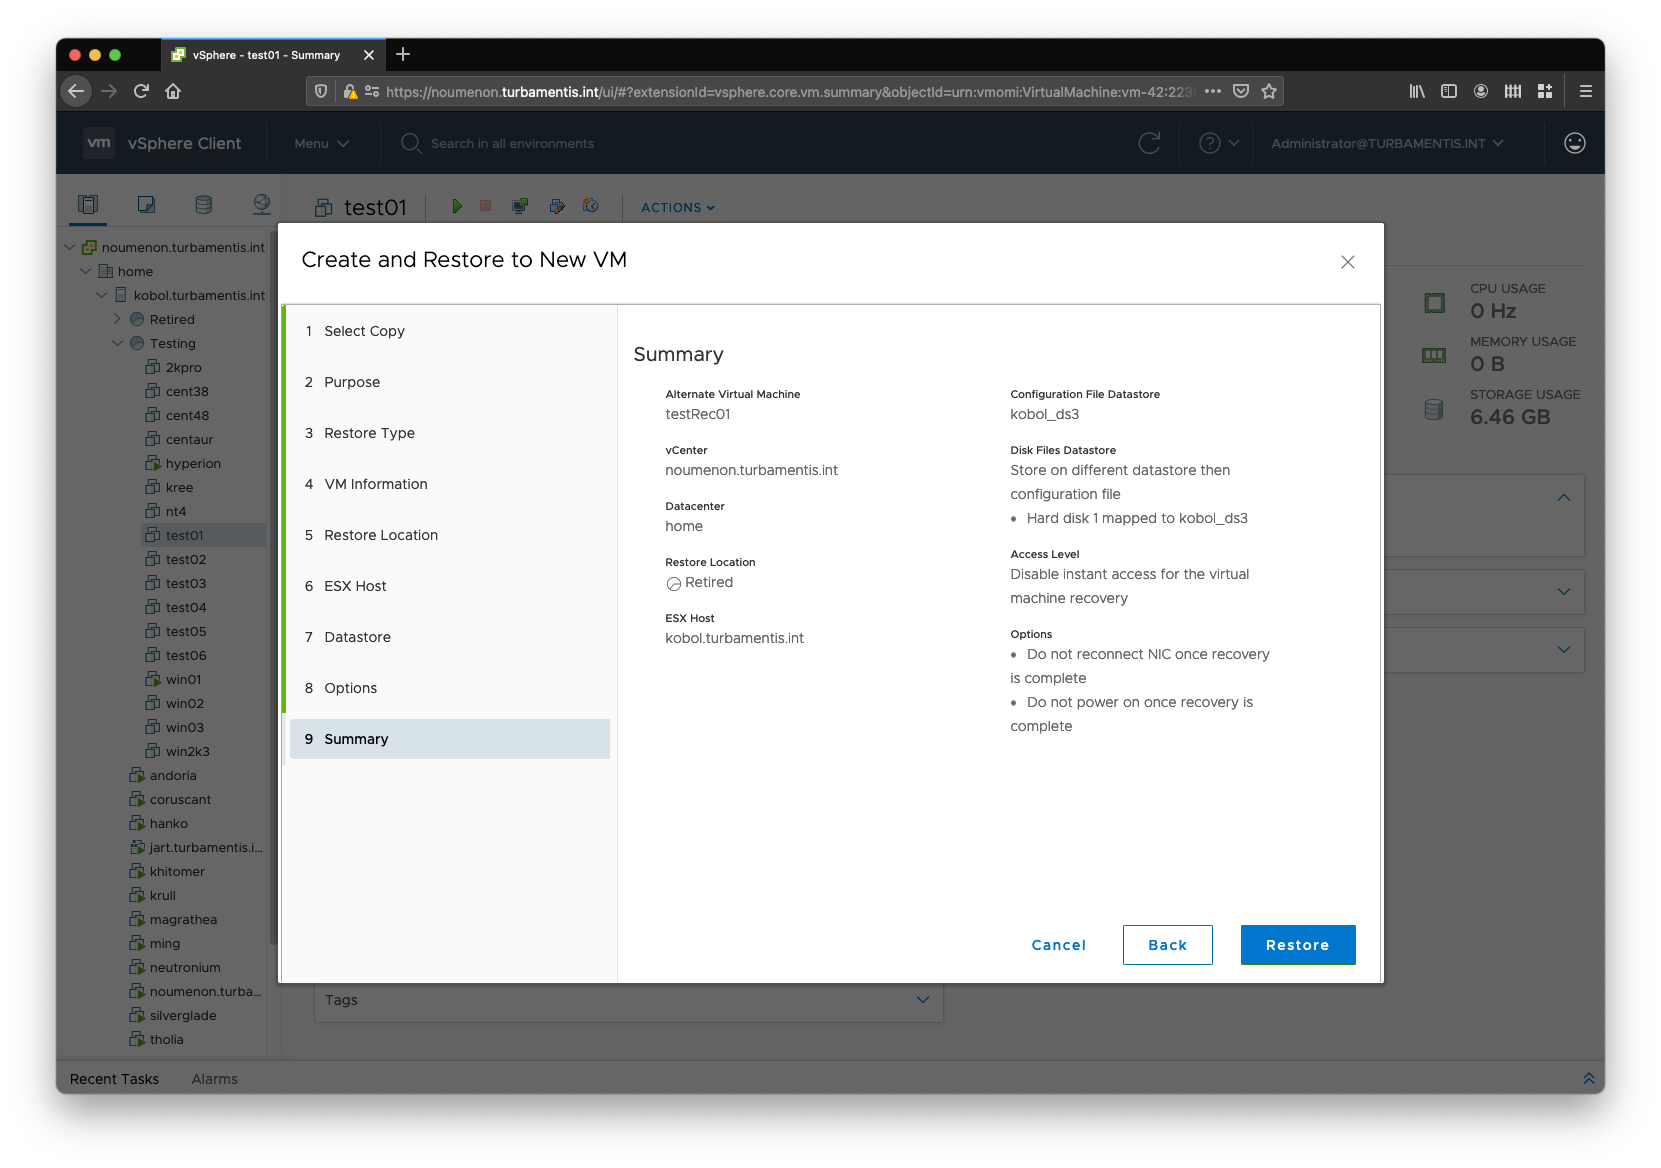
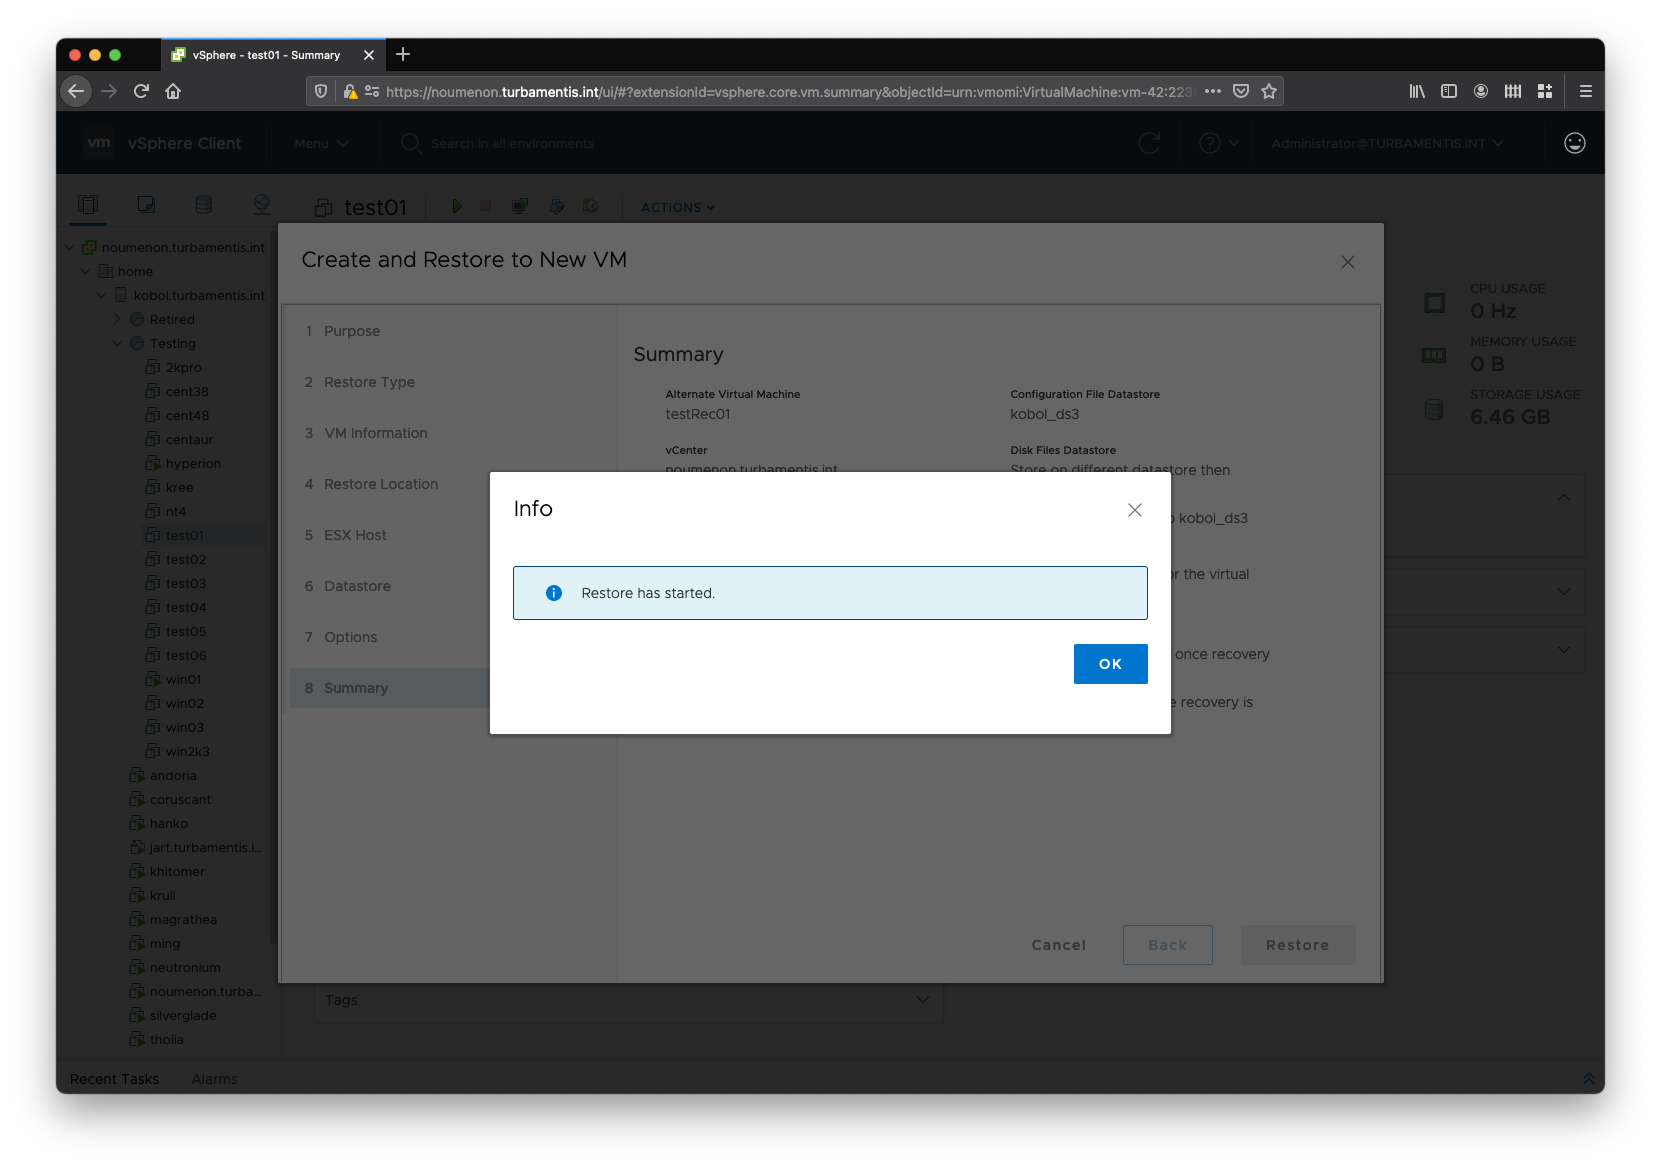
When I was happy with the restore options, I clicked Restore to start the process. This gets Data Manager to initiate the retrieval, and gives you an update after it’s underway:
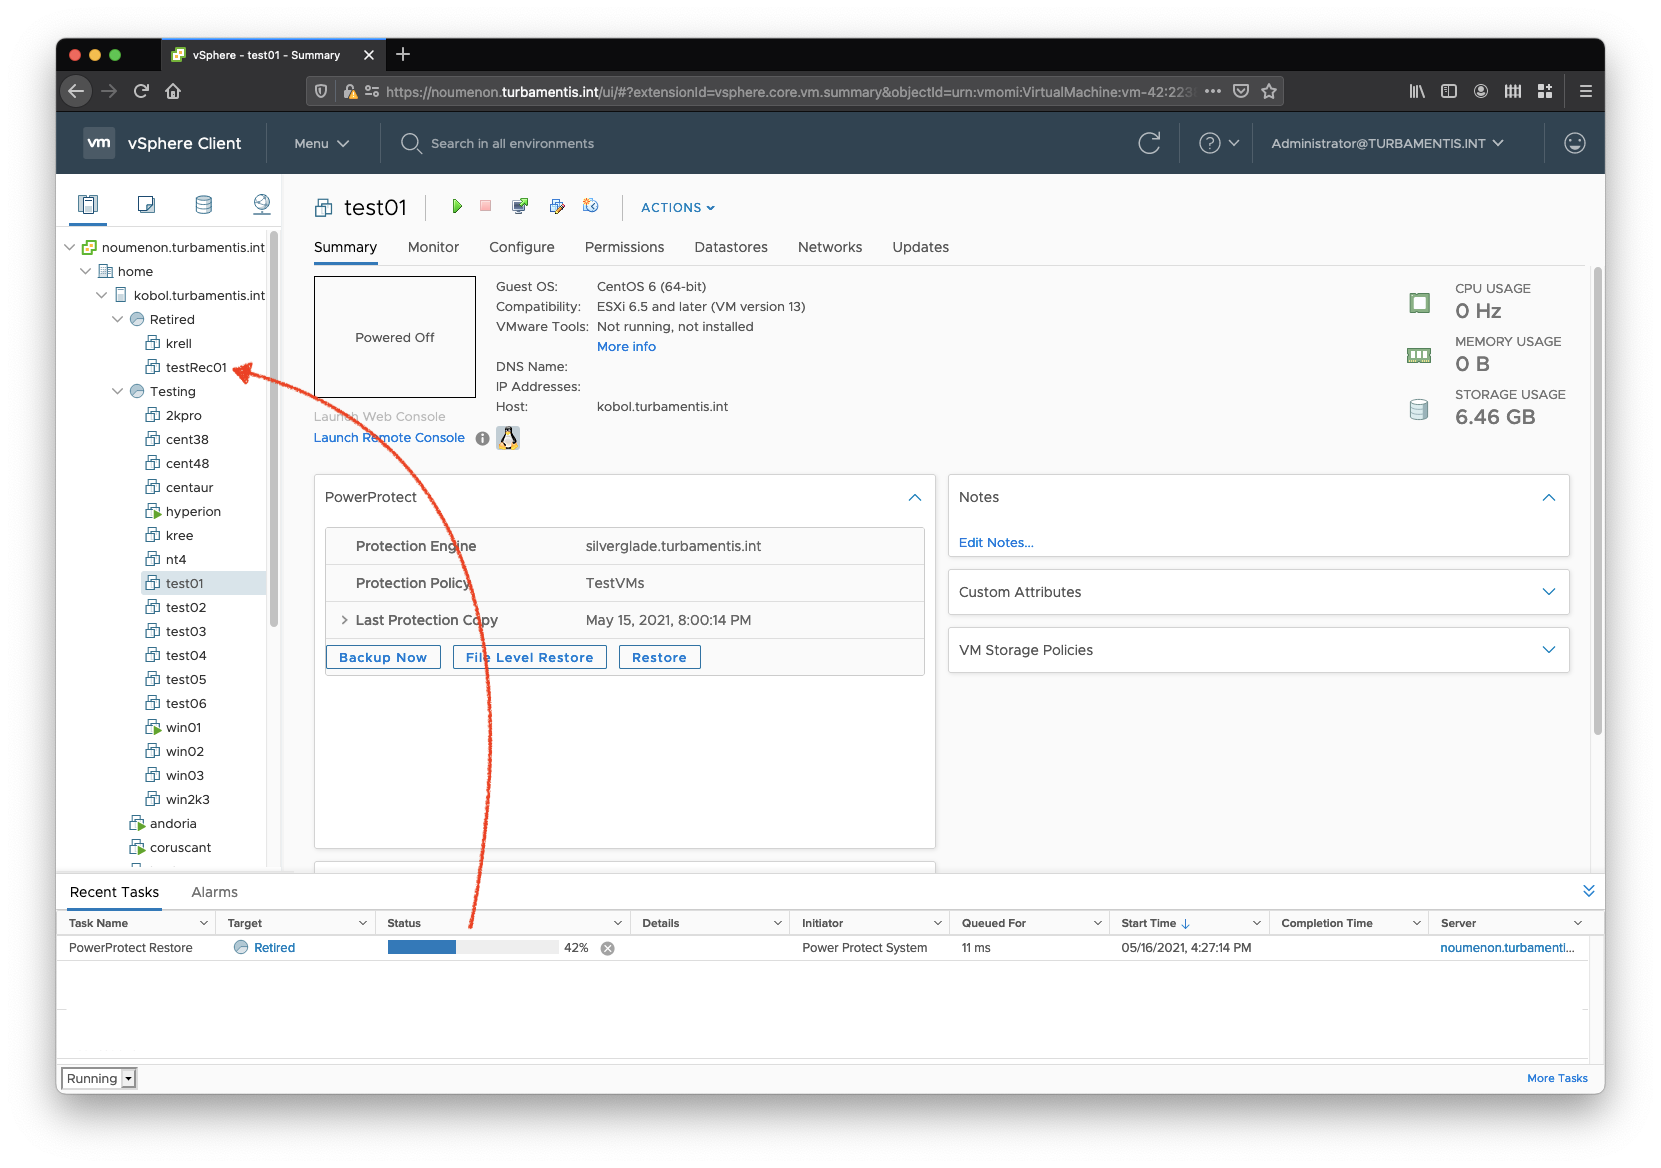
You can track the progress of the restore via the vCenter tasks:
Finally, once the virtual machine had been restored, I clicked on it. This brings up the PowerProtect plugin for the new virtual machine, and because it isn’t a member of a policy, you’ll see it looks a little different:
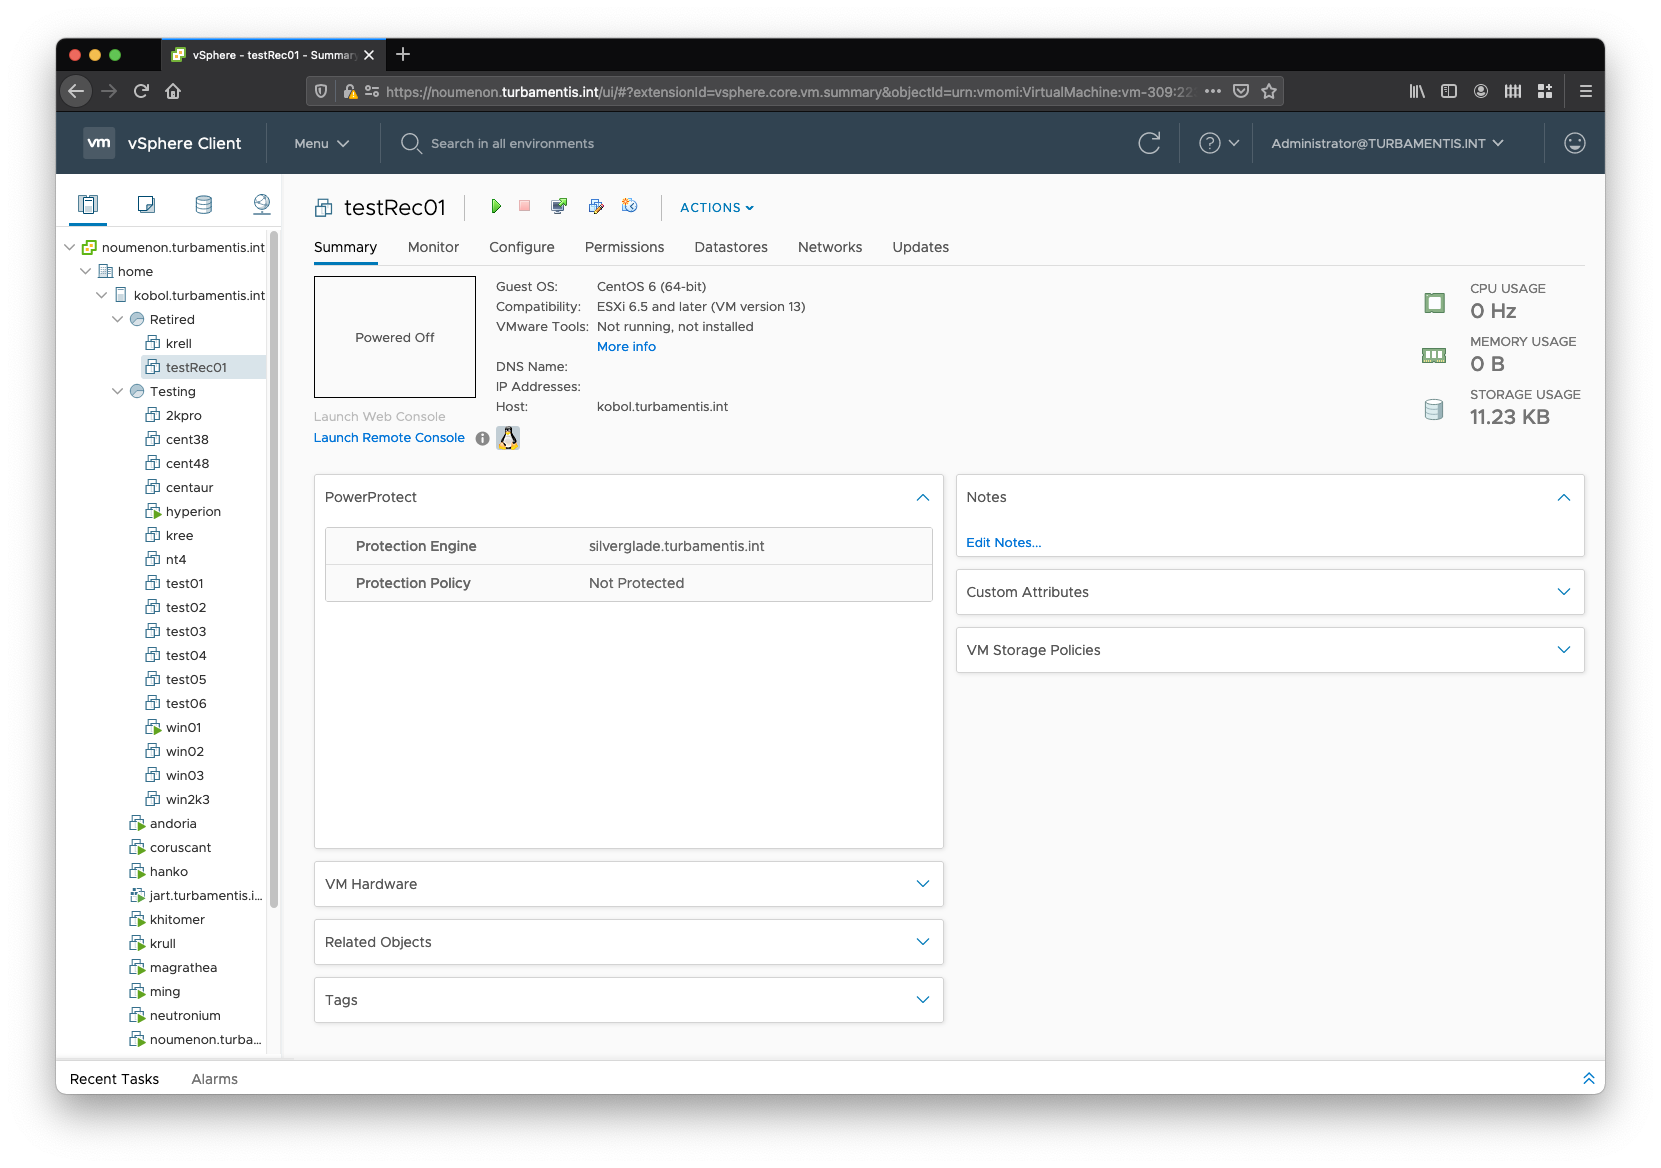
So there you have it – the PowerProtect Data Manager vSphere plugin: enabling simple and efficient operations for your VMware administrators, directly within their favourite interface.