PowerProtect Data Manager features a powerful access control mechanism which allows you to isolate users of the system to only have access to the assets they need to do their job. These are referred to as resource groups.
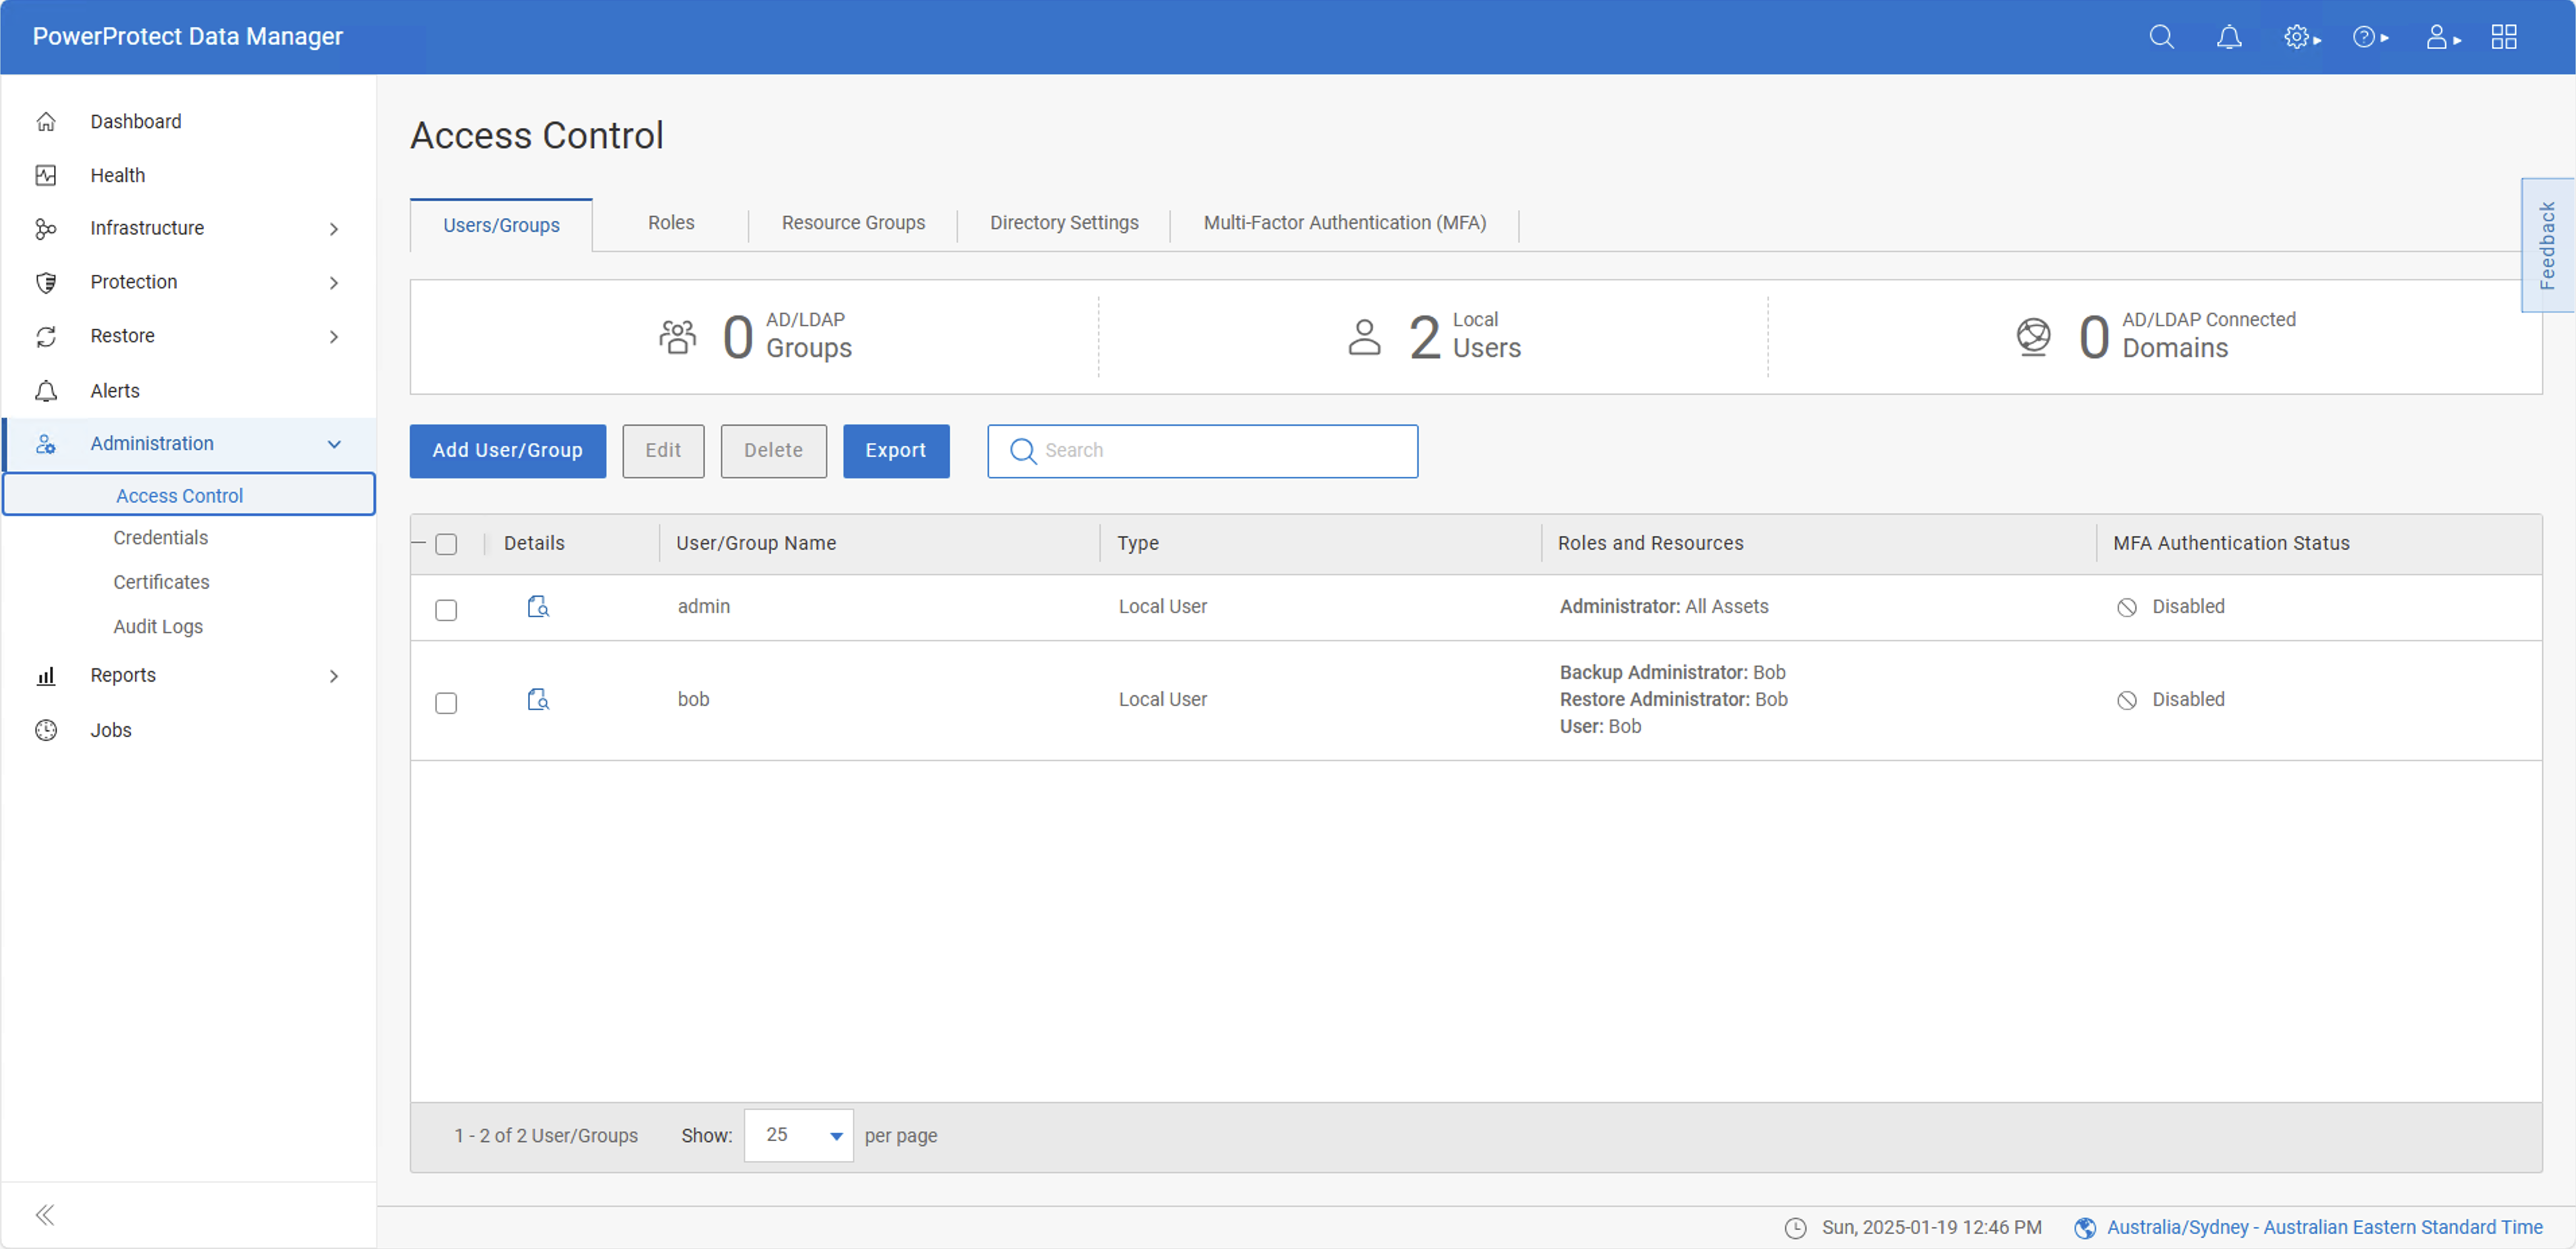
Resource groups are controlled from within the Administration > Access Control page of Data Manager, and you’ll start by making sure you have a user or group defined to apply a resource group against. In the example below, I’ve created a user called bob who has permissions as a Backup Administrator, Restore Administrator and a general view User:
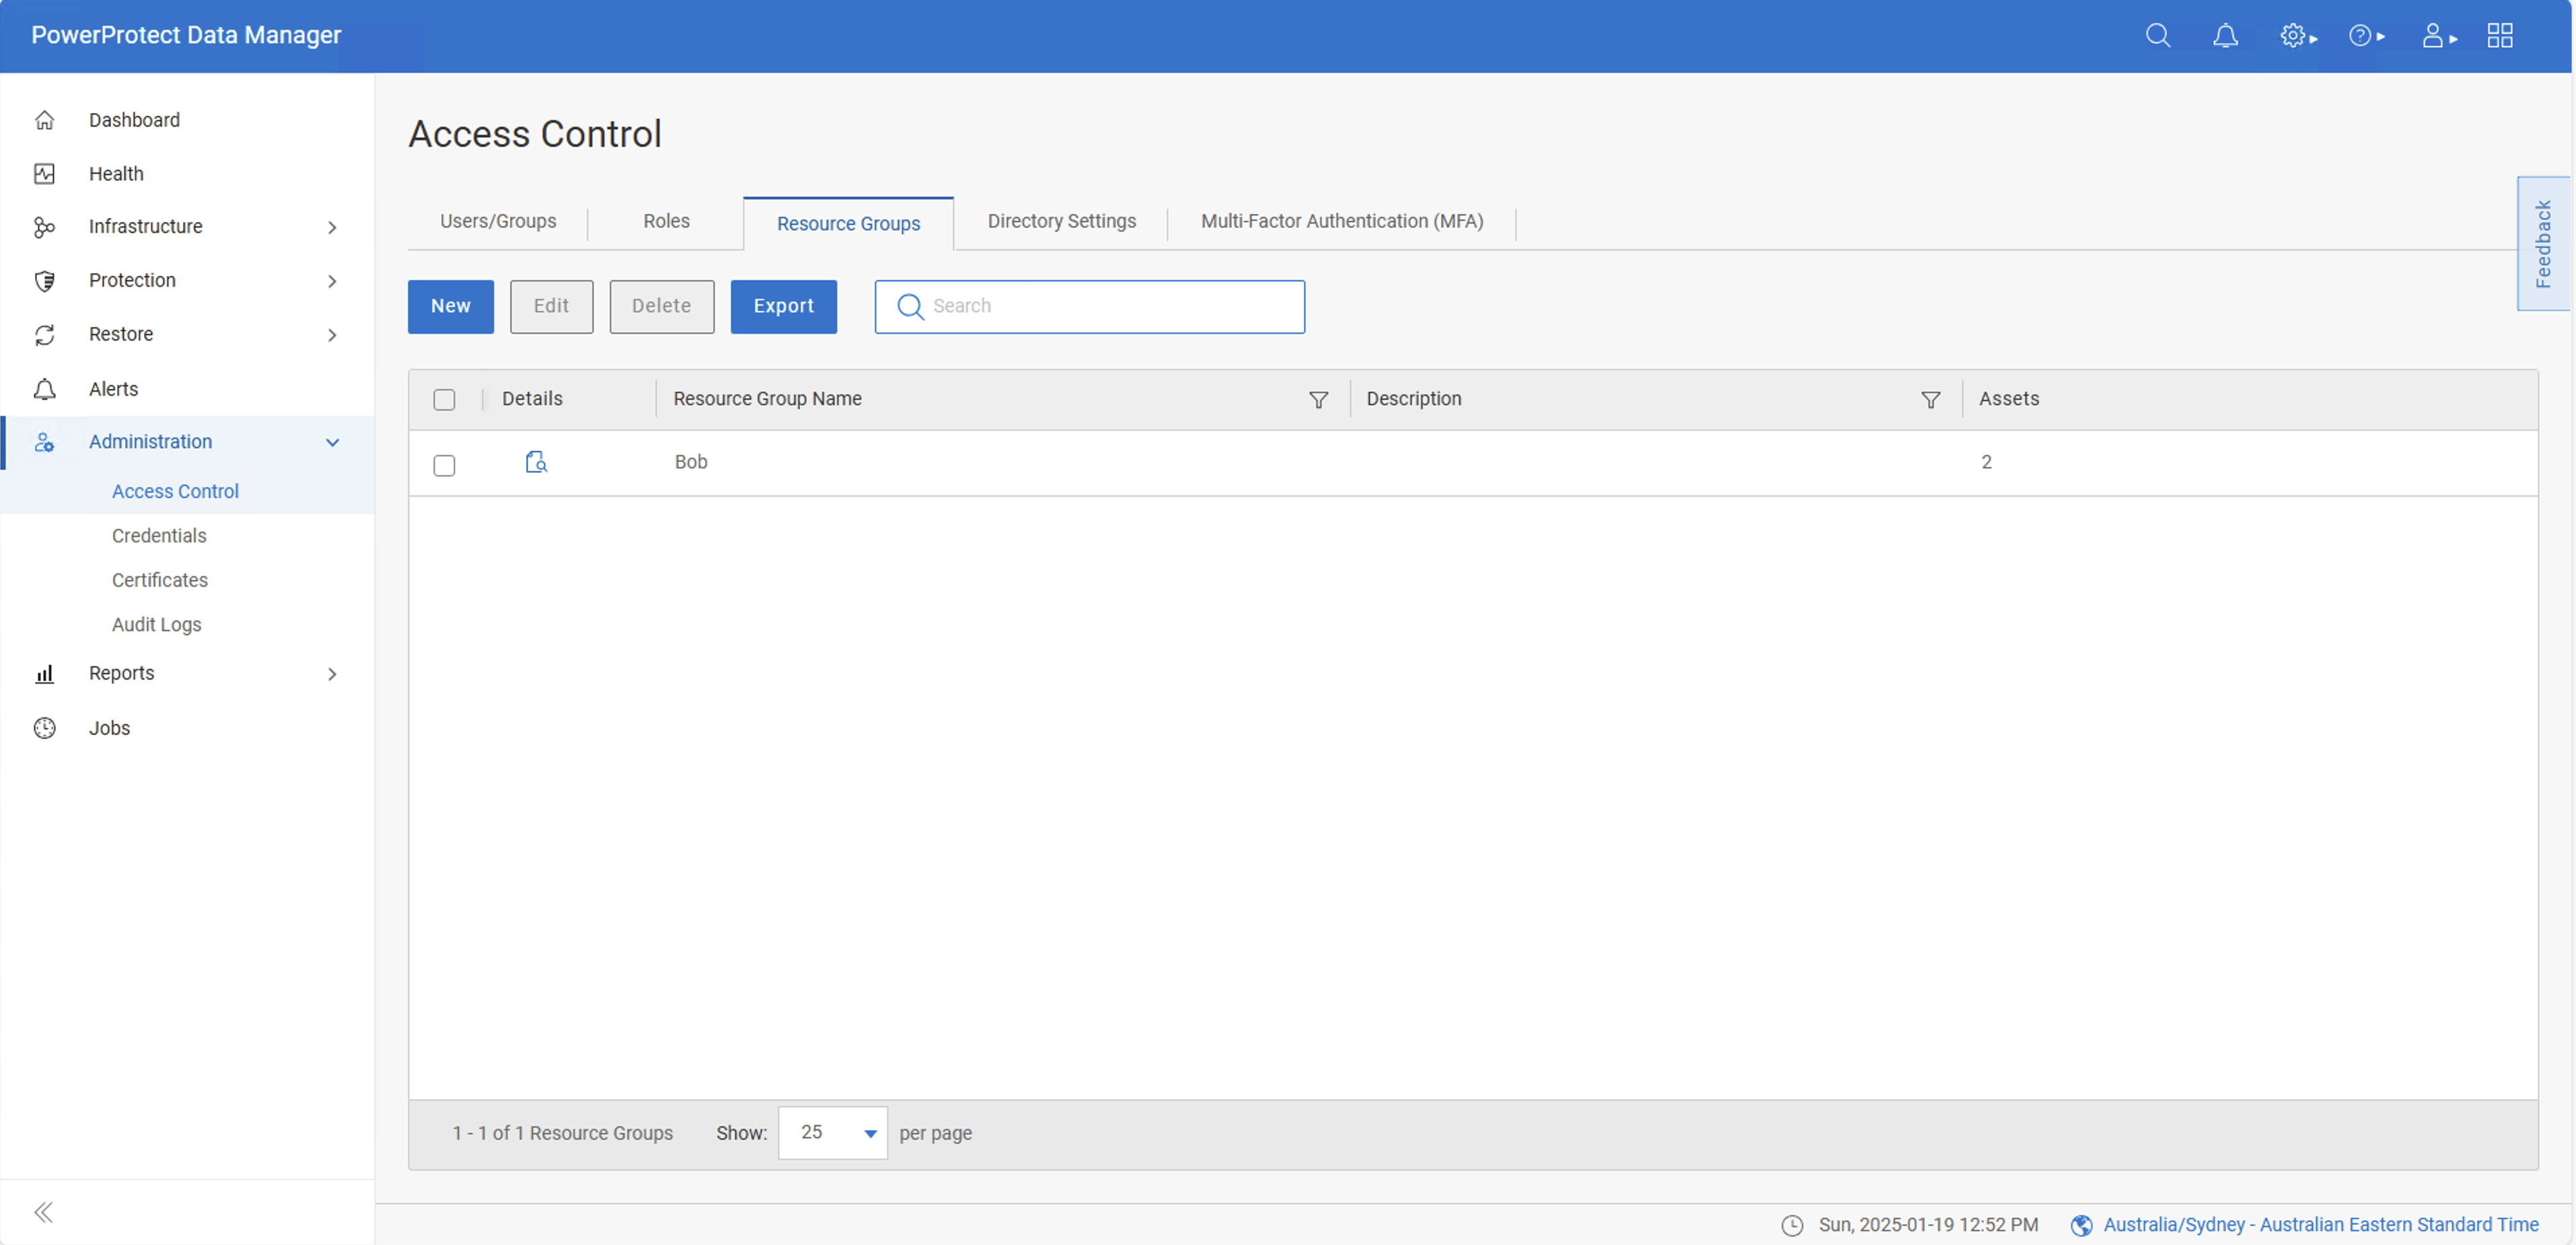
Across on the Resource Groups tab, I’ve got a single resource group defined, which just so happens to be called Bob:
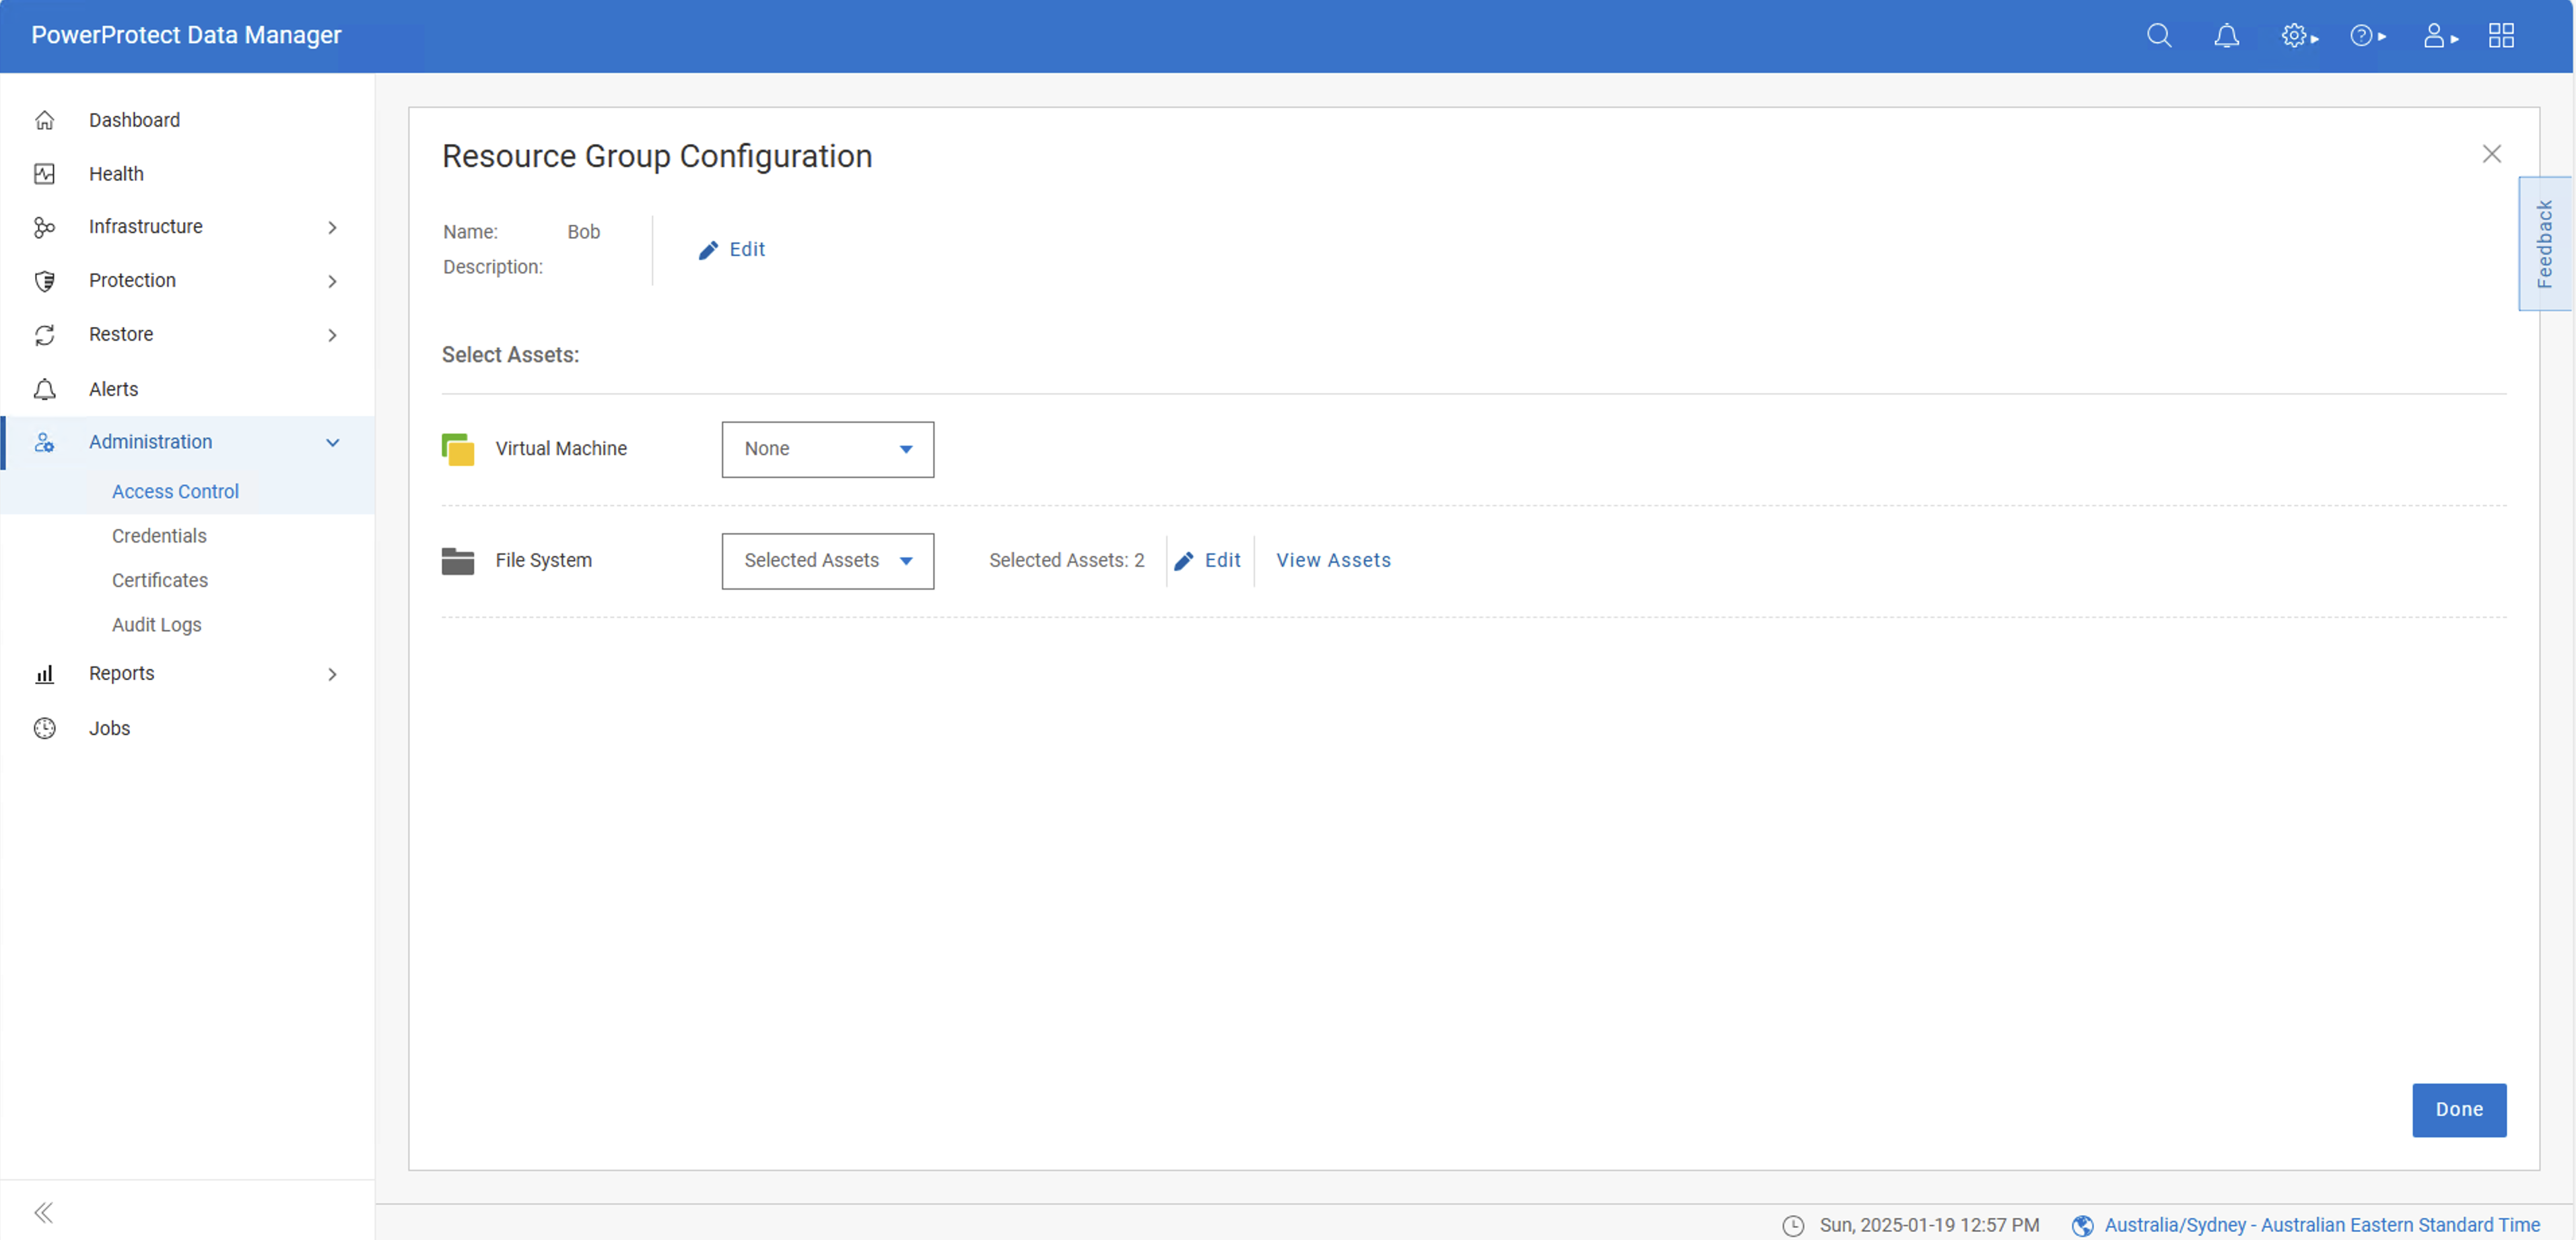
Let’s have a look at what’s defined in the Bob resource group by selecting it and clicking Edit. On my lab system I’ve got two asset types defined on the system: virtual machines and file systems. Two assets in the file system category have been assigned to the resource group, and no virtual machines:
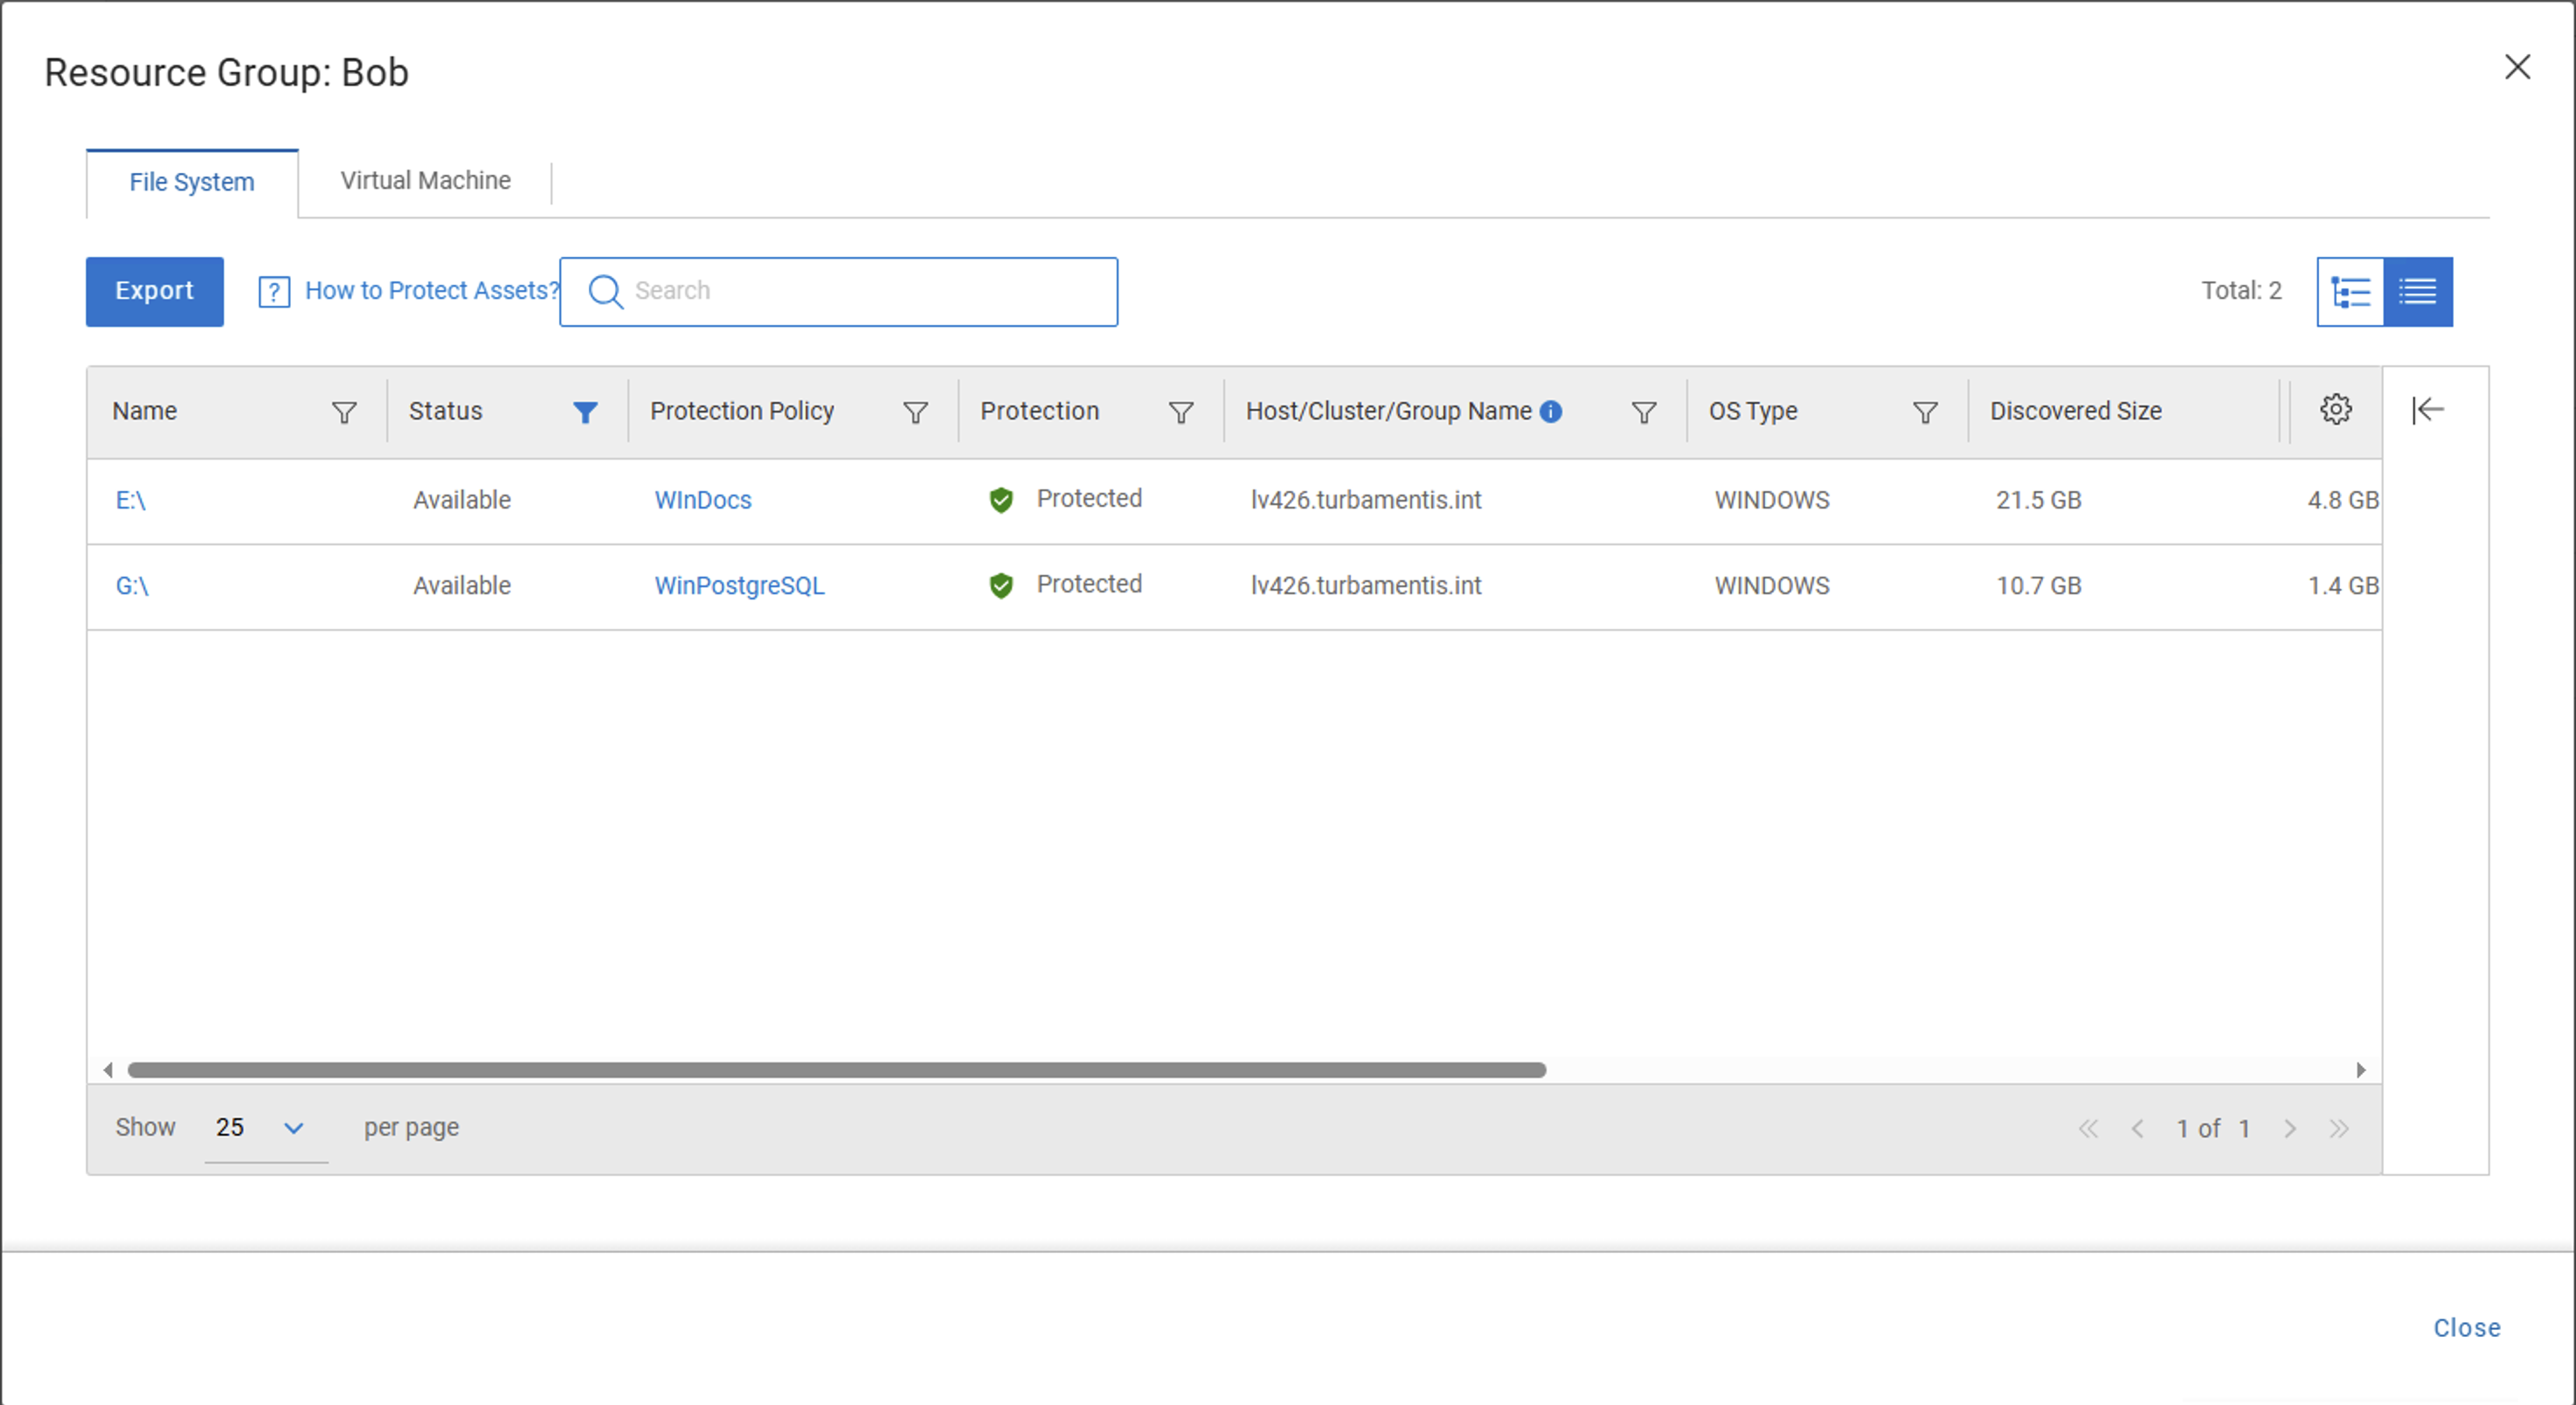
If I click View Assets, I can see which file system assets are assigned to the Bob resource group:
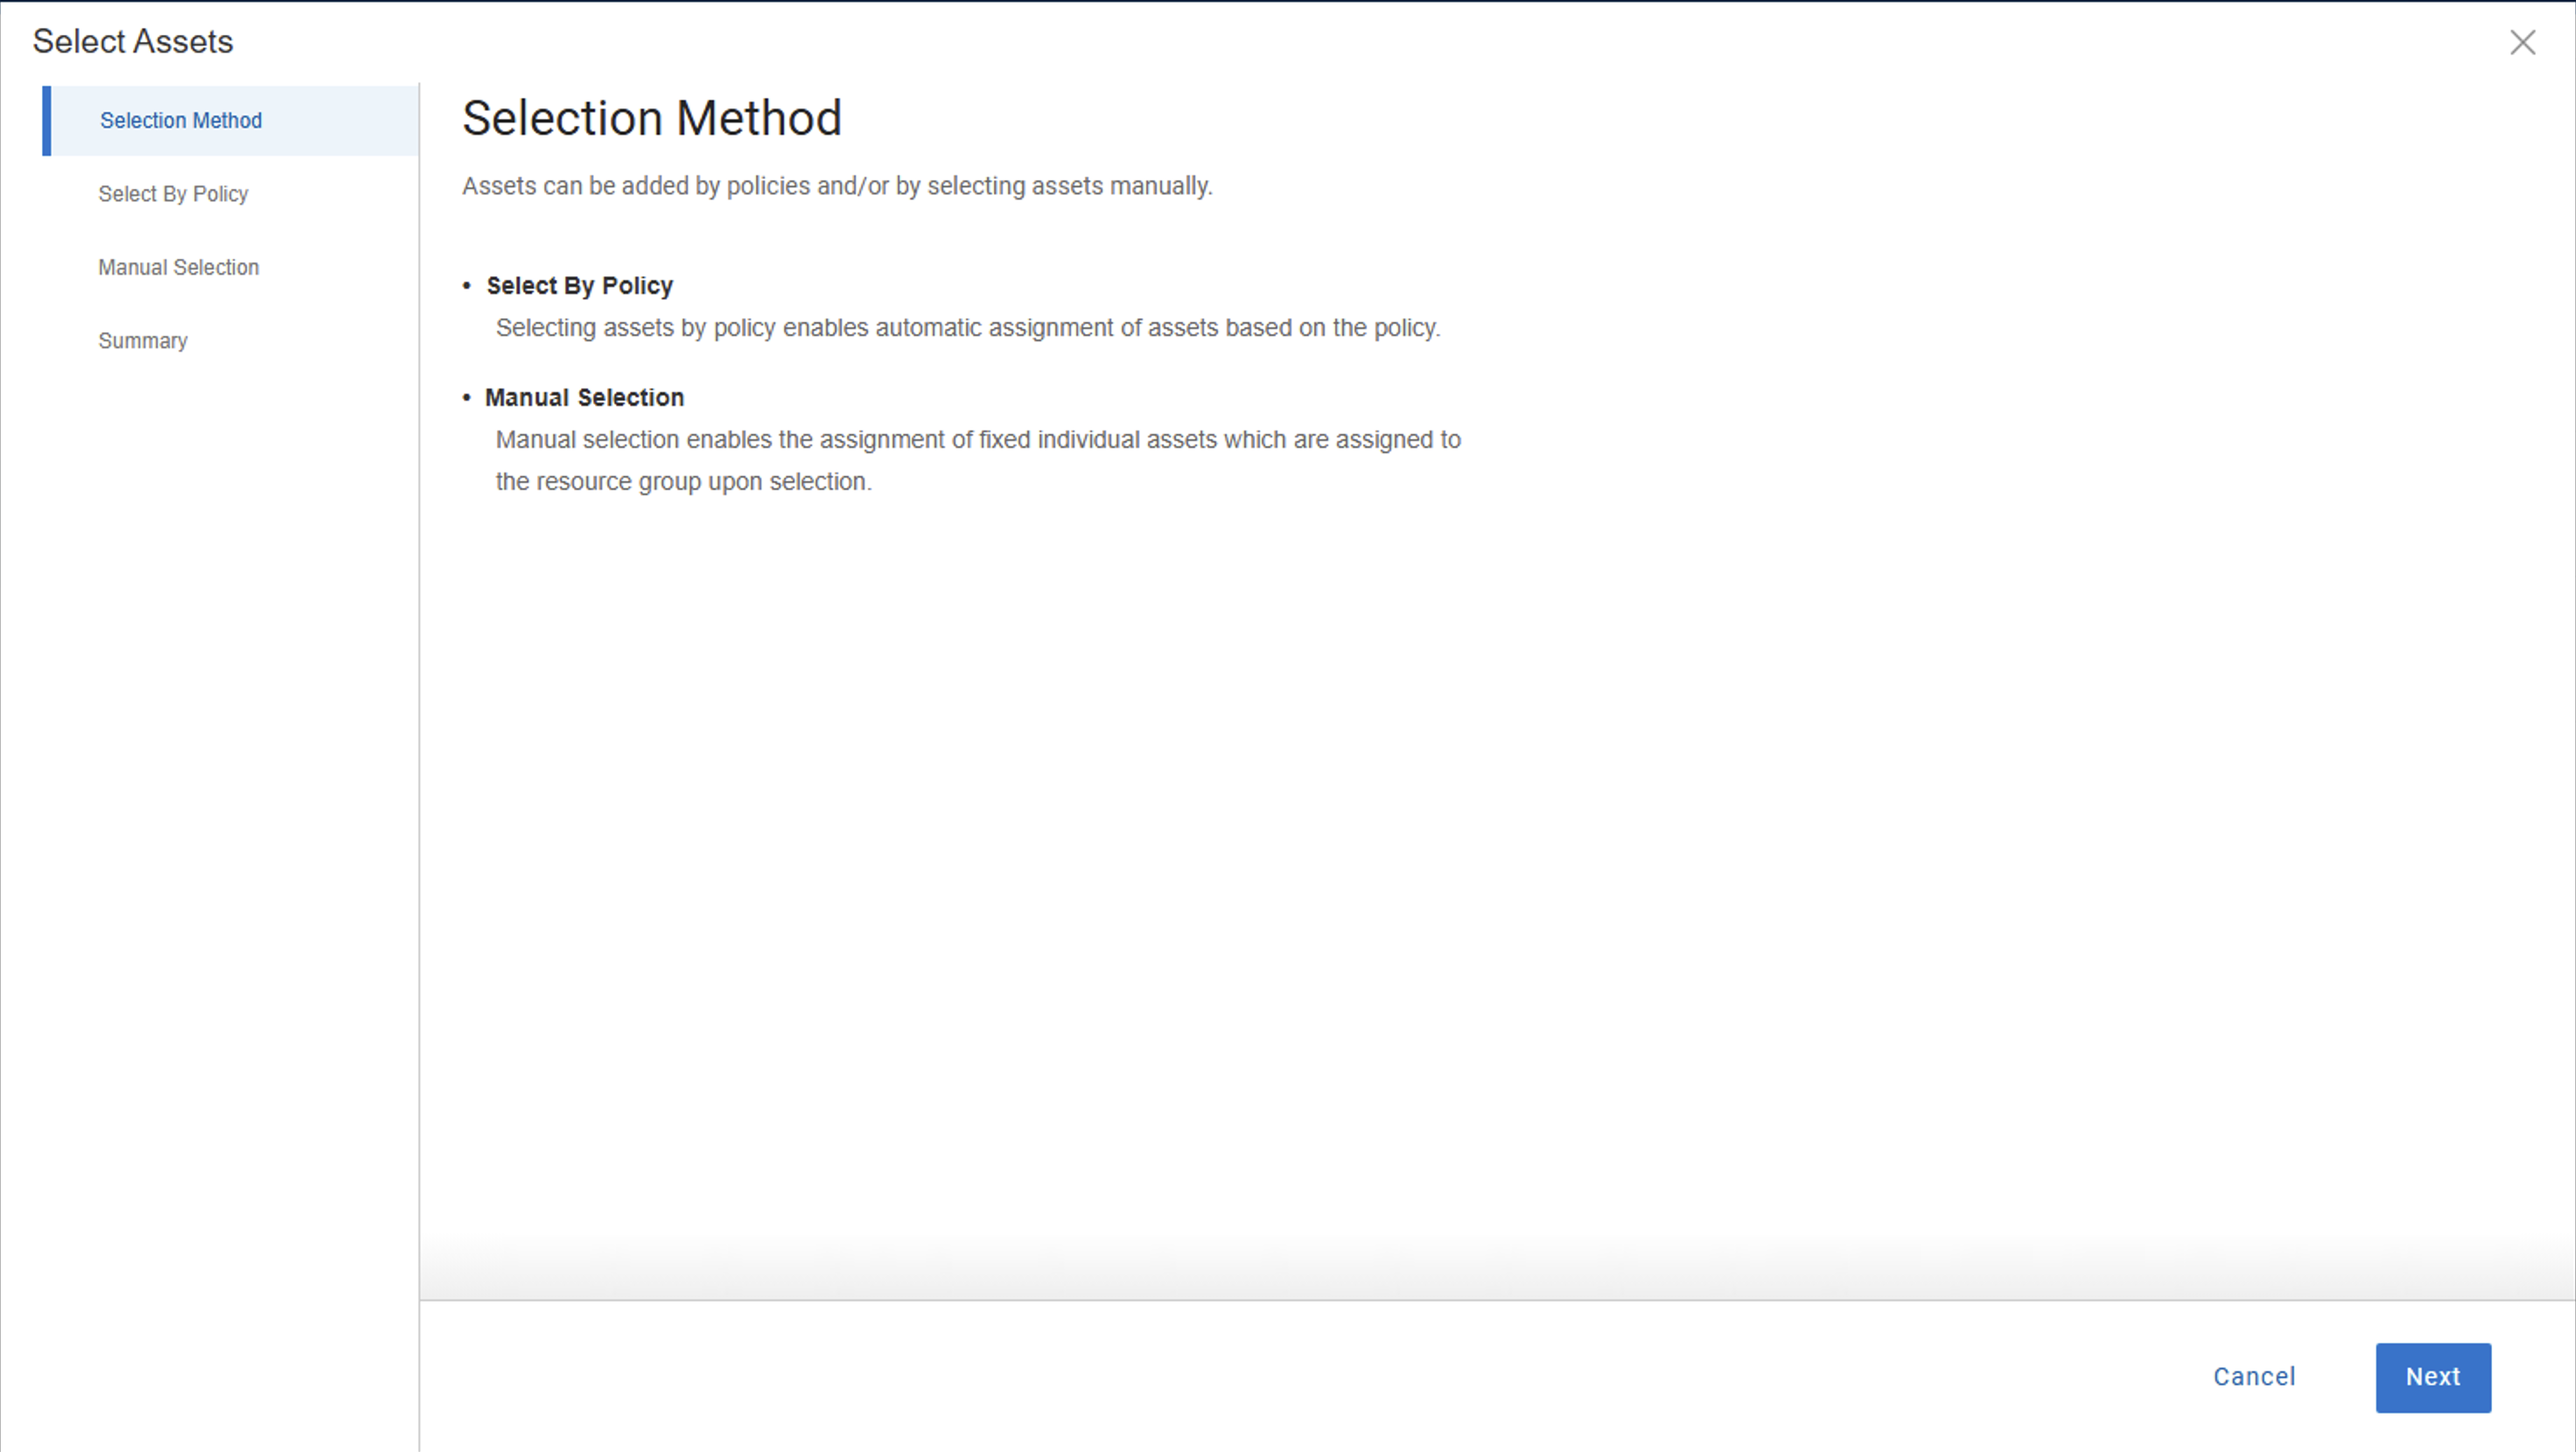
If you need to modify the assets (or you’re creating the resource group in the first place), you can use the Edit link to assign ownership. This uses a wizard and I’ll step through the wizard pages below to let you see how that works:
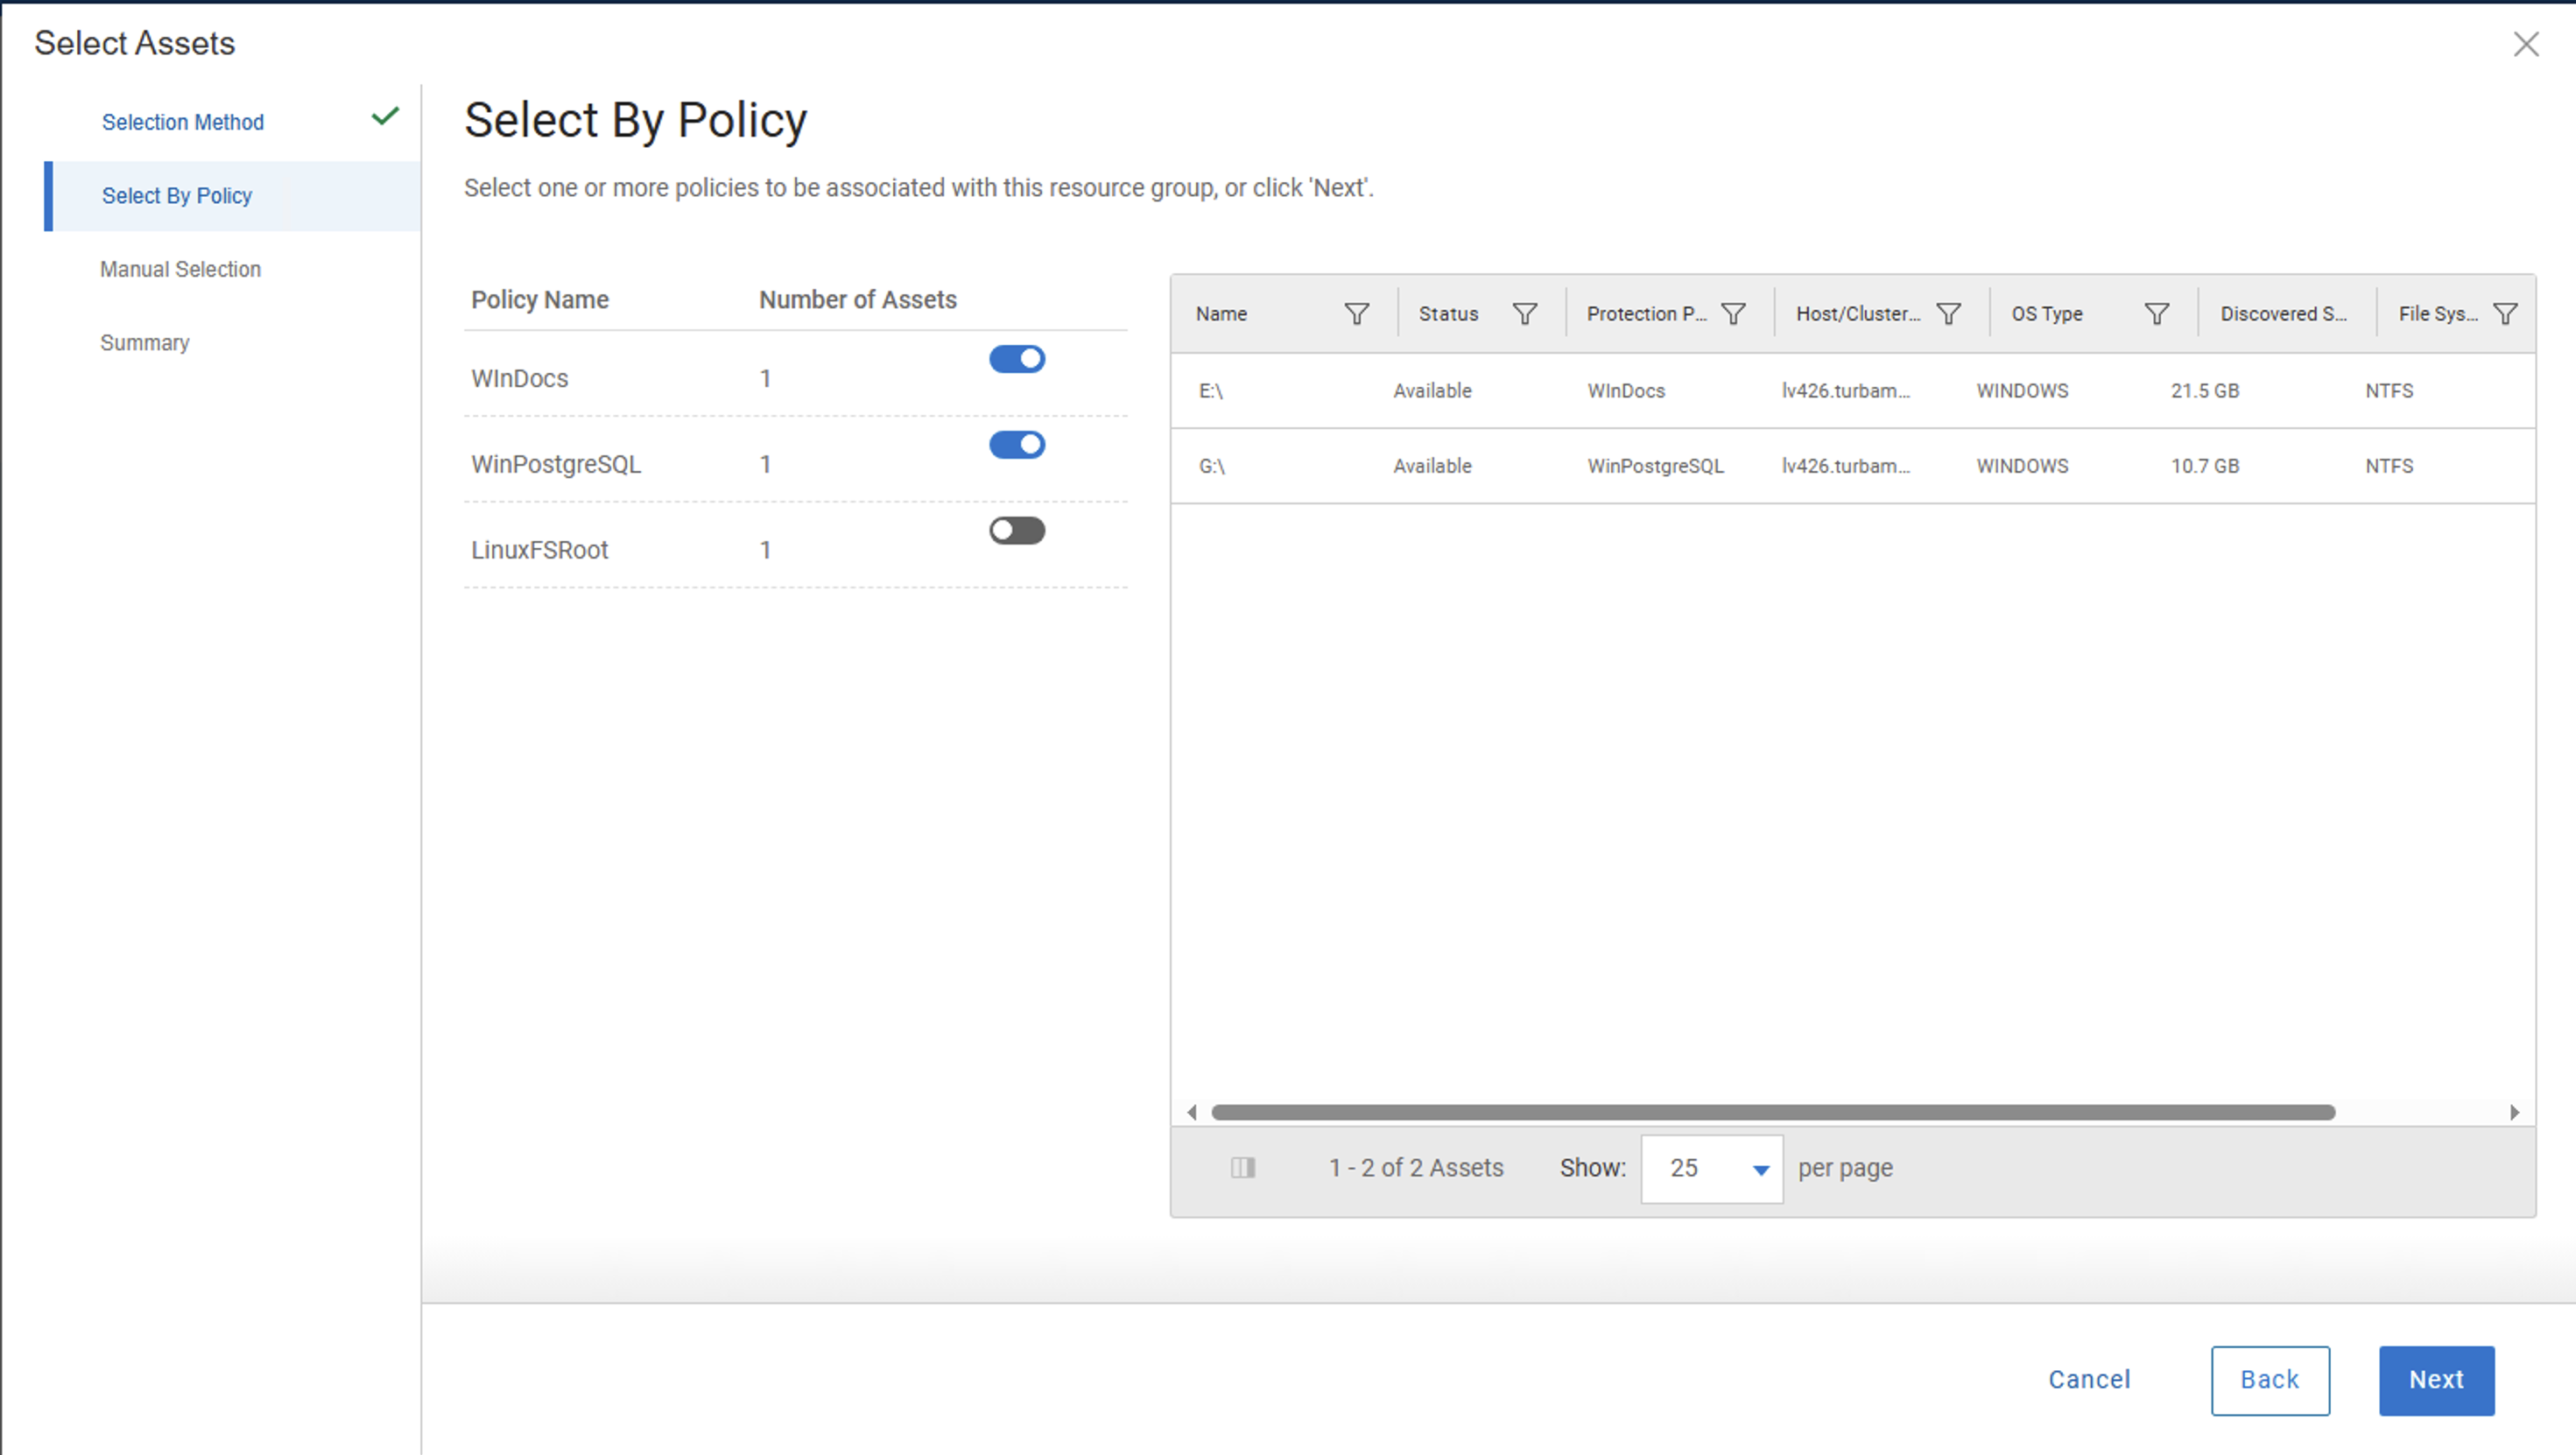
When you go to Select by Policy, you get a list of policies that are compatible with the workload selected. Since this is the file system workload I’m editing, I get to see file system policies. I can toggle on access for each policy, and I get an updated view of assets that will be included based on policy selection:
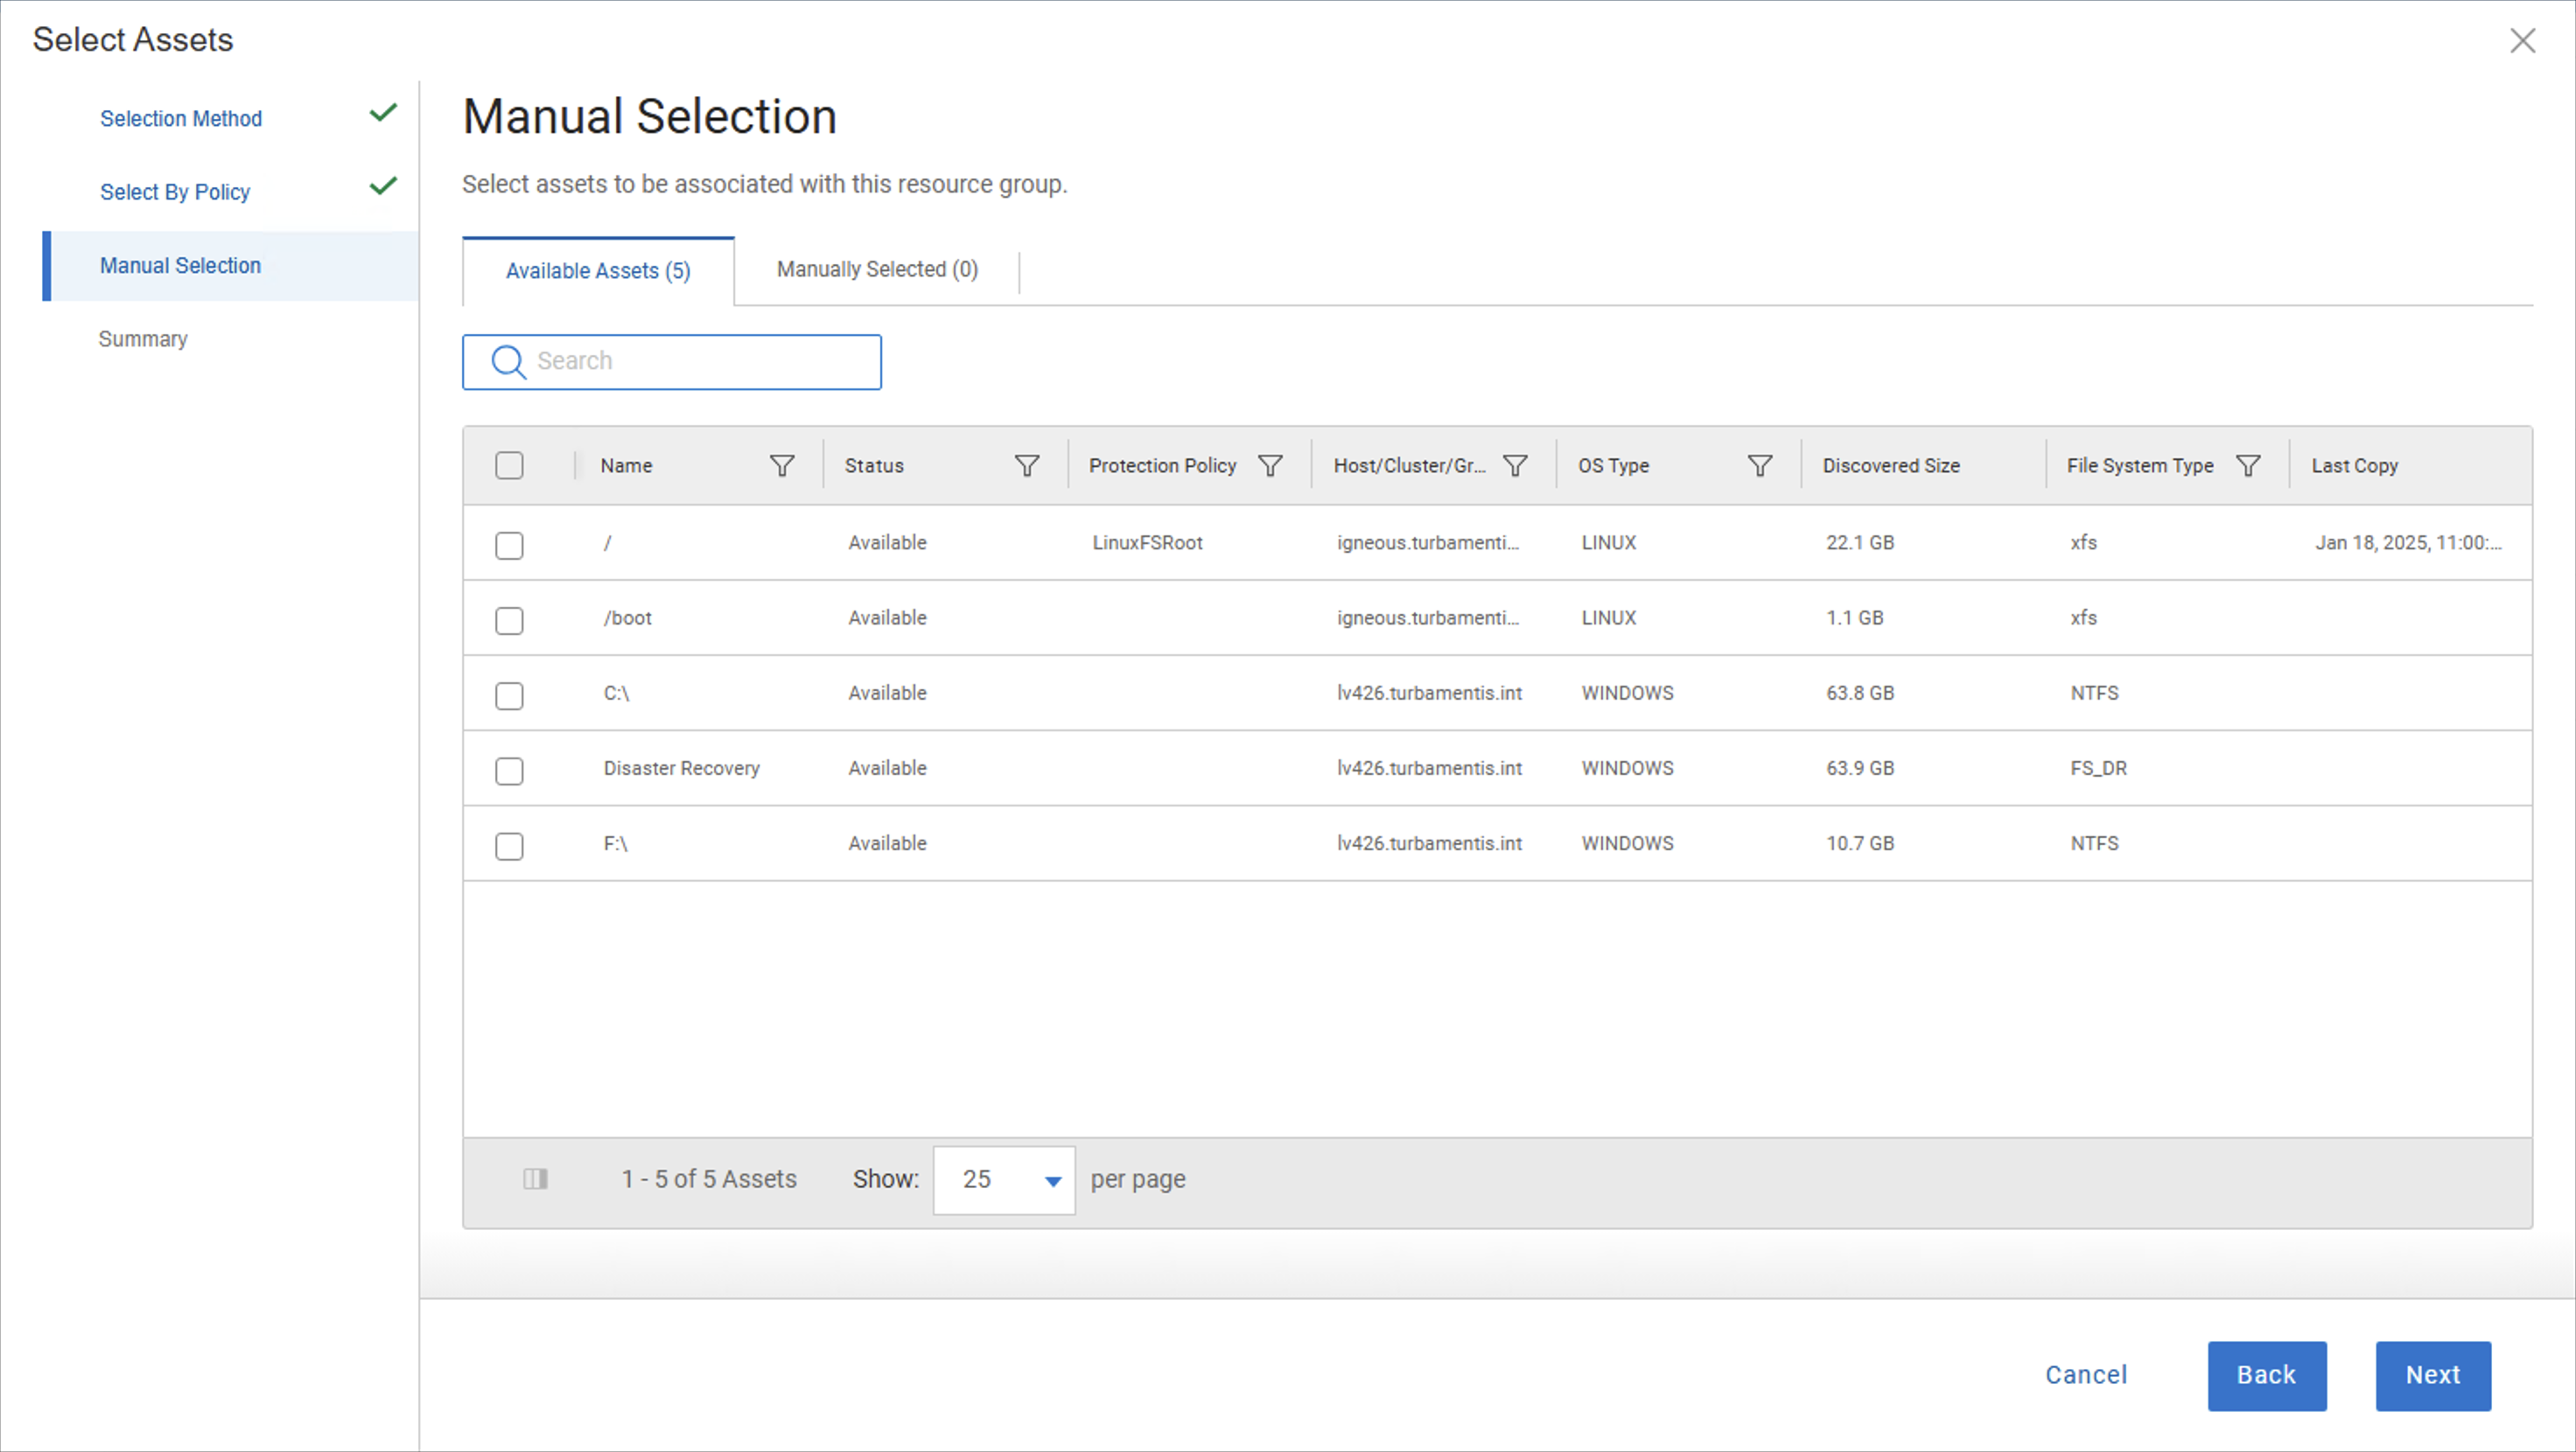
In addition to adding assets by policy, under Manual Selection I can optionally select additional assets to include. For me, the advantage of “Select by Policy” is that if your policy uses rules for asset inclusion, the resource group will be actively, automatically updated as matching assets for the rules are found. But, if you do need to manually add a few assets, this is where you can do it:
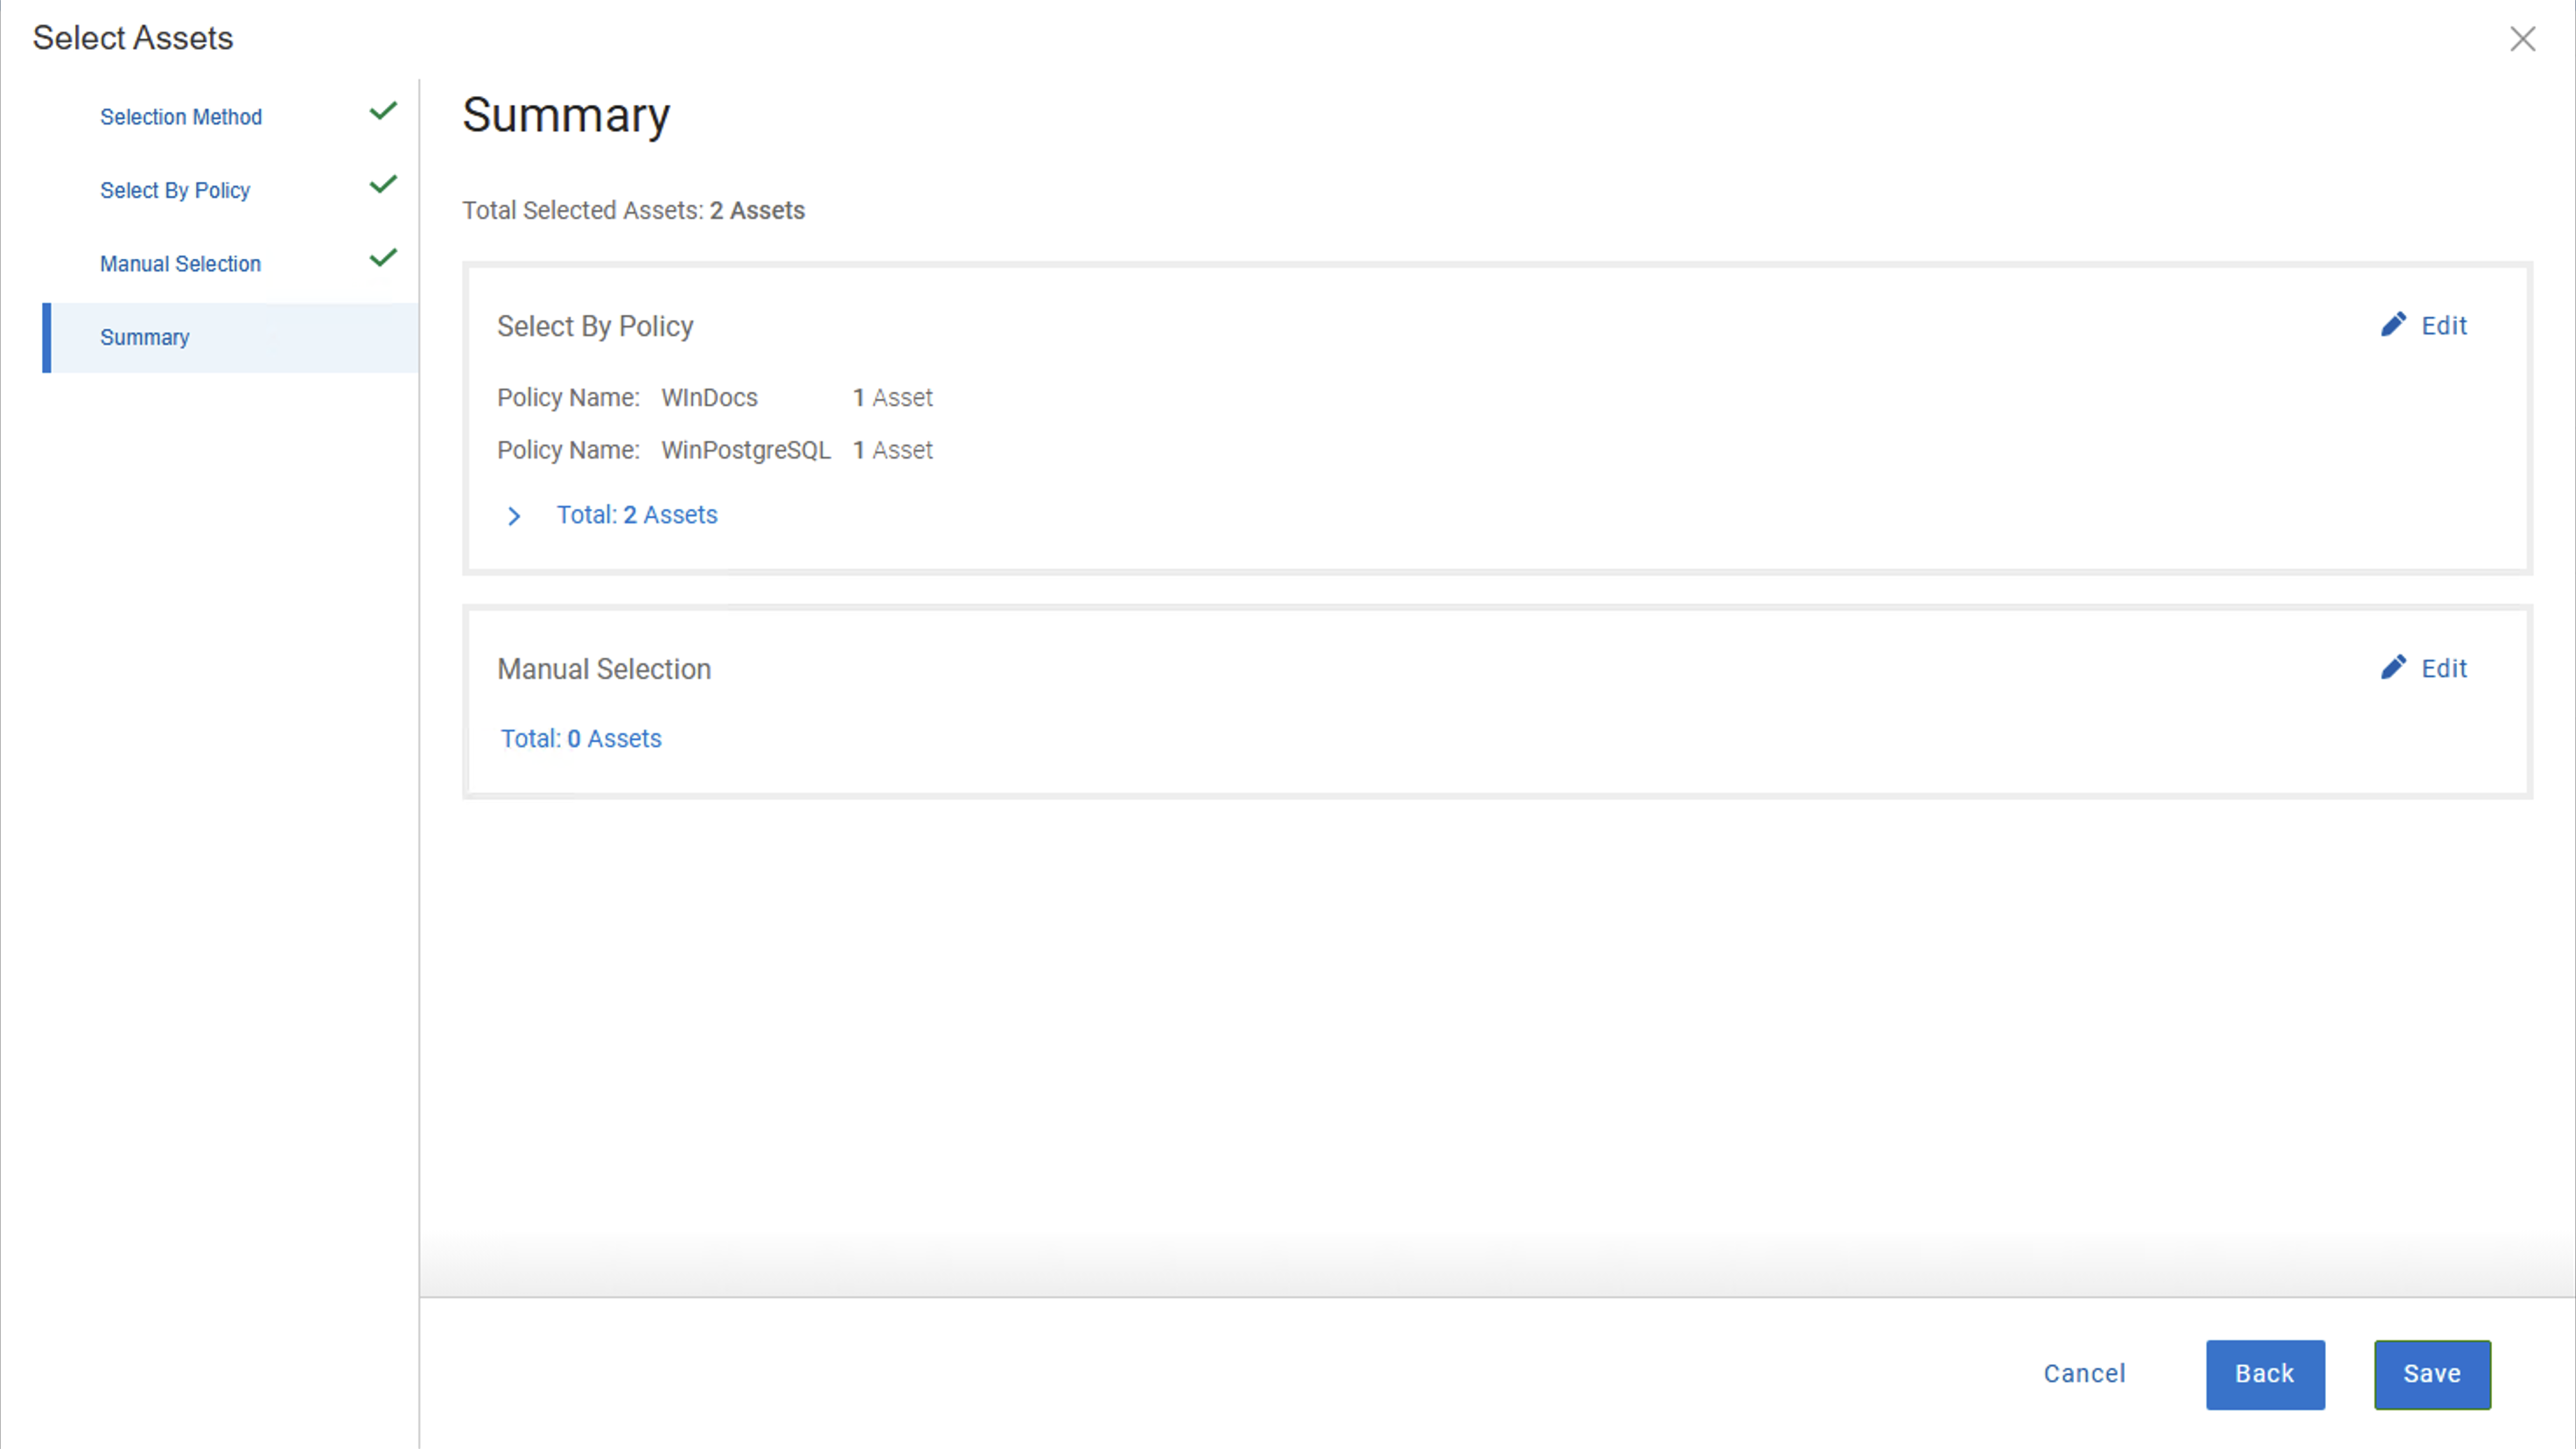
Finally, the summary tells me how many assets have been added through which method and optionally lets me see them:
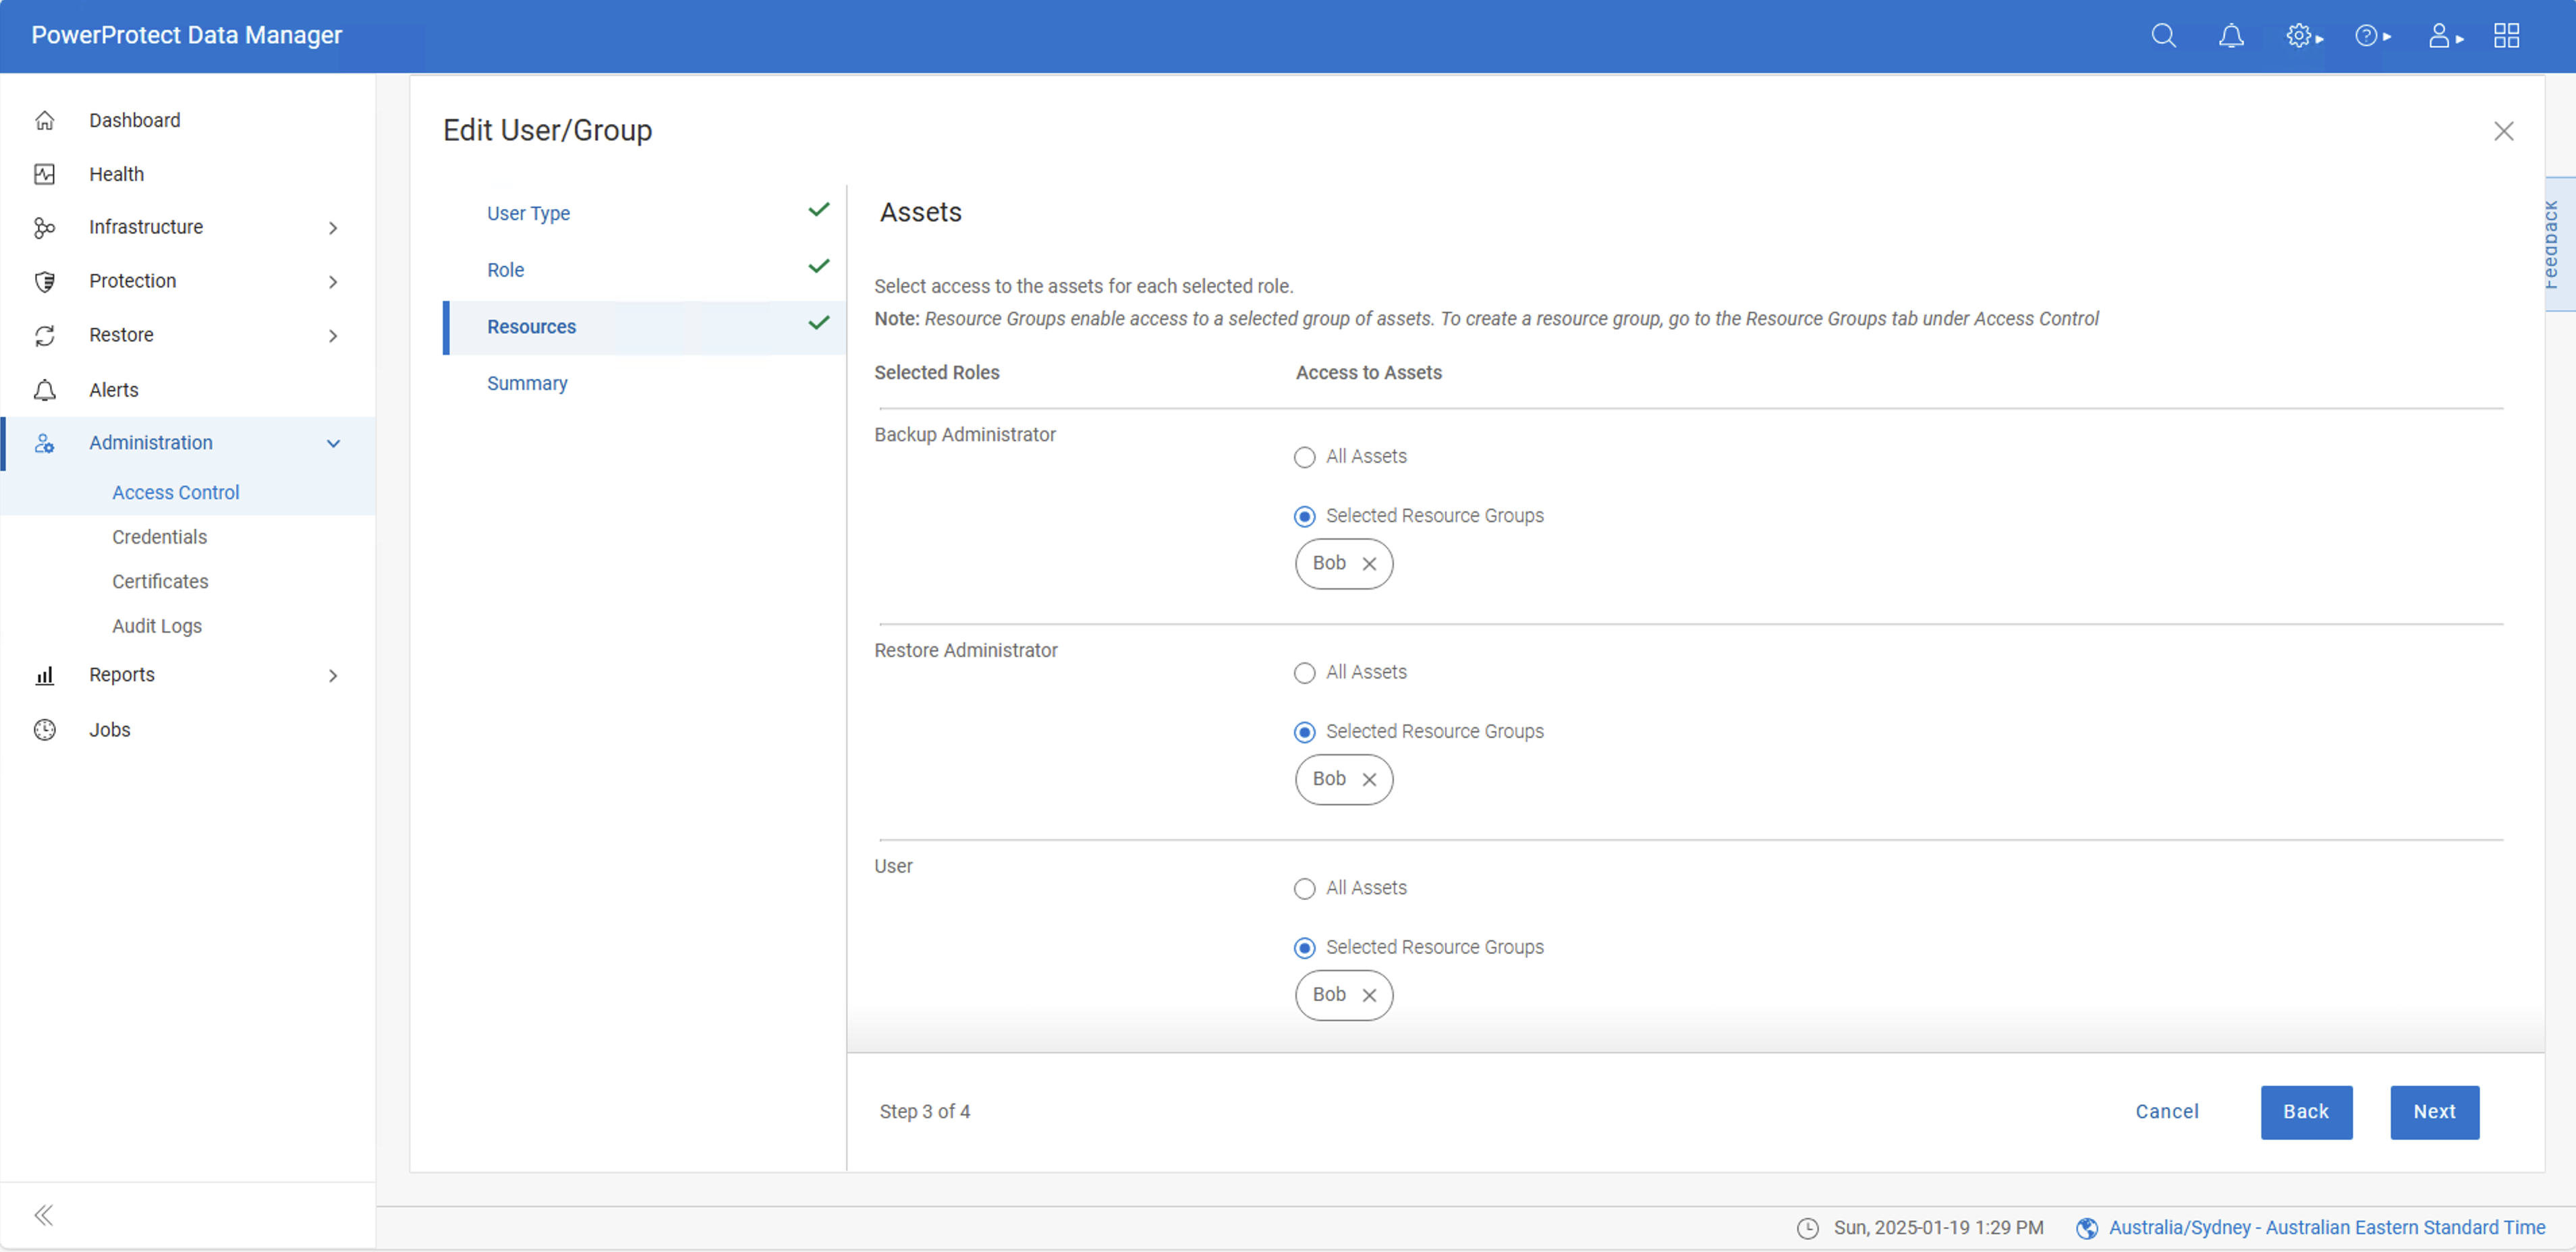
Now, if I jump back across to the User/Groups tab and edit the bob user, I can see that for each of the roles bob has been assigned (Backup Administrator, Restore Administrator, and User), bob has been assigned the Bob resource group:
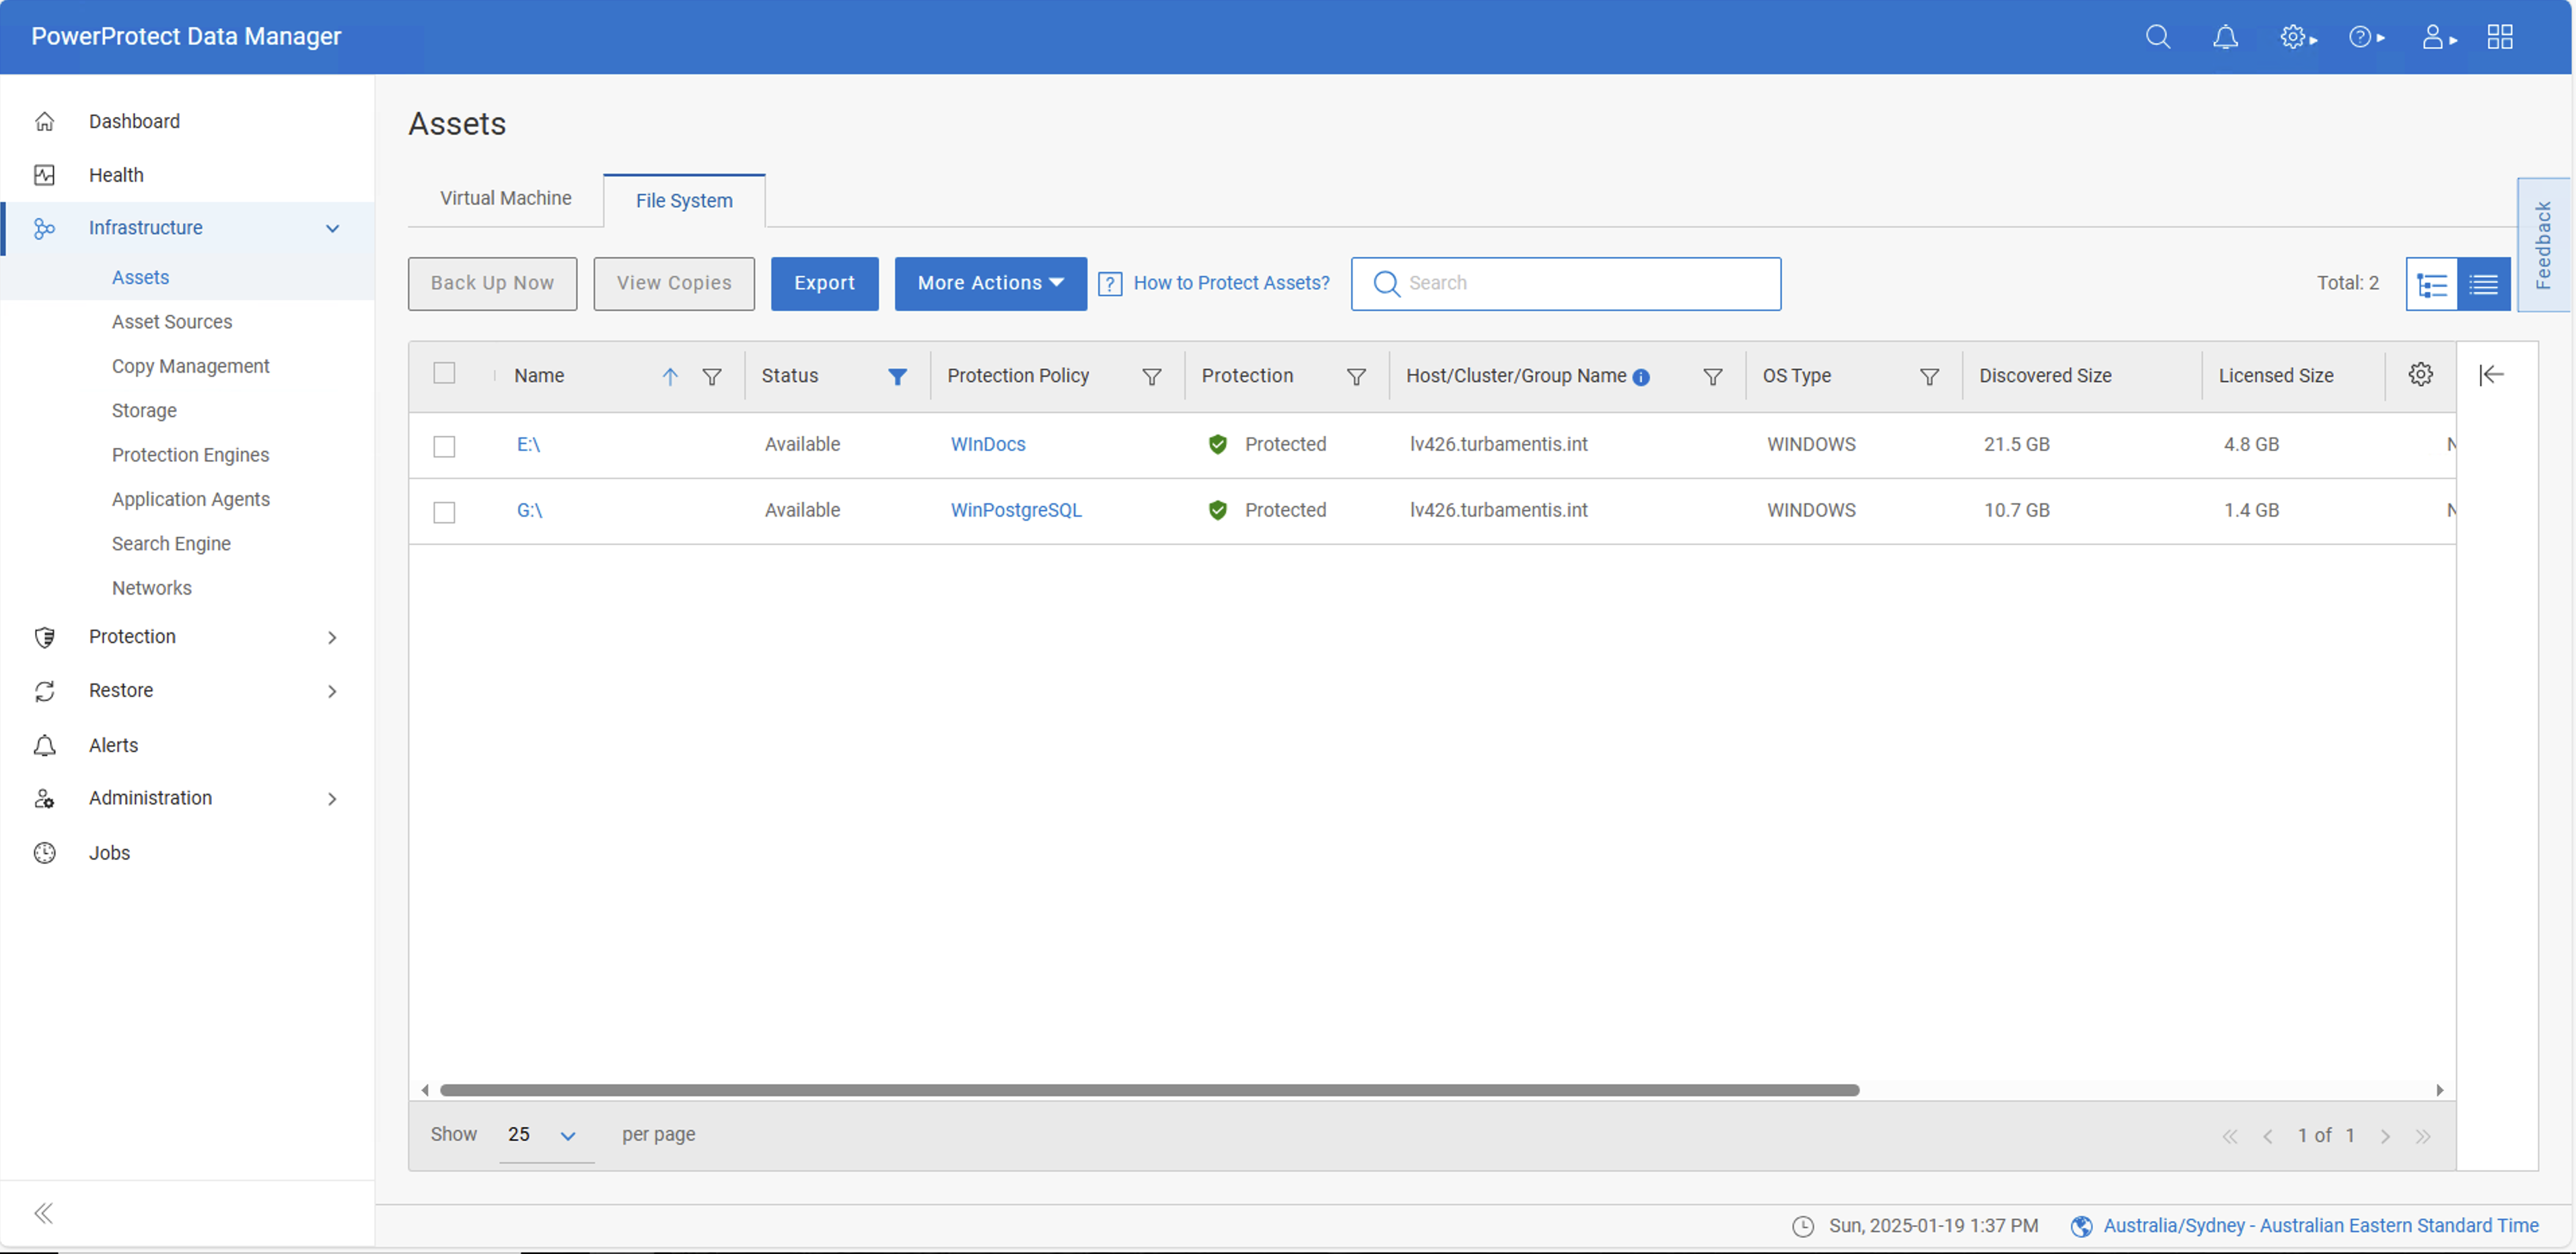
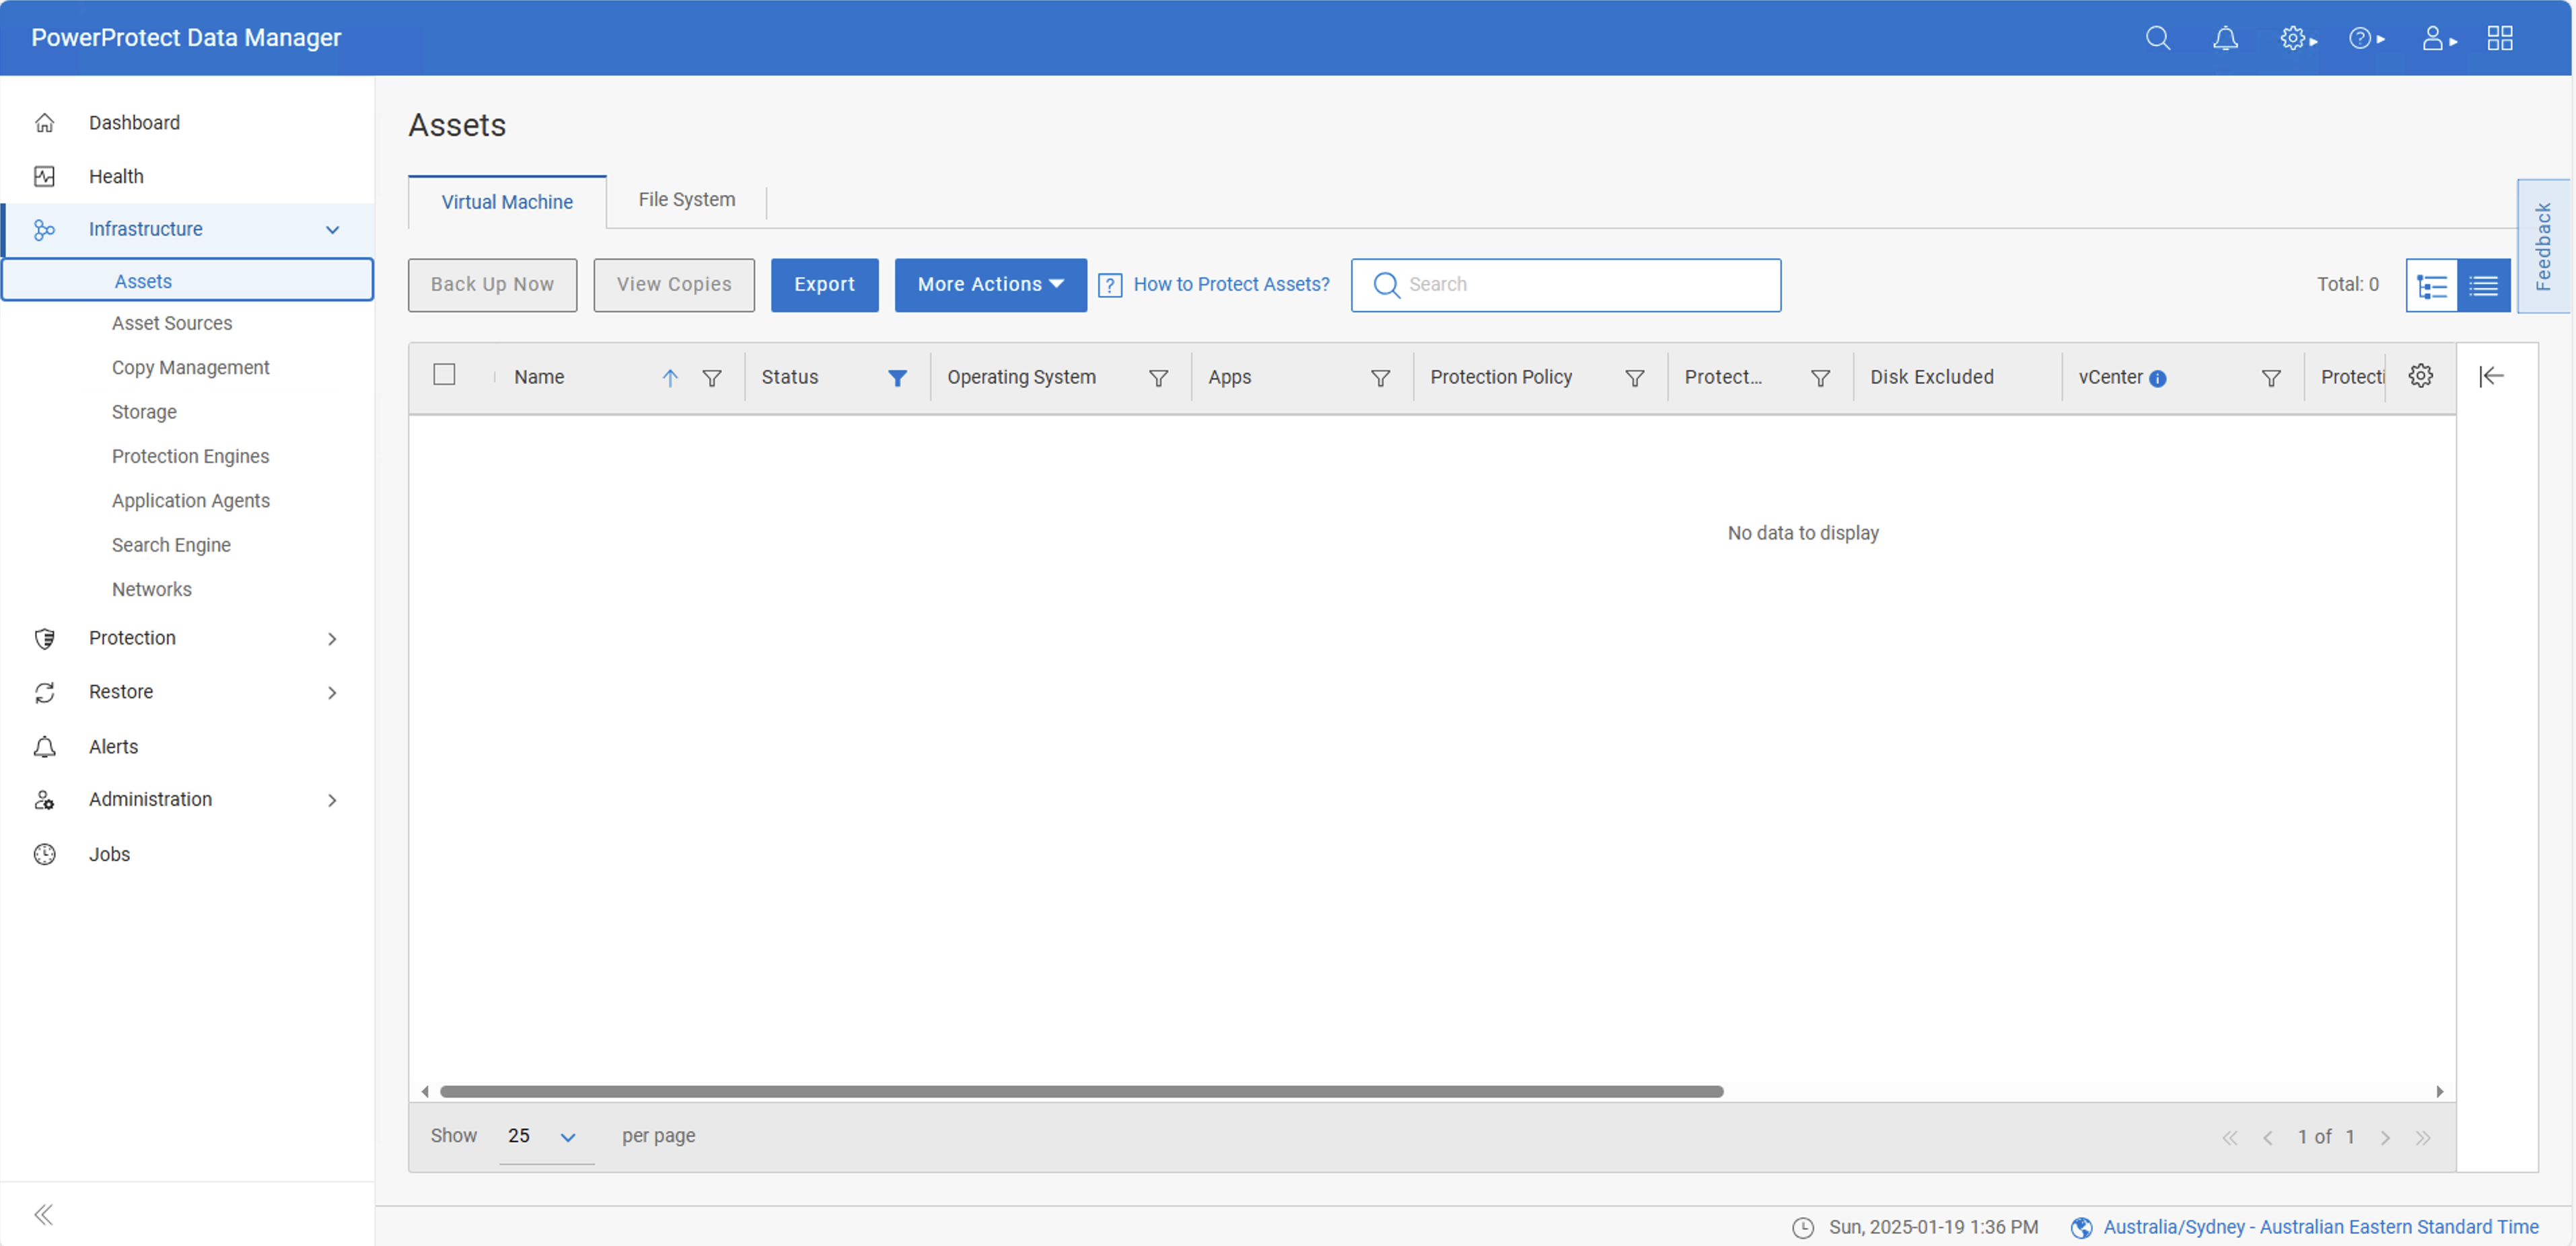
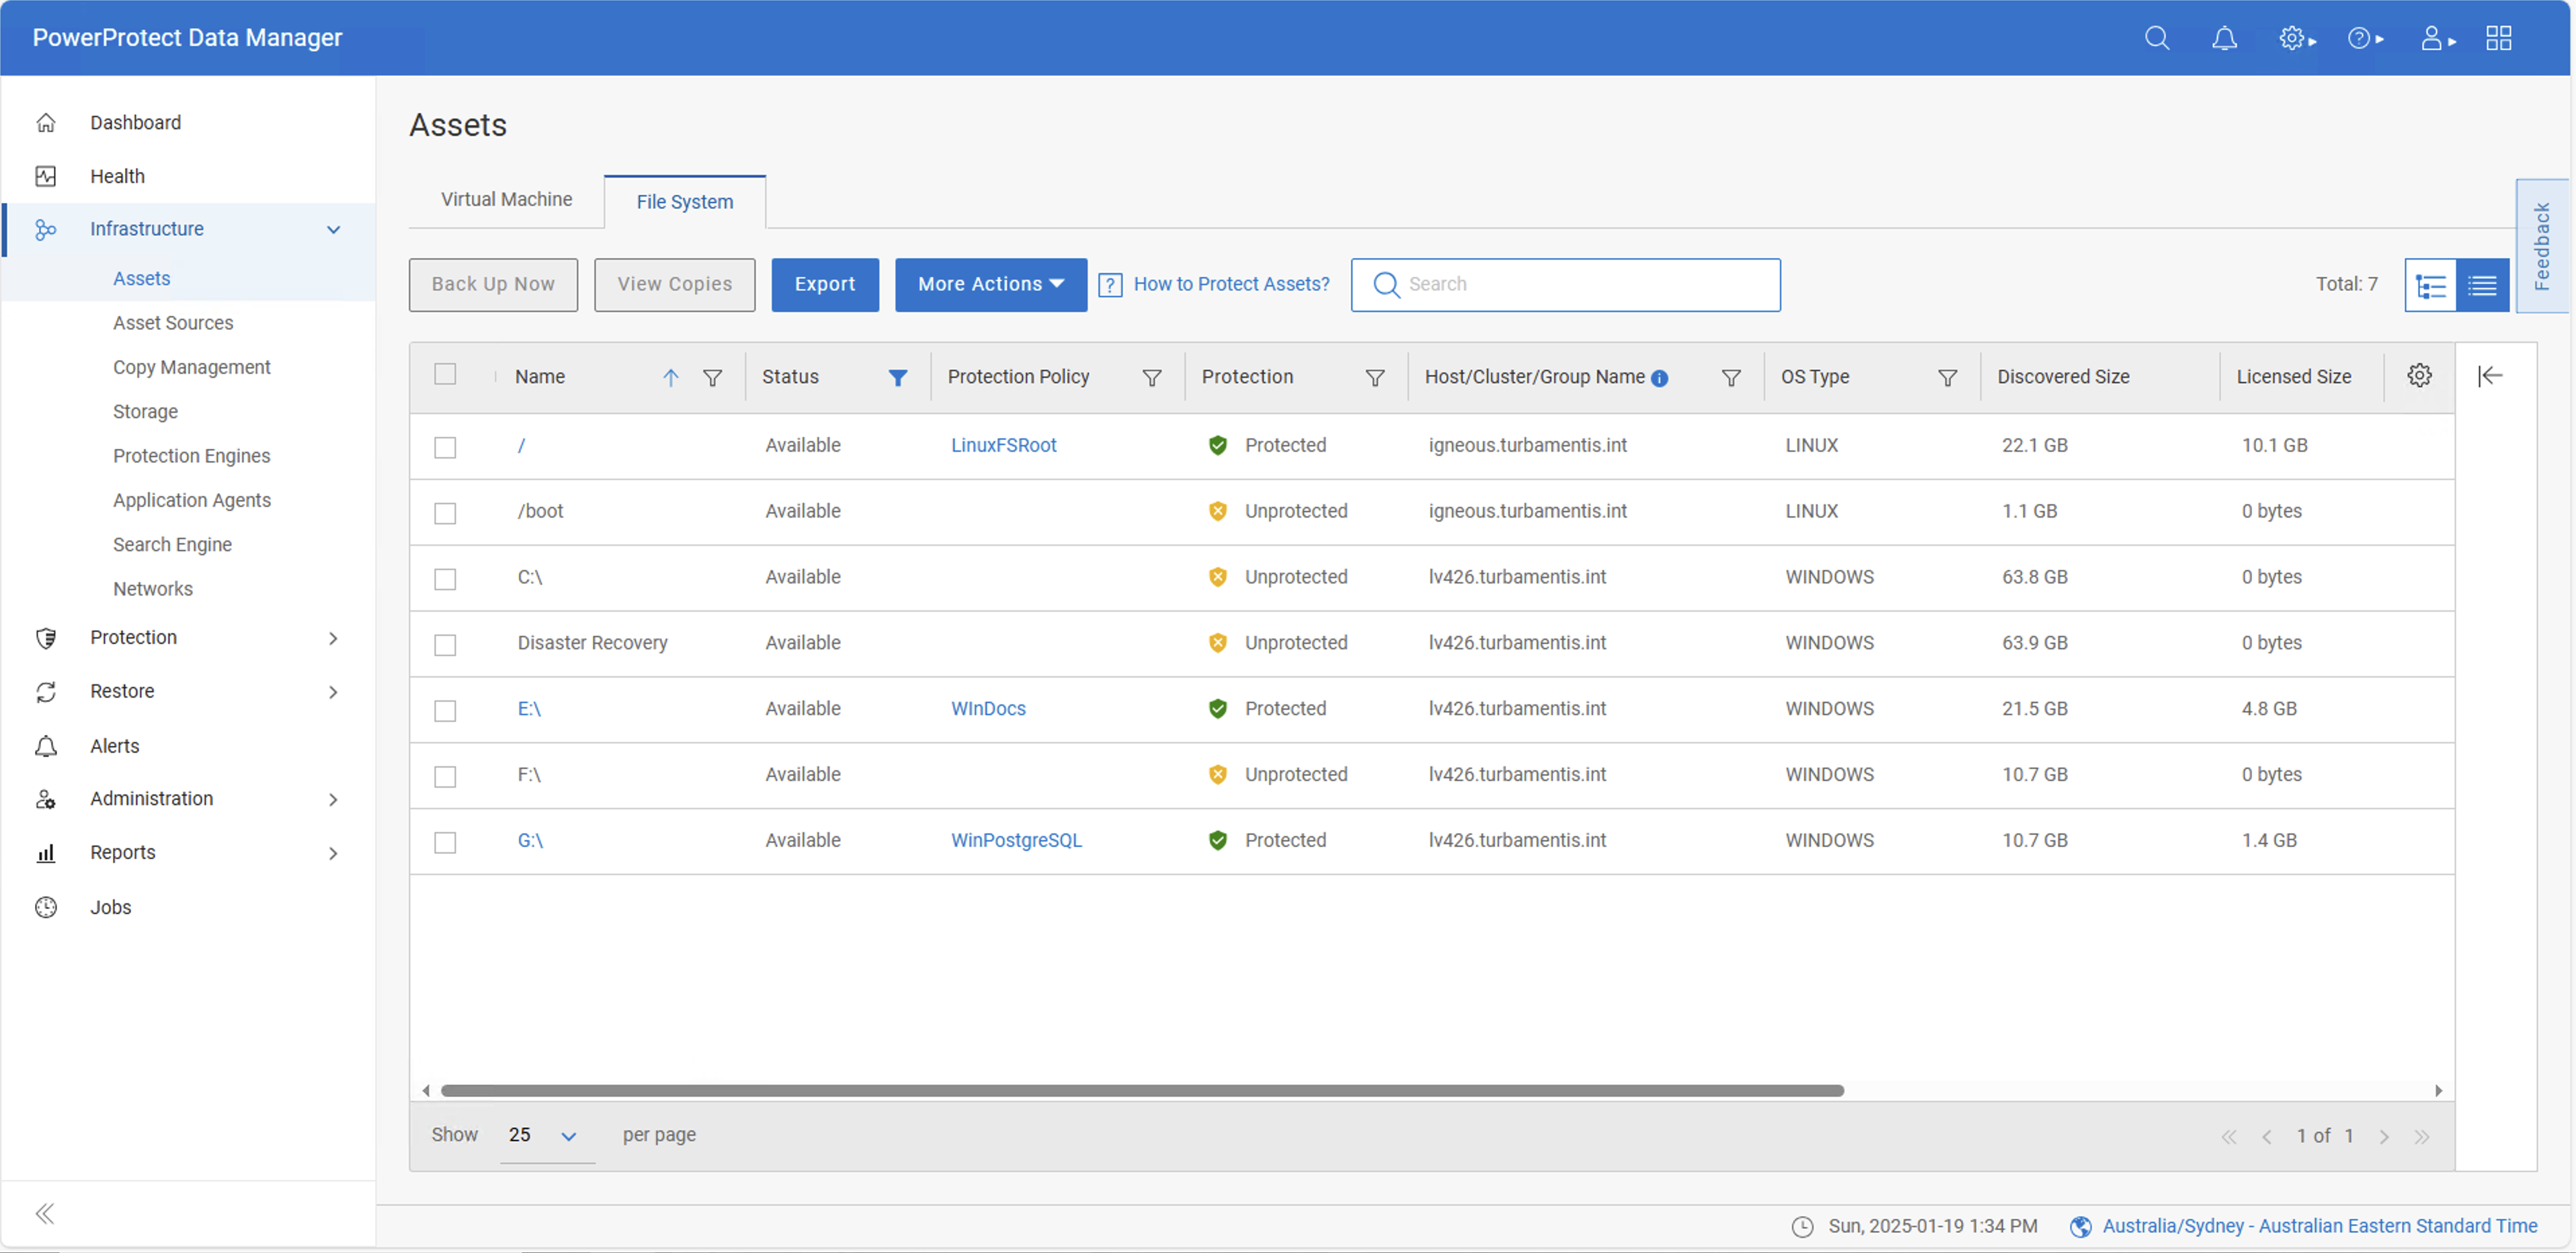
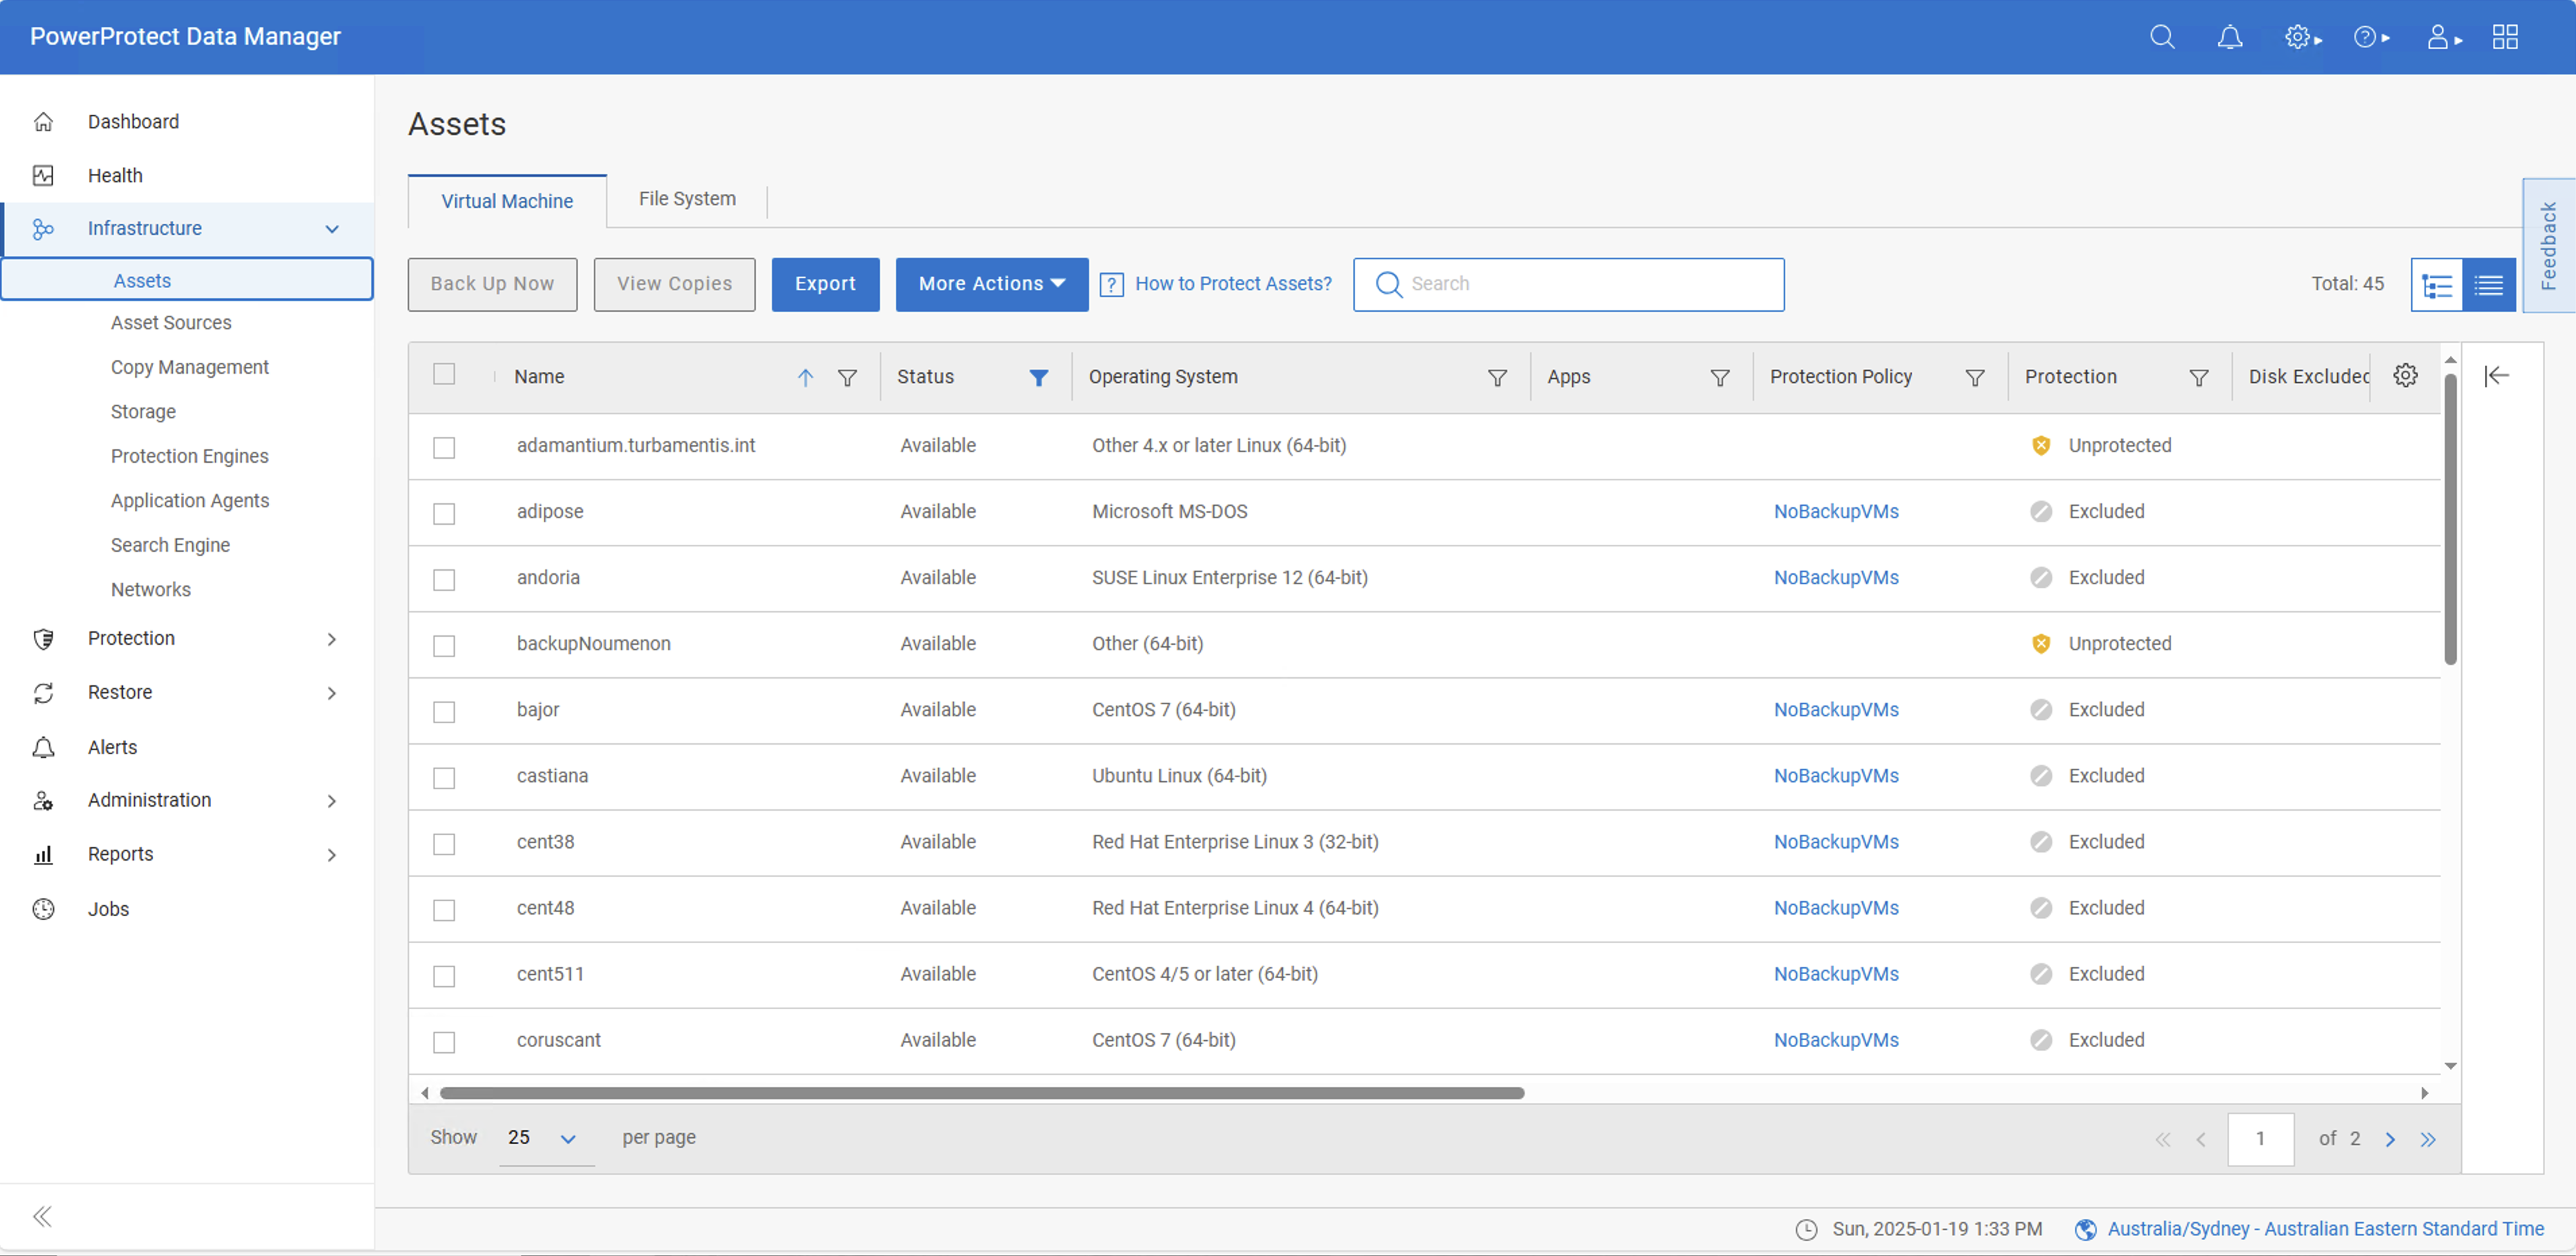
Now, how does this all work? Well, the net result of connecting the bob user to the Bob resource group is simple: bob will only get to see and interact with the assets that have been assigned. Compare for instance, the admin user view for Virtual Machines and File System assets:
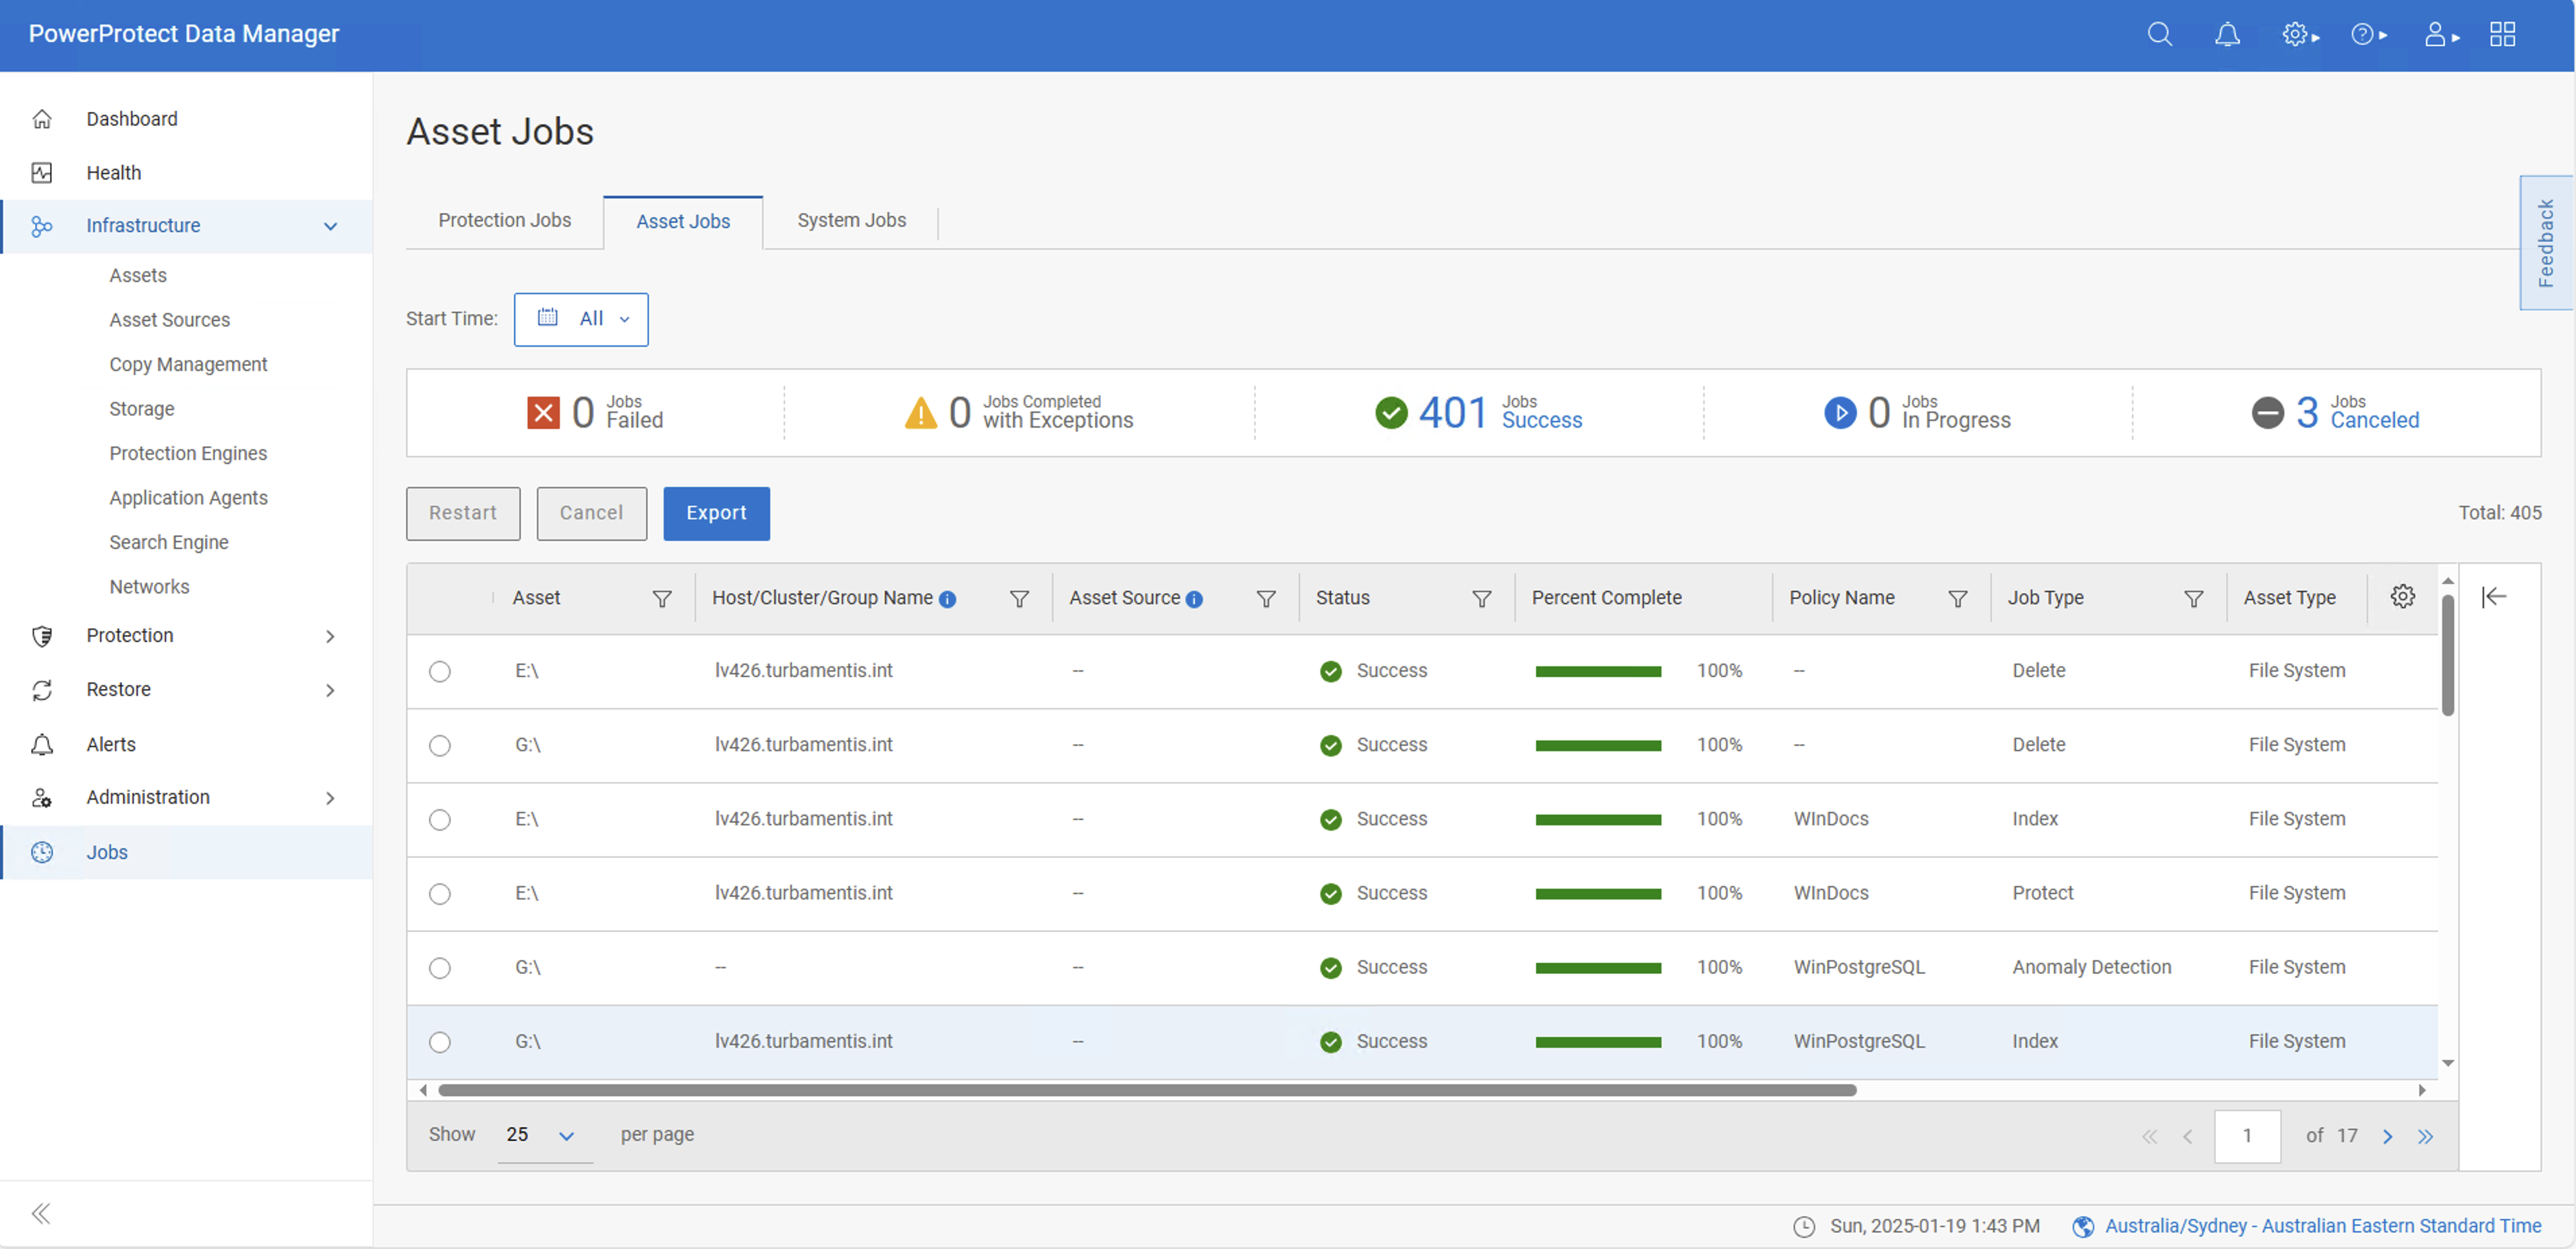
This visibility extends across Data Manager – for instance, if the bob user goes to Jobs > Asset Jobs, they only see asset jobs for the two assets they have visibility of:
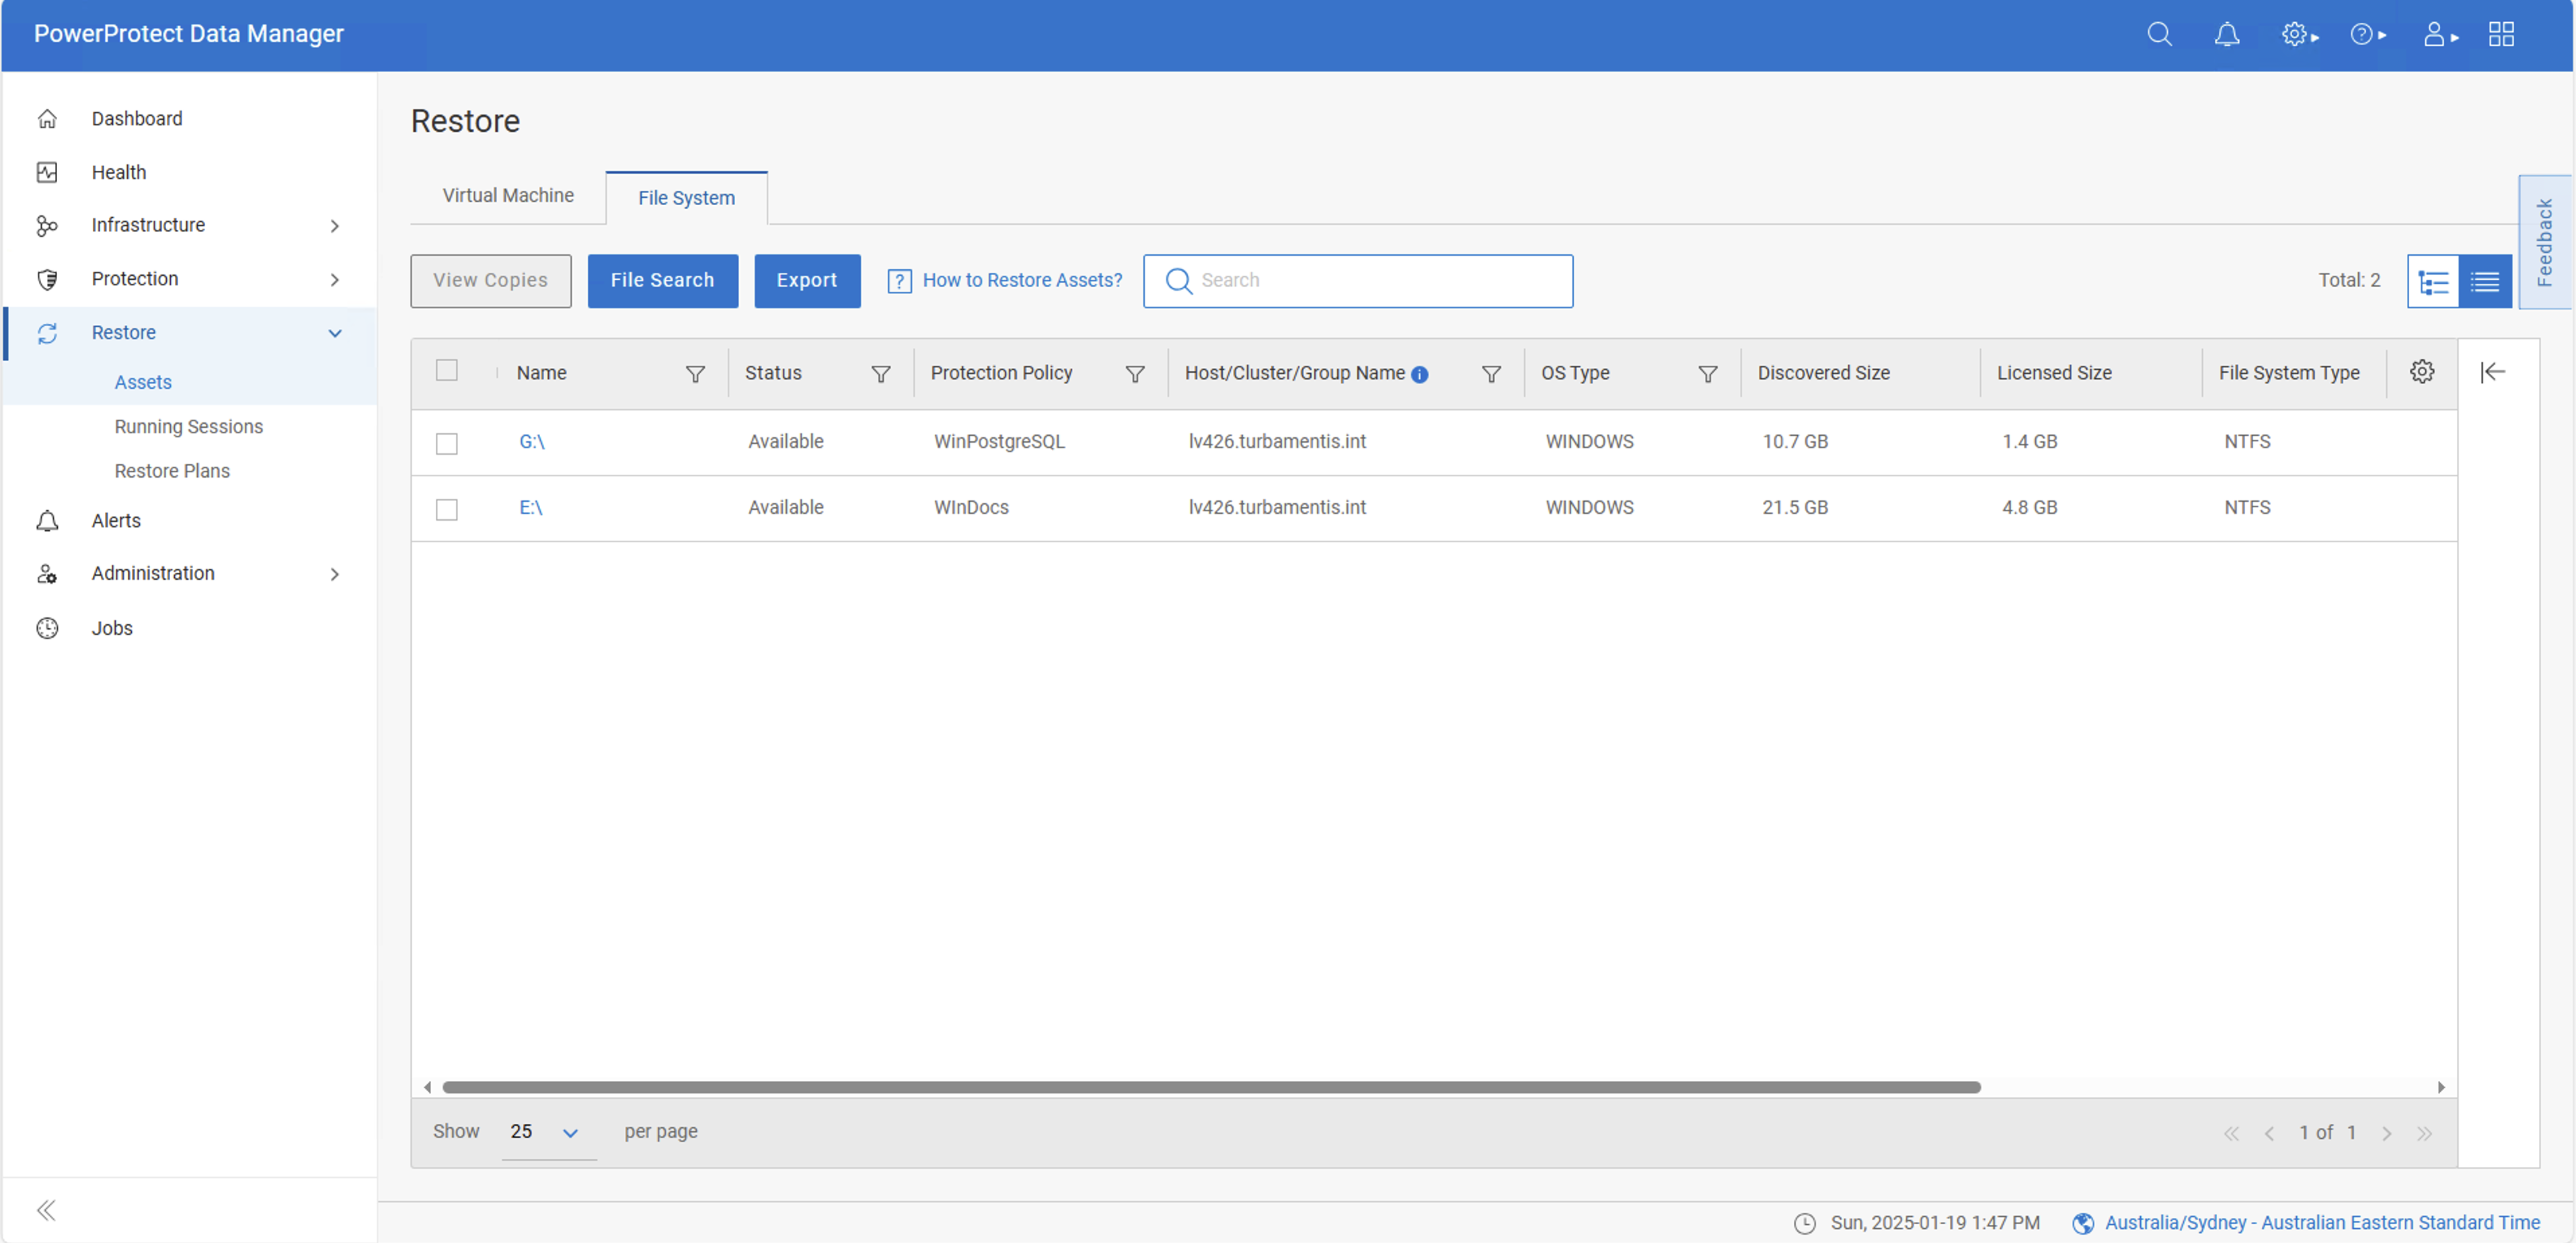
And finally, not to belabour the point, since bob’s Restore Administrator role is tied to only those assets linked by the Bob resource group, bob can only run restores for those two assets:
That’s a quick overview of Data Manager’s Resource Group function. It’s powerful, flexible and easy to setup, letting you limit user access to specific assets on the system – great for giving teams in your organisation control over and access to assets they need to protect and restore, while isolating visibility and access to other assets.

