
Artist credit for post image above: Andrey Suslov via Bigstock.Com.
Introduction to Pre-Backup Commands
In complex environments, pre- and post-backup commands can really help you out.
Over the years, I’ve used them for a variety of things, including:
- Pre-command examples:
- Generating a database dump when there’s no agent
- Storing data from an appliance (e.g., executing remote commands against a switch to record its configuration, and write it to a file on the local client for backup)
- Post-command examples:
- Automated post-backup reboots for in special scenarios
- Pre- and post-command examples:
- Shutting down a database for a cold backup, then restarting it after the backup is complete.
Avamar Pre- and Post-Backup Commands
Within Avamar, you define pre- and/or post-backup commands within the dataset, which is the configuration of what will be protected. Datasets are attached to backup policies, and you can either:
- Create a new dataset when you’re creating a policy,
- Attach an existing dataset when you’re creating a policy, or
- Edit a previously created dataset.
Example – Configuring Avamar Pre-Backup Commands
I’m going to walk through an example of configuring a new Avamar agent-based client (‘totesrhelly’), which will have a pre-backup command that runs a series of commands and saves them to a directory on the host.
I’ve not captured the process of downloading and installing the Avamar client software, or registering the agent – we pickup the process with a new policy wizard run in the Avamar web-based UI:
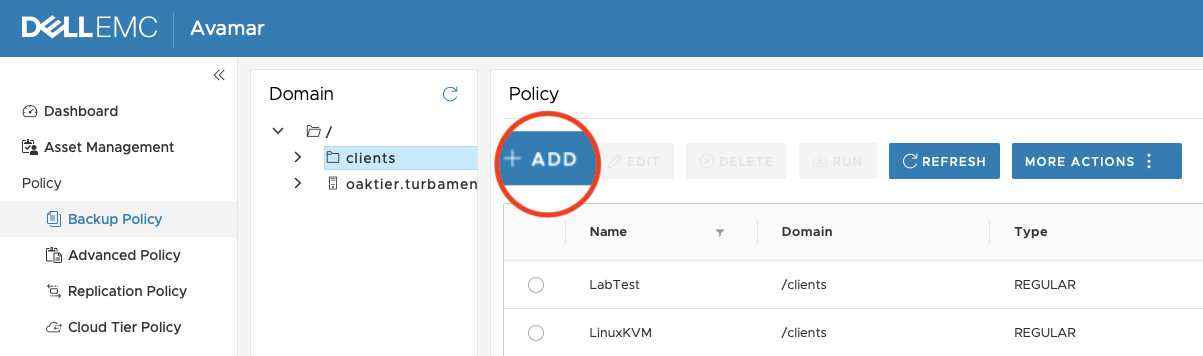
To start the wizard, go into the desired Avamar domain under Policy > Backup Policy, and click the +Add button.
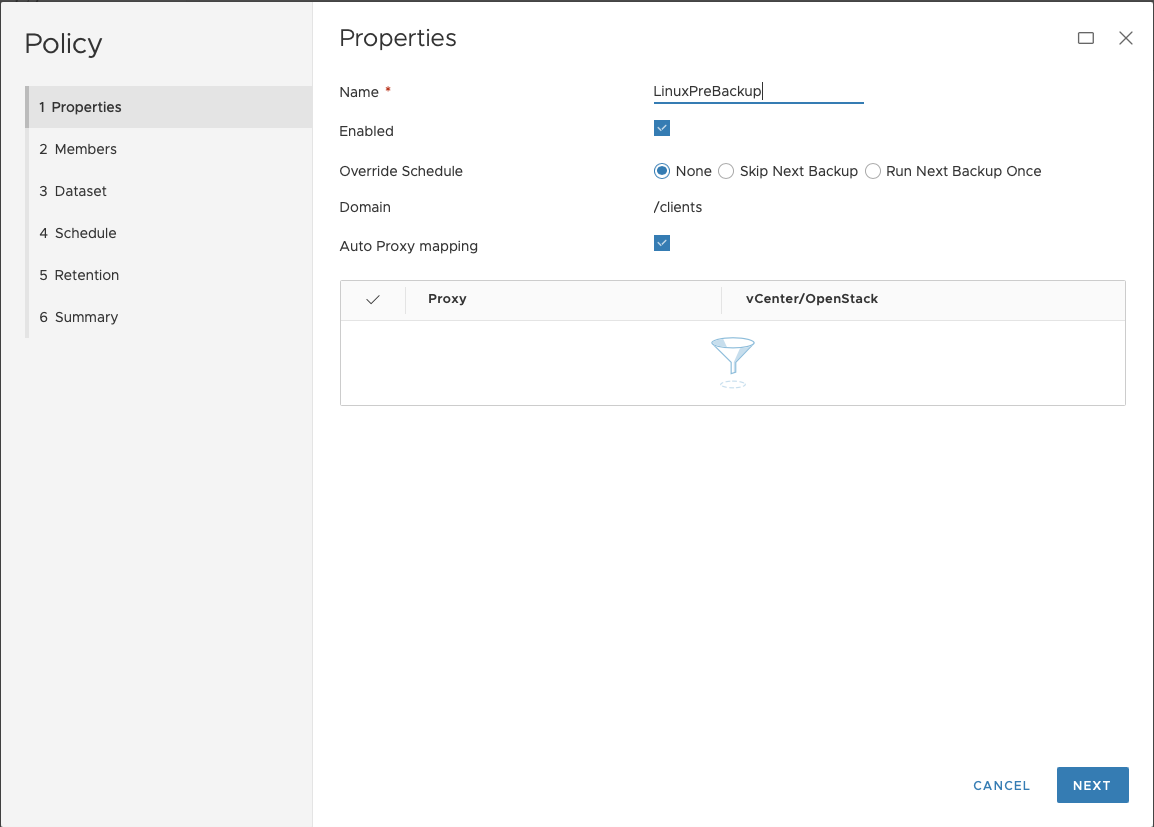
Since this is just a lab setup, I entered a policy name of “LinuxPreBackup”, and left the other settings alone before clicking Next.
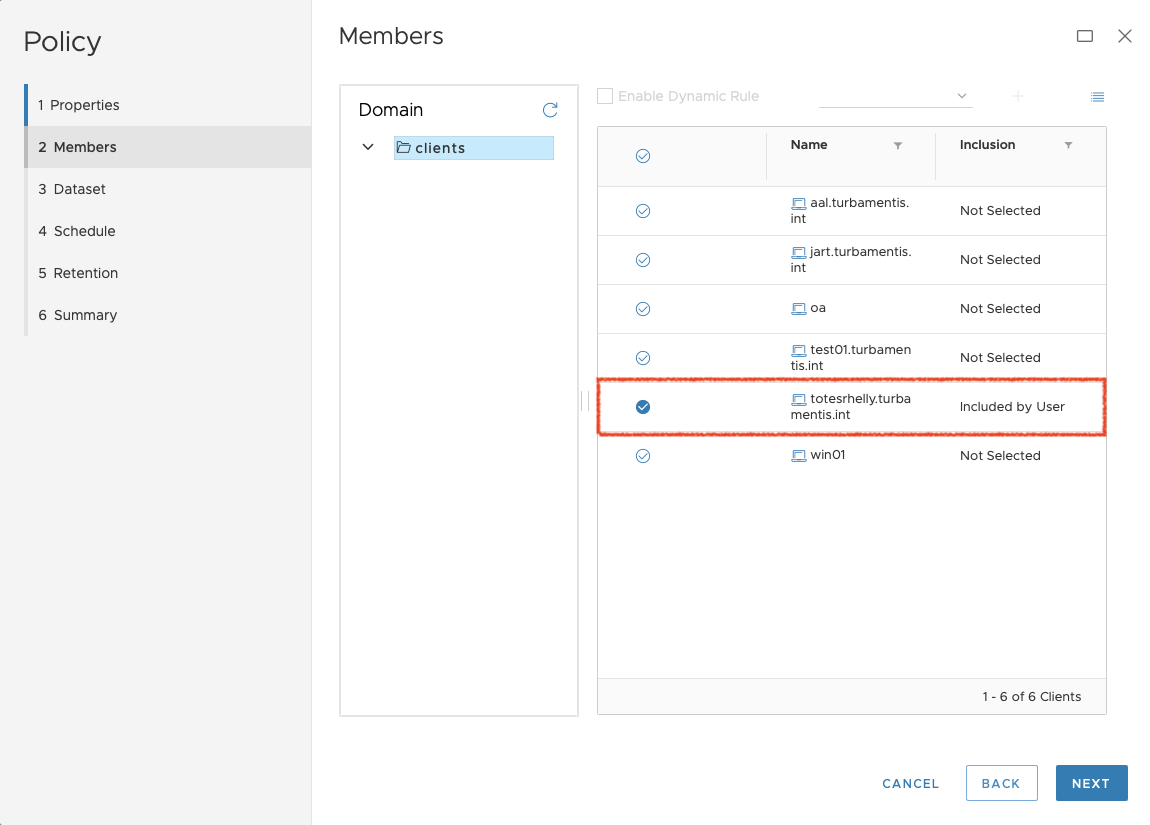
The next step was to choose the ‘Policy Members’, or in other words, the clients. I selected my client, ‘totesrhelly’, and clicked Next.
When you click next, you’ll go into the Dataset configuration section, and this is where you’ll configure your pre-command. I elected to create a new dataset and called it ‘LinuxWithPreCommand’.
You then select the base plugin type (in my case, Linux Filesystem), and activate the “Show Advanced Options” setting:

With “Show Advanced Options” enabled, you can scroll down further in the dataset where you’ll find the option to set a pre- and post- backup command.
How Now to Do A Pre-Command
So … it had been a little while since I’d configured a pre-command in Avamar, and I stuffed up, initially!
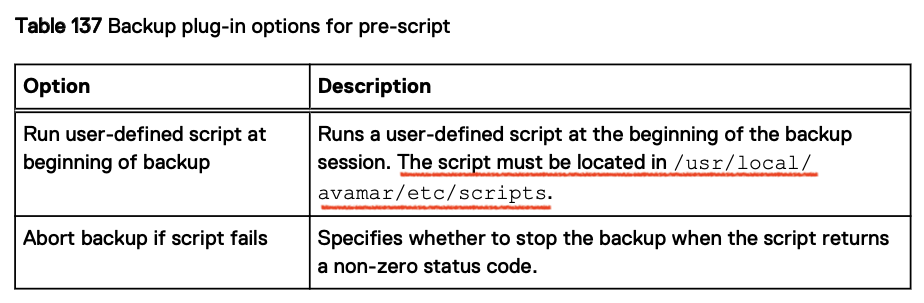
When I configured the pre-command, I forgot one important detail. Here’s the relevant information from the administration guide:
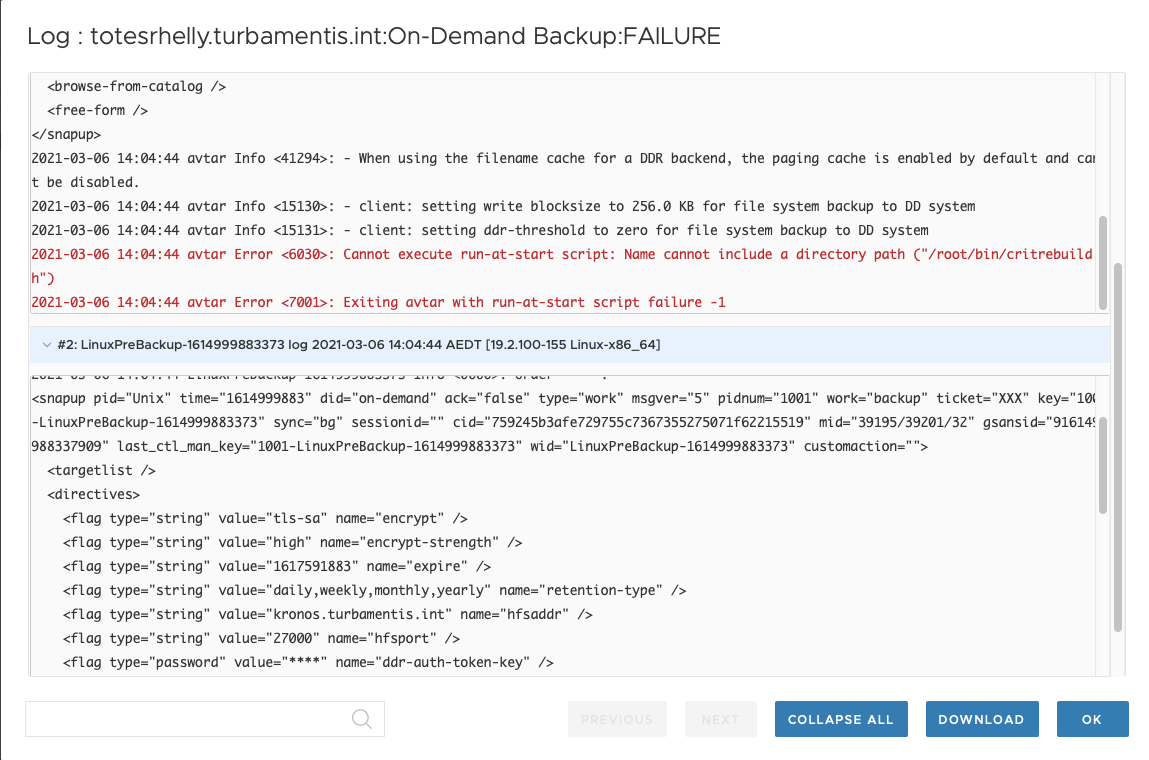
I’d forgotten that – so I’ll jump briefly ahead and show you the error I got when I tried to run the finished policy:
When I saw the error I moved the script into the correct directory and tried to re-run the backup, but:
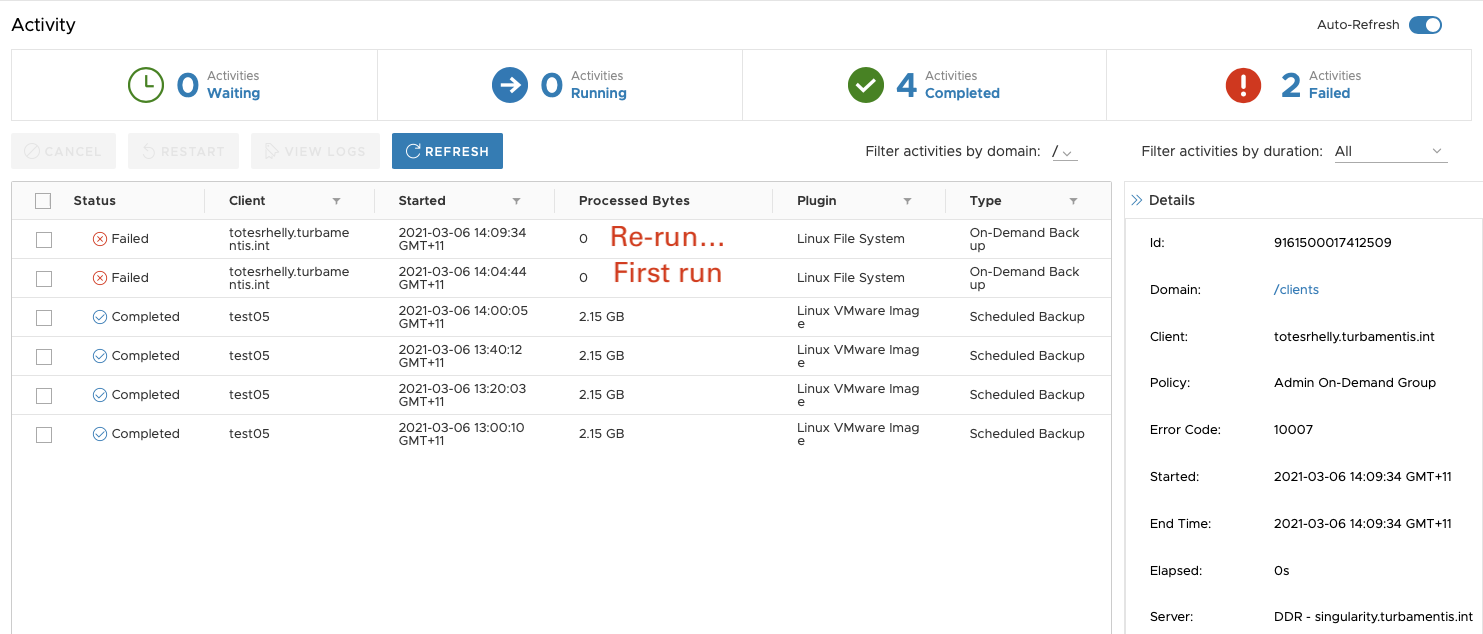
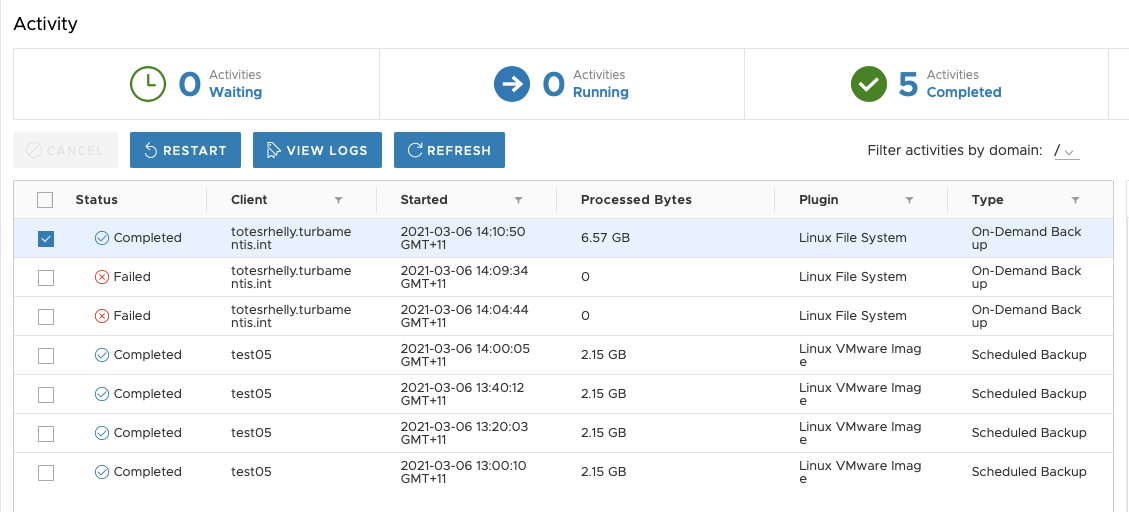
Re-running the policy failed! There’s a good explanation for that though: when you choose to re-run a backup in the Activity window, Avamar re-runs the backup as it was configured. But in this scenario, that meant it ran it again with the misconfigured invocation of the dataset pre-command.
When I edited the dataset options, here’s the correct pre-script definition:
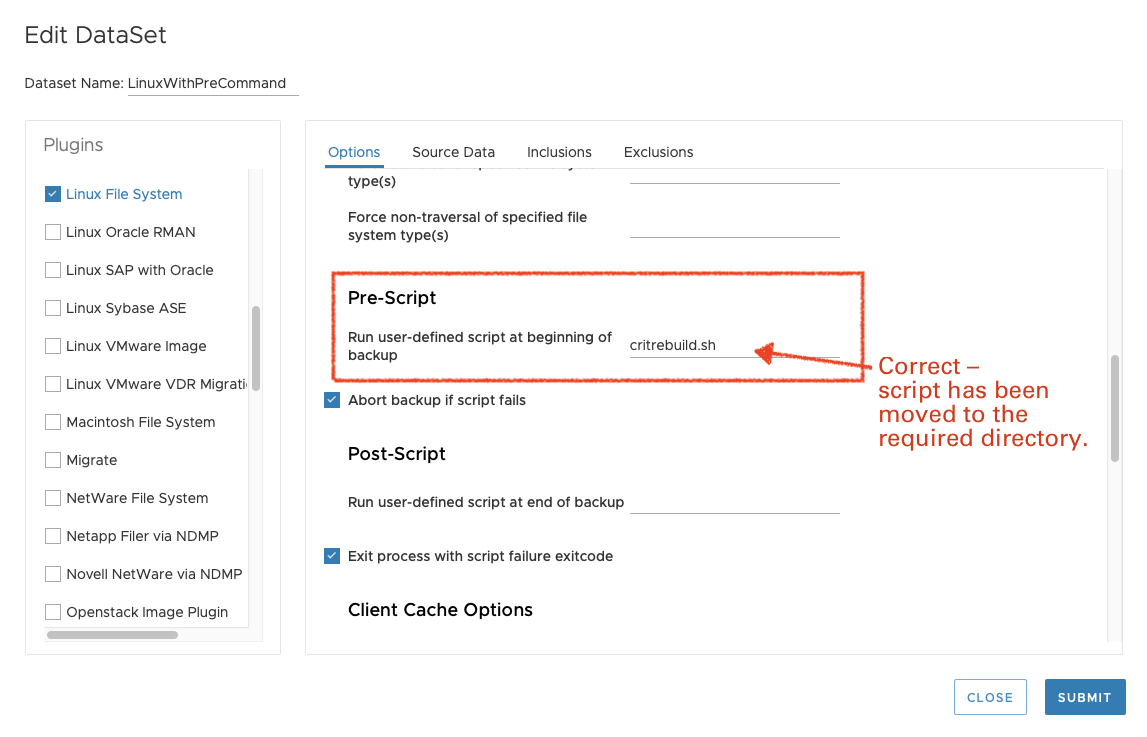
(That also meant moving the script to the /usr/local/avamar/etc/scripts directory.)
Finishing the Policy
OK, so I got the policy wrong initially, but you can see the corrected details above. Here are the remaining configuration steps. First, the schedule:
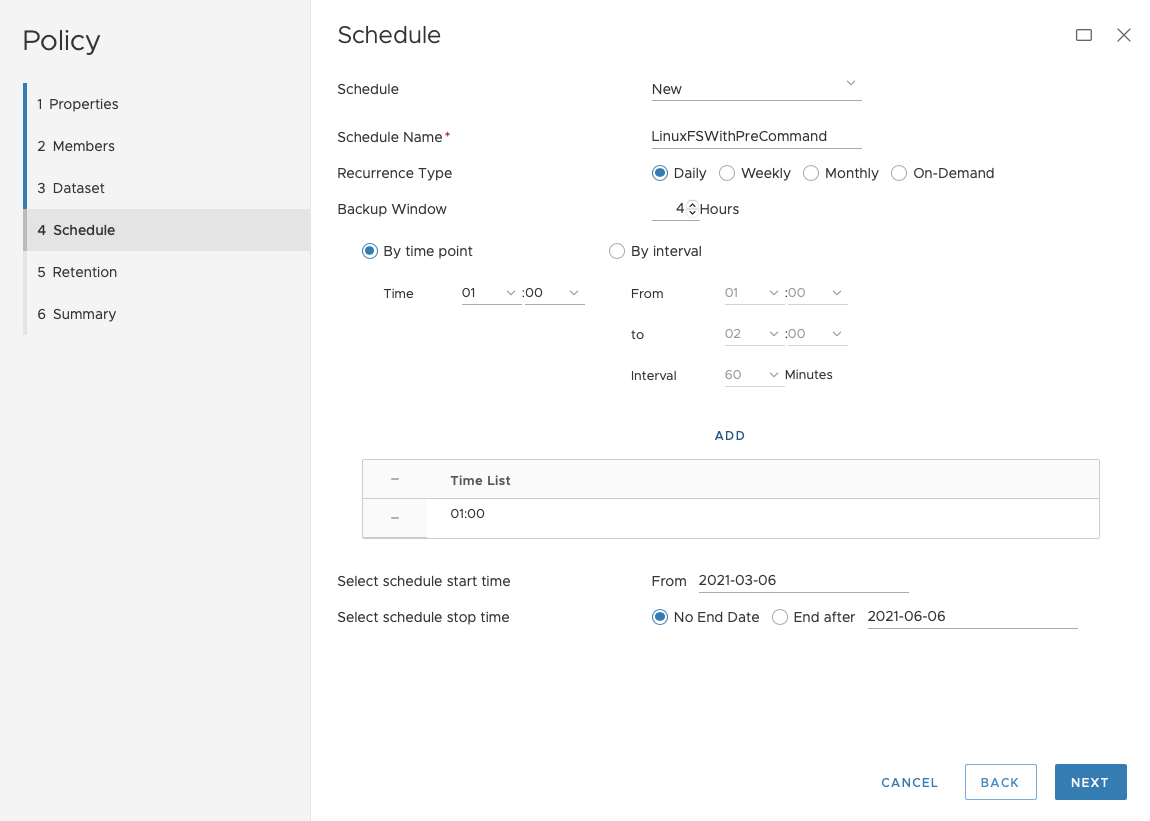
I created a new schedule (LinuxFSWithPreCommand) with a 4-hour backup window starting at 01:00 and no policy expiration time. Clicking Next took me through to the retention definition:
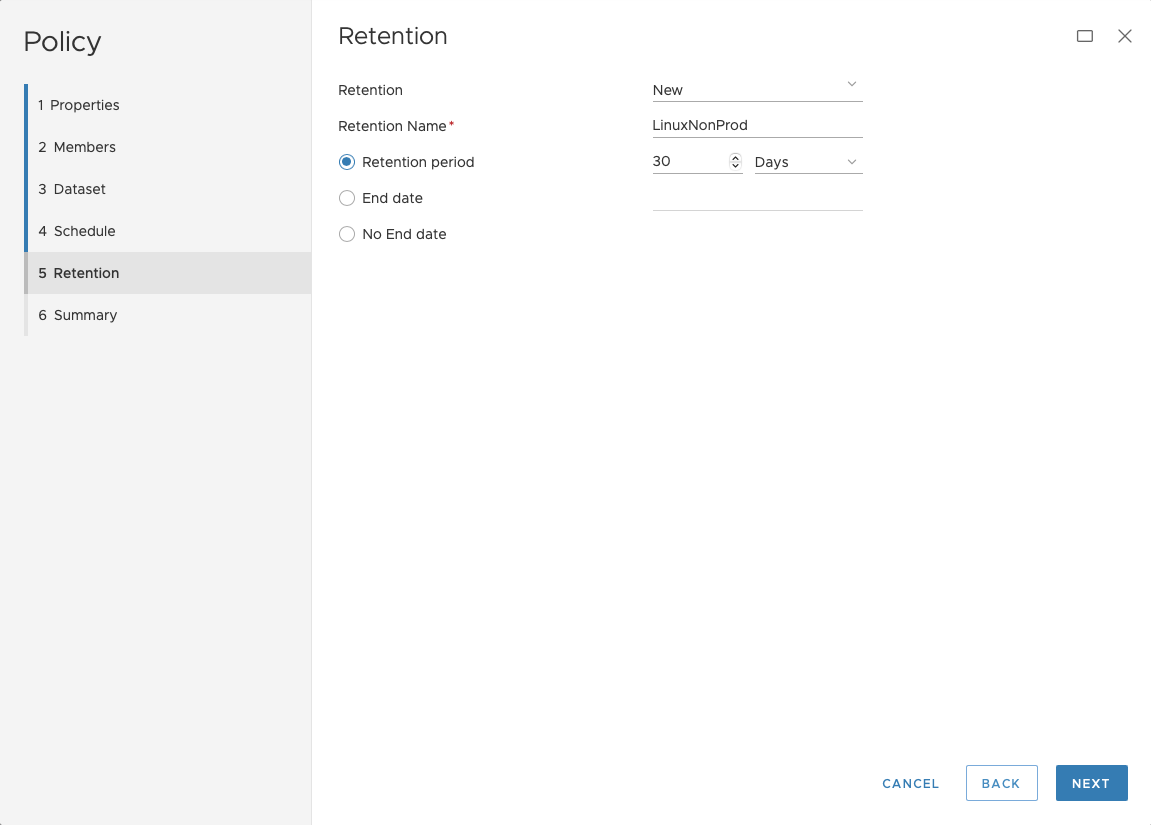
I created a new retention called “LinuxNonProd” with a retention of 30 days and clicked Next to go to the Summary tab:
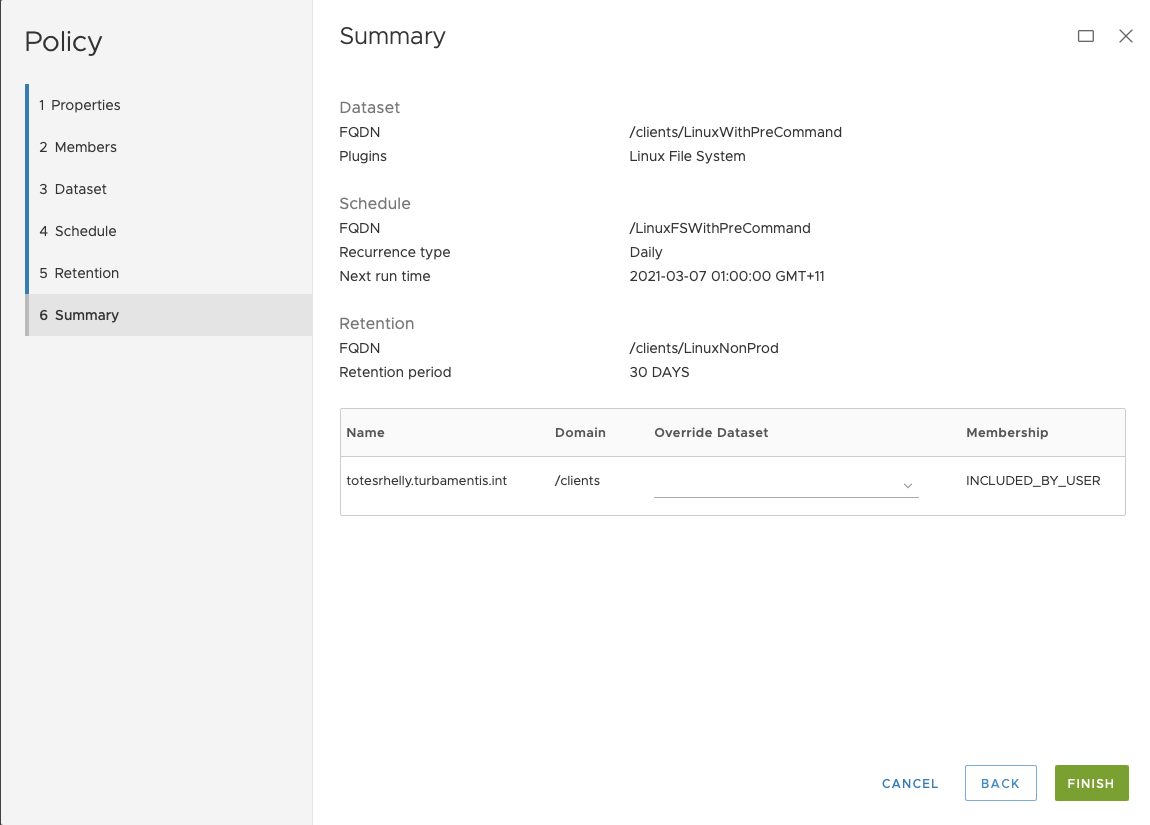
And it was a final Finish to create the policy.
Successful Pre-Backup Commands Executed
So, after I got past my initial incorrect configuration, I did get a successful pre-command execution in my backup job:
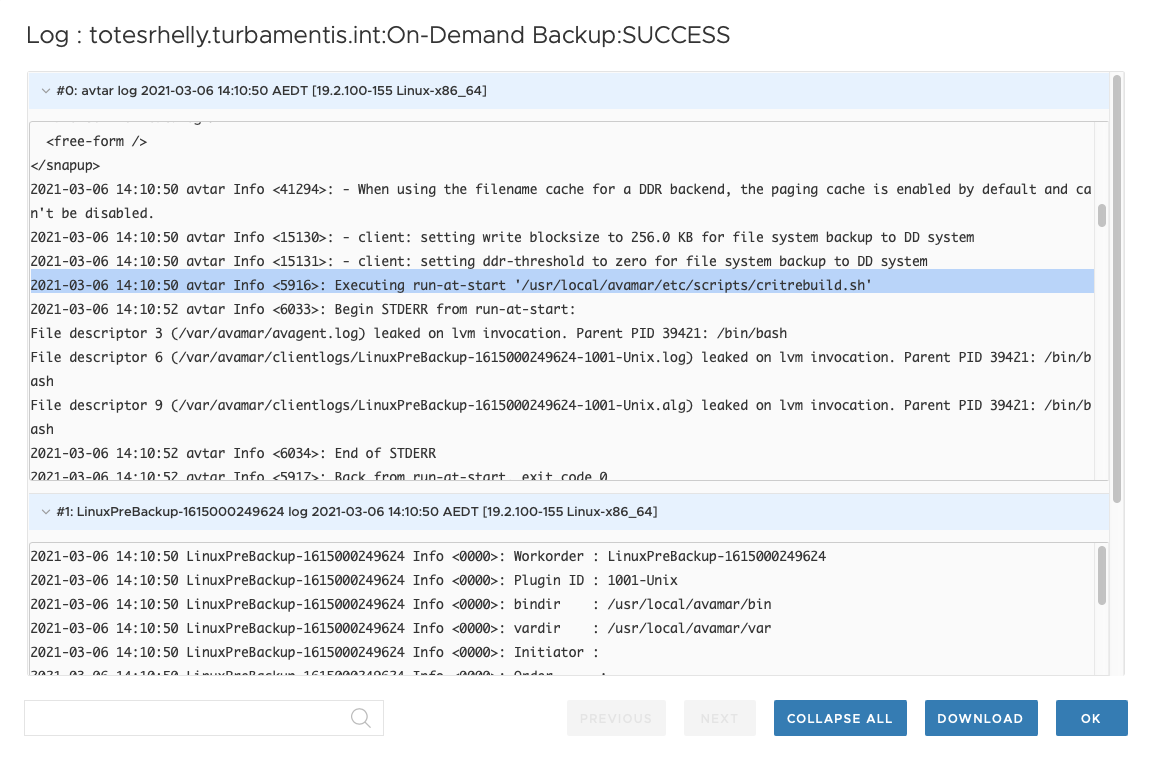
When you view the logs, you can readily find logging information to show the pre-command was executed successfully, too:
Seeing the Pre-Backup Command Result
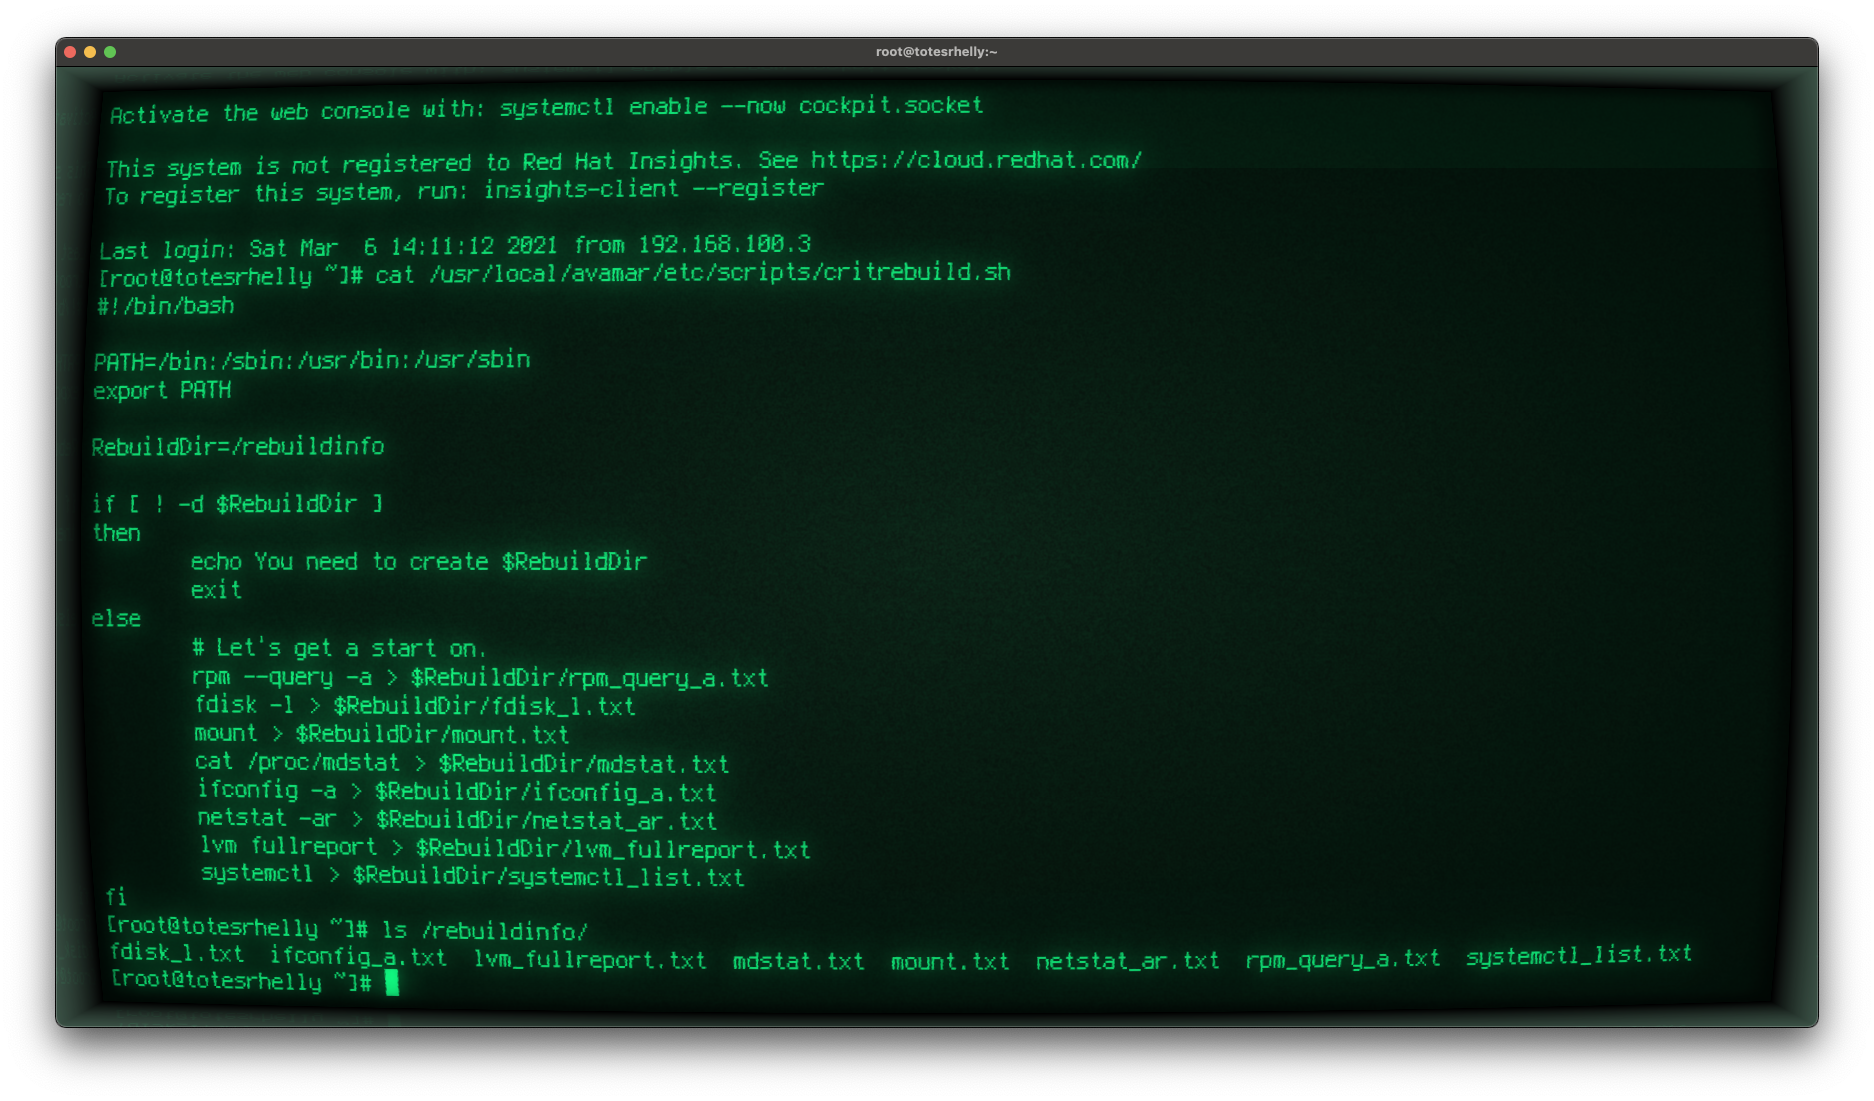
And finally, here’s output of me logging into the Linux client, viewing the pre-command script, and confirming it had run:
Wrapping up Avamar Pre-Backup Commands
You can see from the above that configuring Avamar pre-backup scripts are pretty trivial. In almost all circumstances I can practically guarantee you’ll spend more time writing the actual pre-backup script (or post-backup script for that matter) than you will with the configuration. And unlike my initial incorrect configuration above, if you remember to put the script in the right location first go, you’ll have a successful result in minutes.
Hey – before I go, don’t forget to check out the second edition of Data Protection: Ensuring Data Availability! If you’re interested in learning about data protection in-depth, regardless of whether it’s on-premises or in the cloud, it’ll be an invaluable resource for you.