Introduction
While PowerProtect Data Manager supports some important functions, like highly efficient VMware and database backups, we shouldn’t lose sight of the basics, either – like traditional filesystem backup operations.
In this this post I’ll take you through installation of the standard filesystem agent (not the block-based backup version), policy configuration, and recovery from a backup.
Note: I’d previously done a video demo of this functionality, but I wanted to do a step-by-step walk-through this time to provide the screen-grabbed steps. You can find the video option in the related posts section at the end of this article.
Filesystem Agent Engine Activation
Data Manager uses one or more protection engines, which relate to types of assets that you can run services for. If you’re about to configure filesystem backups for the first time, you’ll want to activate the filesystem protection engine.
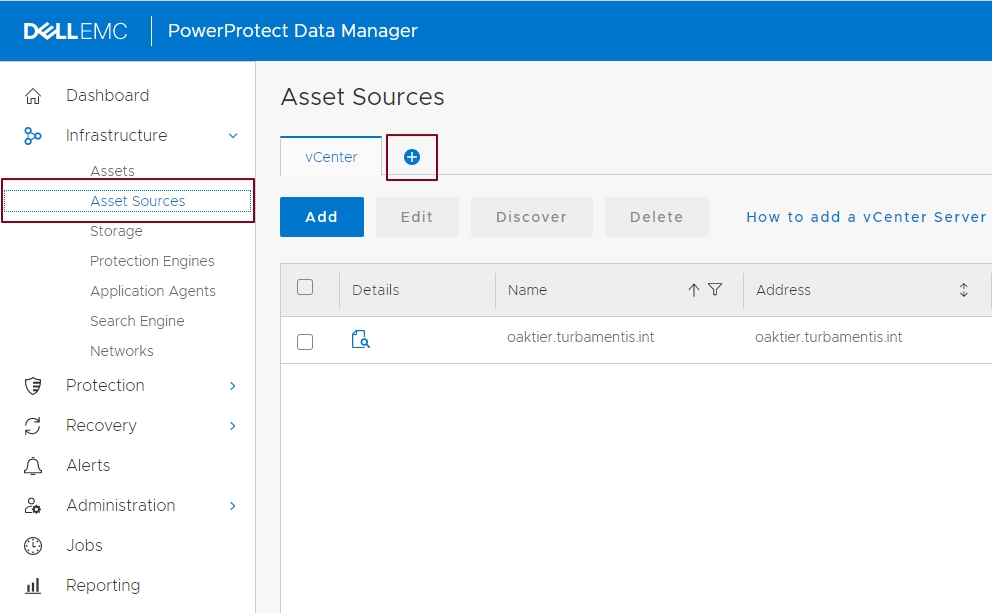
Under Infrastructure > Asset Sources, click the Plus (+) button to add a new source if the Filesystem source isn’t there.
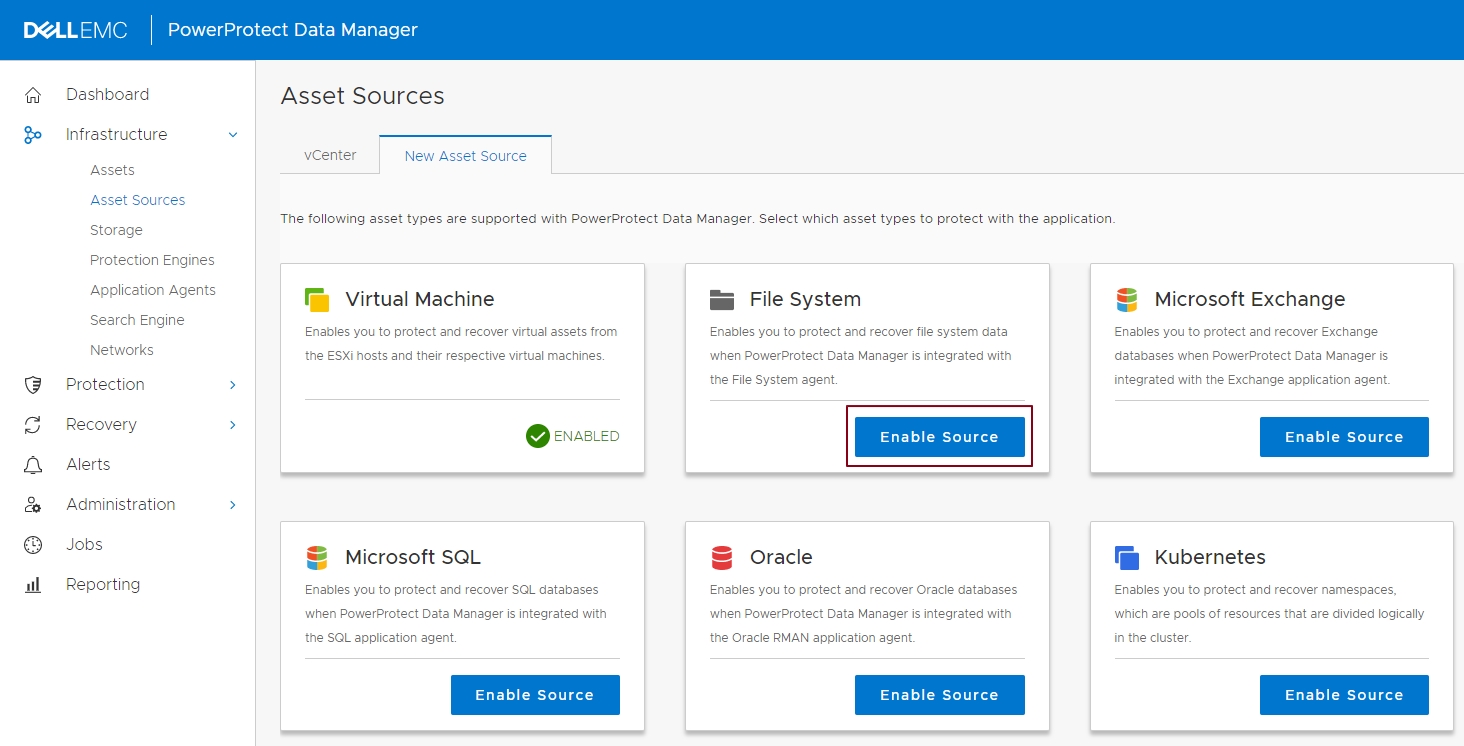
You’ll be presented with a series of cards showing the different asset sources supported by the version of Data Manager that you’re using. Find the File System card and click Enable Source to activate that protection engine with Data Manager. You’ll get a “Howto” cheat sheet to review:
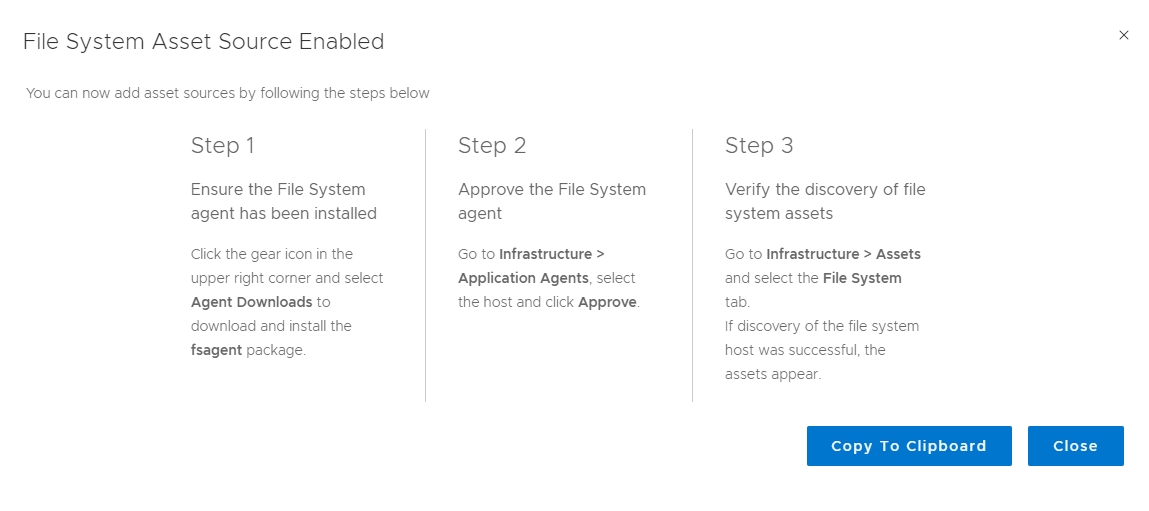
The cheat sheet tells you that you can now add filesystem asset sources by:
- Downloading and installing the agent
- Approving the agent registration
- Confirming the assets appear
Once you can see the assets, you can add them to an existing policy, or create a new protection policy.
Filesystem Agent Installation
OK, so having activated the protection engine for filesystem backups, the next step would be to download, install and register a filesystem client.
For this test, I took advantage of the recent changes to the RedHat Developer network, allowing you to install RHEL on up to 16 non-production systems. I downloaded RHEL 8.3 and installed a new virtual machine with the following specs:
- 1 x CPU
- 2 GB RAM
- 16 GB Root Disk (thinly provisioned)
- 8 GB Data Disk (thinly provisioned), mounted at /DATA and formatted XFS.
I named the virtual machine totesrhelly, added it to my developer subscription, ran patching on it, and copied some PDFs across to it for backup and recovery testing. (Because it’s in my lab environment, I disabled the firewall and turned SELinux off.)
The next step was to download the filesystem agent. You can download these from the Dell EMC support site, or you can go to the Settings menu (Gear Icon) in Data Manager and click Agent Downloads:
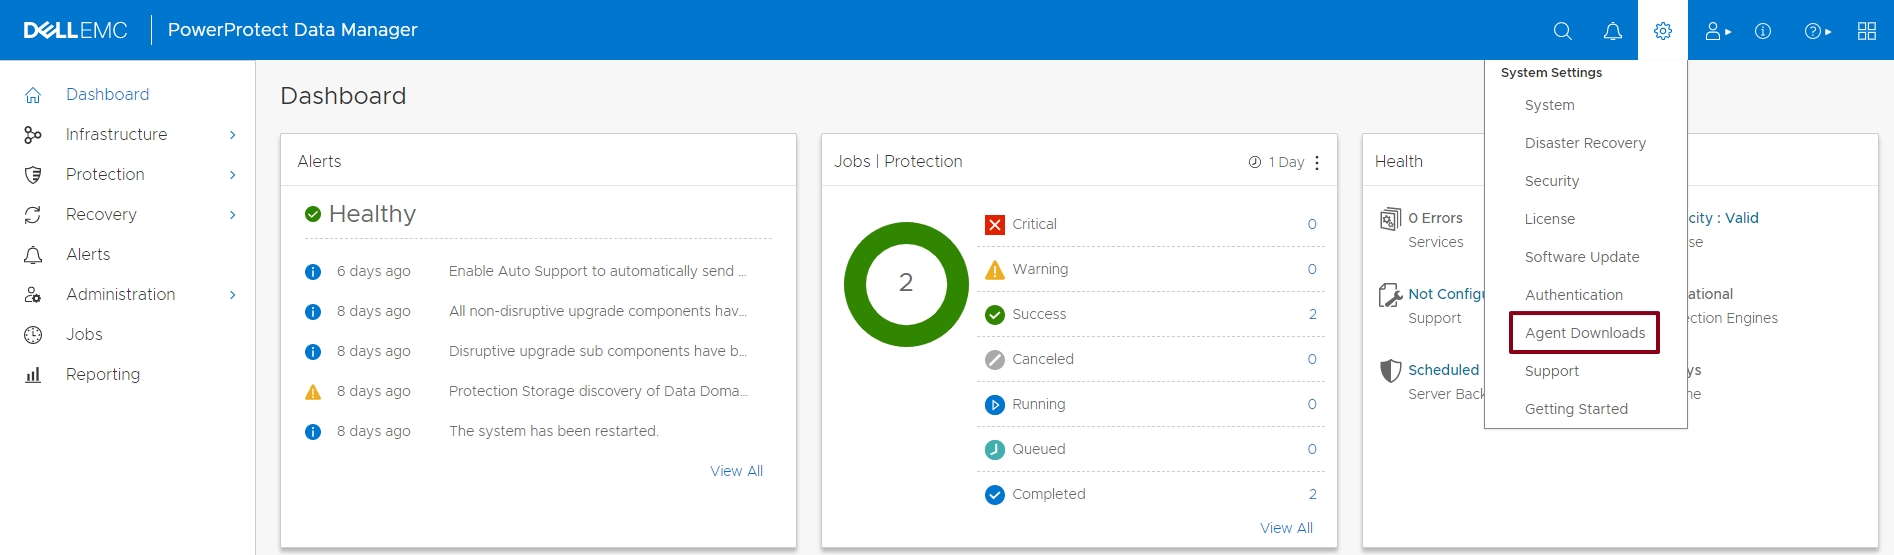
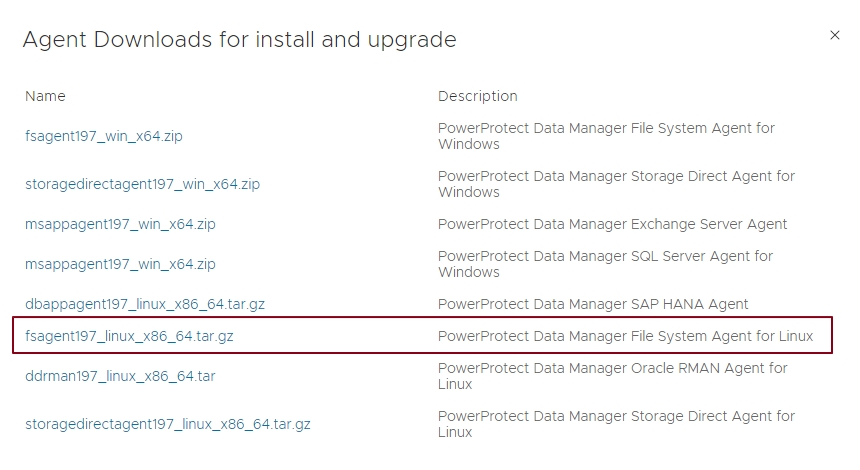
Clicking the Agent Downloads link will give you a list of available agents, and in this case I needed to download the Linux Filesystem agent:
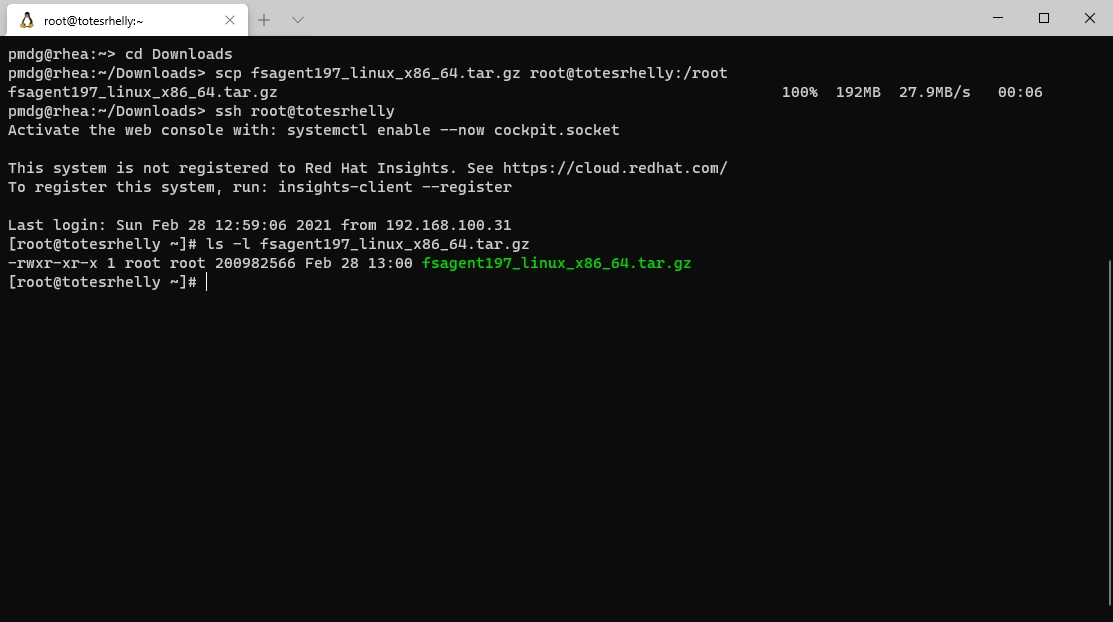
The agent will download to system you’re running your web browser from, so I used ssh to copy it across to totesrhelly and confirmed it was there:
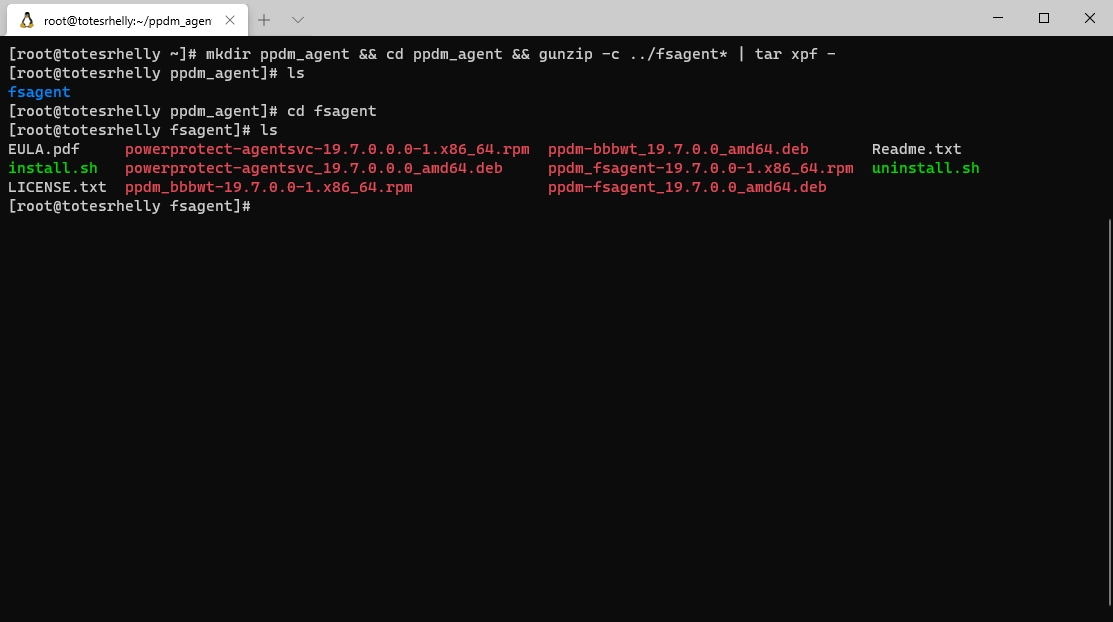
The agent installer is in a tar/gz format, which you need to unpack – you can see the process and directory listing below:
If you’re unsure of installation options and don’t have the Agent guide handy, you can run the install.sh file with a –help option:
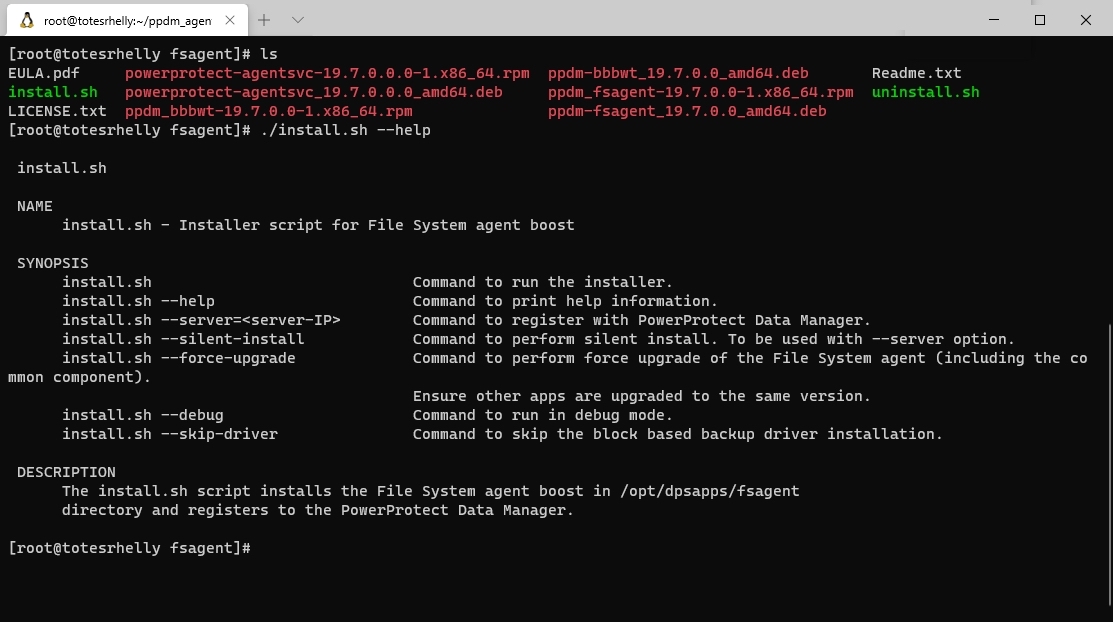
In this case, I wanted to run the installer interactively, but use the –skip-driver option to turn off installation of the block-based backup driver:
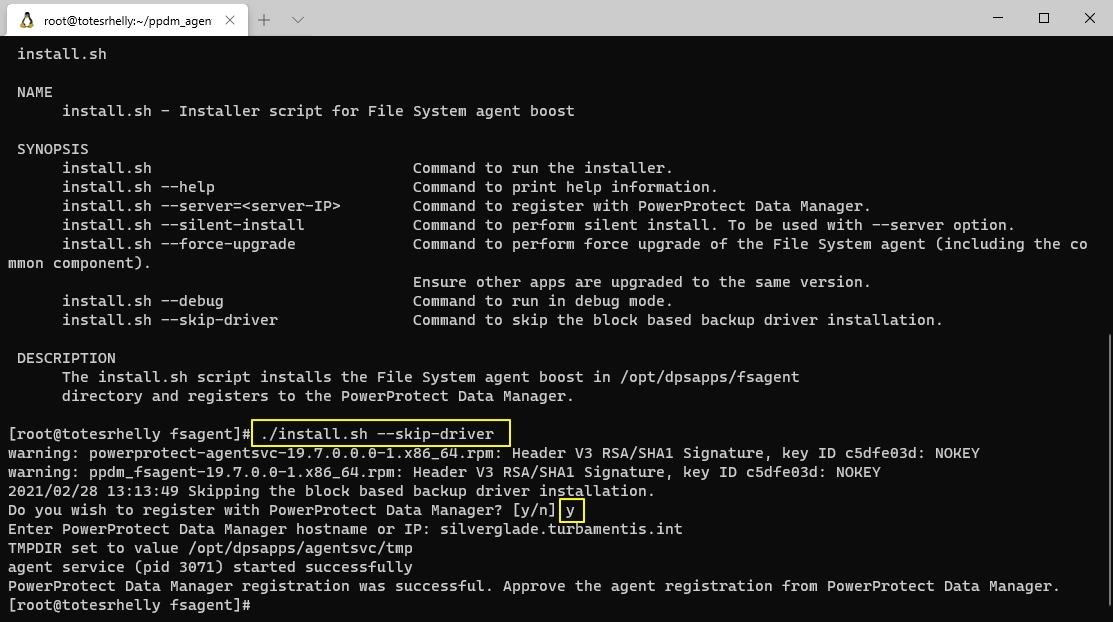
Once the agent is installed, you’re prompted whether you want to register the agent with a Data Manager server. I answered ‘y’ for yes, and when prompted, entered the fully qualified domain name for my server.
Once the agent finishes registering, it’ll prompt you to approve the registration process.
Agent Registration Approval
The agent was installed and it had sent a registration request to the Data Manager server, so it was time to jump back onto the console, find and approve the request.
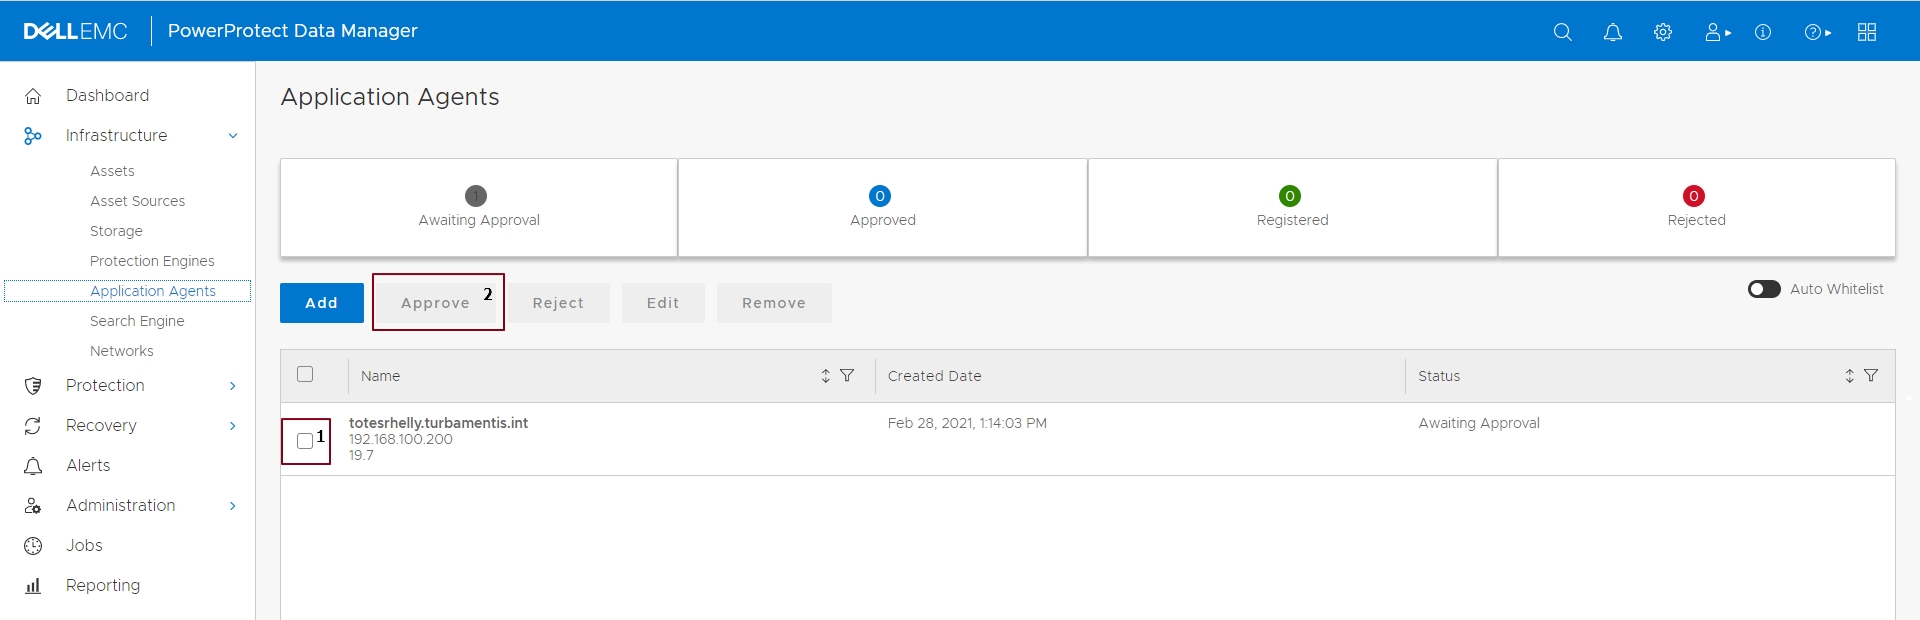
To find the registrations pending approval, you go to Infrastructure > Application Agents, click the checkbox next to the client you’ve just installed the software on, and click the approve button – shown above for totesrhelly.
Once you approve, the agent and server will have a little natter, and the console will update shortly thereafter to show the agent is registered:
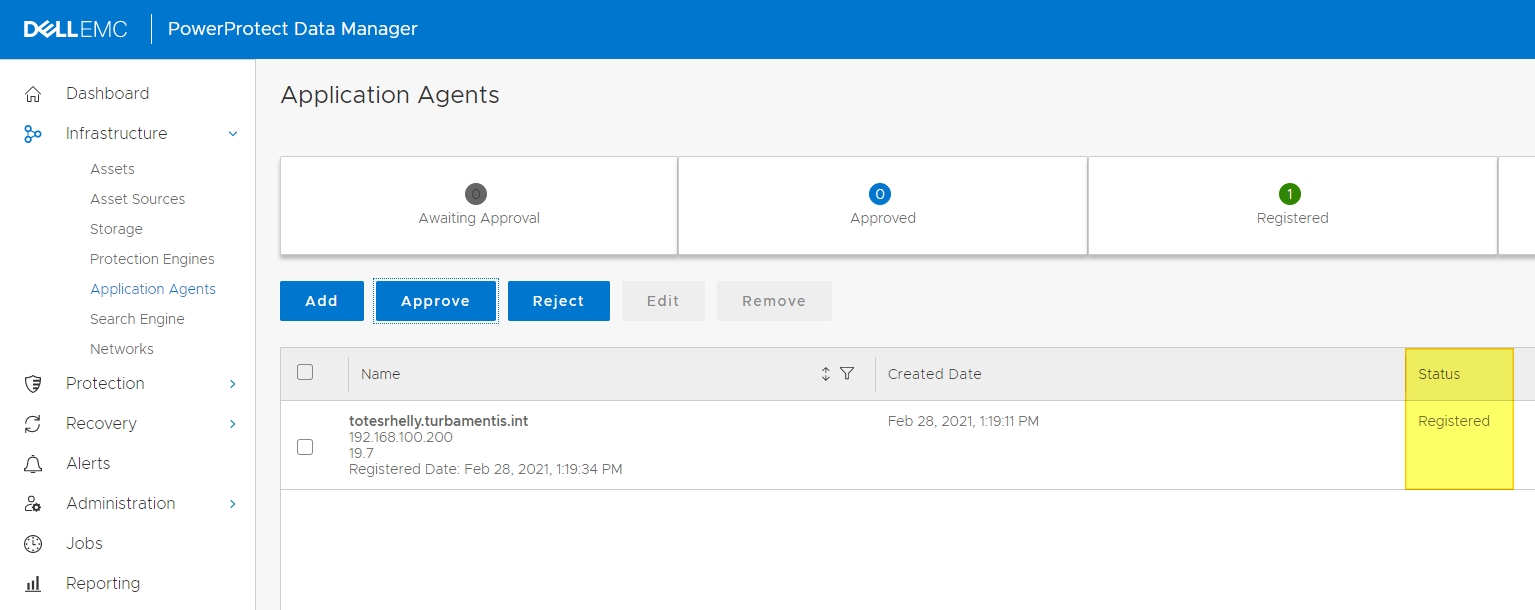
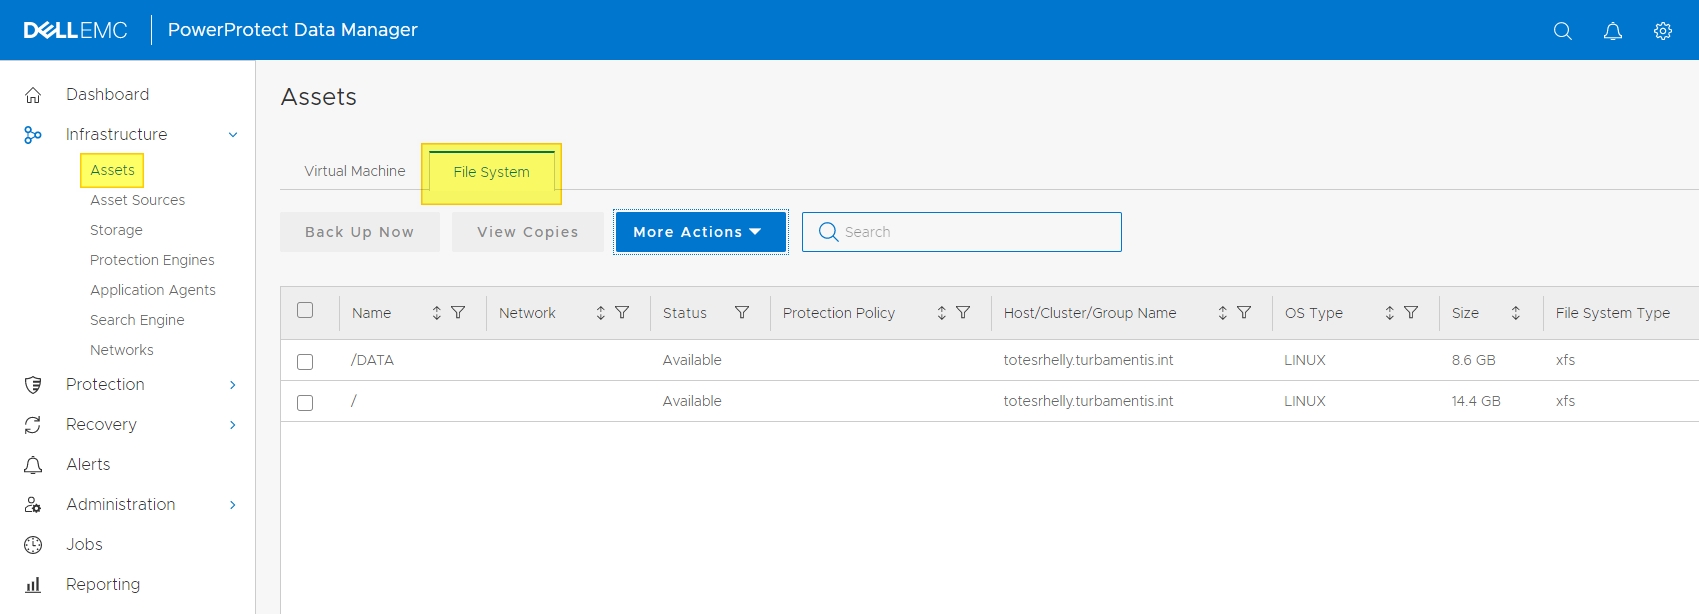
With that done, you can click through Infrastructure > Assets > File System to confirm the filesystem assets are now showing up:
Configuring a Filesystem Agent Backup Policy
So, my agent engine is activated, my client has an agent installed and registered on it, the registration is approved, and I’ve confirmed the sources are visible. That really didn’t take any time at all – from start to finish, it was just a few minutes of work.
To add a new protection policy, you go to Protection > Protection Policies and click the Add button:
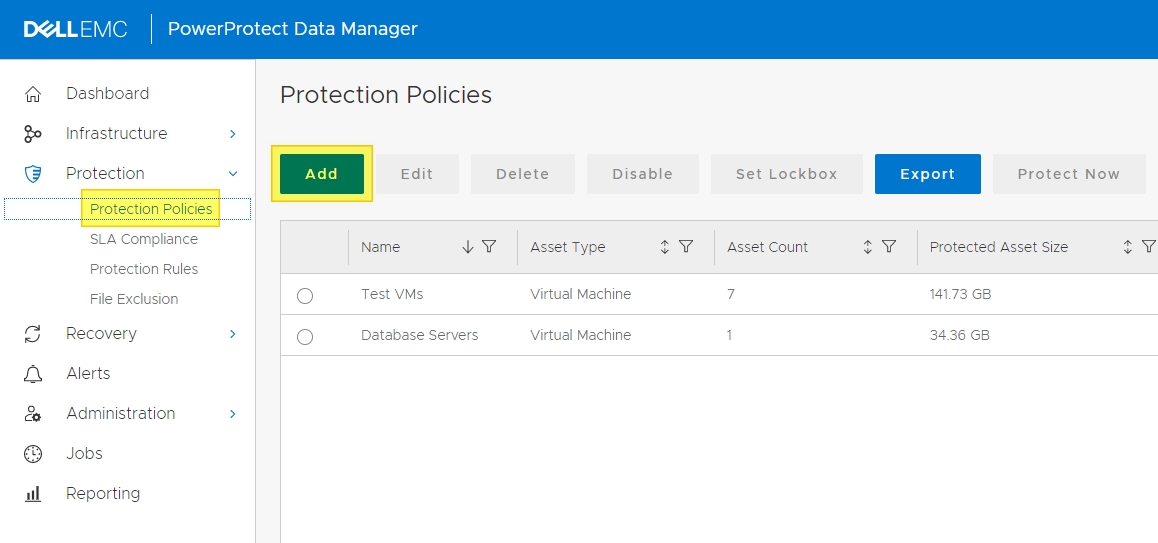
(If I’d already been backing up filesystem agents, I may not have needed a new policy. But because this was the first filesystem agent I’d installed/configured on this Data Manager server, a new policy was required.)
Once you click the Add button, Data Manager starts the new policy wizard to lead you through the process. The first step is to name the policy and choose the type:
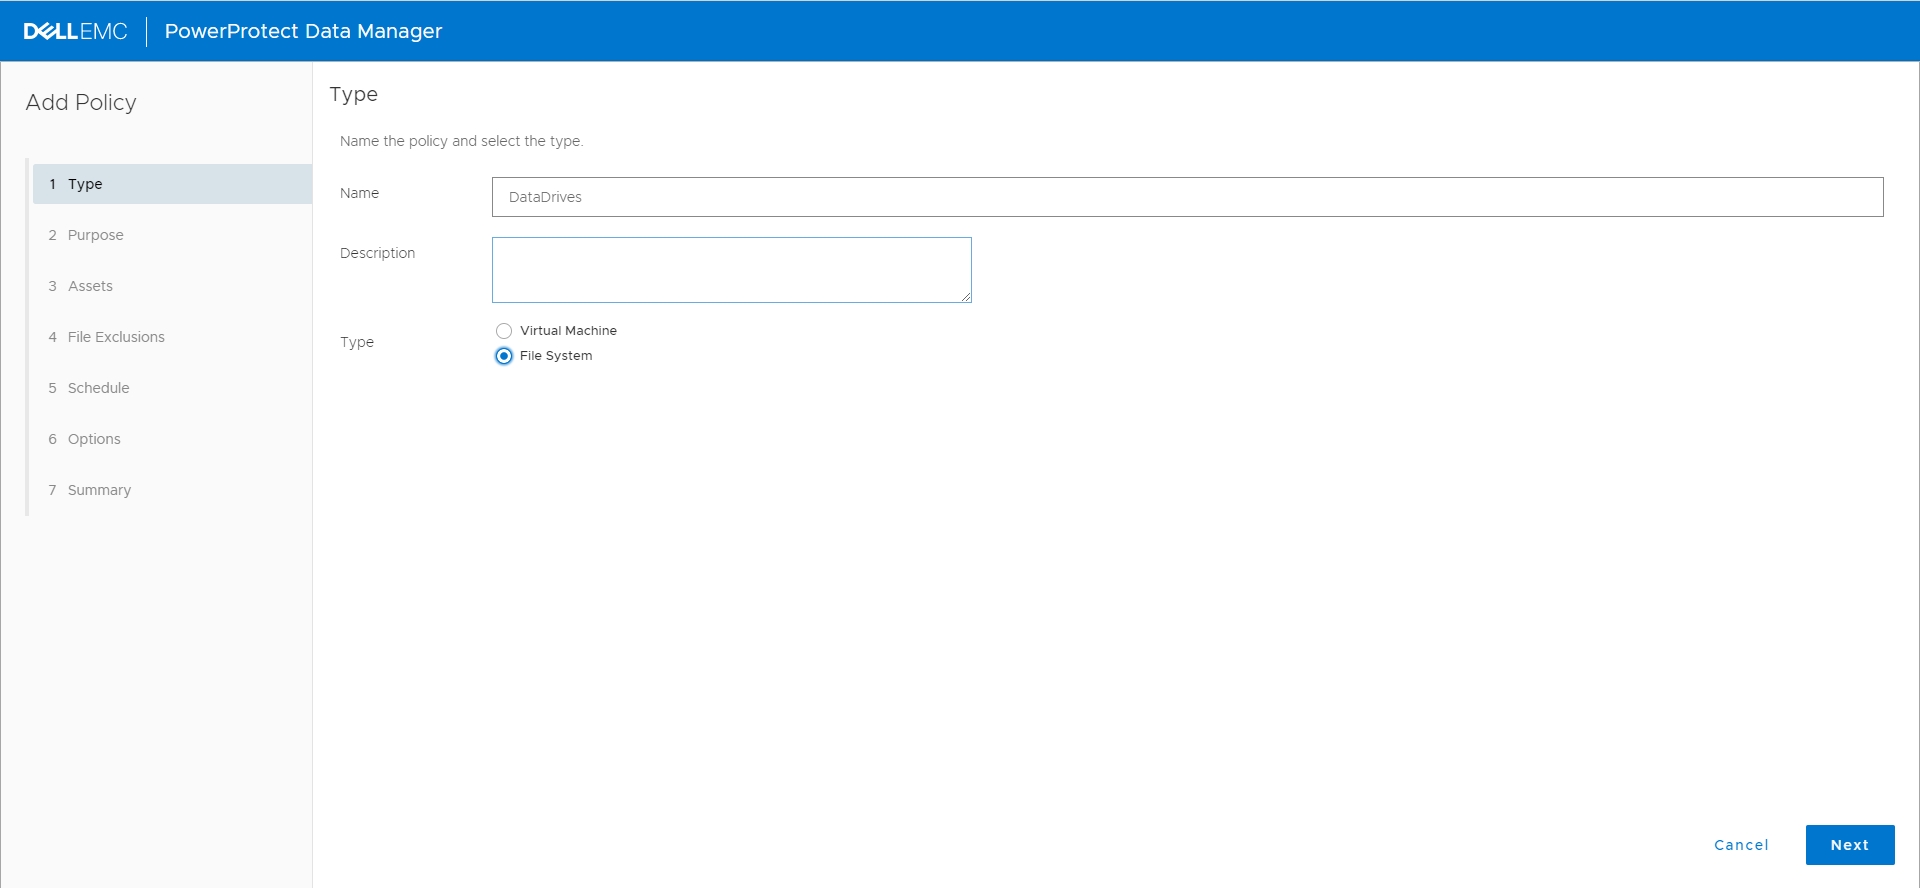
(Note that in the Type radio selector, you’ll only see the protection engine types that you’ve enabled within Data Manager.)
Once I’d named the policy (DataDrives) and set it to File System, I clicked Next to continue, where I was prompted for the purpose of the policy:
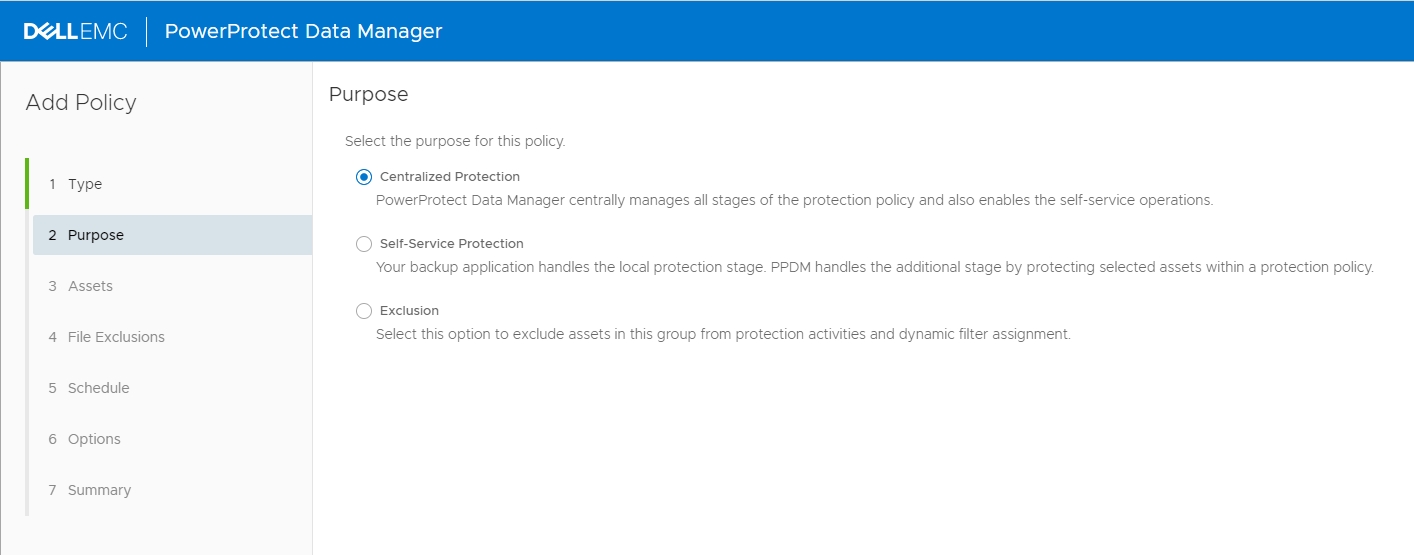
In this case, I wanted to use automated backups, so I left it on the default: Centralized Protection. (Excuse the American spelling.) I’ve trimmed the screen-grab above, but there’s a nice inviting blue Next button you can click once you’ve made this selection, which I did.
Once you’ve clicked Next, you’ll be invited to choose which assets you want to add to the protection policy:
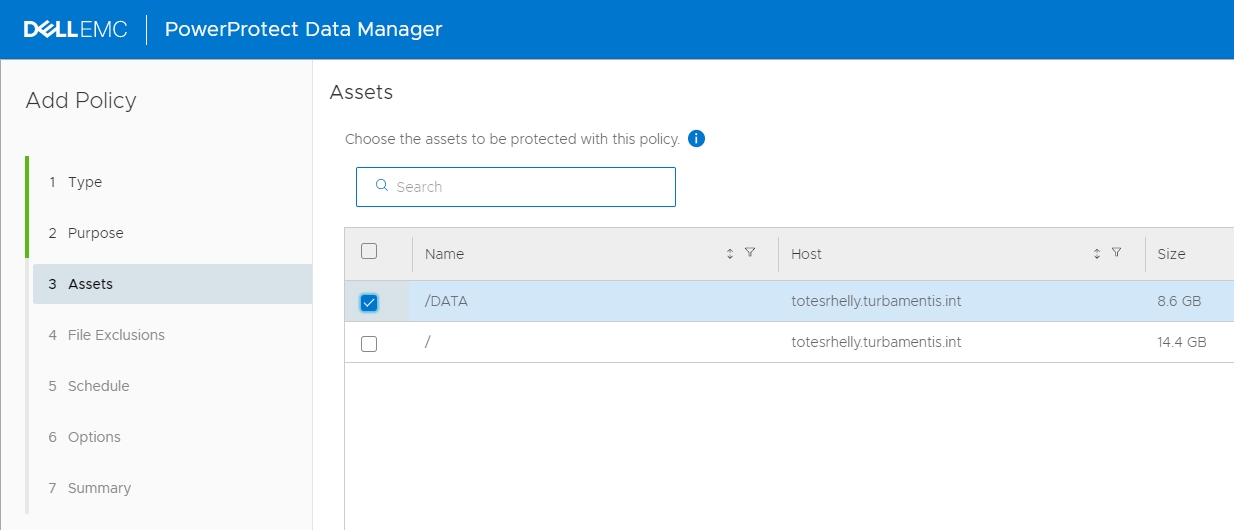
For this policy, I just wanted to select the totesrhelly:/DATA filesystem, so I clicked its checkbox and left the checkbox for totesrhelly:/ unselected. Once I made the selection, I clicked the Next button to move on:
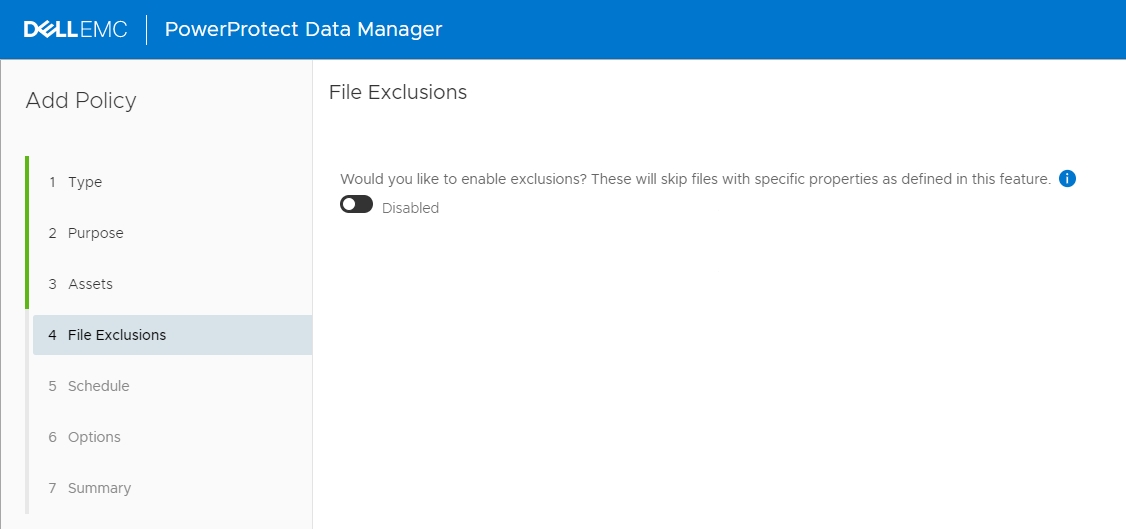
I was prompted whether I wanted to configure any file exclusions, but I was quite certain that everything in the /DATA directory was super-important and definitely needed to backup, so I again clicked the Next button.
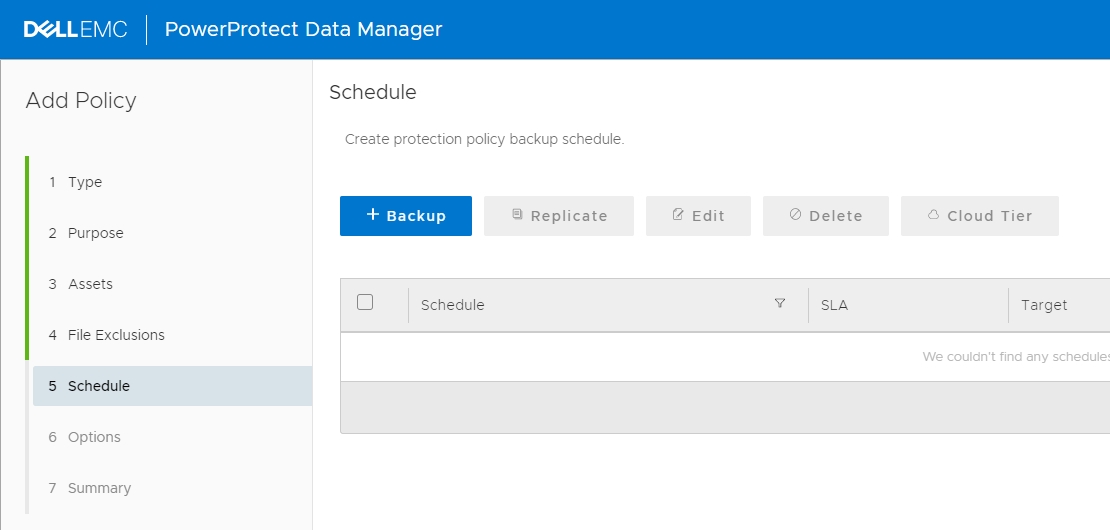
At this point the Protection Policy has a name, a type, and the appropriate asset(s) selected, but I haven’t told Data Manager what I want to do. So in the Schedule section, I clicked the +Backup option to add a new backup schedule:
I configured a daily backup policy to run between 14:00 and 19:00 every day, with backups kept for 14 days, going to the one Data Domain attached to the Data Manager server:
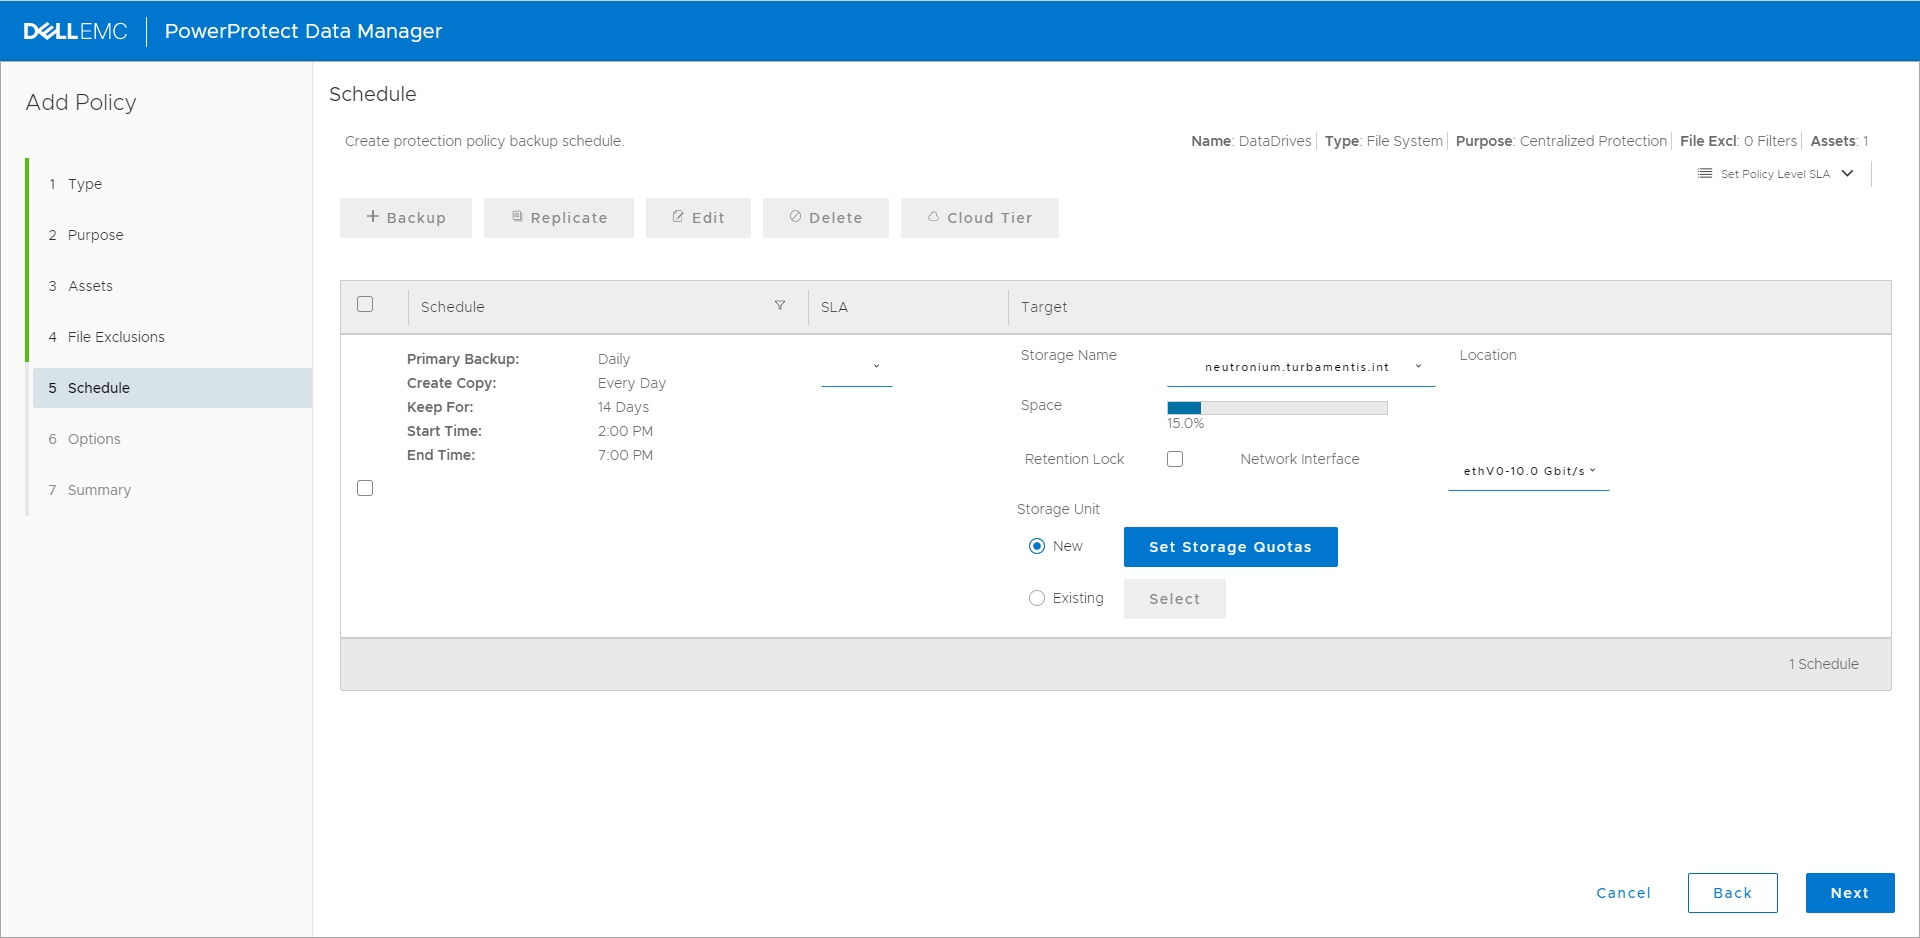
With the schedule and storage now defined, I could click Next for final options:
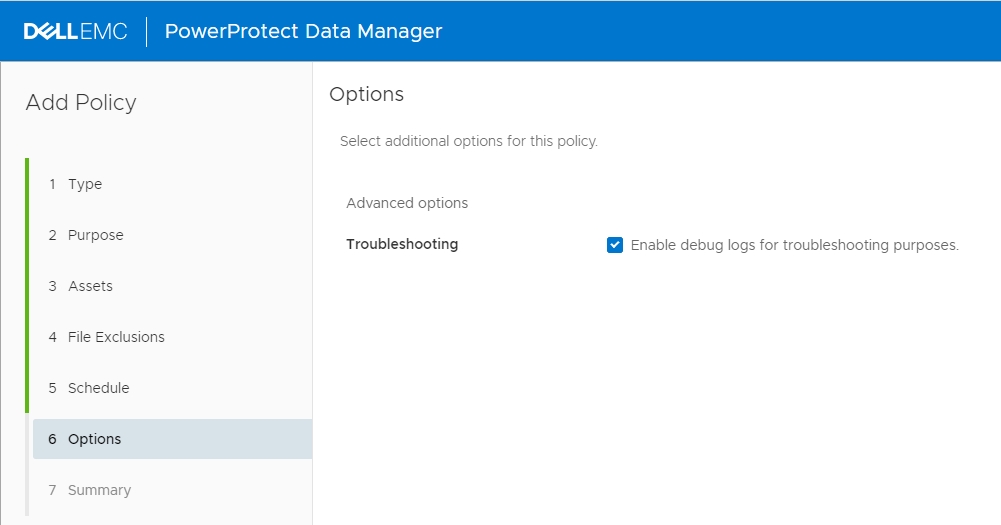
In this case, for a filesystem agent backup, the option was to enable troubleshooting logs. Anyone who reads my blogs regularly knows what a fan I am of logs, so of course I clicked that checkbox immediately, before clicking Next to continue. This led me to a summary of the policy, waiting for my confirmation to go ahead and create it:
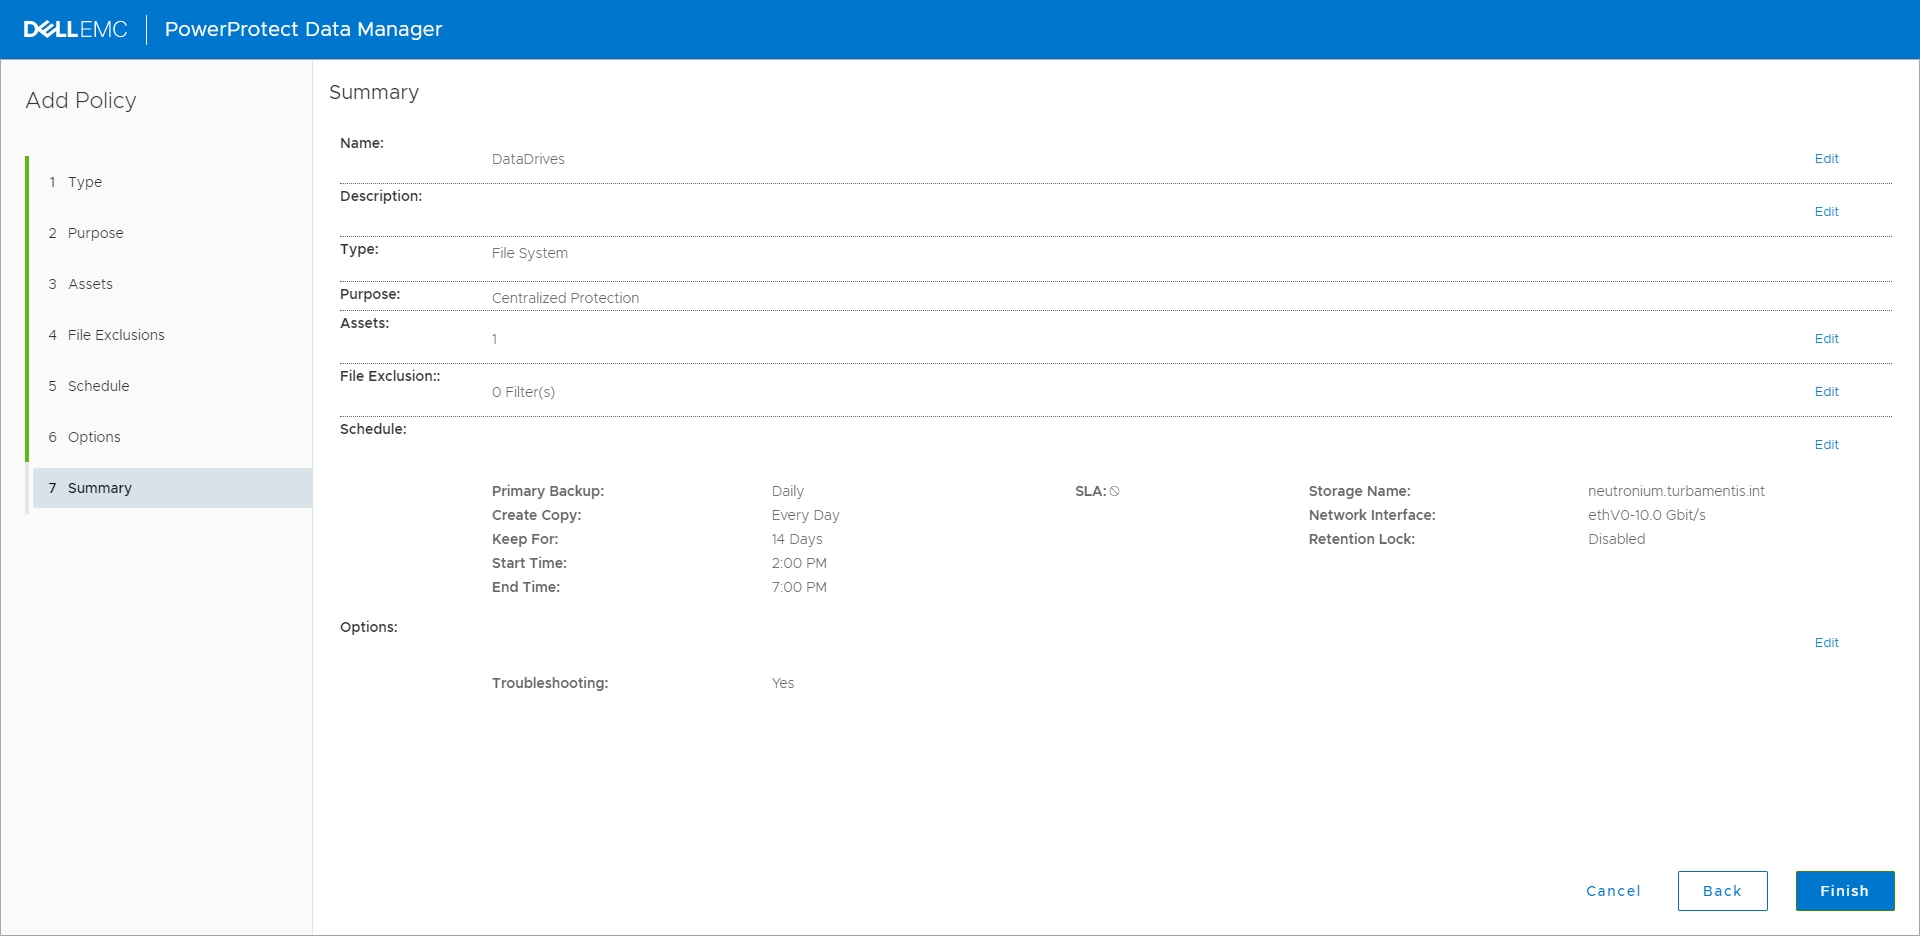
I was happy with all the options shown in the summary, so I clicked the Finish button to get the policy created.
Once the policy has been created, you’ll see an alert saying it’s done and an option to go to the Jobs monitoring dashboard:
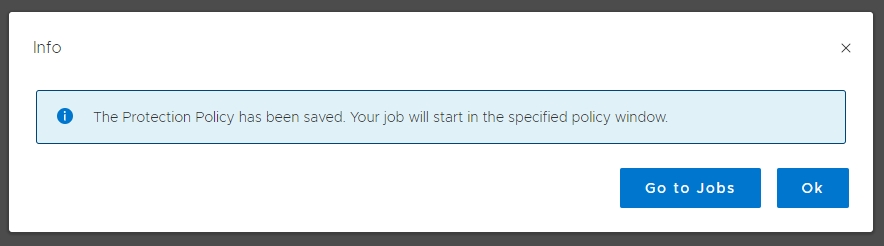
I chose the “Go to Jobs” option. The policy has been created, but Data Manager will run through a little background setup to prep things for the first run of the policy at the requested start time.
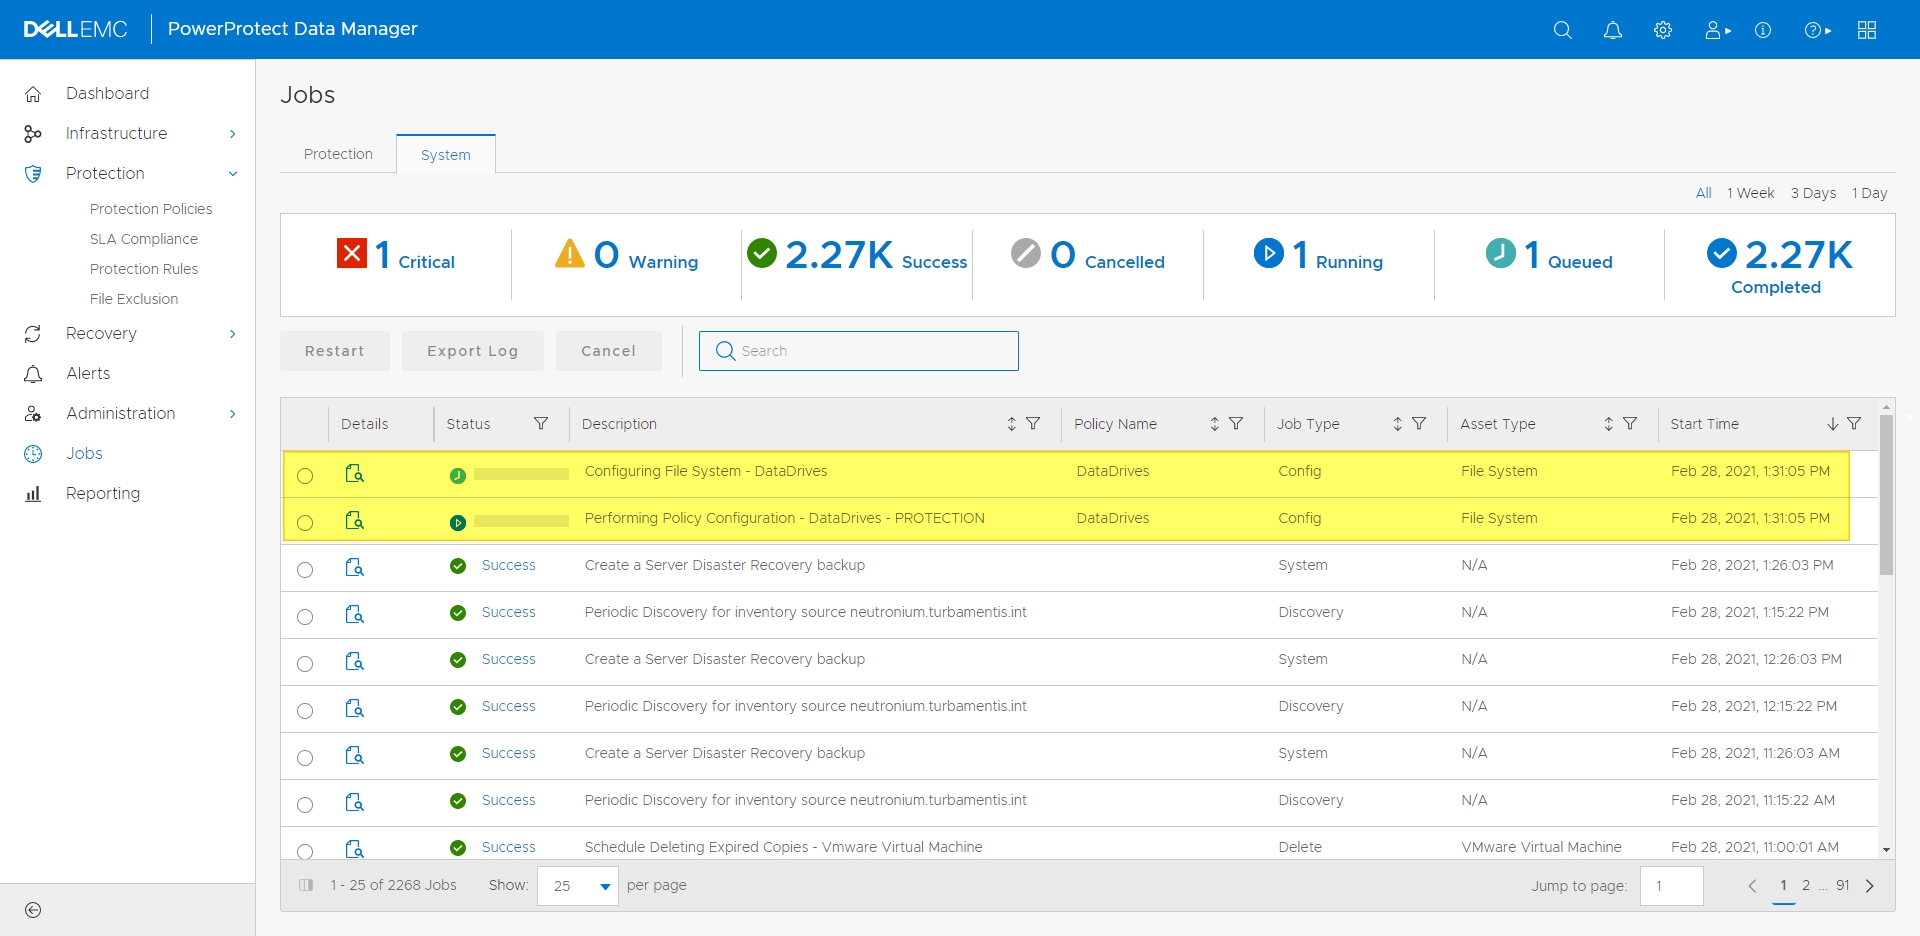
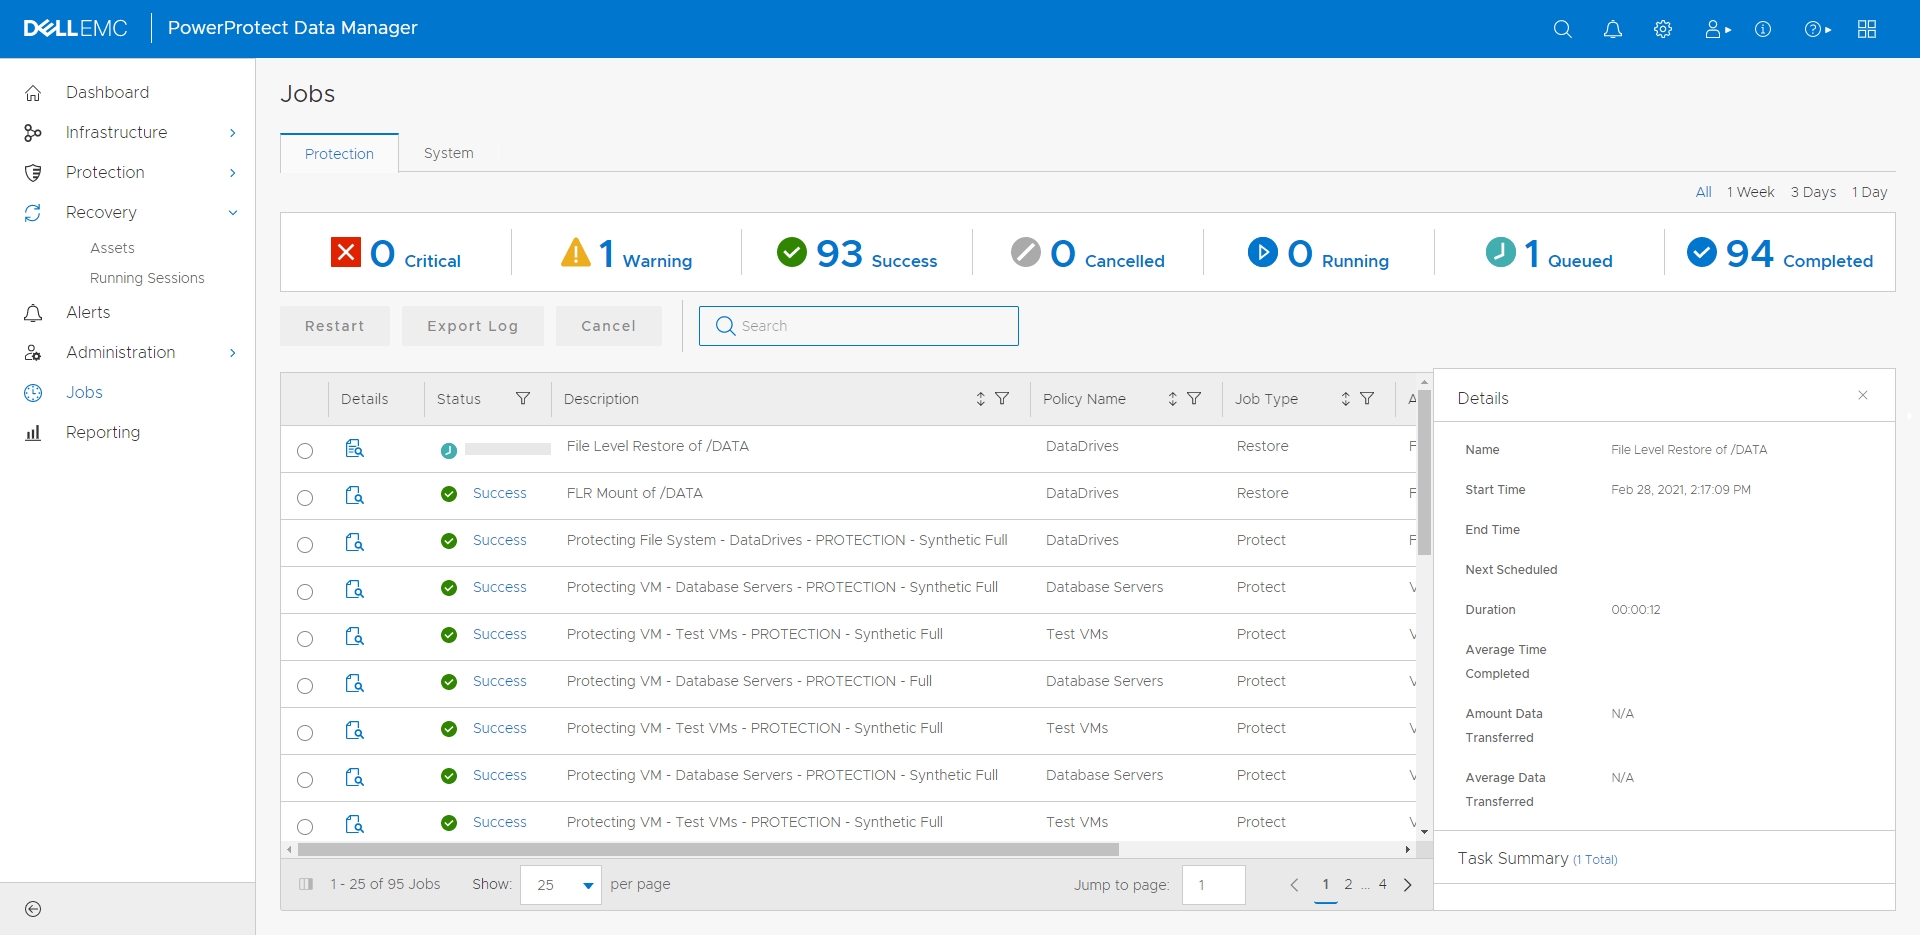
Once those tasks are complete, the Jobs dashboard will update appropriately, and you can click on the notes icon next to any of the individual jobs to see the status details, such as below:
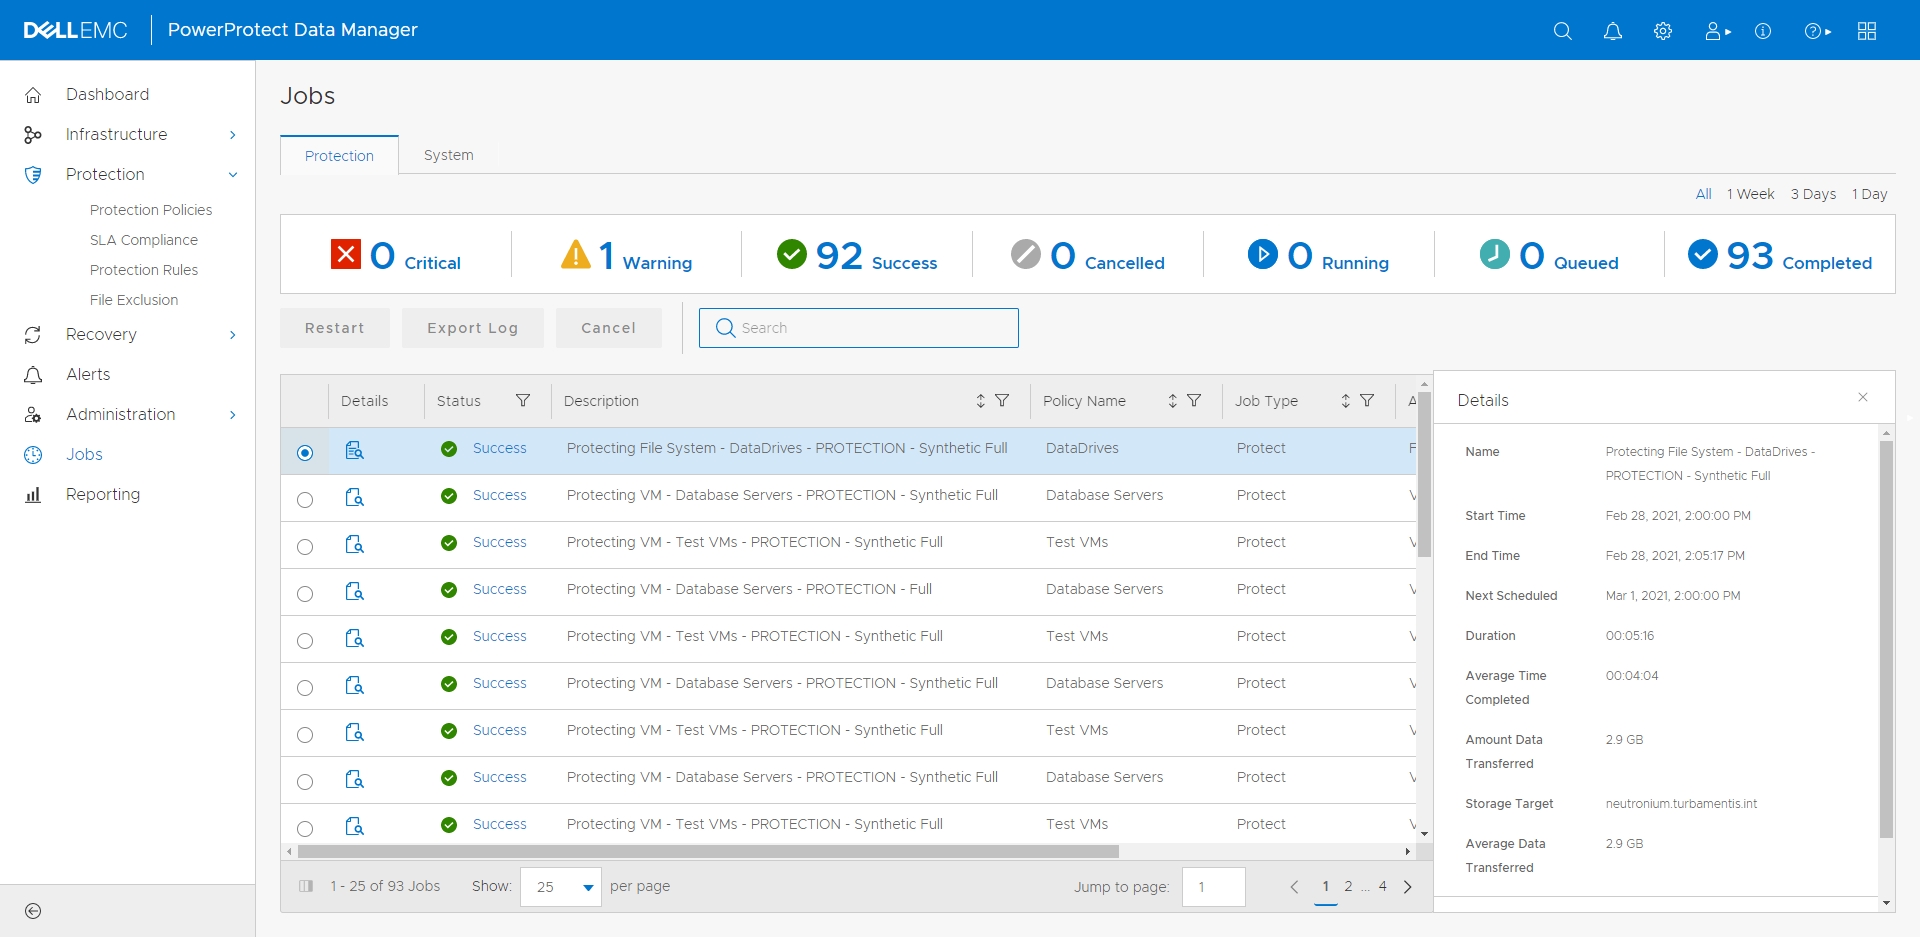
(You can view the status details any time during a job execution, by the way. I’ve just shown it at the end.)
Running a Filesystem Agent Recovery
I’d created my policy at 13:30 and had some time to kill, so I went and did a PowerPlate session before returning to my Data Manager console around 14:05 to see the backup job complete. It was now time to start the recovery.
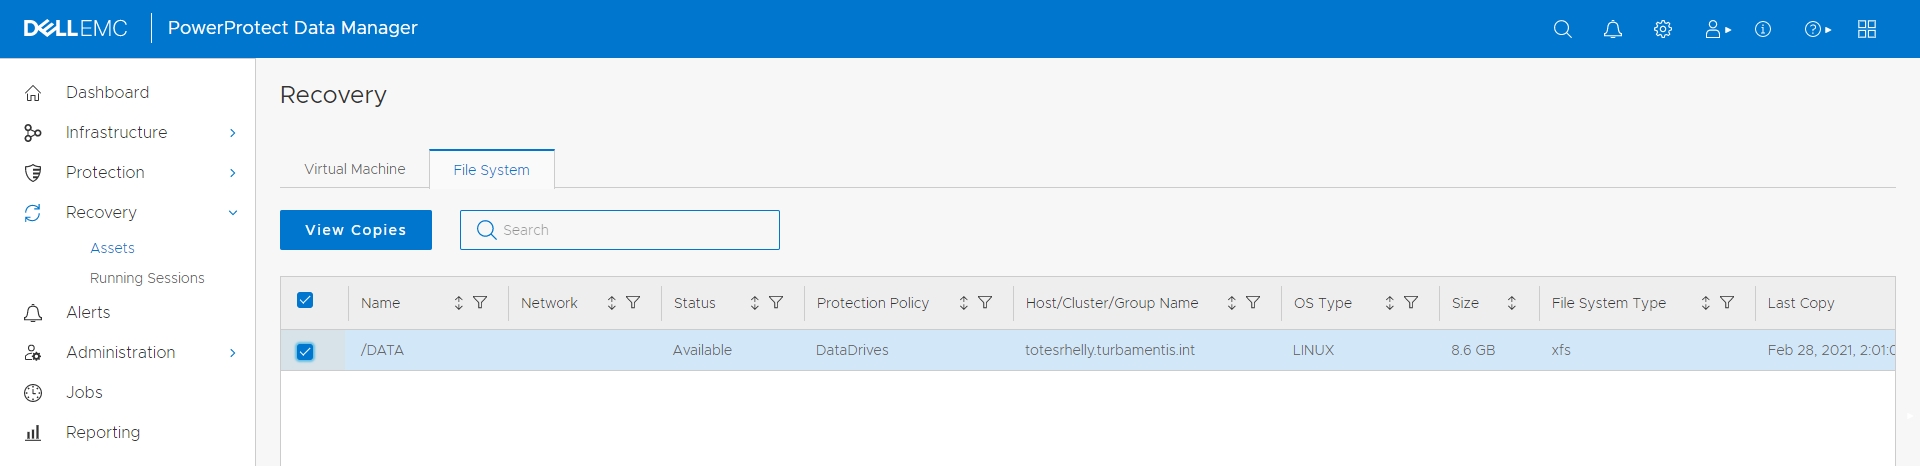
In Data Manager, you start a recovery by navigating to Recovery > Assets and choosing the asset type you want to recover from. For me, that was Recovery > Assets > File System. In that view, I could then select the asset I wanted to recover from:
Once you start the recovery, you’re prompted to choose which Data Domain you want to recover from, and the backup you want to use for the recovery. In my case, I’d only done a backup, not a replication, and I’d only done one backup, so the selections were easy:
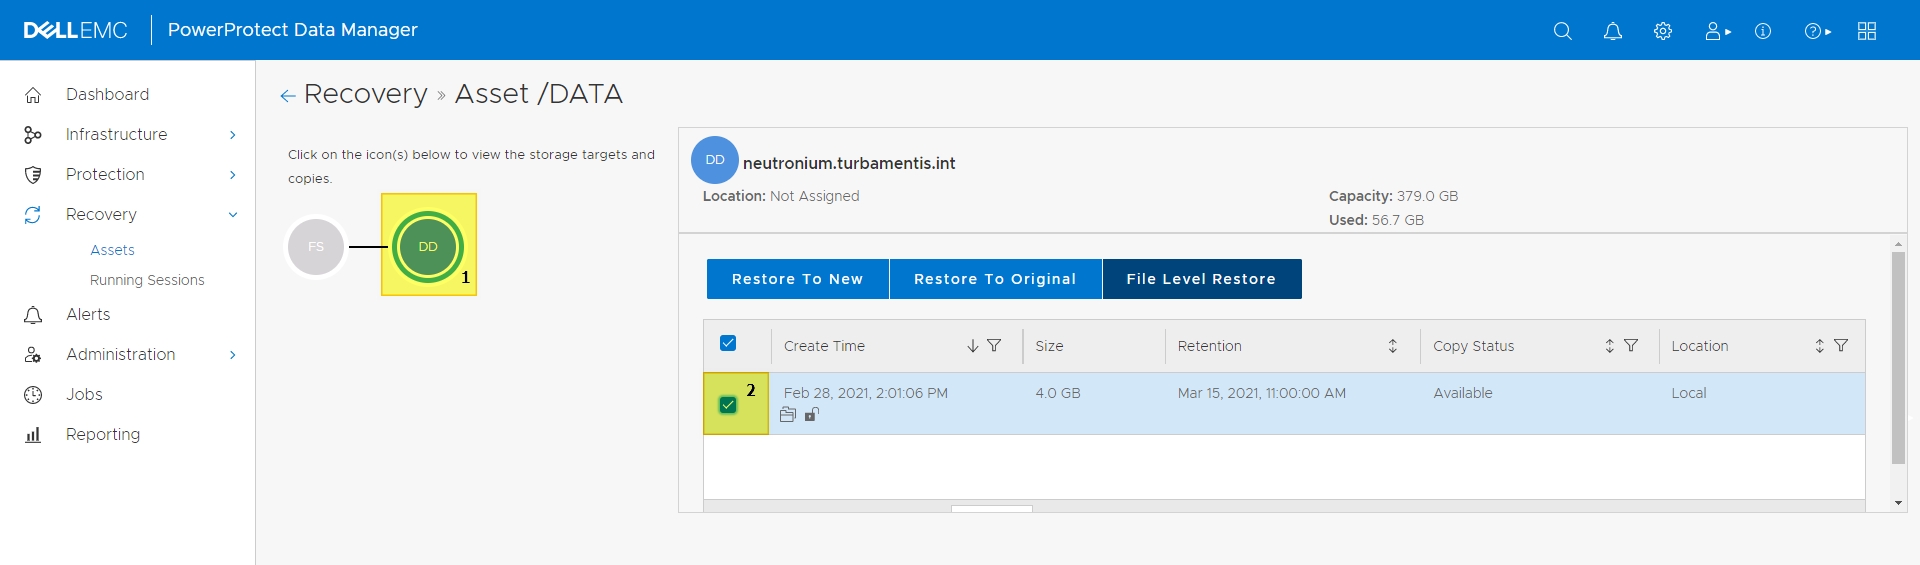
I wanted to do a browsed, selective recovery, so I clicked the File Level Restore button to start that wizard.
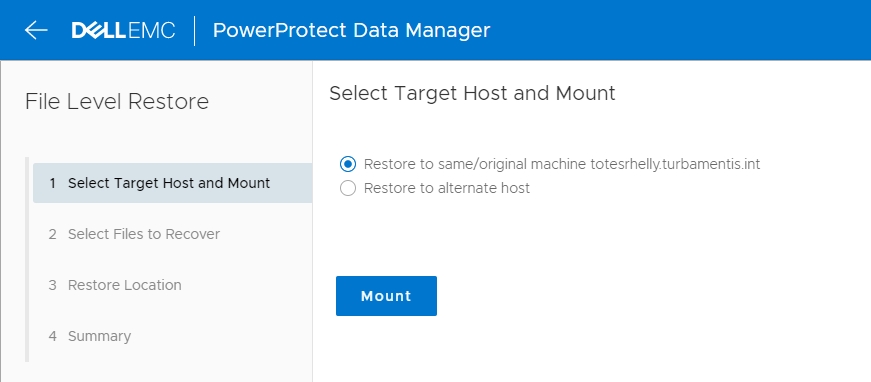
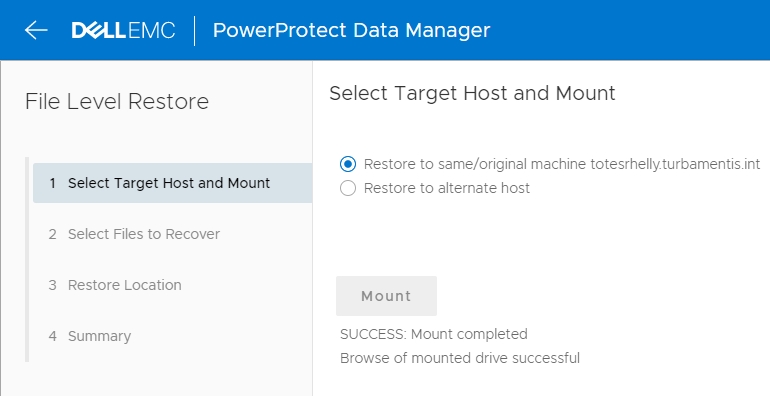
Your first choice is whether you want to recover back to the same host, or another host. Once you’ve made that selection, you click the Mount button presented to mount the backup for recovery.
Once the backup has been mounted for recovery, you’ll see a status update and you can click the Next button (not shown below):
With the backup mounted, you can proceed to selecting the files you’d like to recover:
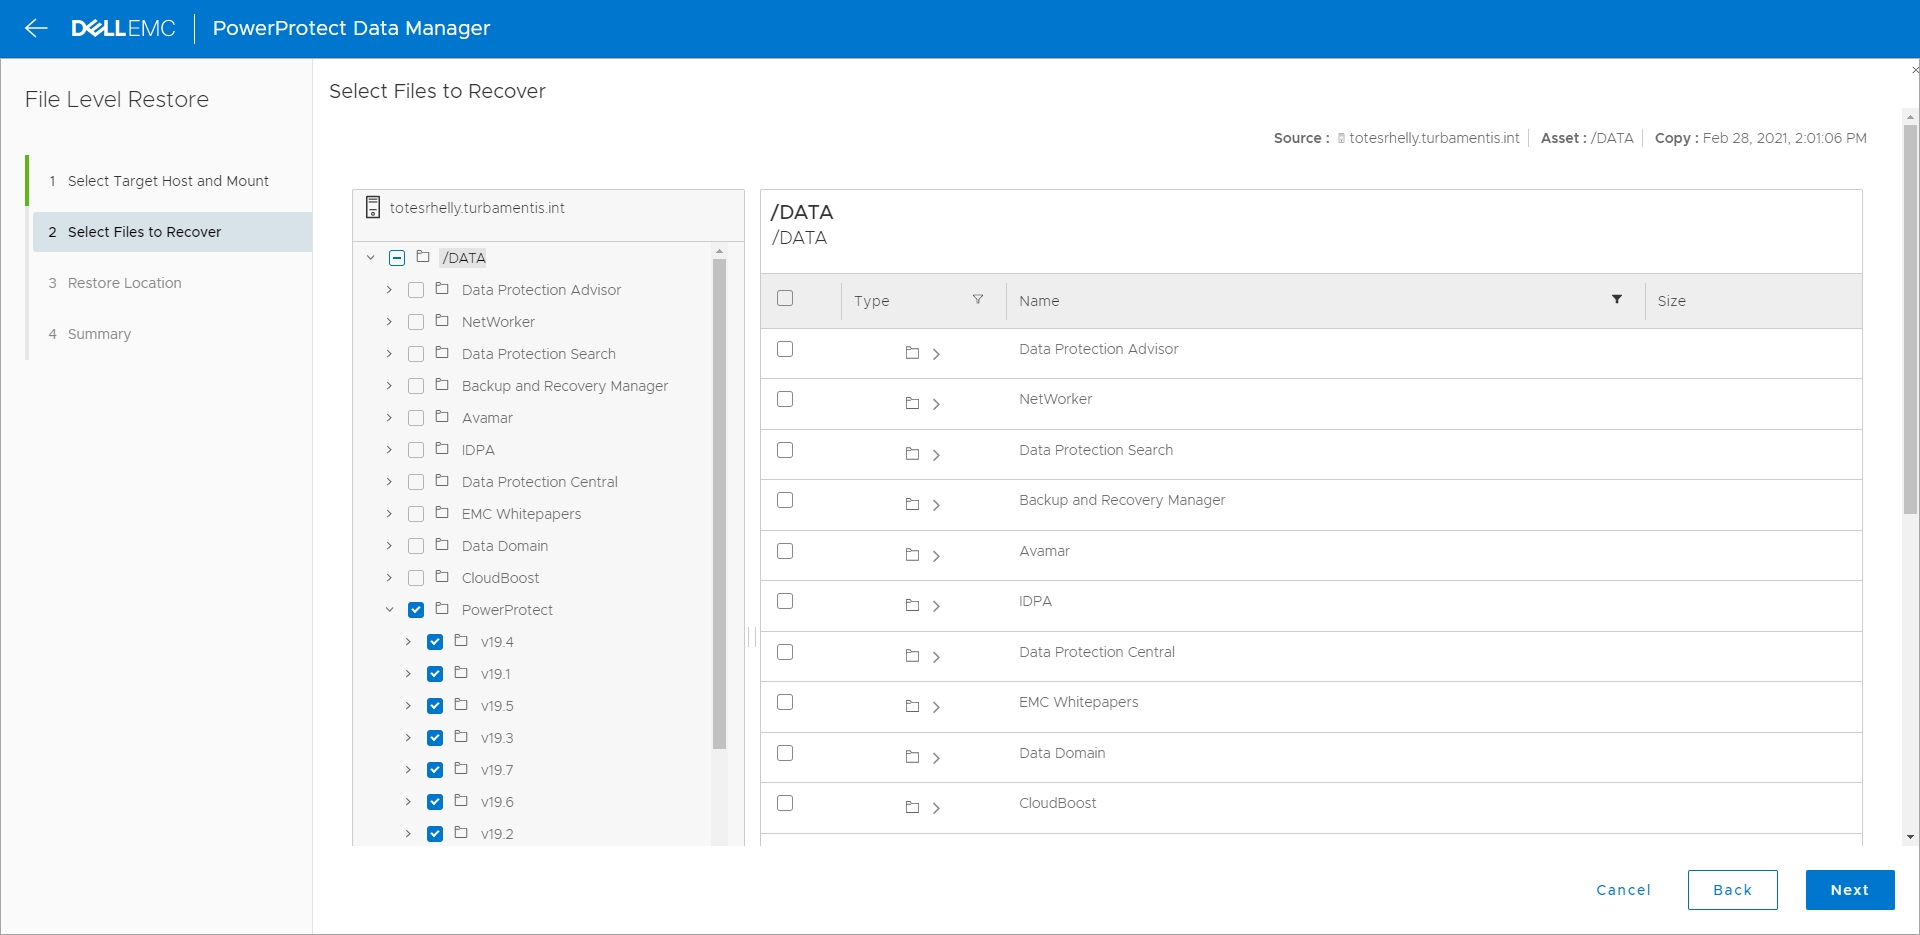
I went for a very meta recovery, choosing to recover documentation for PowerProtect Data Manager itself, so I selected all the version folders I’d had in the /DATA directory and clicked Next to continue.
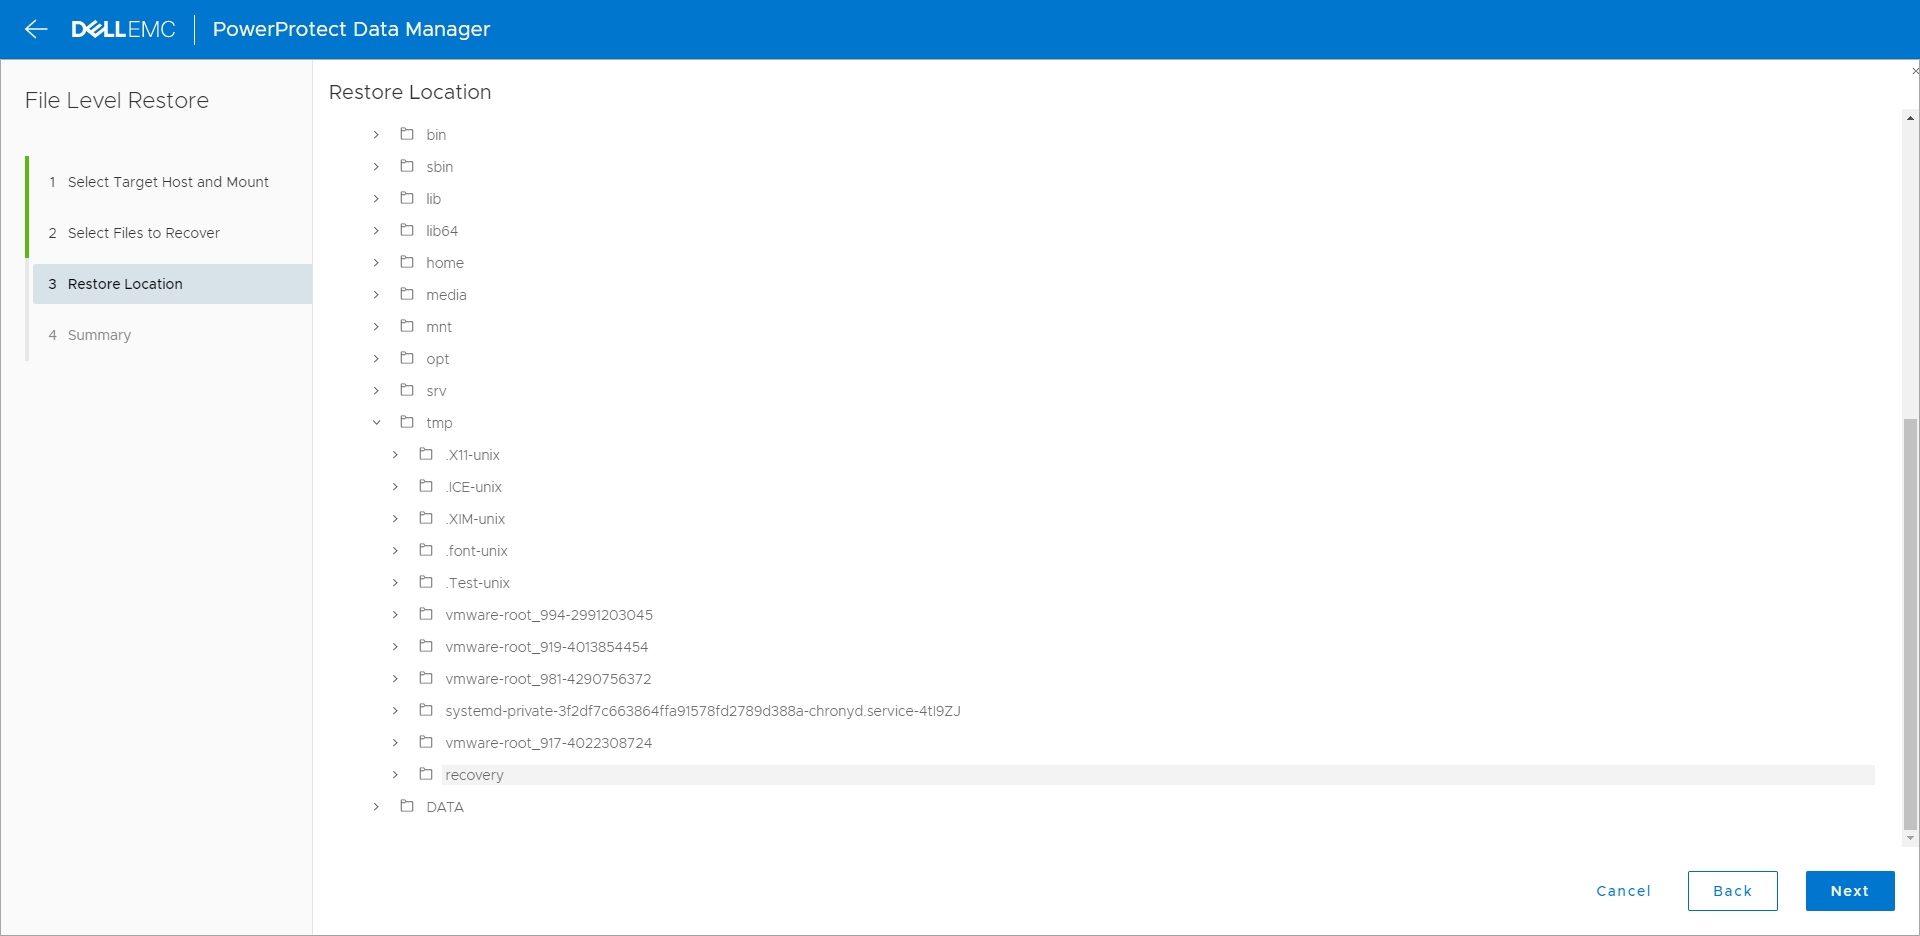
I’d created a /tmp/recovery directory on the host, and when presented with a filesystem structure to choose my recovery target, I scrolled through and selected that.
Having selected my target host, files to recover, and recovery location, I could click Next to see a summary of the actions I’d chosen.
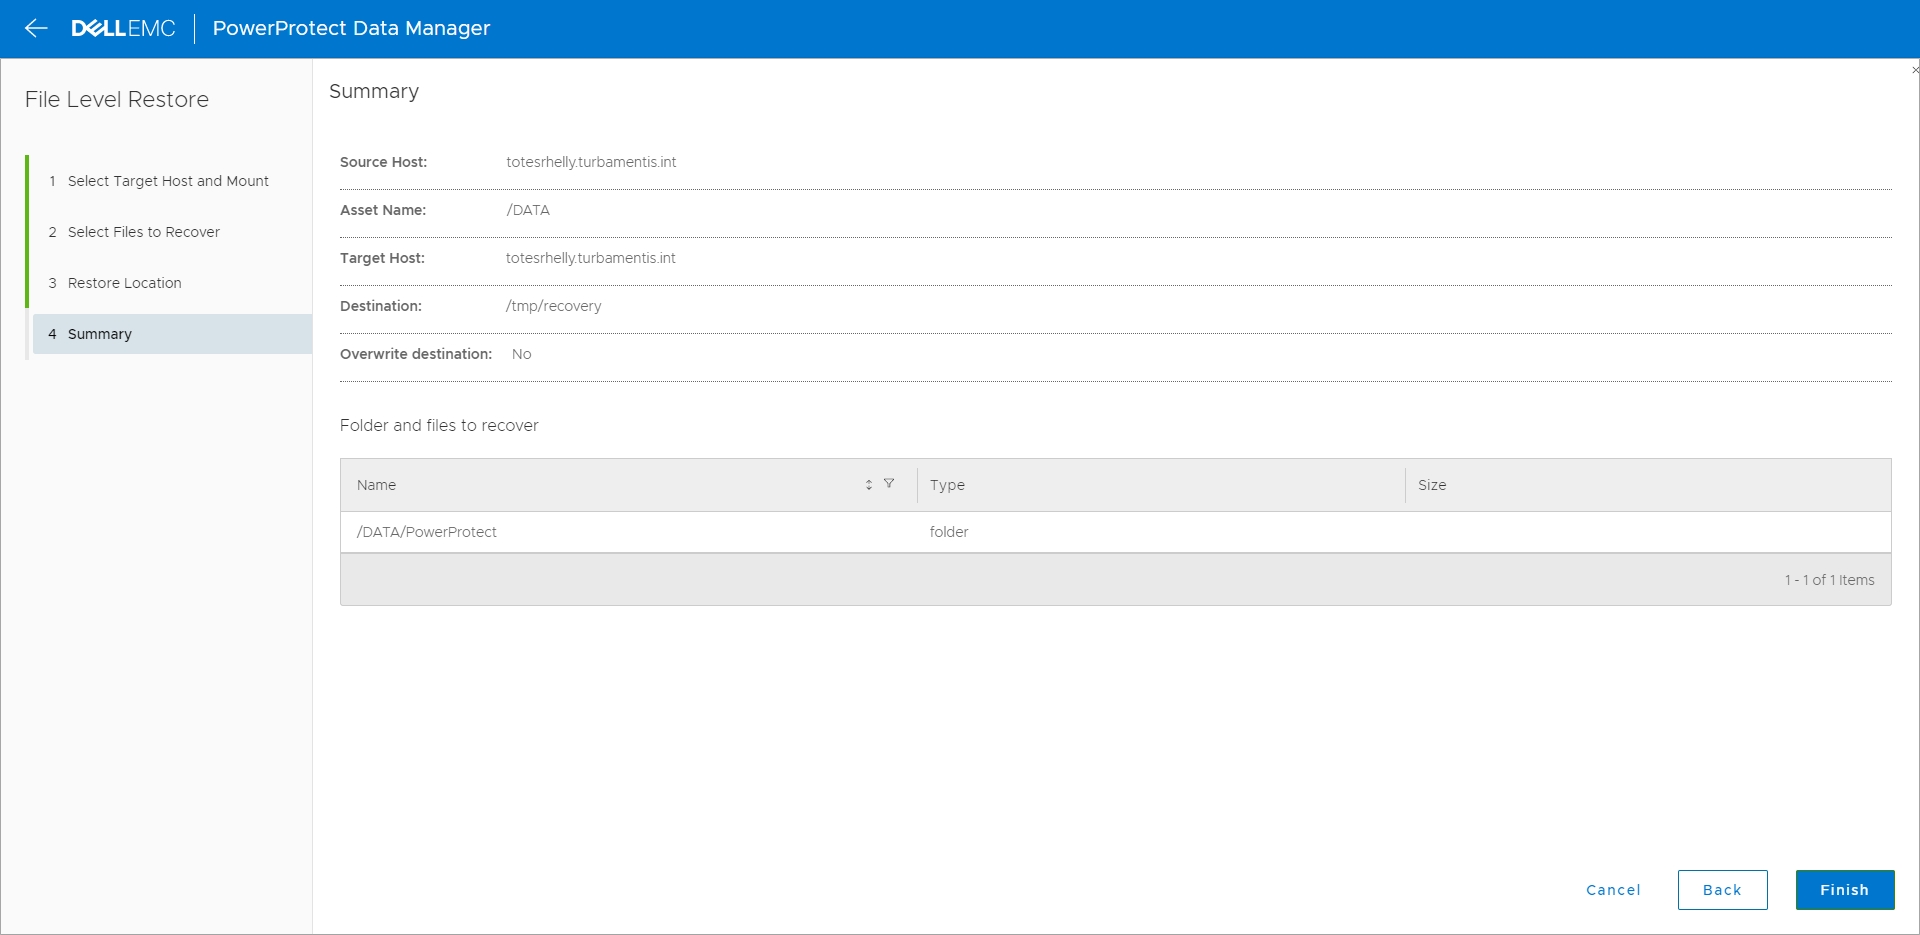
With everything confirmed, clicking Finish then starts the recovery process. I jumped across to the Jobs dashboard so I could see it progress:
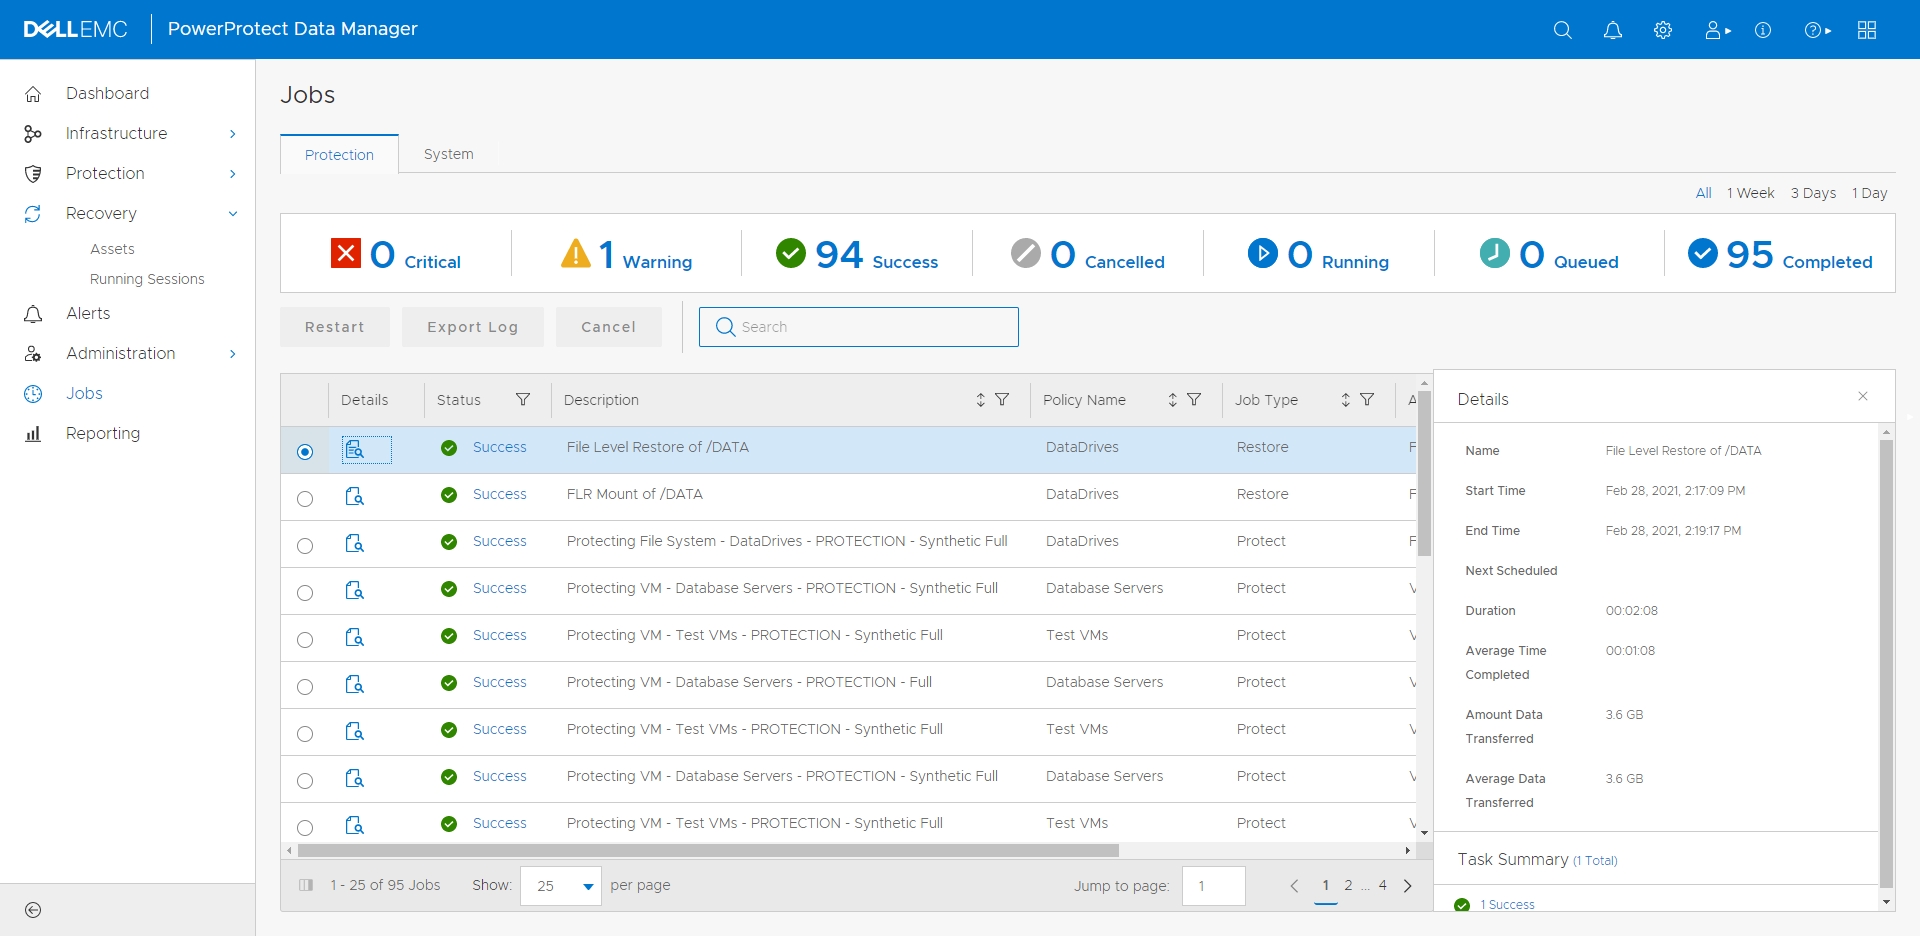
In short order, the recovery completed, and the Jobs dashboard updated to show the details:
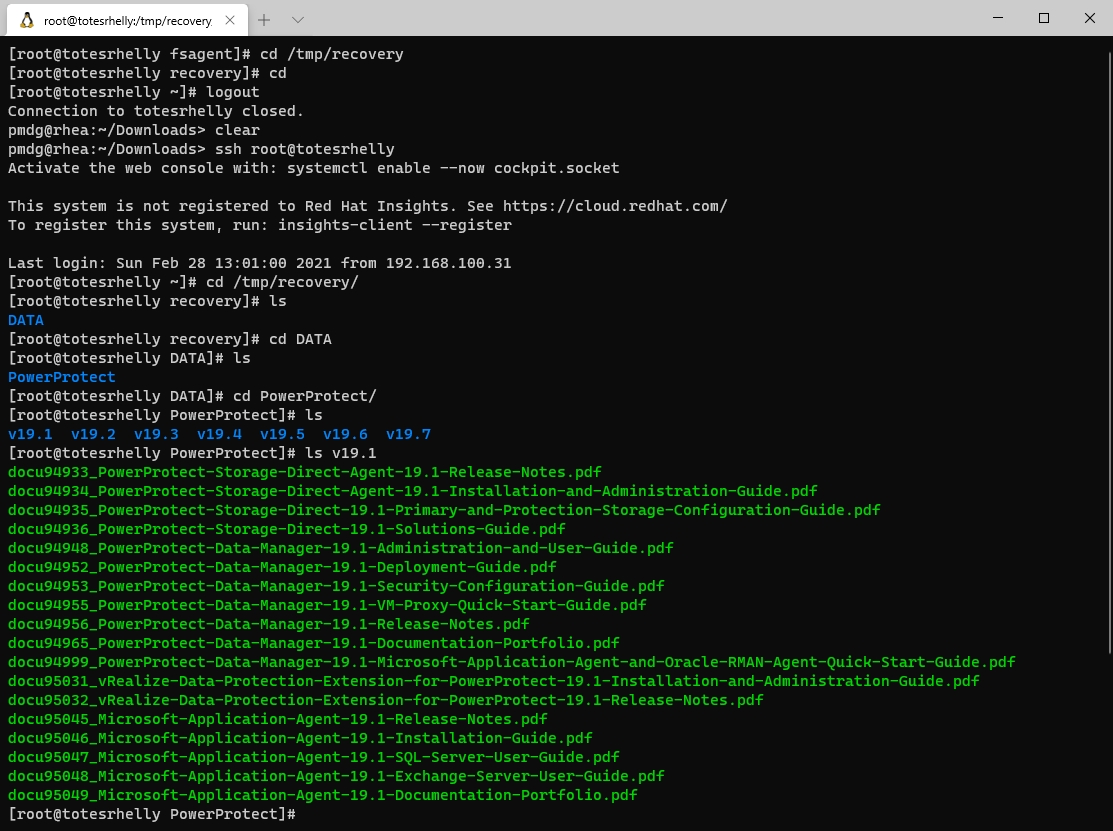
Finally, I jumped onto totesrhelly and confirmed that the recovery had brought the requested files back:
Wrapping up Filesystem Agent Installation and Recovery
That’s the end-to-end process for installing a filesystem agent on a Linux client, registering the client, approving the registration, configuring a policy and waiting for it to run, and then performing the recovery.
(You might ask: why do I so rarely show Windows examples? That’s easy: I don’t have permanent Windows Server licenses and I find the every-180-days reinstall process irksome.)
What you should see from the above is how straight-forward the complete process was. So if you’ve got regular filesystem backups you need to do, don’t feel shy about using PowerProtect Data Manager to do them.
1 thought on “PowerProtect Data Manager Filesystem Agent – Installation and Recovery”