
I recently wanted to check out some PowerProtect Data Manager options with Oracle, and so I found myself spinning up a temporary test server running Oracle 19c.
To get cracking on this, installed Oracle 19.c on a CentOS Stream 8 host, then downloaded the Oracle RMAN agent documentation for Data Manager 19.9 and started working through the process.
So, what’s involved?
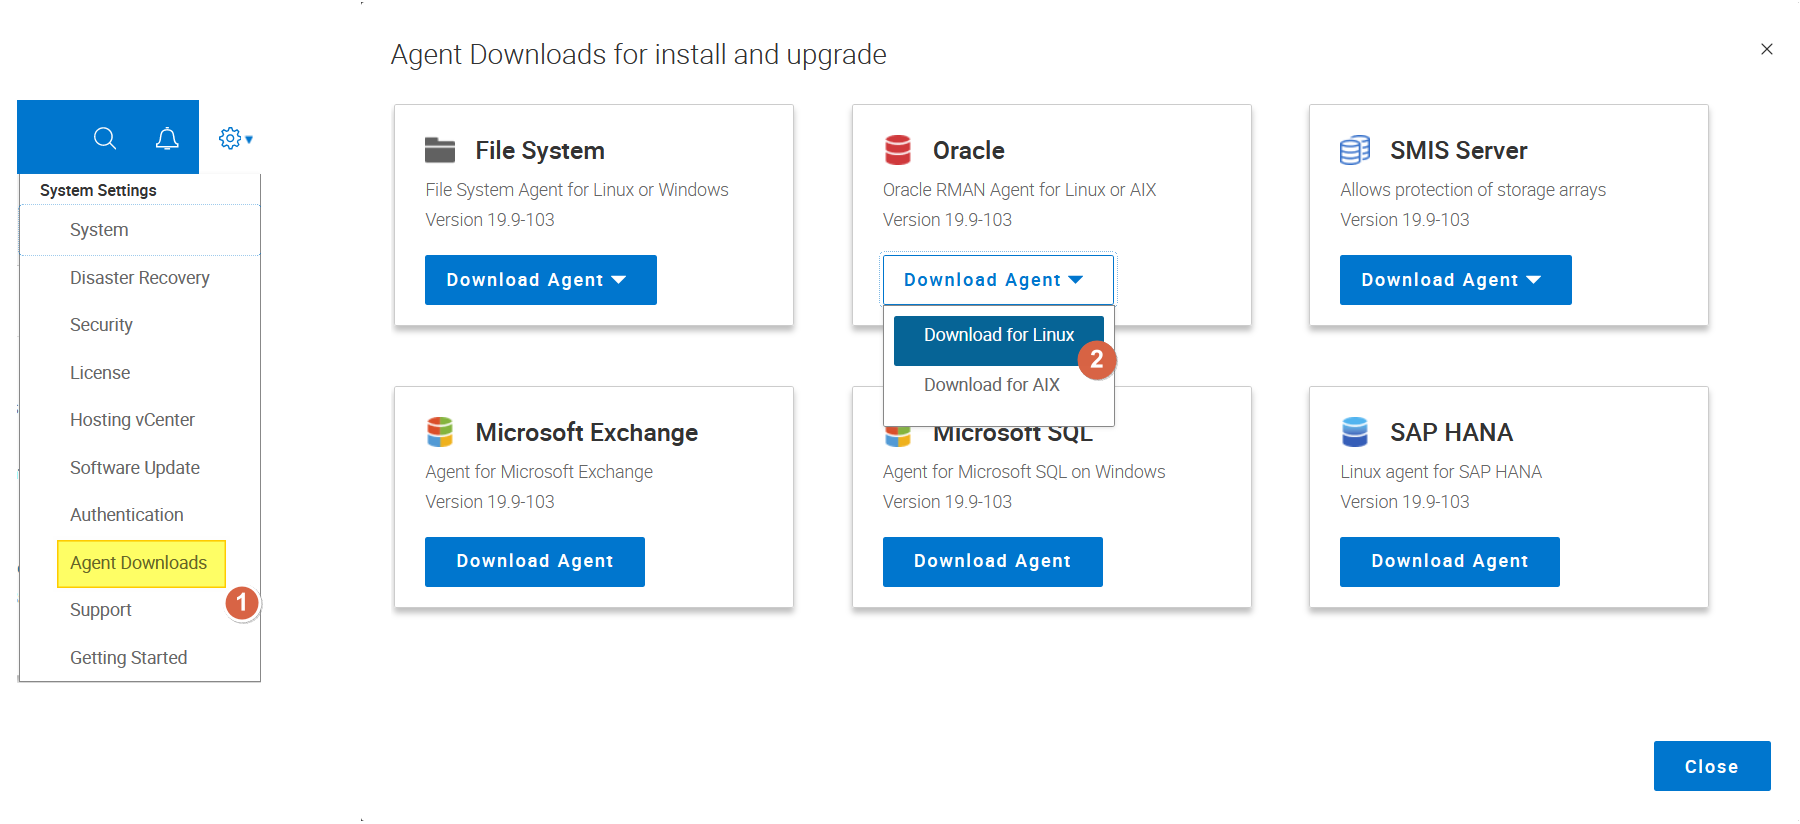
You’ll start by downloading the Oracle agent. You don’t need to go to the support website for that — agent downloads are accessible directly from within the Data Manager administration console by clicking on the Gear icon:
Having downloaded the agent, transfer it across to the Linux host you’re going to install it on and unpack it in the oracle user’s home directory.
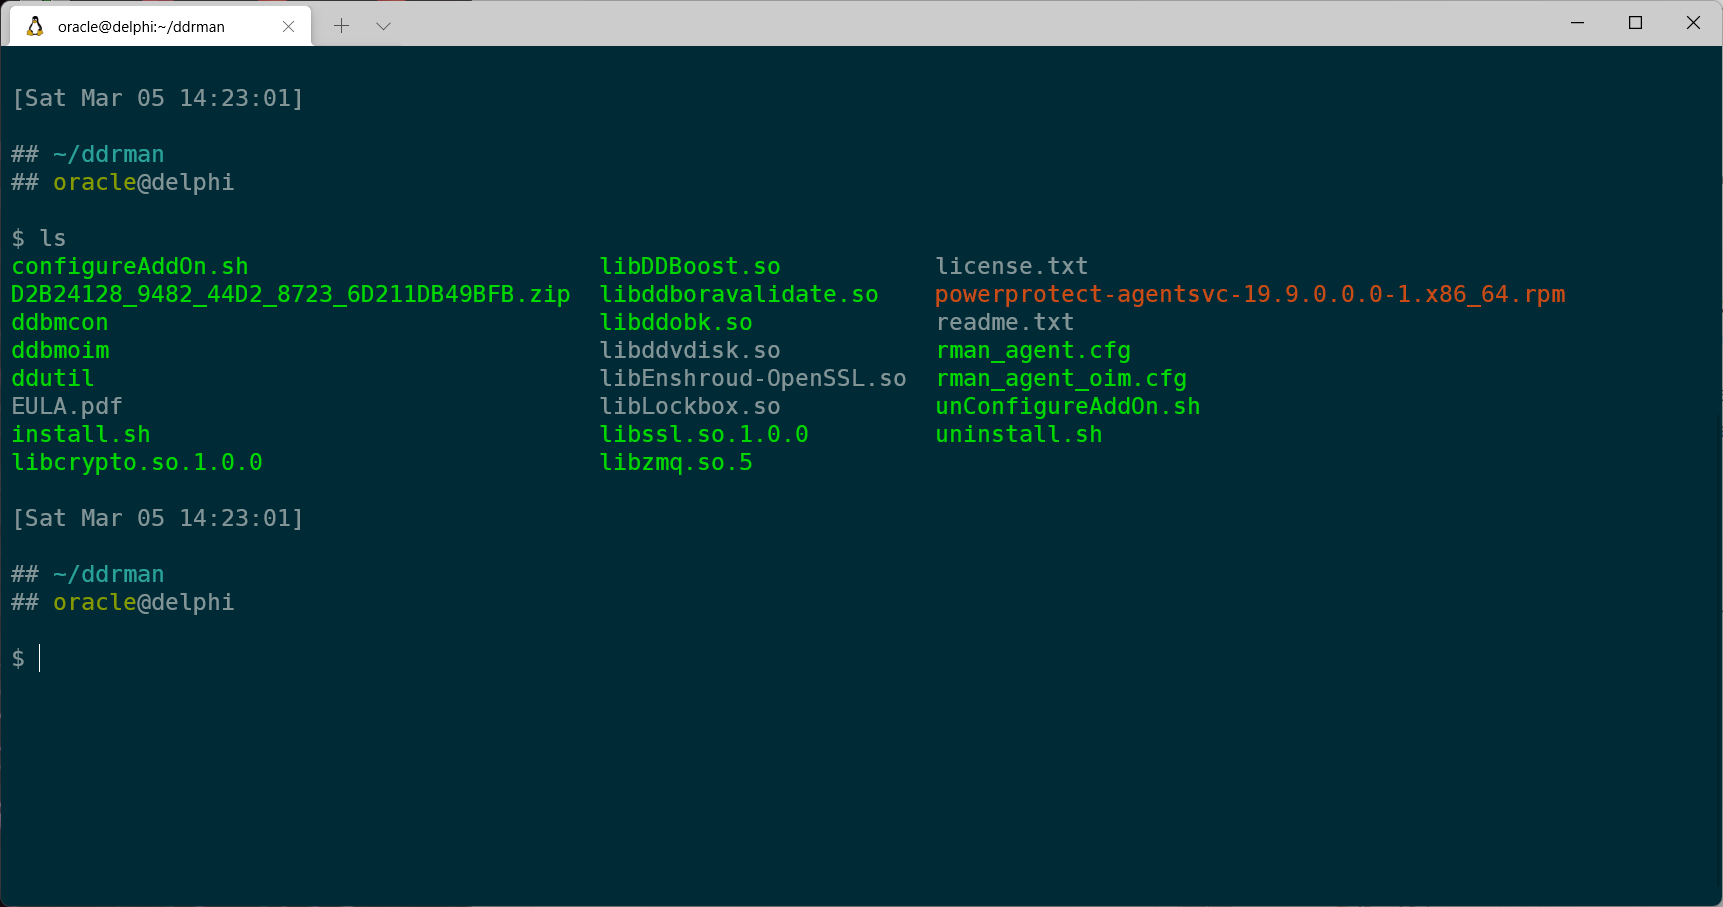
You’ll notice in addition to an install.sh executable, there’s also a powerprotect-agentsvc-19.9.0.0.0-1.x86_64.rpm file. You’ll install this first as the root user to provide an agent-level connection between the host and the Data Manager server. After that’s done, as the oracle user you can run the install.sh script. (This process is documented in the Oracle RMAN guide for Data Manager that I linked to in the introduction.)
Once you’ve registered the system against Data Manager and approved the asset registration from within Data Manager, it’ll appear as an Oracle asset source:

To discover the databases on the host, click the radio button for the newly added asset and click the ‘Discover’ button to start an immediate discovery job. You can monitor this in the Jobs panel if you’d like:

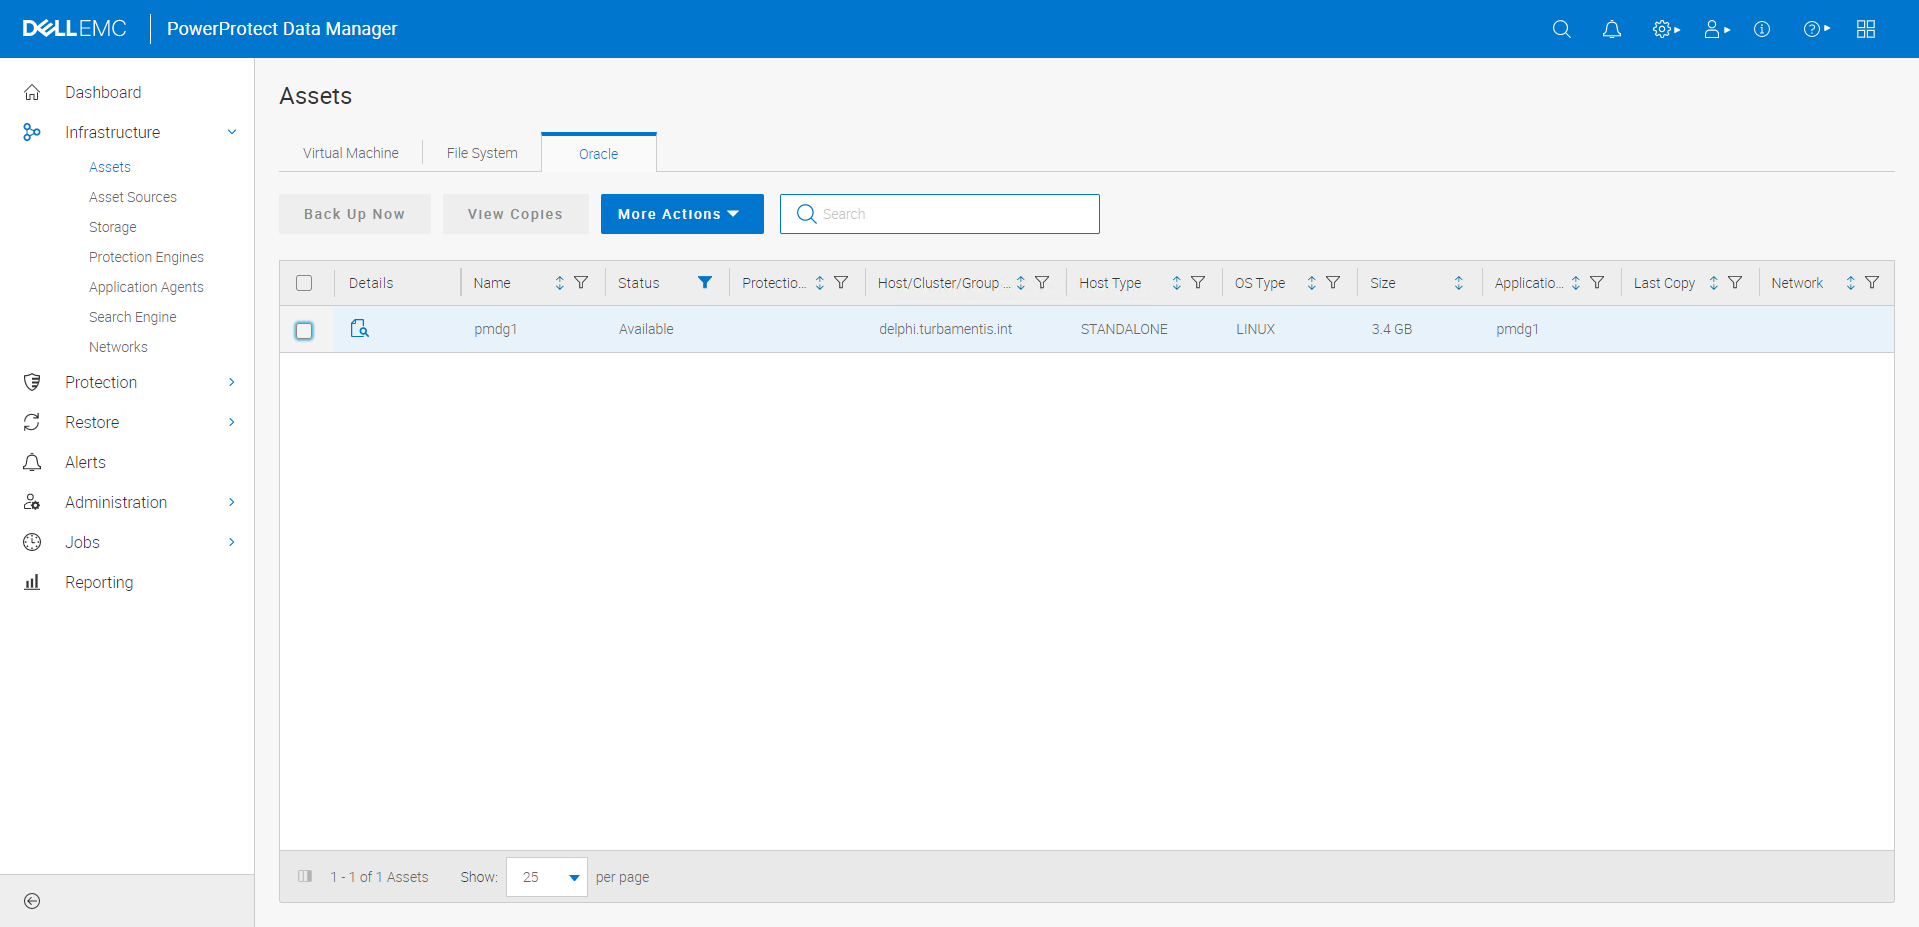
With the discovery complete, the Data Manager assets page then shows the database on my Oracle server:
OK, so with the agent installed and activated, and the database on the system discovered, the next step is to create an actual backup policy. (Normally of course you’d put more than one database server into a policy, but in this case, I’ve only got one.) So here’s the sequence I went through for a new policy. Under Protection > Protection Policies I clicked the Add button to start the process:
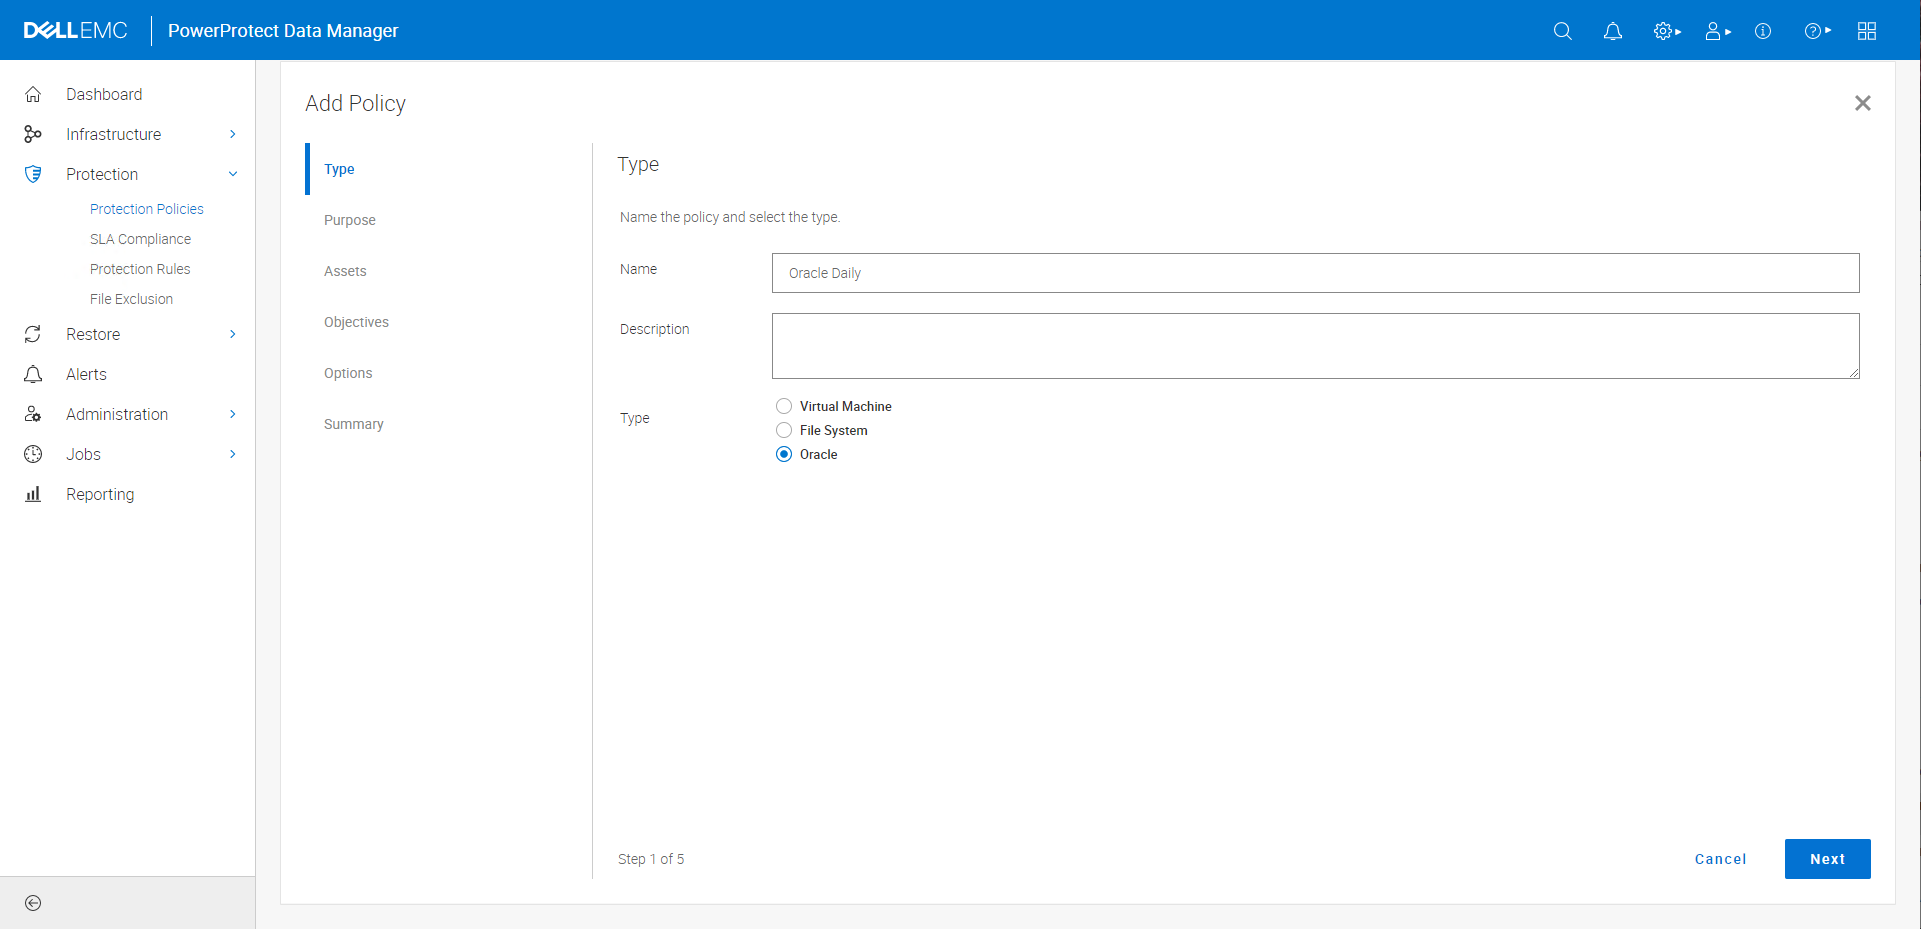
I gave the policy a name and selected the ‘Oracle’ type before clicking Next.

On the second step, you’re prompted to confirm whether this is a centralized policy (one that Data Manager will run for you), a self-service policy (where the DBAs will run the backups themselves), or an exclusion policy (which prevents elements of an environment being added by other policies when you don’t want them protected). For this, I chose a Centralized Policy, and clicked the Set Credentials button to provide Data Manager with authentication details. There are a few different options for credentials, but I went with the simplest — providing that of the oracle user itself. (In a production environment, you’ll likely choose database credentials or wallet instead.)
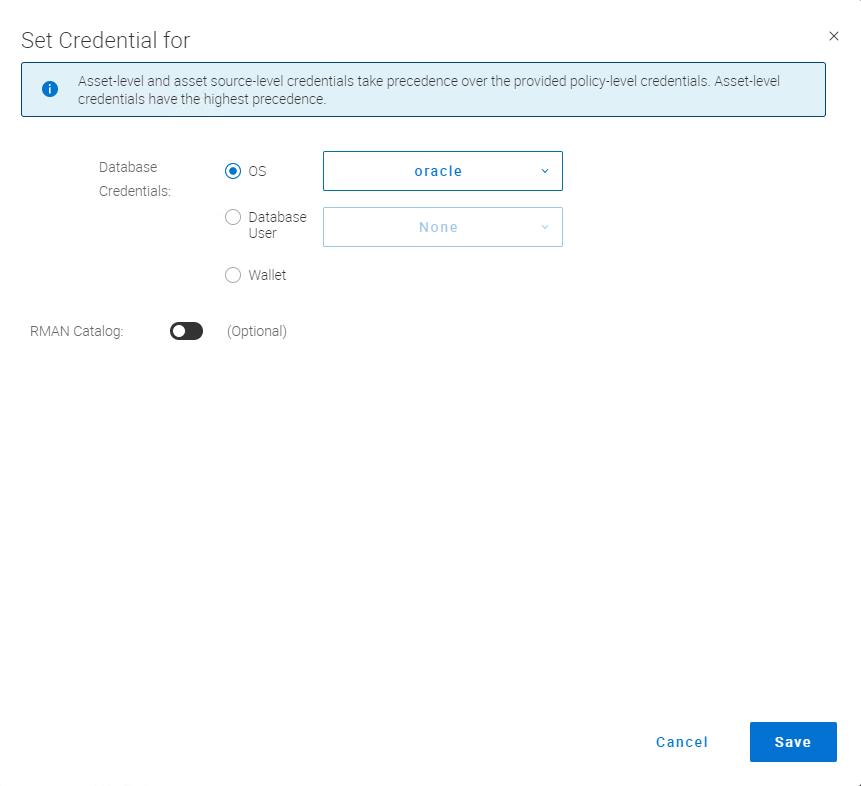
If you’re using an RMAN catalogue, you can provide the credentials for it in the screen above. For my testing I wasn’t, so after adding the credentials I clicked Save to return to the policy wizard and progress to the next screen.
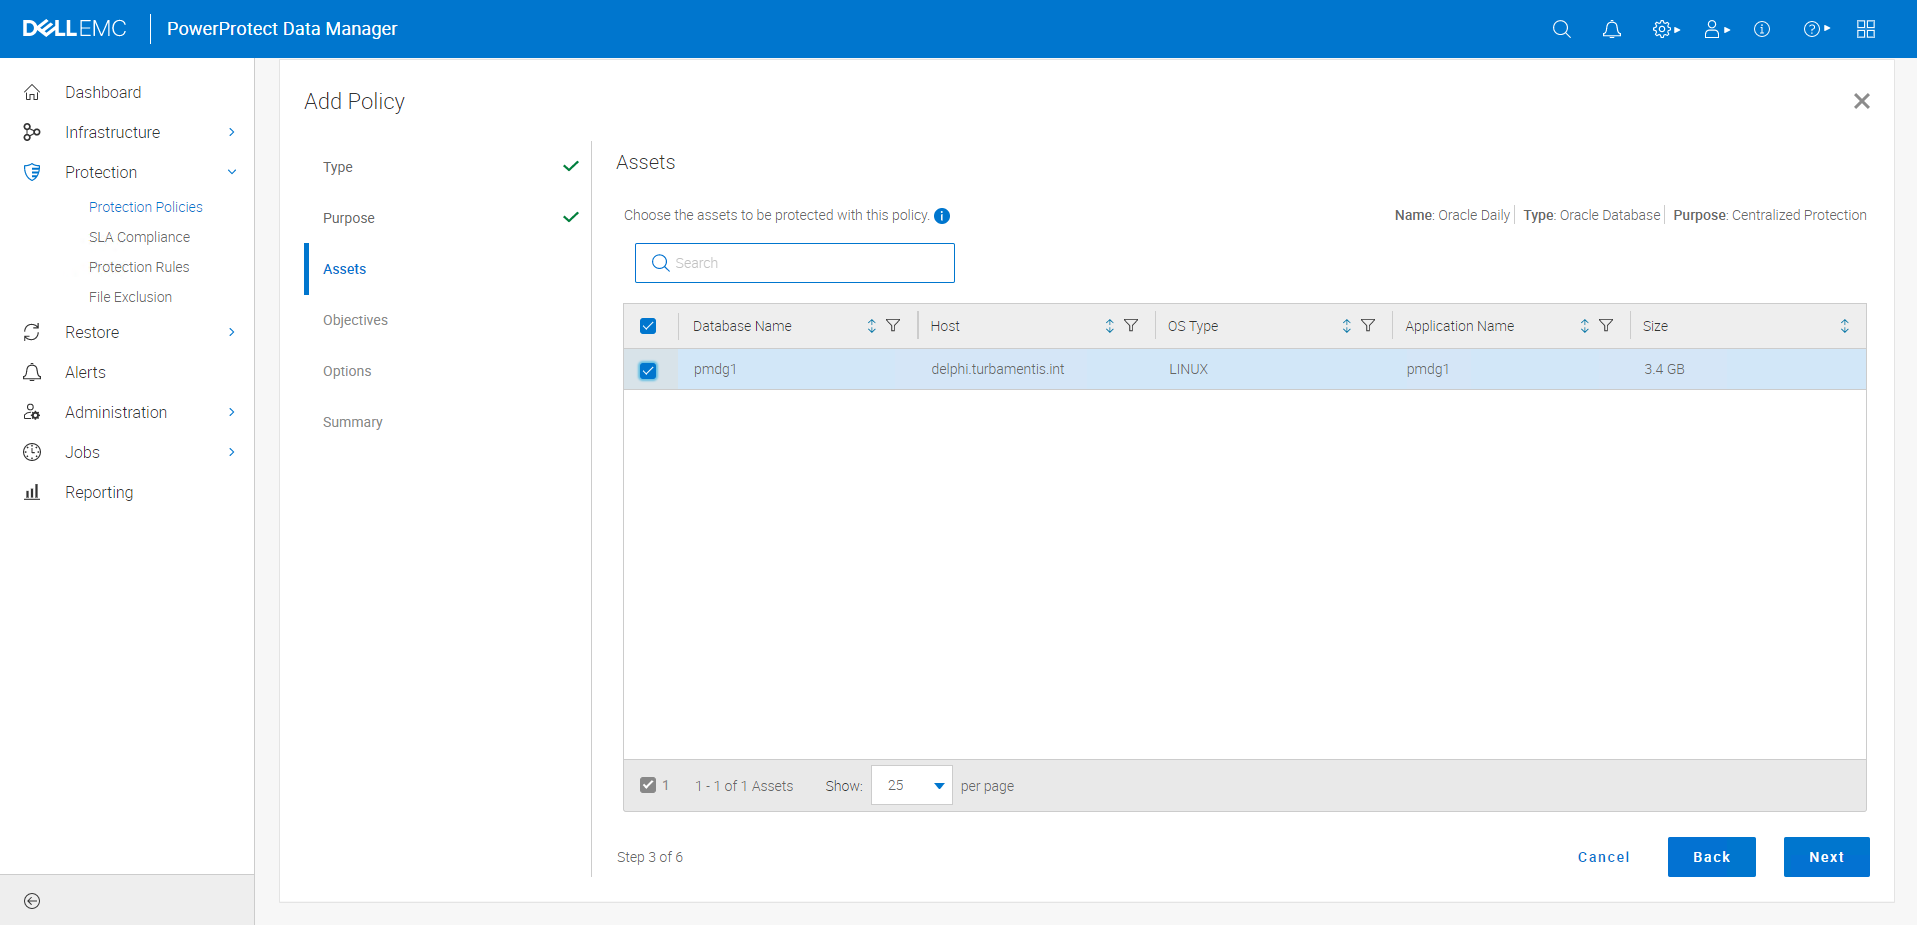
The next step is to choose the assets — i.e., the databases — you want to protect. In my case, just a singular database, ‘pmdg1’:
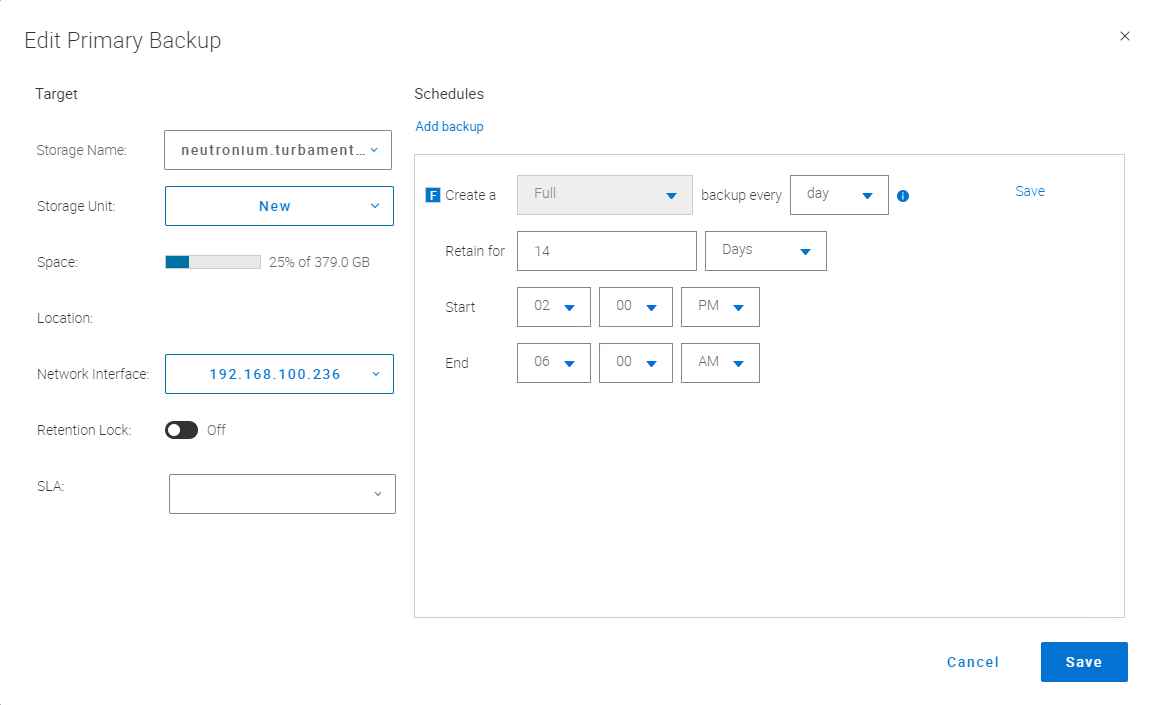
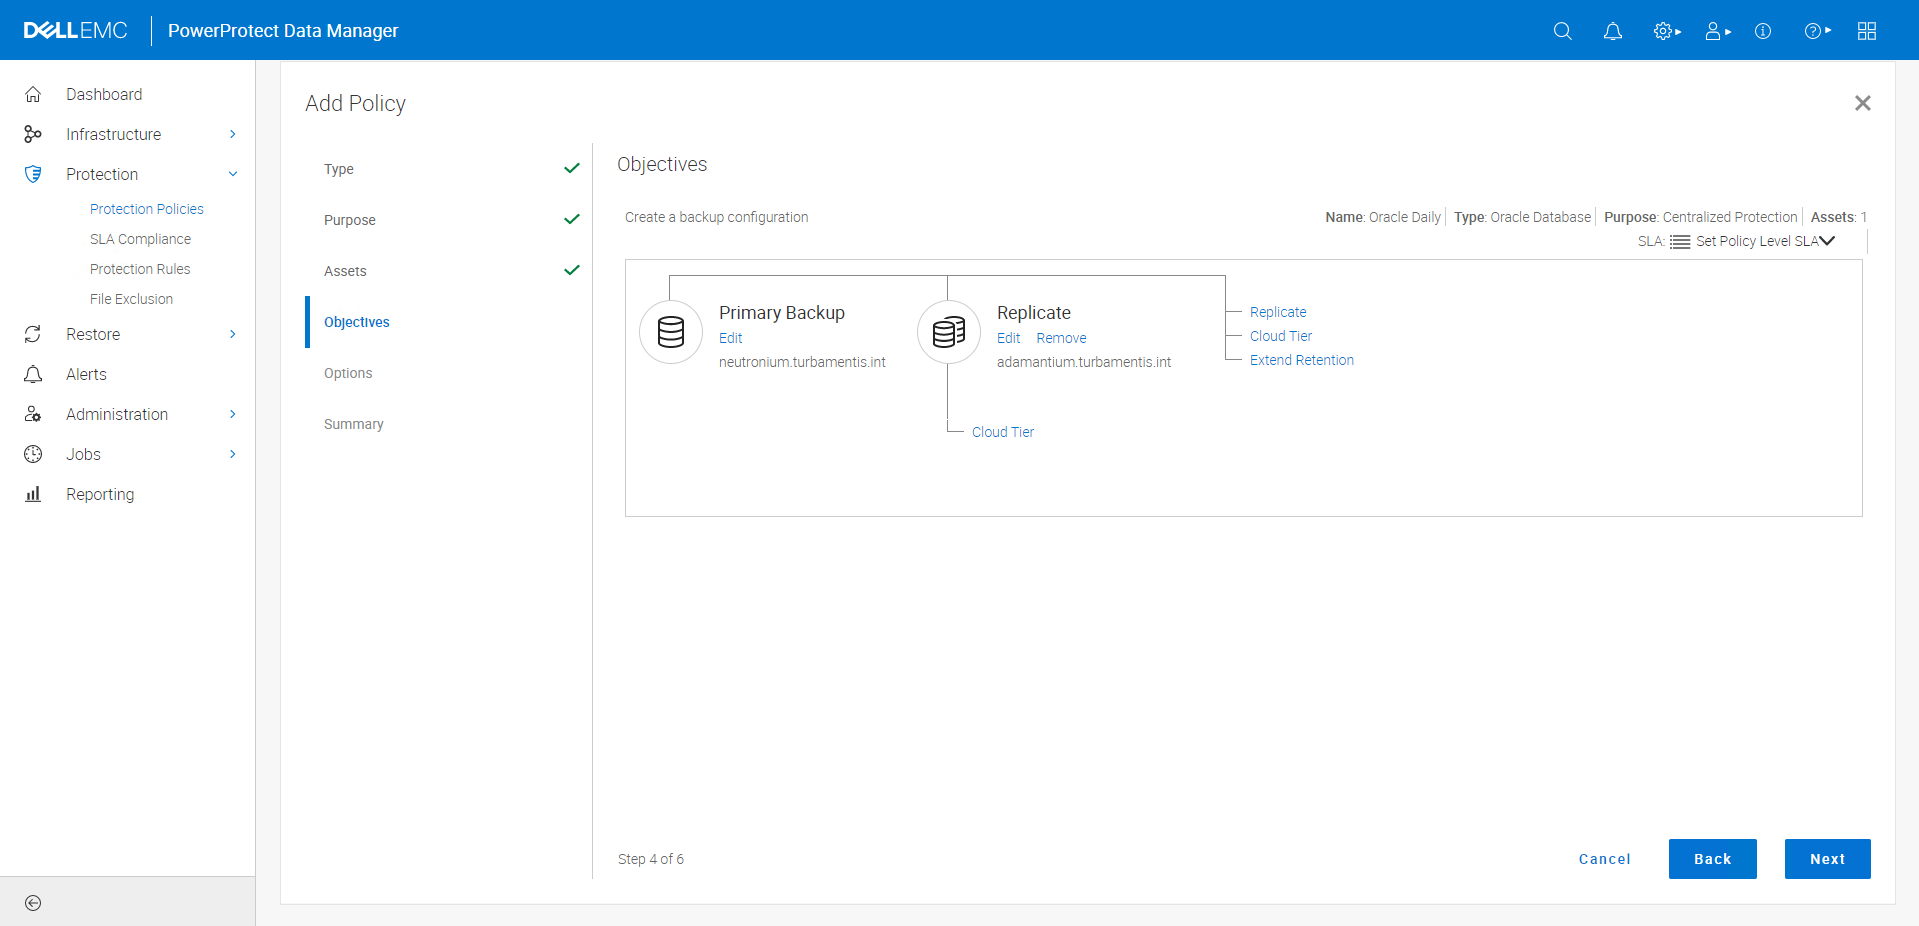
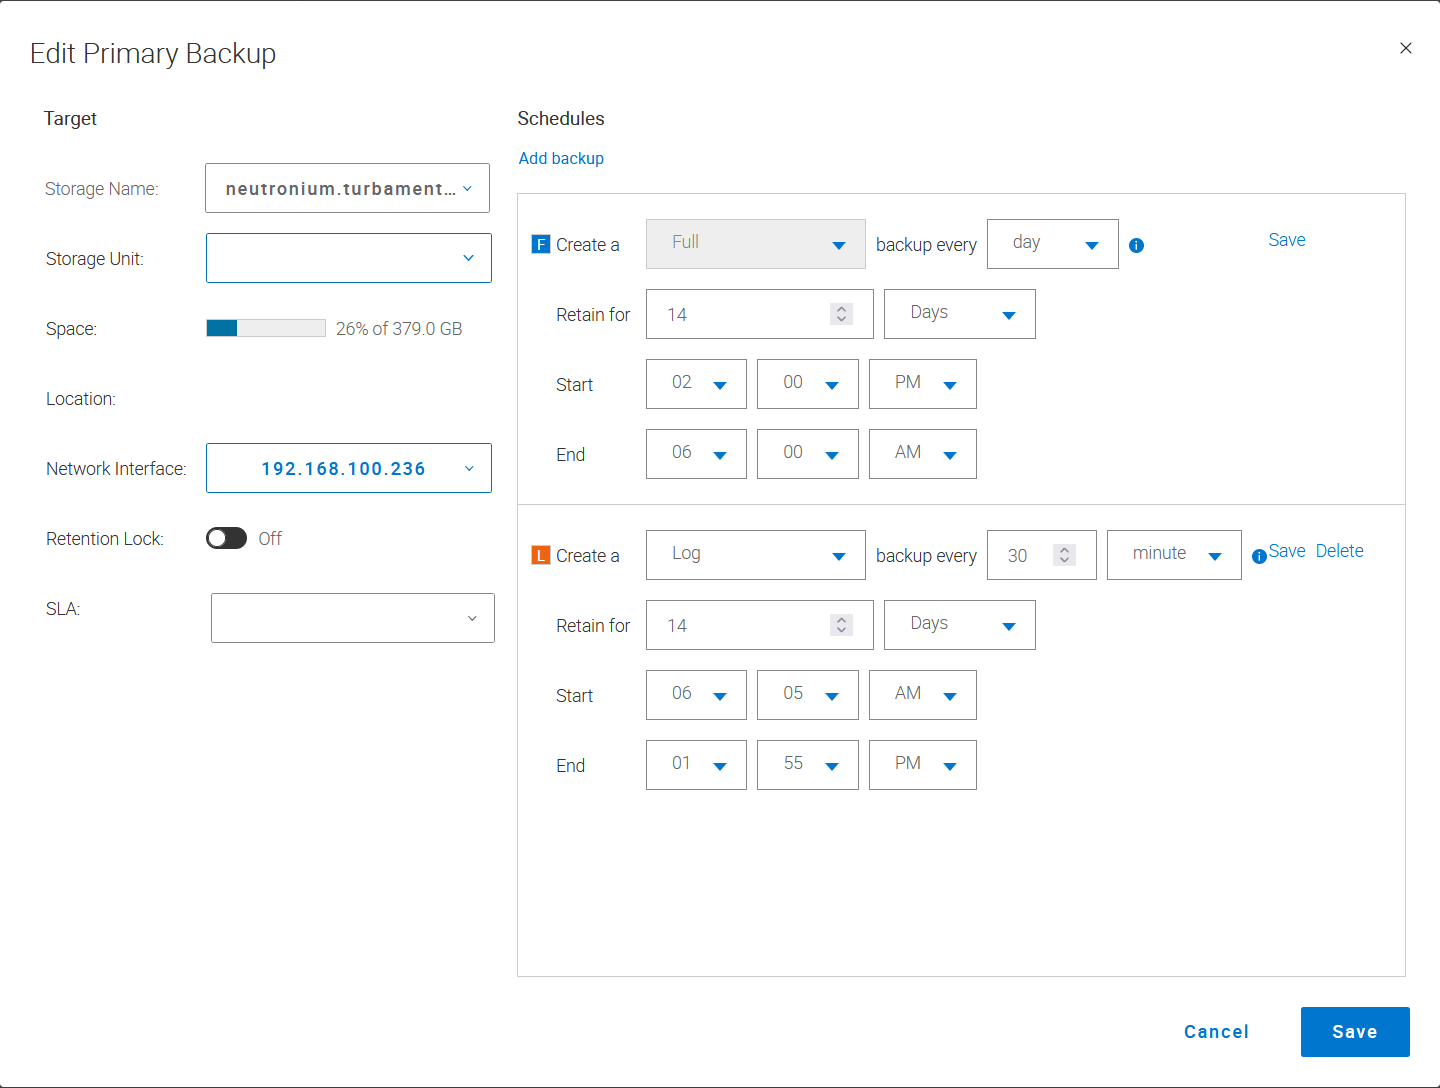
The next step is to choose the backup schedule. I’ll start with a basic one and show you a mixed model at the end. Here I’m aiming for a full backup once a day, and keeping the backup for 14 days:
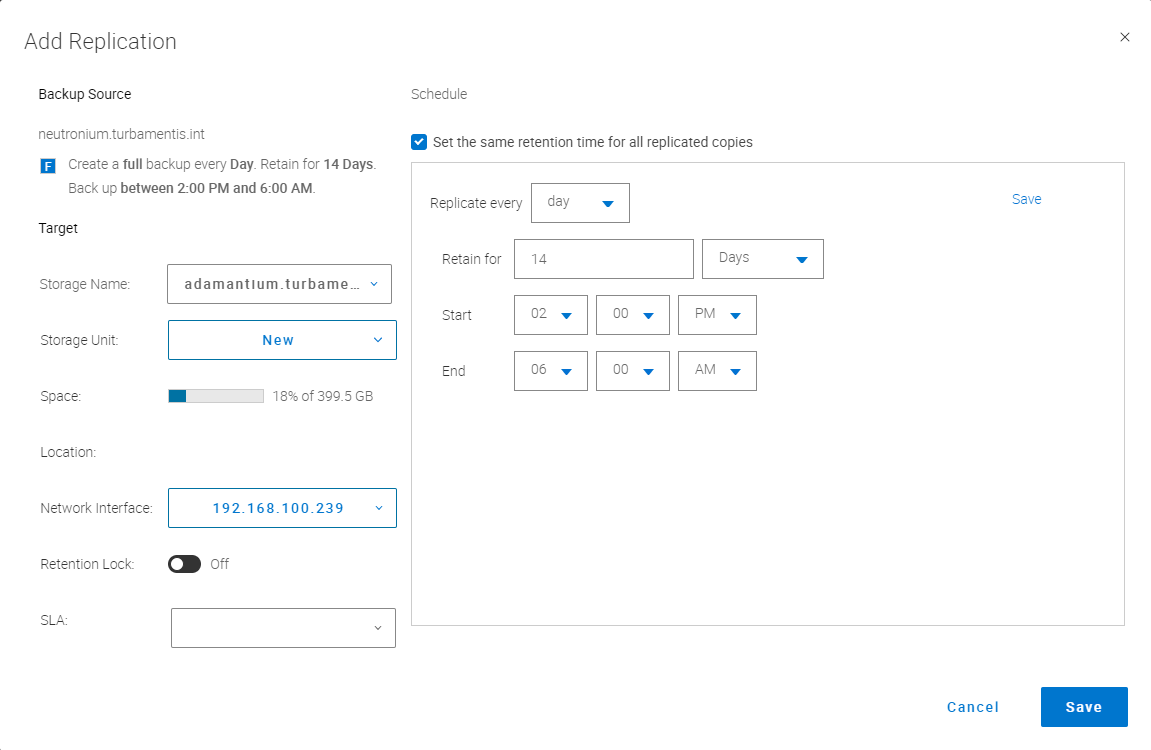
It also helps to make sure you have a copy of your backup, so I configured a replication policy with a 14 day retention period, too:
The resulting configuration looked like this:
(No need to set an SLA, since it’s a centralized backup policy and therefore the policy definition is effectively an SLA. I recommend SLA definitions in situations where you’re using self-service backups, since they provide guard-rails on the people running the self-service backups.)
Before wrapping up the policy, you have some extra options for Oracle:
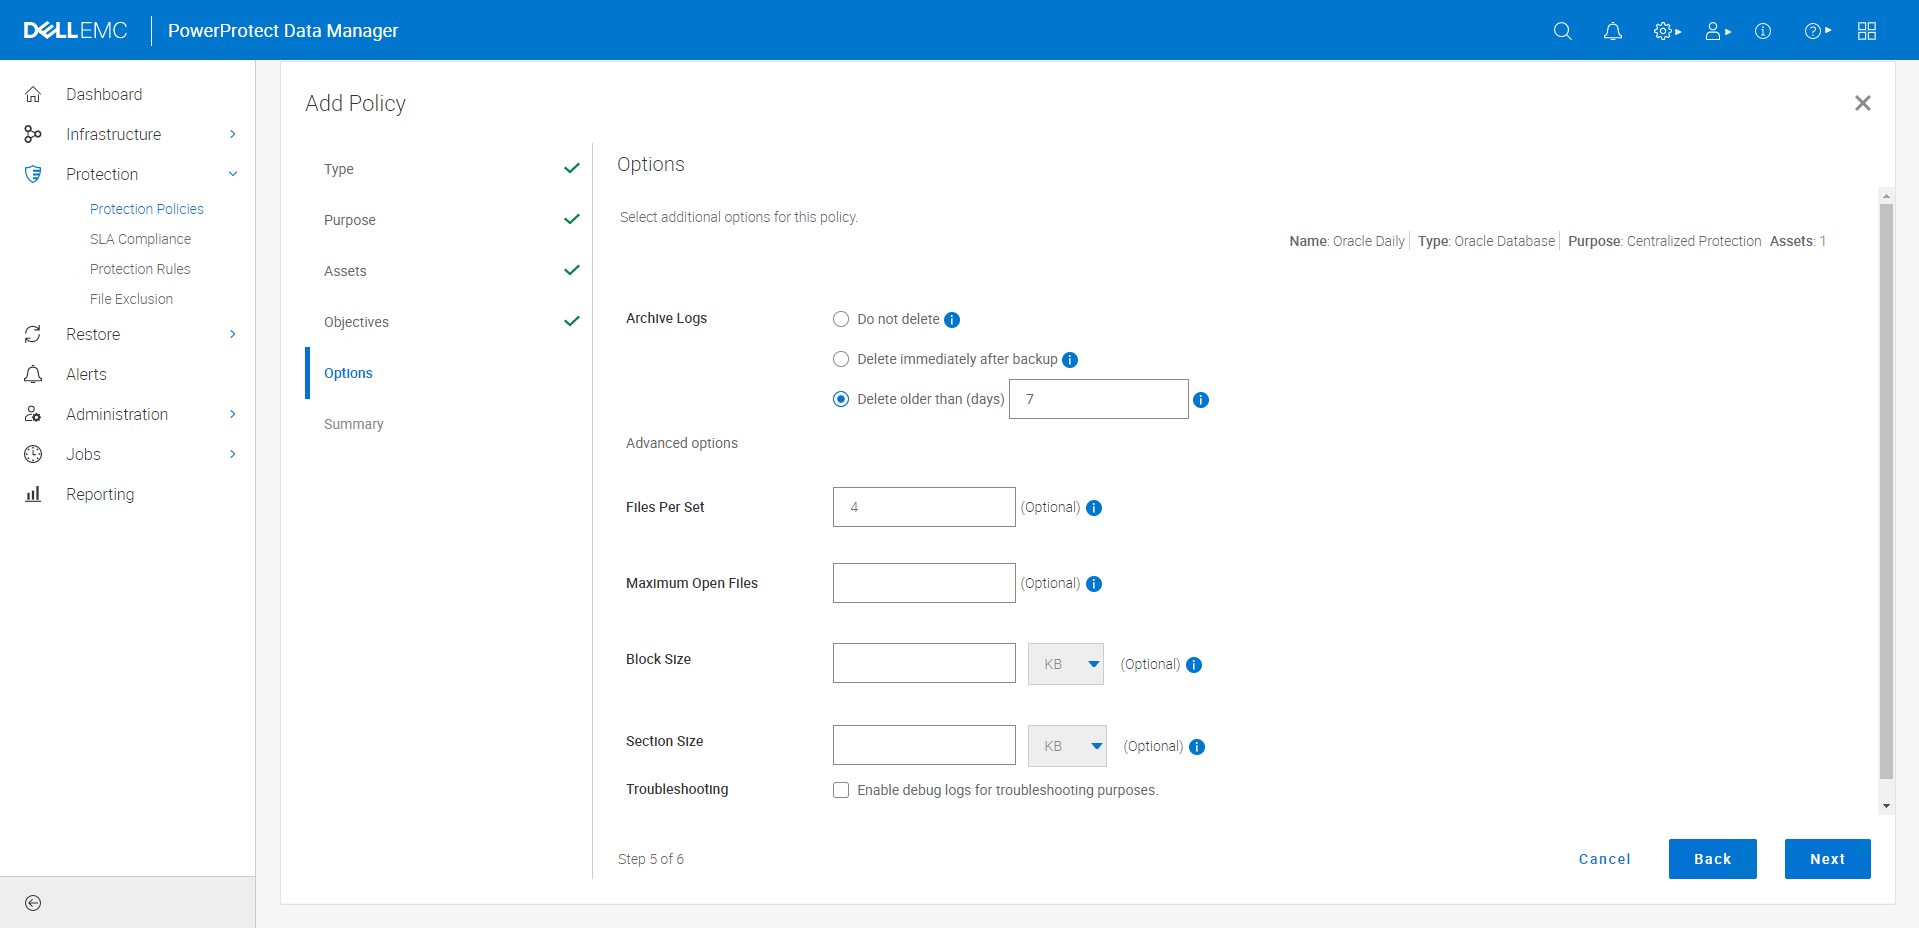
In this case, I set the files per set to 4, and elected to delete archived redo logs older than 7 days as part of the backup process.
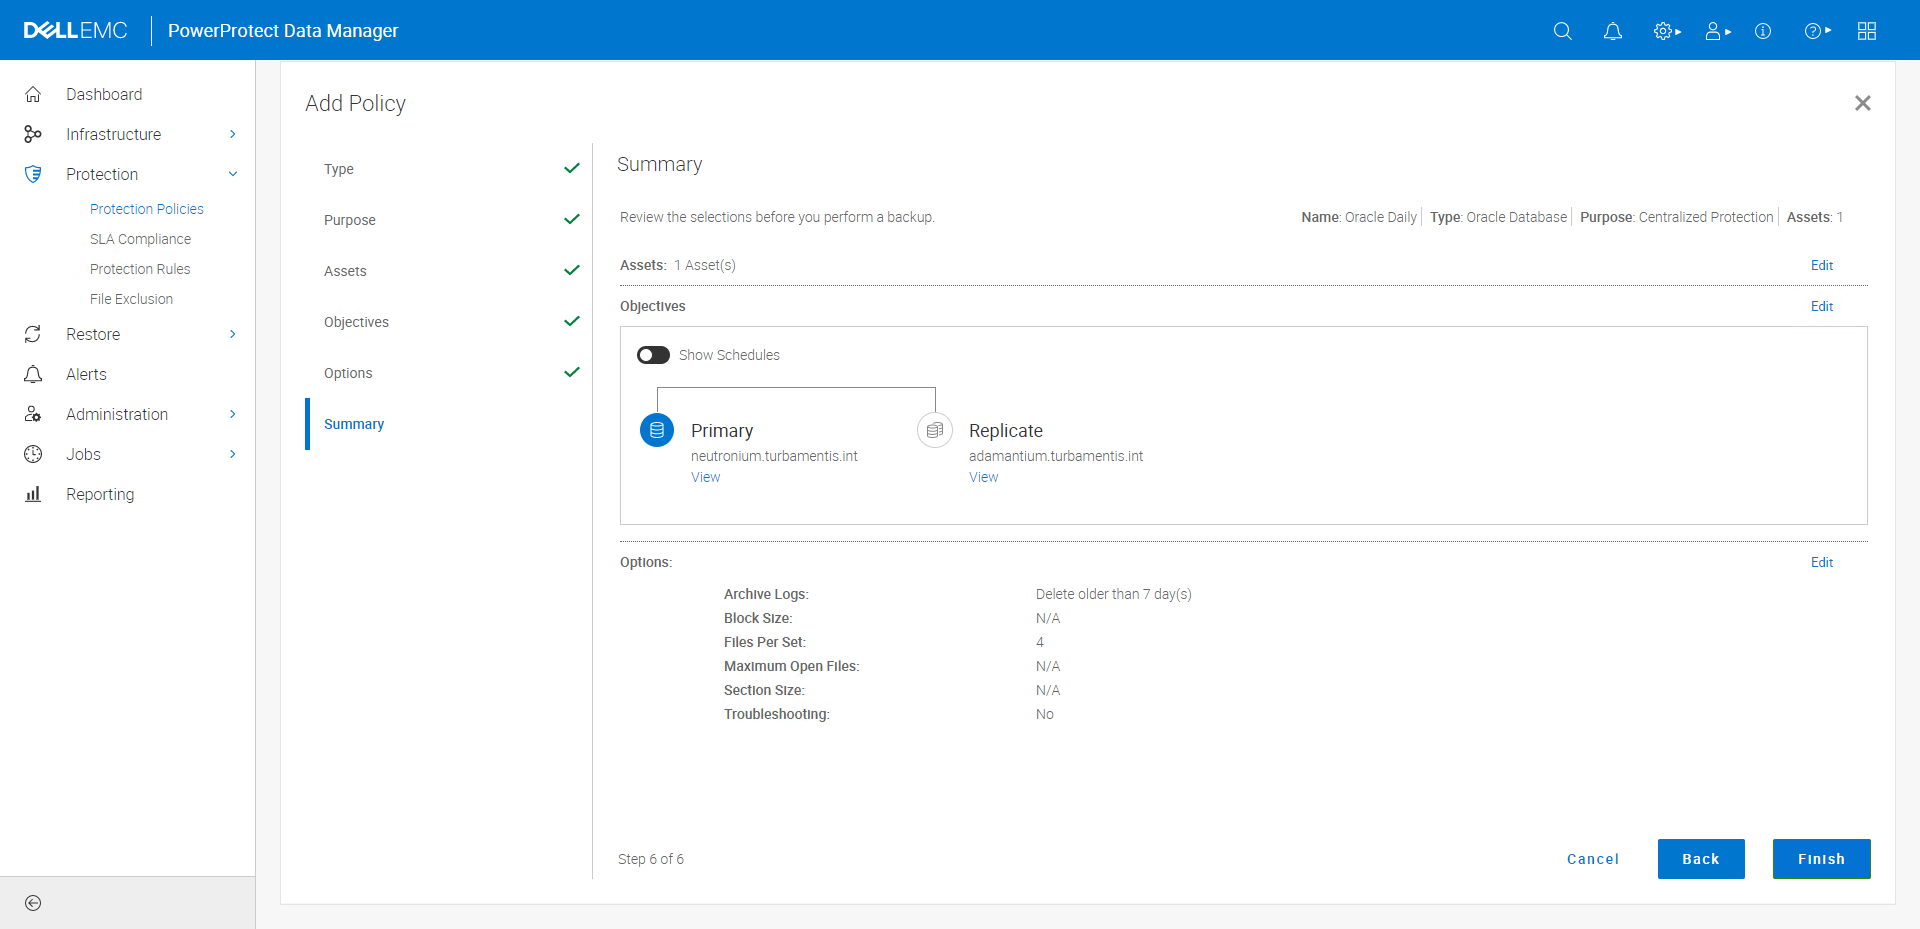
Once I was happy with the settings, I saved the policy and elected to run it immediately.
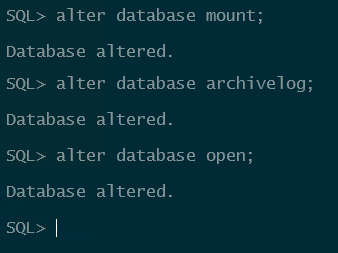
And of course, dummy that I was, I’d forgotten when I installed the Oracle database server to enable archive logging (i.e., live backups) on the database — so the backup initially failed! That sent me to the command line on the client to log on as the Oracle user, connect to the database and run:
- shutdown immediate
- startup mount
- alter database archivelog
- alter database open
With that done, I re-ran the protection policy and it completed successfully, but gave me an alert in the job status because the first attempt at the job had failed:
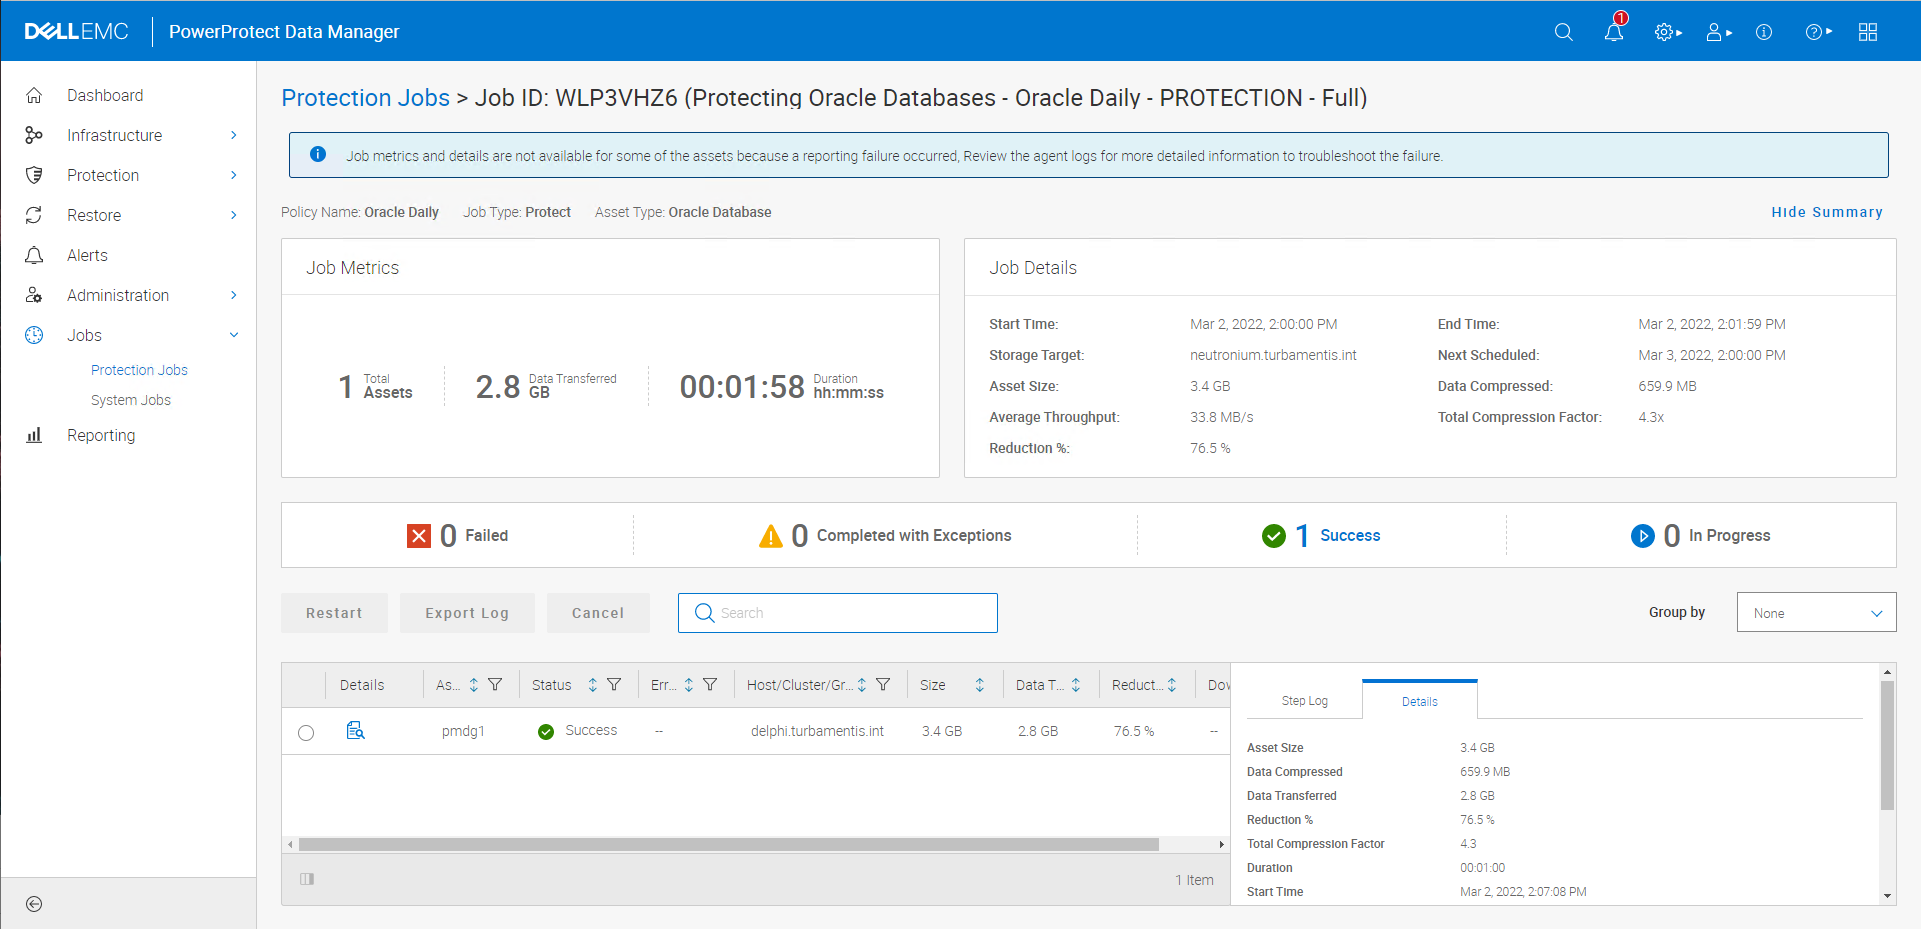
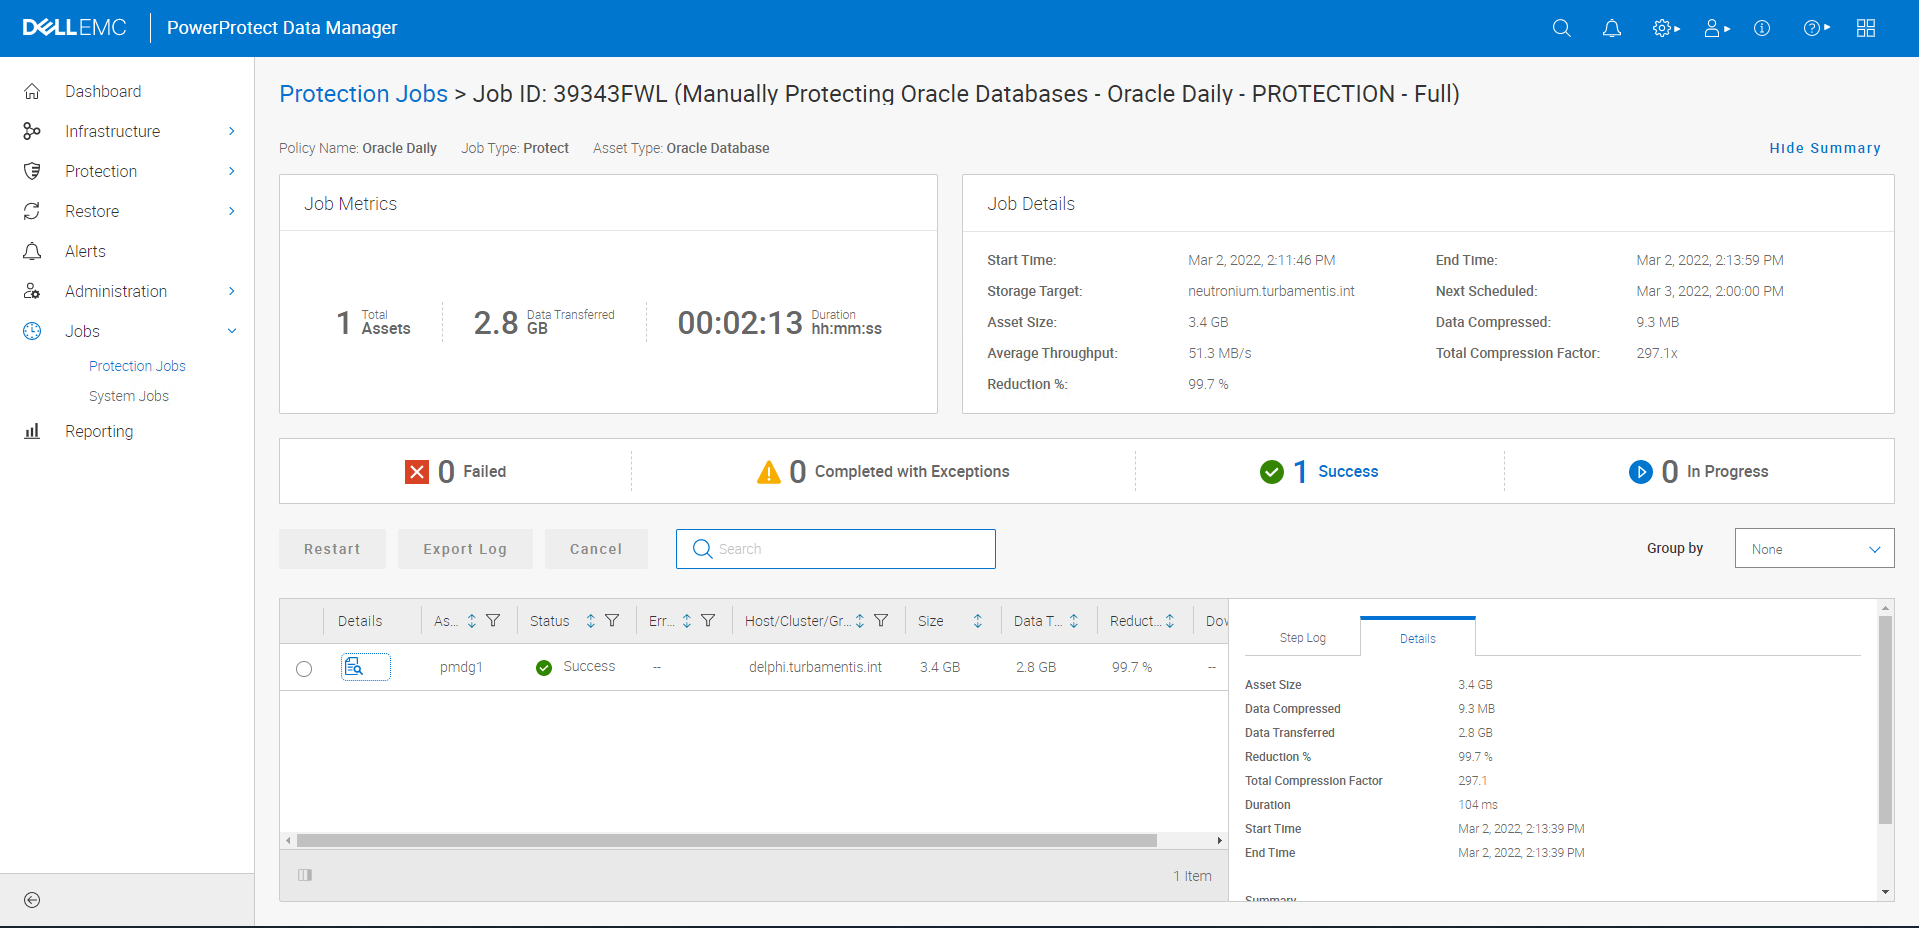
I then ran the policy again for good measure and yep, not only did the error go away, but the deduplication was (as you’d expect), quite good:
And yes, you can configure an Oracle backup policy for frequent archive log backup operations as well, something I know is quite popular with DBAs. I eventually updated my policy to include half-hourly archive log backups:
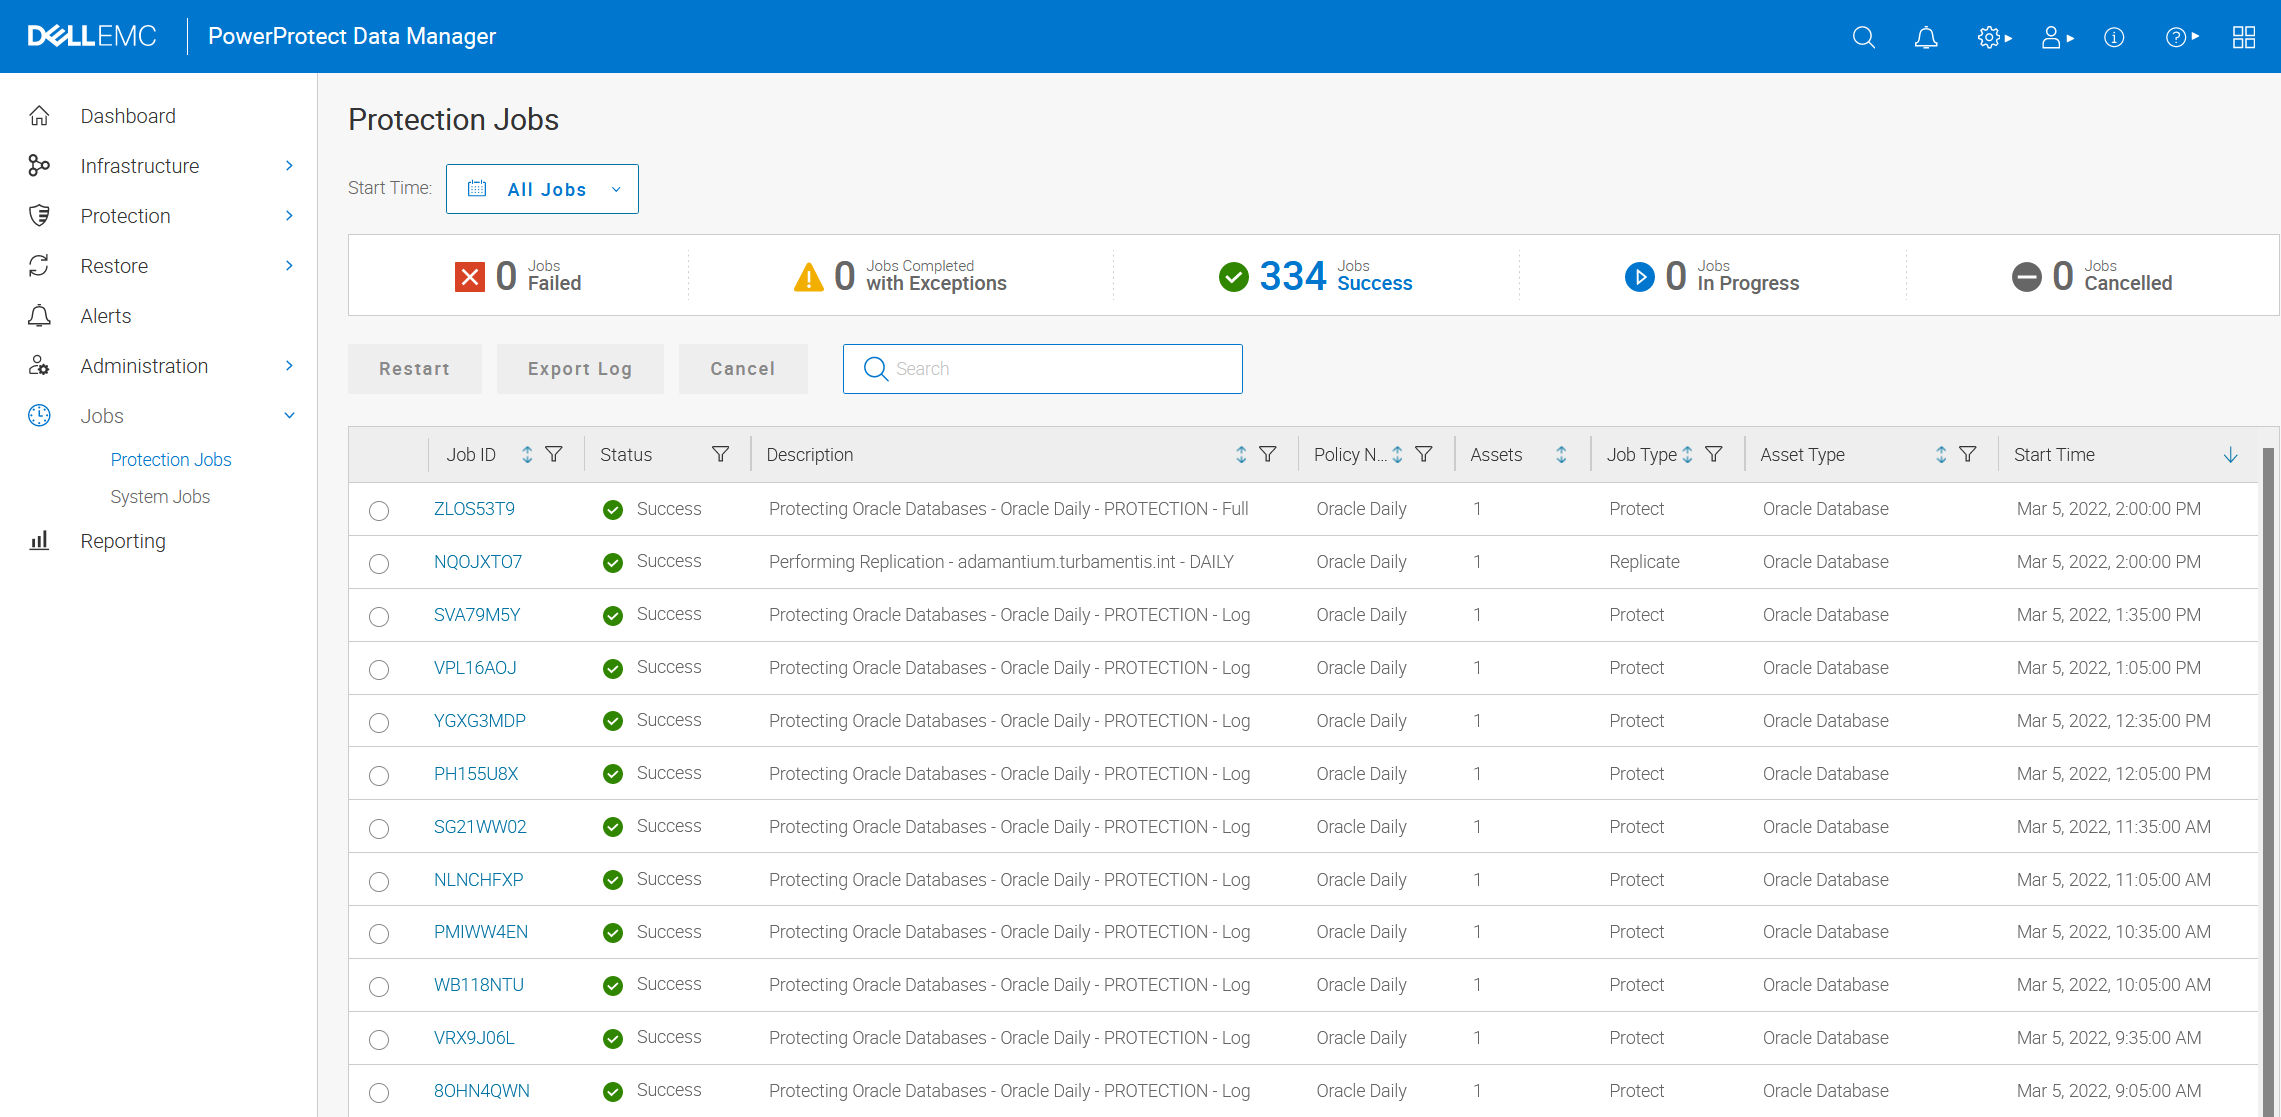
The half-hourly log backups of course will show up in your job monitor, as you’d expect:
And there you go — an end-to-end process for getting Oracle backups within PowerProtect Data Manager running!
Is that “delete older than 7 days” for logs on the production host or those backed up? Because I wonder why would you have different retention for logs and DB… on production host I want archive logs to be removed as soon as backed up ofc.
This refers to deleting logs from the Oracle server that (a) have been backed up and (b) are older than 7 days.