
There are a few traditional ways you can backup to an S3 target via NetWorker. If you’re in the cloud, you can spin up DDVE, and it’ll do all the work for you, writing to object storage. Regardless of whether you’re in-cloud or on-prem, you can spin up a CloudBoost appliance and write directly to object storage as well. Some cloud vendors even present VTL gateways, but of course, virtual tapes can be just as much a headache to manage as physical ones.
NetWorker doesn’t have an ‘S3’ type device as it stands, but if you’re prepared to work with the Linux S3-FuseFS kernel extension, could you create an Advanced File Type Device (AFTD) writing directly to an object storage bucket?
It turns out, yes.
Critical Note 1
NOTE: Before I continue, I need to stress: this is not a documented NetWorker configuration. If you were to do something like this in your environment, I’d suggest extensive testing first. I’d also recommend considering one of the officially supported ways — CloudBoost or DDVE, for instance. In short: this falls far more into my geeky approach of “hey, can I do this?” than it does, “hey, should you do this?”
Critical Note 2
In addition to the warning above, you also have to think of S3 limits – AWS S3 for instance has a maximum object size of 5TB, and as each saveset in NetWorker is written as an atomic file, that would place an upper limit on what you can write. I’ve also not experimented with S3-FuseFS for writing multi-GB files (AWS says a single PUT can’t exceed 5GB – at that point you need to do it as a multi-part operation).
But let’s experiment, anyway
So, with those warnings out of the way, let’s get cracking with some fun backup geekery.
Starting with S3
To get this idea tested, I used the following:
- An AWS S3 bucket
- A Linux host called ‘tholia’ configured as follows:
- Running CentOS 7.8.
- EPEL Package s3fs-fuse-1.87-1.el7 installed.
- S3 bucket mounted to /s3 on the host.
- NetWorker 19.5 client, extended client and storage node packages installed.
The mounted S3 bucket appeared as follows in the output of the ‘mount’ command:

After I mounted the bucket, I installed the NetWorker client, extended client and storage node on the host, as I intended to configure this host as its own storage node.
I also created a directory /s3/AFTD which would become the root directory of the AFTD I intended to configure.
Creating a NetWorker Storage Node and AFTD
Before I created the NetWorker Storage Node and AFTD on tholia, I had to add it as a client on NetWorker. I didn’t capture that session, but here are the properties of the client that I created:
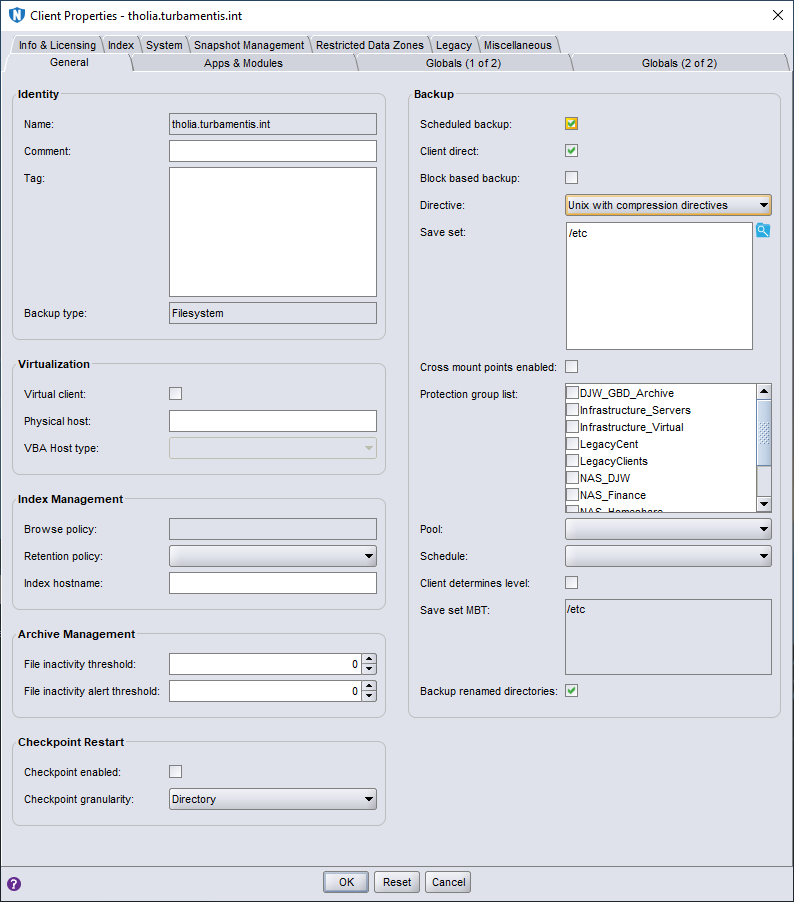
You can see there I’ve defined a basic saveset for the client — just the /etc directory. I’ve also made sure to turn on the compression directives. And this is where we get into the territory of “just because you can, doesn’t mean you should”. Even with compression directives turned on, you’d still write more to an S3 bucket as an AFTD than you would by using DDVE or CloudBoost, because both of those apply deduplication as well as compression. The maths of this is simple:
- DDVE: Assuming you get a tiny 10:1 deduplication against a device. If you write 10 x 2TB backups to DDVE, that comes down to 2TB total storage used.
- Compression to S3: Assume you get 2:1 compression for each saveset you write. If you write 10 x 2TB backups to S3 with 2:1 compression, you’ll still write 10TB.
But let’s continue. Having created the client, I added tholia as a storage node, without any special configuration — here’s a view of the properties for it, below:

Before I went on to use the device wizard for a new AFTD, I created a backup pool called ‘S3FS’. With all that done and out of the way, it was time to run the wizard:

I chose Advanced File Type Device (AFTD) as the device type and clicked Next > to continue.
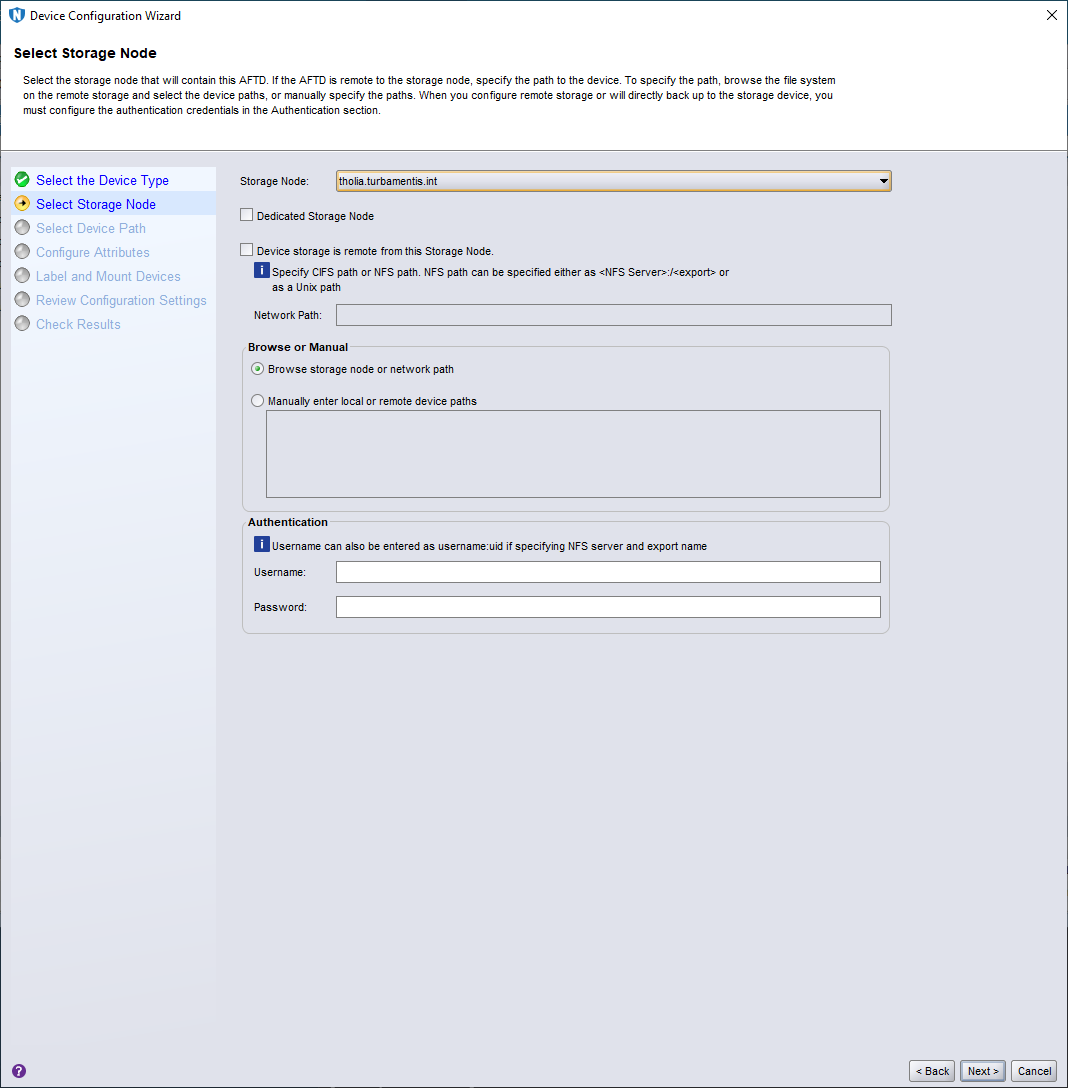
In this part of the wizard I changed the default storage node selection (the NetWorker server) to my new client/storage node, tholia.turbamentis.int, before clicking Next > to continue.
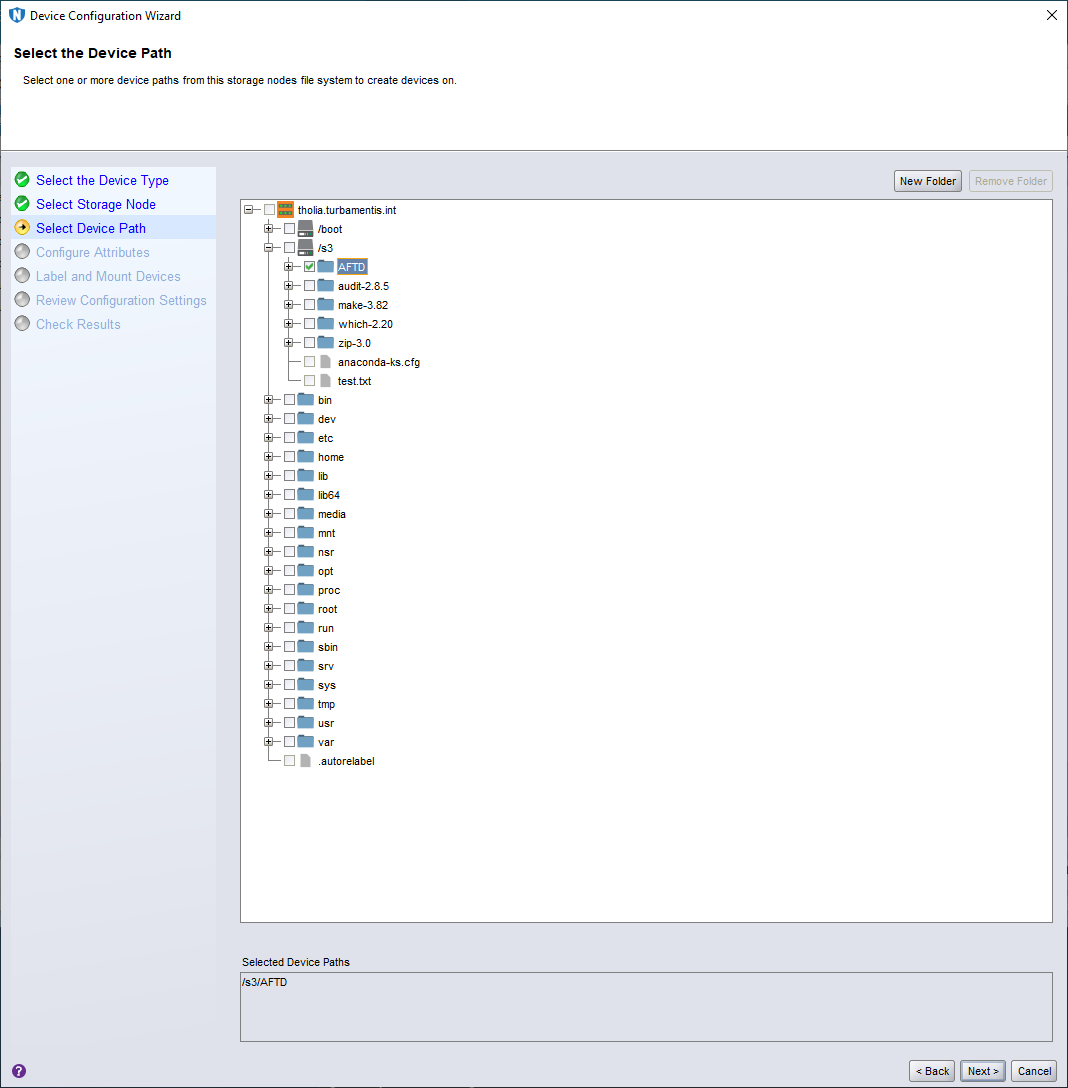
The next step in the device wizard is to select the path that’ll be the root directory of the AFTD device. I browsed to /s3/AFTD, selected it, and clicked Next > to continue.
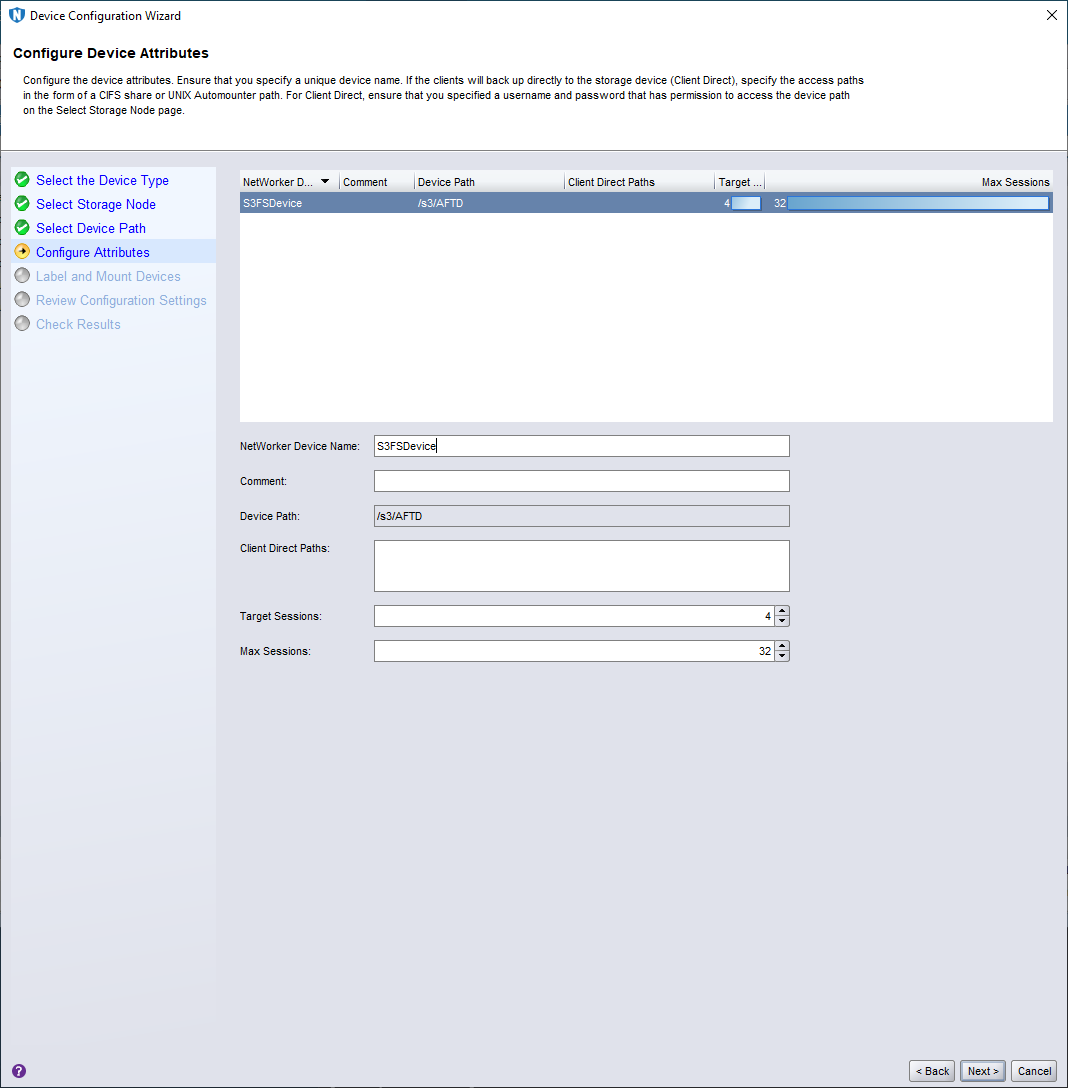
This step of the wizard saw me providing a name for the device and confirming session counts. I left target and max sessions at their default and gave it the name ‘S3FSDevice’. (Not perhaps my most imaginative naming moment, but it’ll do.)

On this page of the wizard, I elected to label and mount the device after creation, and chose the ‘S3FS’ pool for my volume before clicking Next > to continue.

This was the critical moment — I confirmed the device properties and clicked Configure to start the device and volume creation process. As you might expect when working with object storage, this took a little longer to complete — approximately 45 seconds rather than the usual zippy <5 seconds for creating a local AFTD. I suspect most of that was in the various filesystem-emulated calls associated with creating the directory structure of an AFTD volume. Once everything was done, NetWorker told me it had been completed successfully:

Once this was completed, I clicked Finish to dismiss the wizard, and jumped onto the host via ssh to check the directory contents — which looked accurate:

Creating a Workflow for Backup to S3
On my NetWorker lab server, I have an ‘Adhoc’ policy that I use to create workflows for testing purposes. For this configuration, I’d create a new workflow called S3FS_as_AFTD_Target and within it, a backup action. Here’s the workflow creation process:

In the above screen, I gave the workflow a name, created a new group that comprised just of the tholia:/etc client, and disabled autostart, as I’d be only running this manually. I then clicked the Add button to define a new backup action.
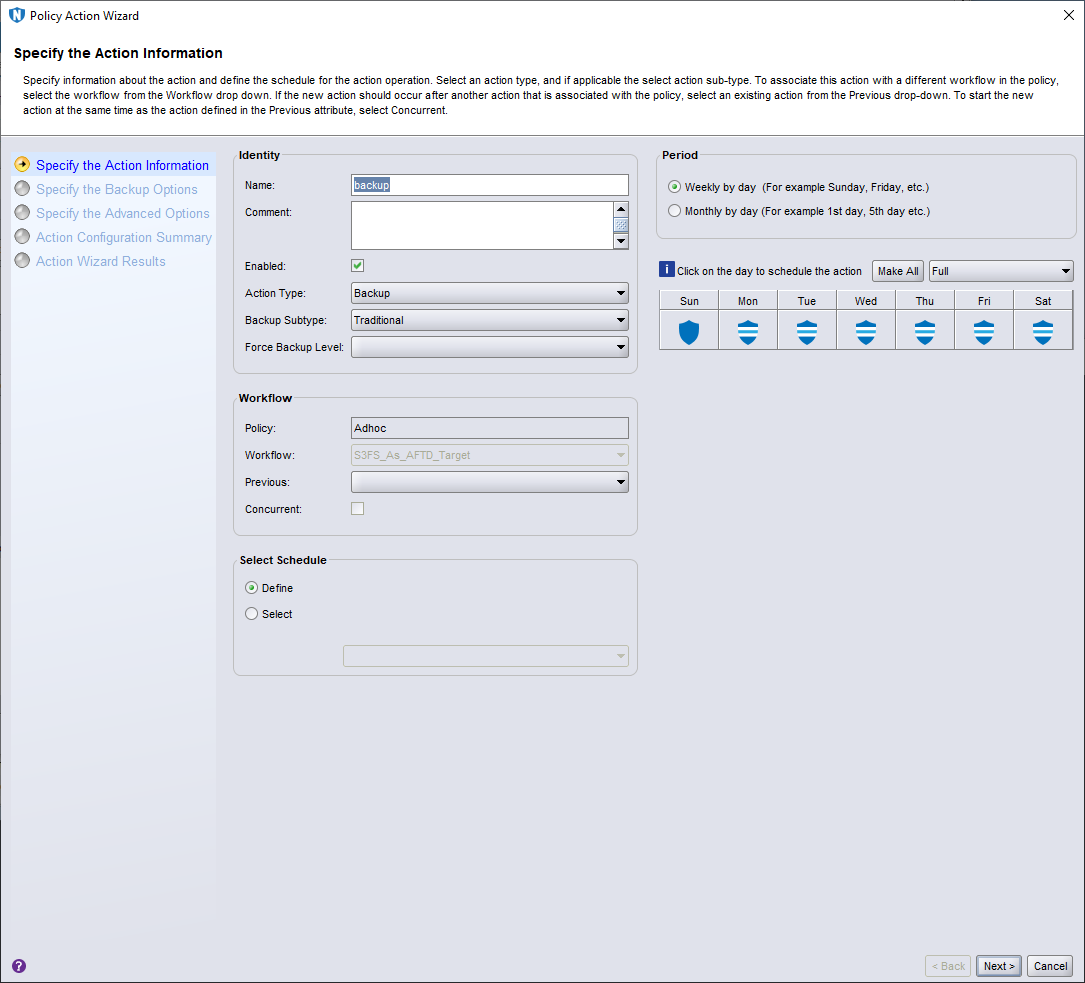
For my testing purposes, I left all these settings as normal and clicked Next > to continue.

On this panel I selected tholia.turbamentis.int as the storage node, set the destination pool to S3FS, and set browse/retention to 1 month, before clicking Next > to continue.
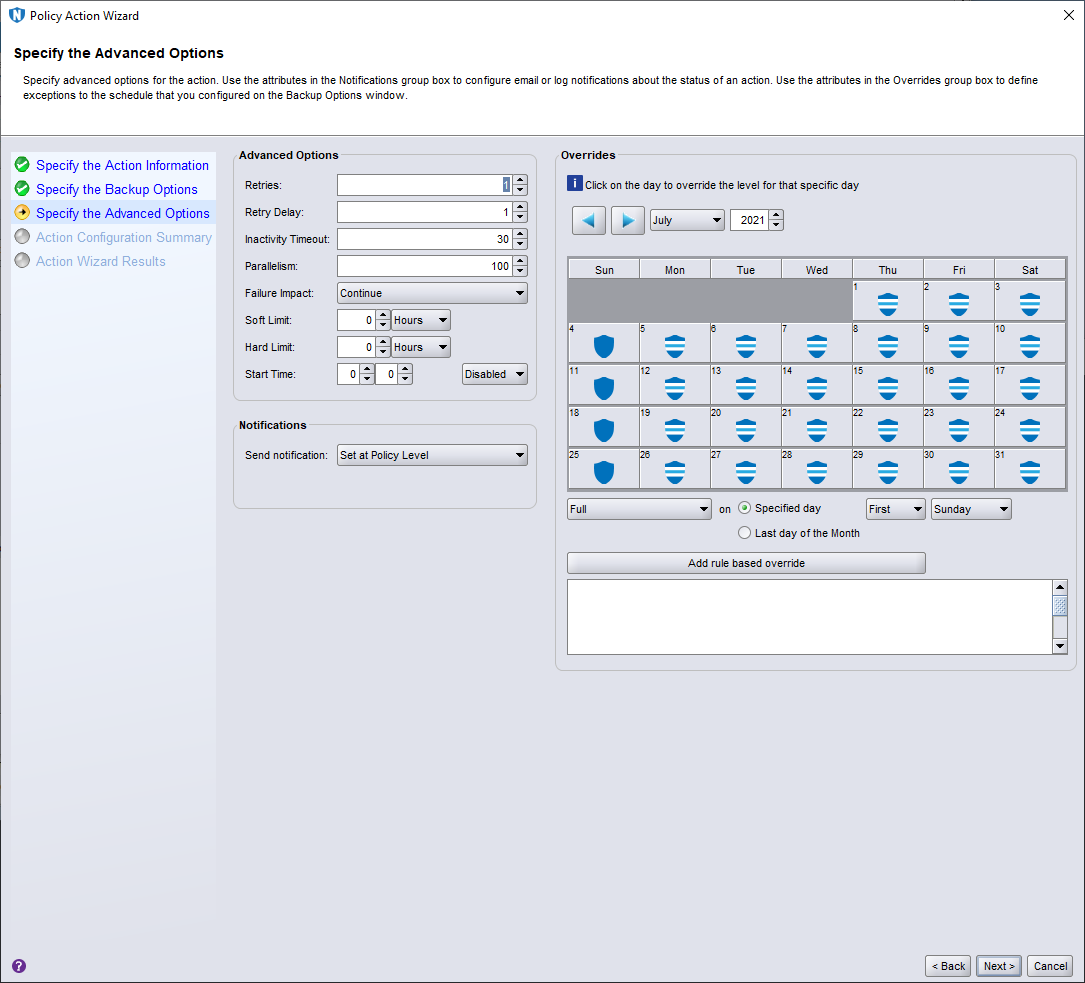
I left the advanced backup options at their defaults and clicked Next > to continue.
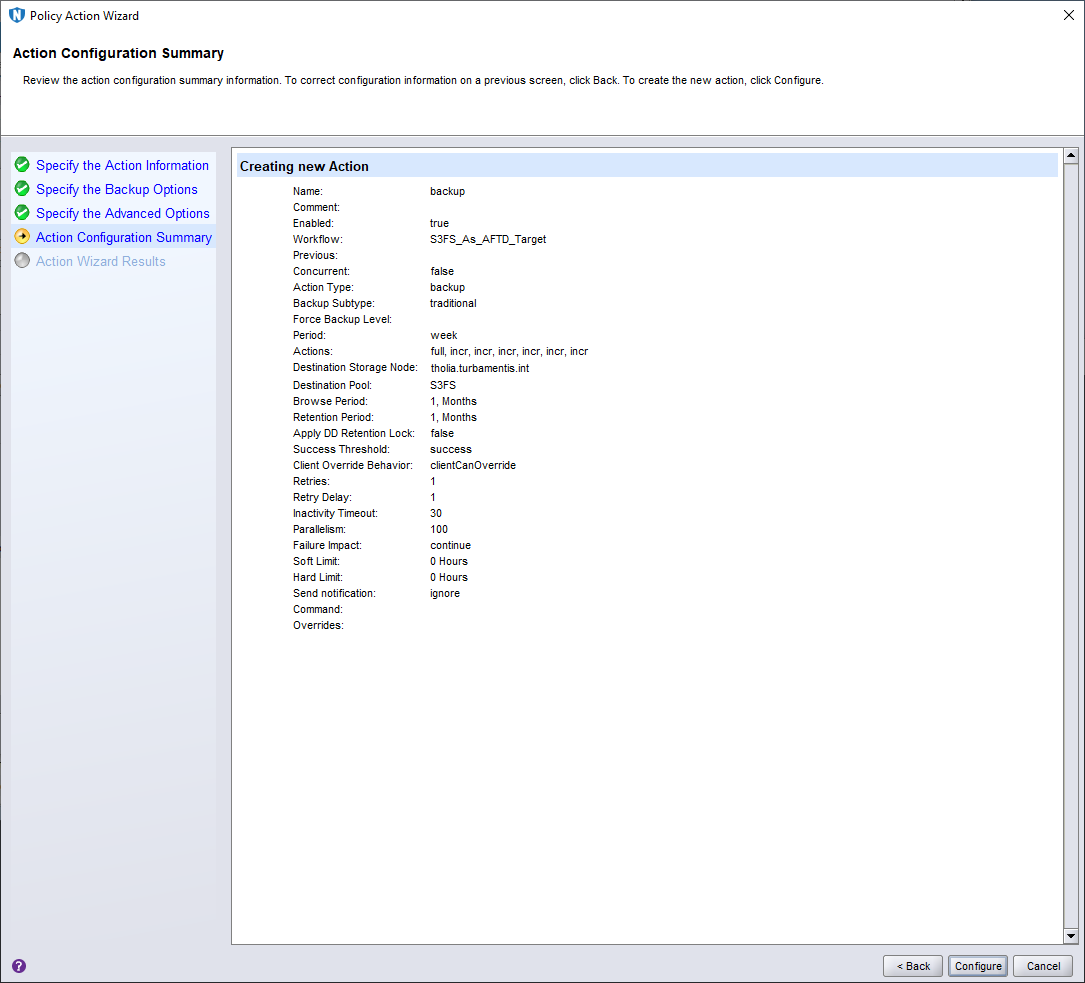
Everything looked correct on the Action summary, so I clicked Configure to add the action to the workflow. This gave me a completed workflow as follows:

Backing up to an S3 AFTD
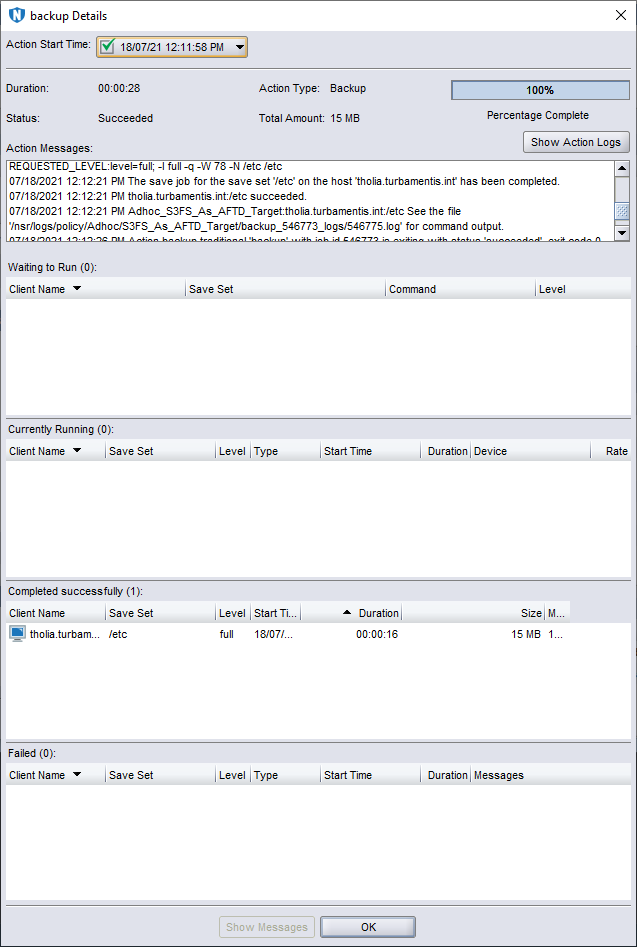
I then ran the workflow. NMC showed as you’d expect — the workflow ran fast enough that NMC didn’t get around to showing me performance (sorry, I think Bezos is rich enough without me paying for demo bucket storage), but NMC did show the backup starting:

Then, when the workflow completed, I viewed the status details:
There’s a Backup in My Bucket, Dear Liza
For sure, NetWorker said it wrote the backup, but how can I confirm the saveset exists? That’s relatively straightforward. First, use mminfo on the NetWorker server to get the long-form saveset ID. (The long saveset ID is actually the filename of the backup on the volume.)

OK, with that long-form SSID in hand, I could then find files matching that name under /s3/AFTD on tholia:

We Backup to Recover
It’s all good to do the backup, but the most important thing is a recovery — so I set out to recover the /etc/sysconfig directory from the backup to an alternate location on tholia. Here’s that process in action.
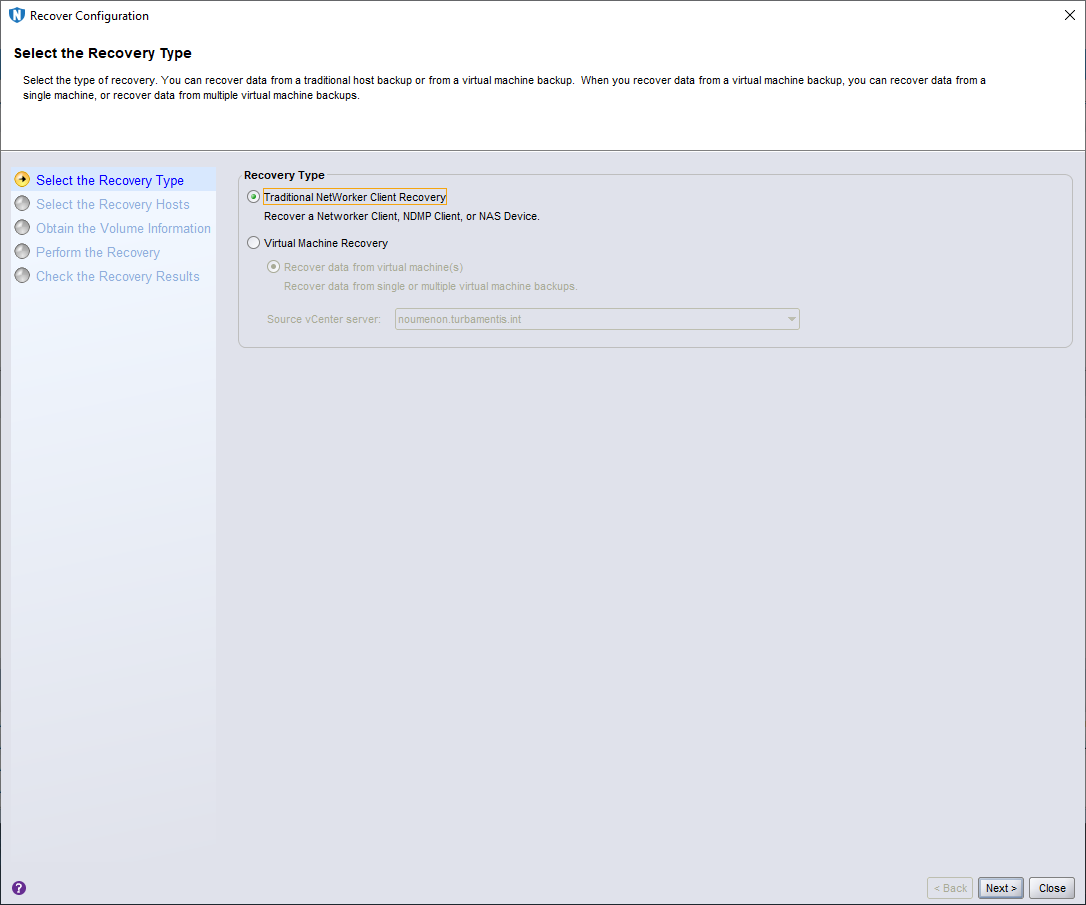
The first step in the NMC recovery wizard is to choose between a traditional recovery and a virtual machine recovery. While tholia is a virtual machine in my lab, I’d done an agent-based backup, so I chose the Traditional NetWorker Client Recovery and clicked Next > to continue.

I selected tholia.turbamentis.int as the client, noted it had a filesystem backup available, and chose to recover to the same host before clicking Next > to continue.
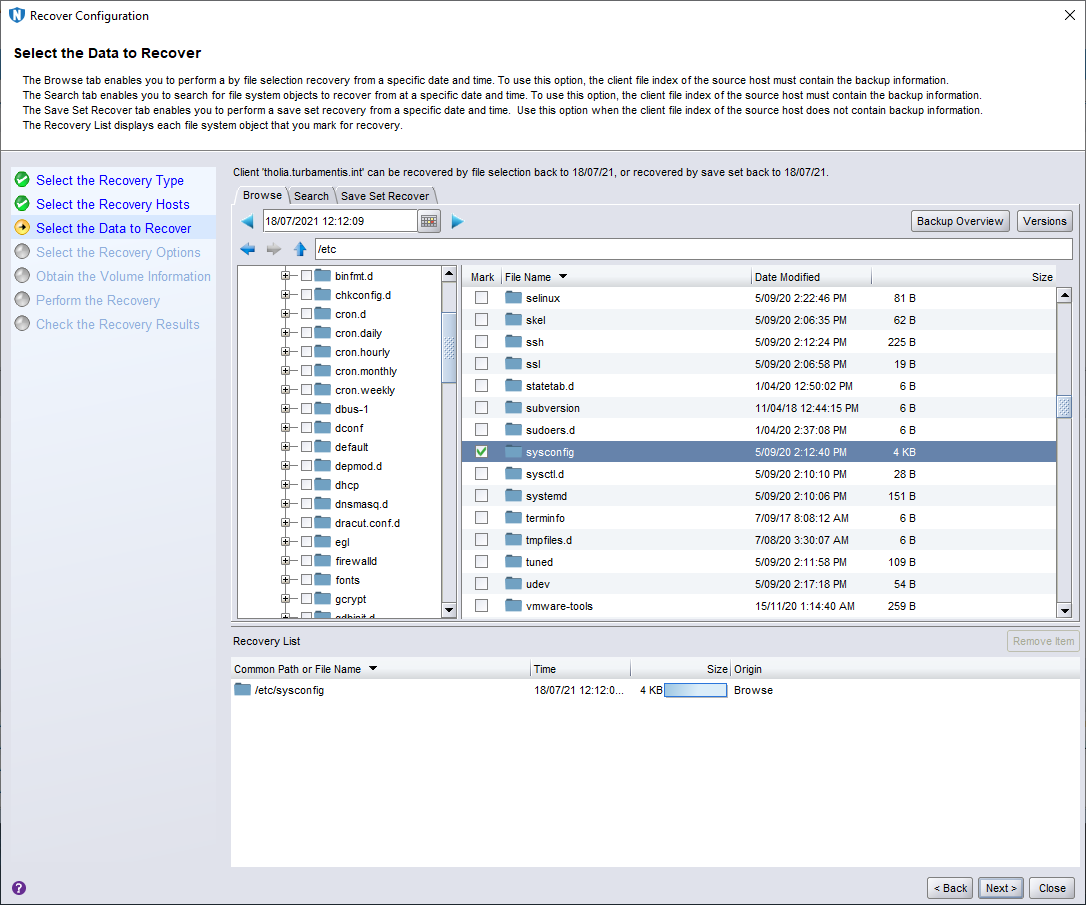
I only had one backup to recover from, so I didn’t need to change my browse time. I drilled into /etc and selected the sysconfig directory to recover before clicking Next > to continue.
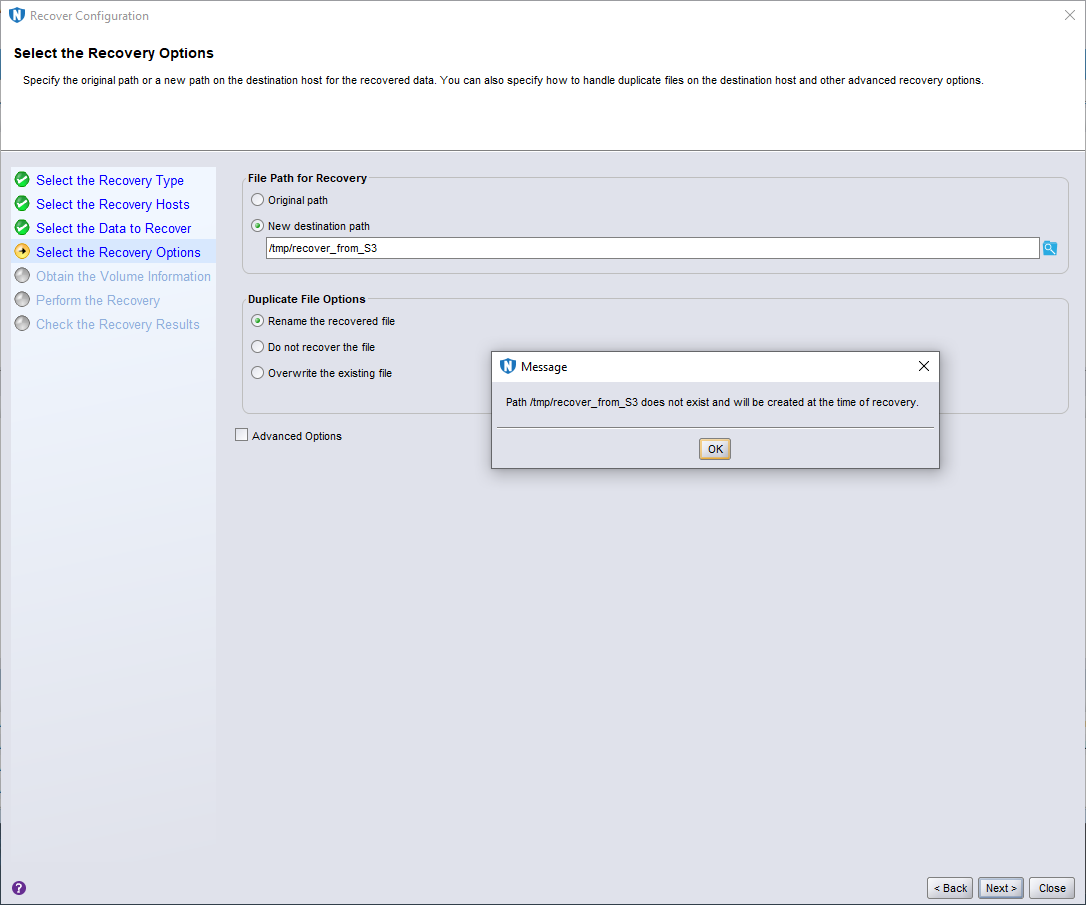
I elected to recover to an alternate path, /tmp/recover_from_S3, and clicked OK on the prompt warning me the directory would be created when the recovery starts, then clicked Next > to continue.

The next step in the recovery wizard is to choose which volume you want to recover from (which you use if you want to choose between different cloned copies). In this case, I only had one copy, so I clicked Next > to continue.

I gave the recovery a name, and rather than scheduling it for a later time, I left the default selection of “Start recovery now” active, and clicked Run Recovery.

I wasn’t recovering a lot, so the recovery was completed in short order and I clicked Finish after confirming it was all OK. I then quickly did a directory listing of the recovery location on my client:

Wrapping Up
The TL;DR is “yes, you can backup to S3 with NetWorker if you really want”. But as Stephen Donaldson implies a few times in The Gap Series, the real story is more complicated.
Can you? Yes. Should you? Probably not. It’s not going to deliver the same efficiency as either CloudBoost or DDVE, and as a result, it’s going to cost you more for object storage. The various limits associated with S3 storage on object sizes, etc., also places limits on what you could write, too.
Yet it’s handy to remember that NetWorker is pretty damn flexible when you need it to be. And as Michael Ende was fond of saying, “…that’s another story for another time.”
1 thought on “NetWorker Basics – S3 as an AFTD Target”