
Restore Plans were introduced in PowerProtect Data Manager 19.14. Restore Plans are simple, yet offer a great deal of power to automating recoveries of potentially large numbers of assets in a single operation, once configured.
A restore plan lets bundle one or more restore groups (collections of assets) with their own unique settings, and then kick off the recovery whenever you want to. Let’s see it in action.
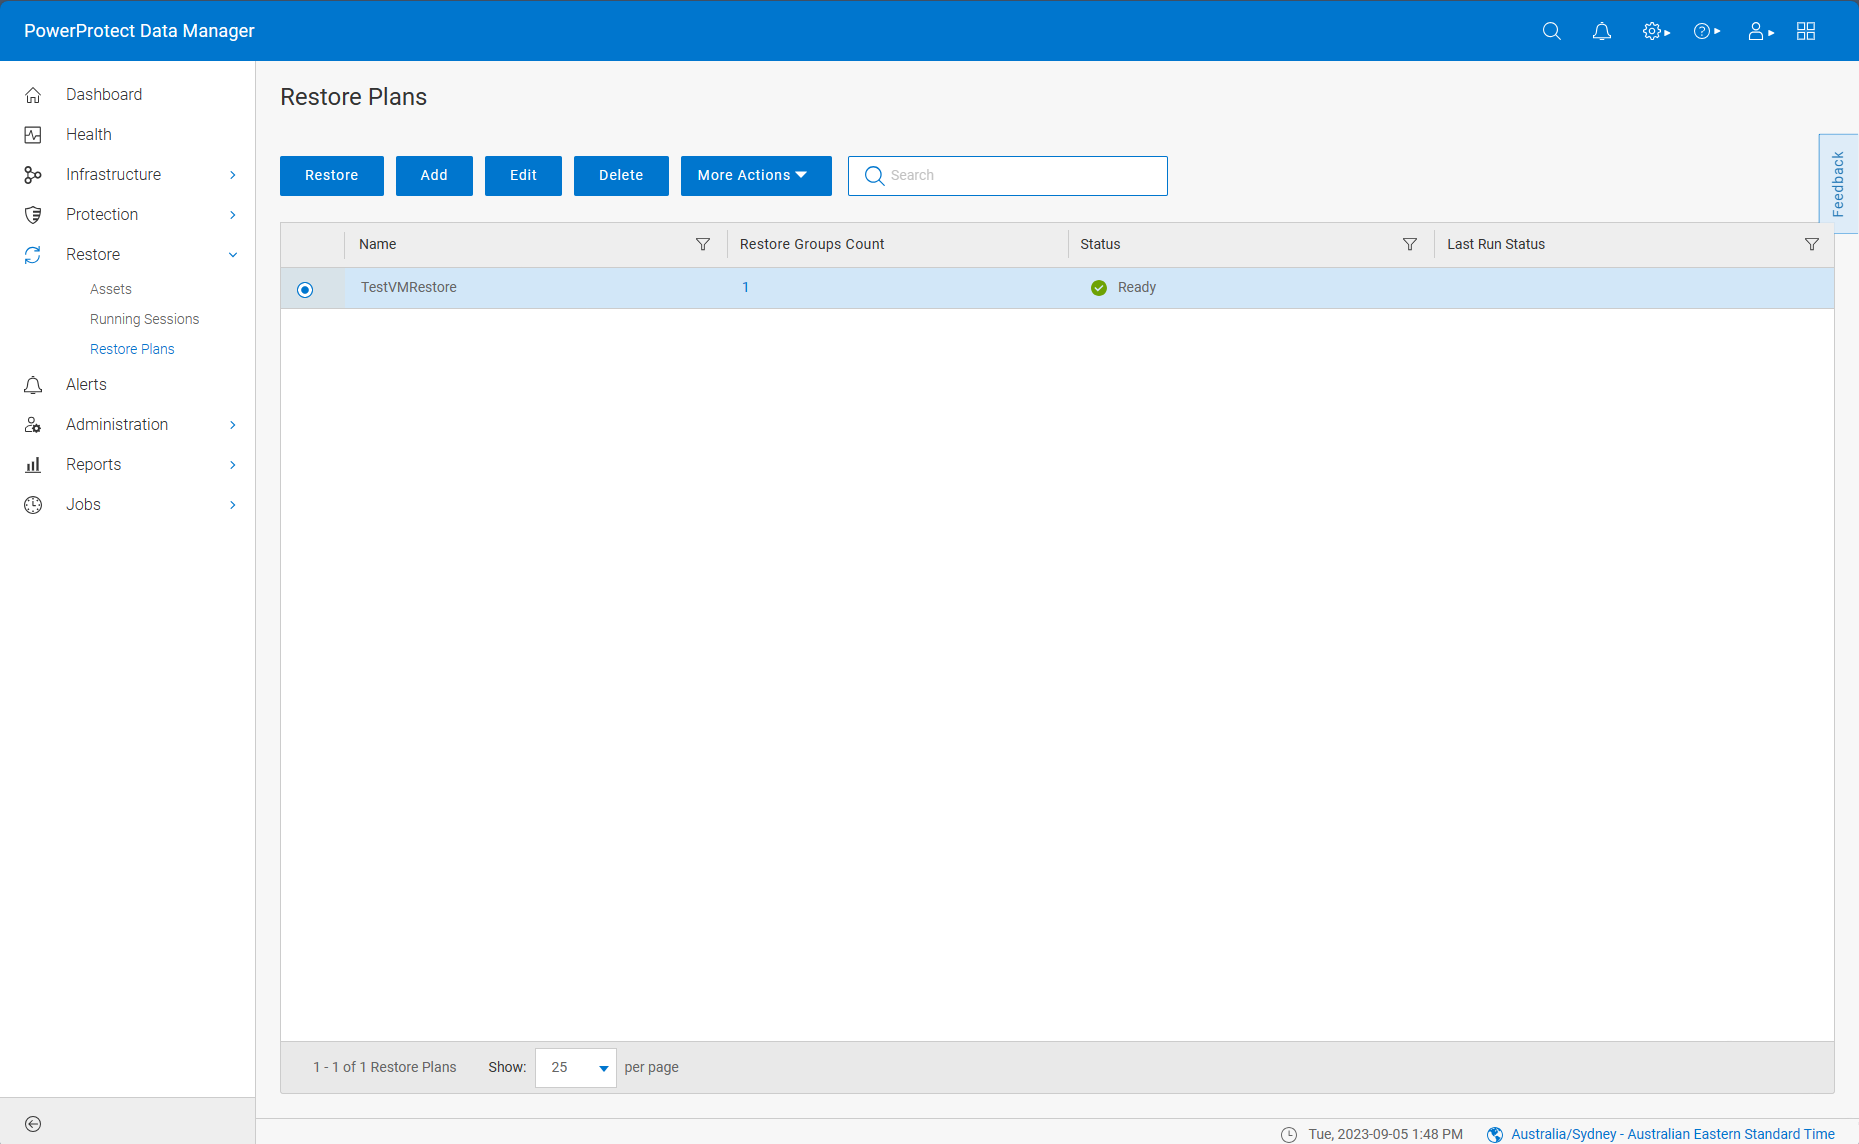
You can configure and run your restore plans from Data Manager’s main menu, under Restore > Restore Plan, shown below:
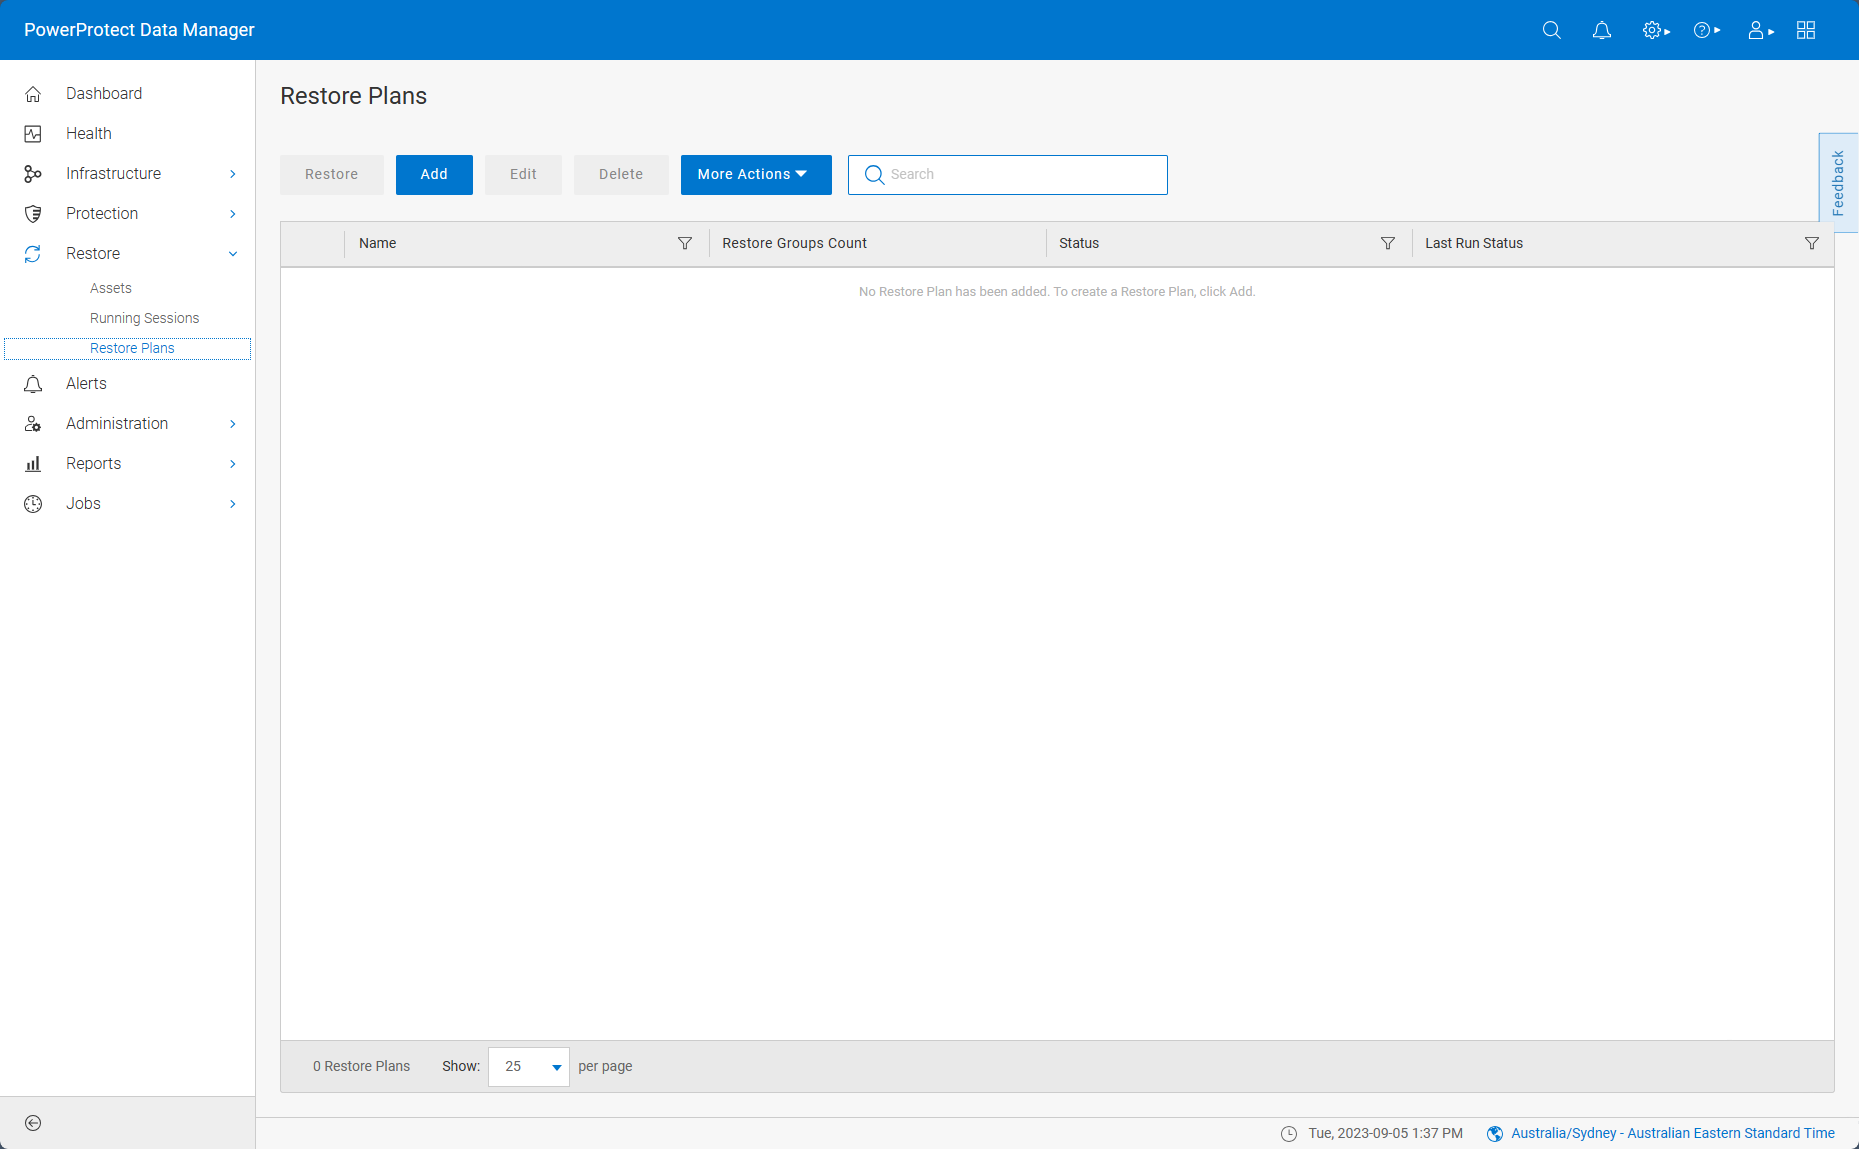
In this case, I don’t yet have any restore plans, so I’ll click Add to start creating one. The restore plan itself is quite minimal, but the restore groups have a number of options to them so there’s a bit to step through. As you’ll see in the step through though, those options are what gives you so much power.

Start by giving the plan a name and an optional description, then choose whether you’re going to add assets or select a resource group. Note that a resource group isn’t the same as a restore group: a resource group (controlled under Administration > Access Control > Resource Group) allows you to assign specific resources to users and roles on the system. (Which means you can quickly fold those resource groups into your restore plans and keep the two in sync, if you’re using them.)
In this case, I’m going to select All Assets as my scope, because I want to browse all assets on the system to determine which ones I want in my restore plan.
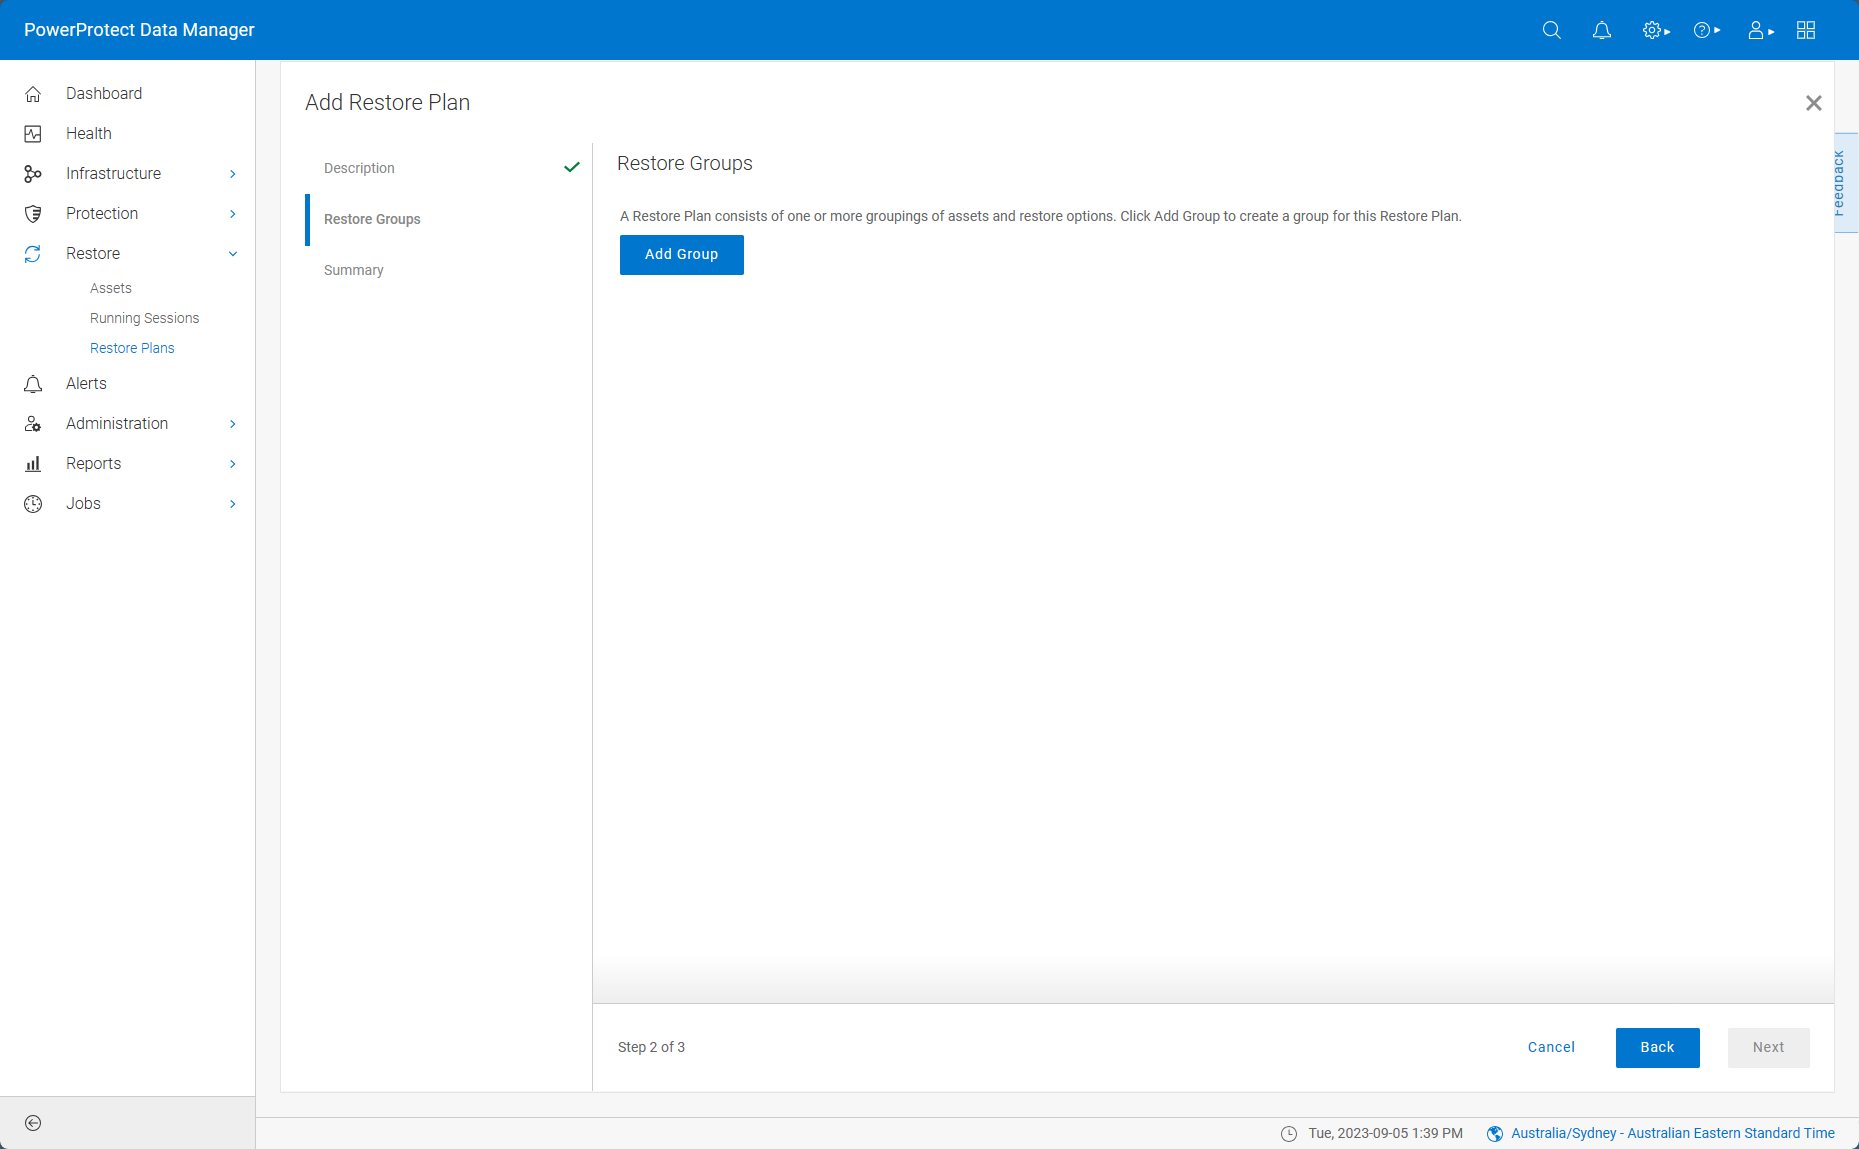
Since this is a net new config so the first thing I need to do is click Add Group. That’ll bring up the start of the new restore group function:
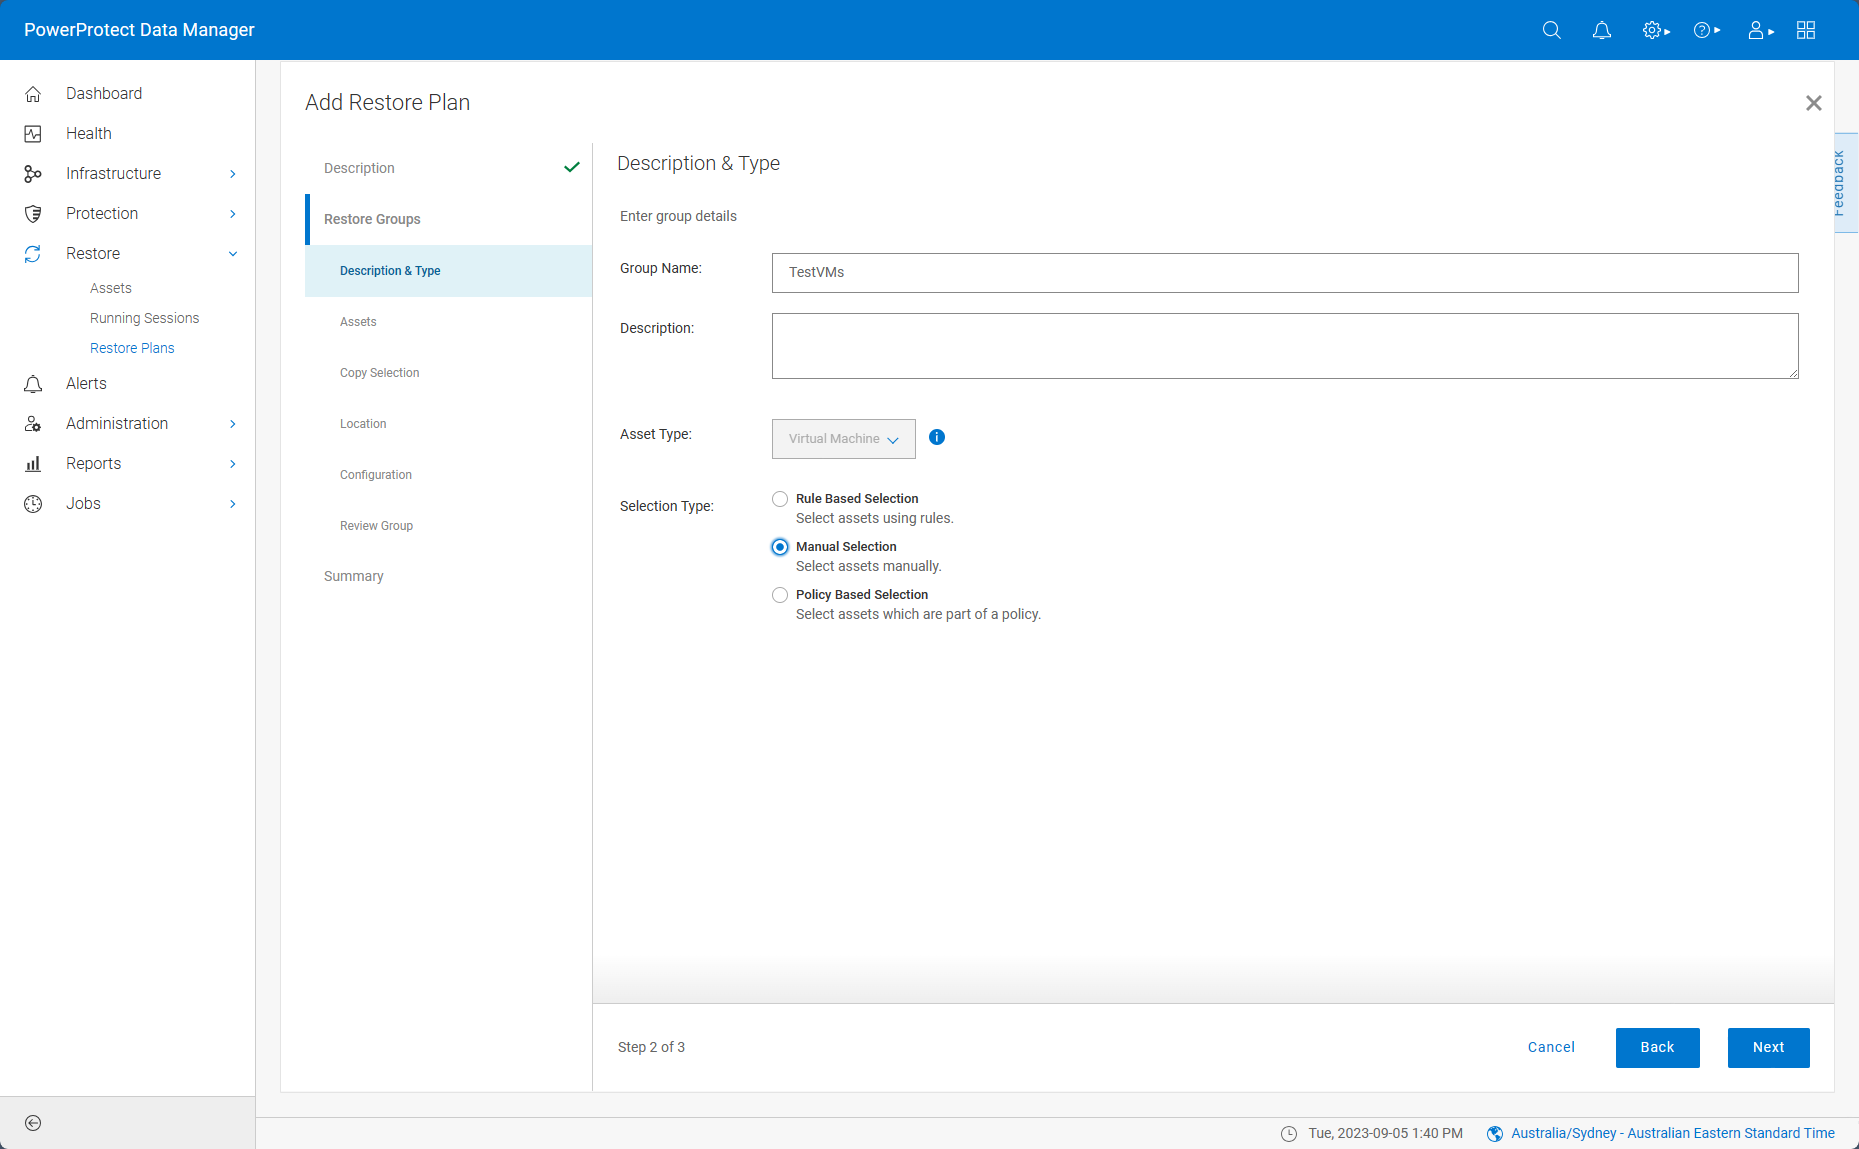
Since you can have a lot of assets in a restore group, make sure to give it a meaningful name, then choose how you’re going to select assets for membership. Restore plans currently support Virtual Machines, and you can choose whether you want to add assets based on a rule definition, manually or that belong to specific policies. In this case, I’m going to chose to add the assets manually:
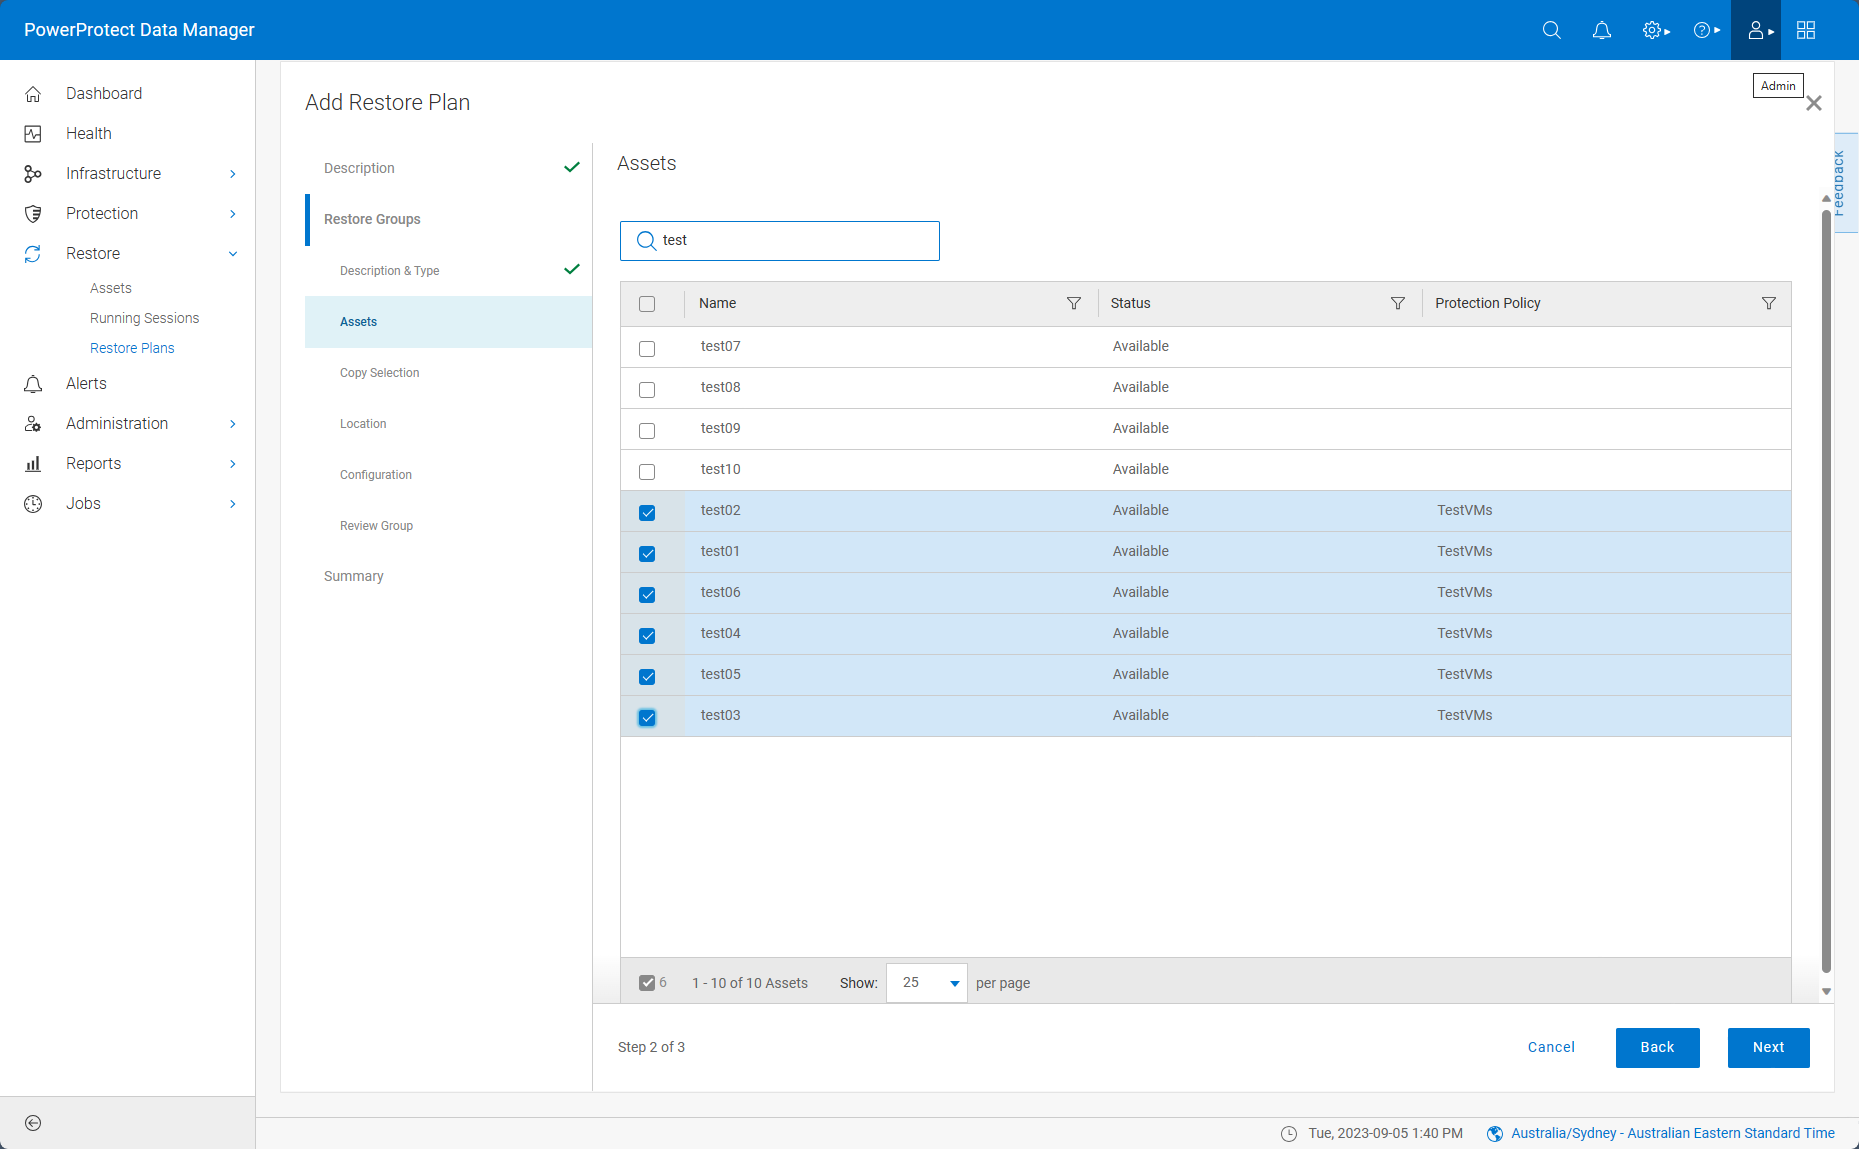
Once I’ve selected the virtual machines, I can click Next to continue. This is where the fun starts!
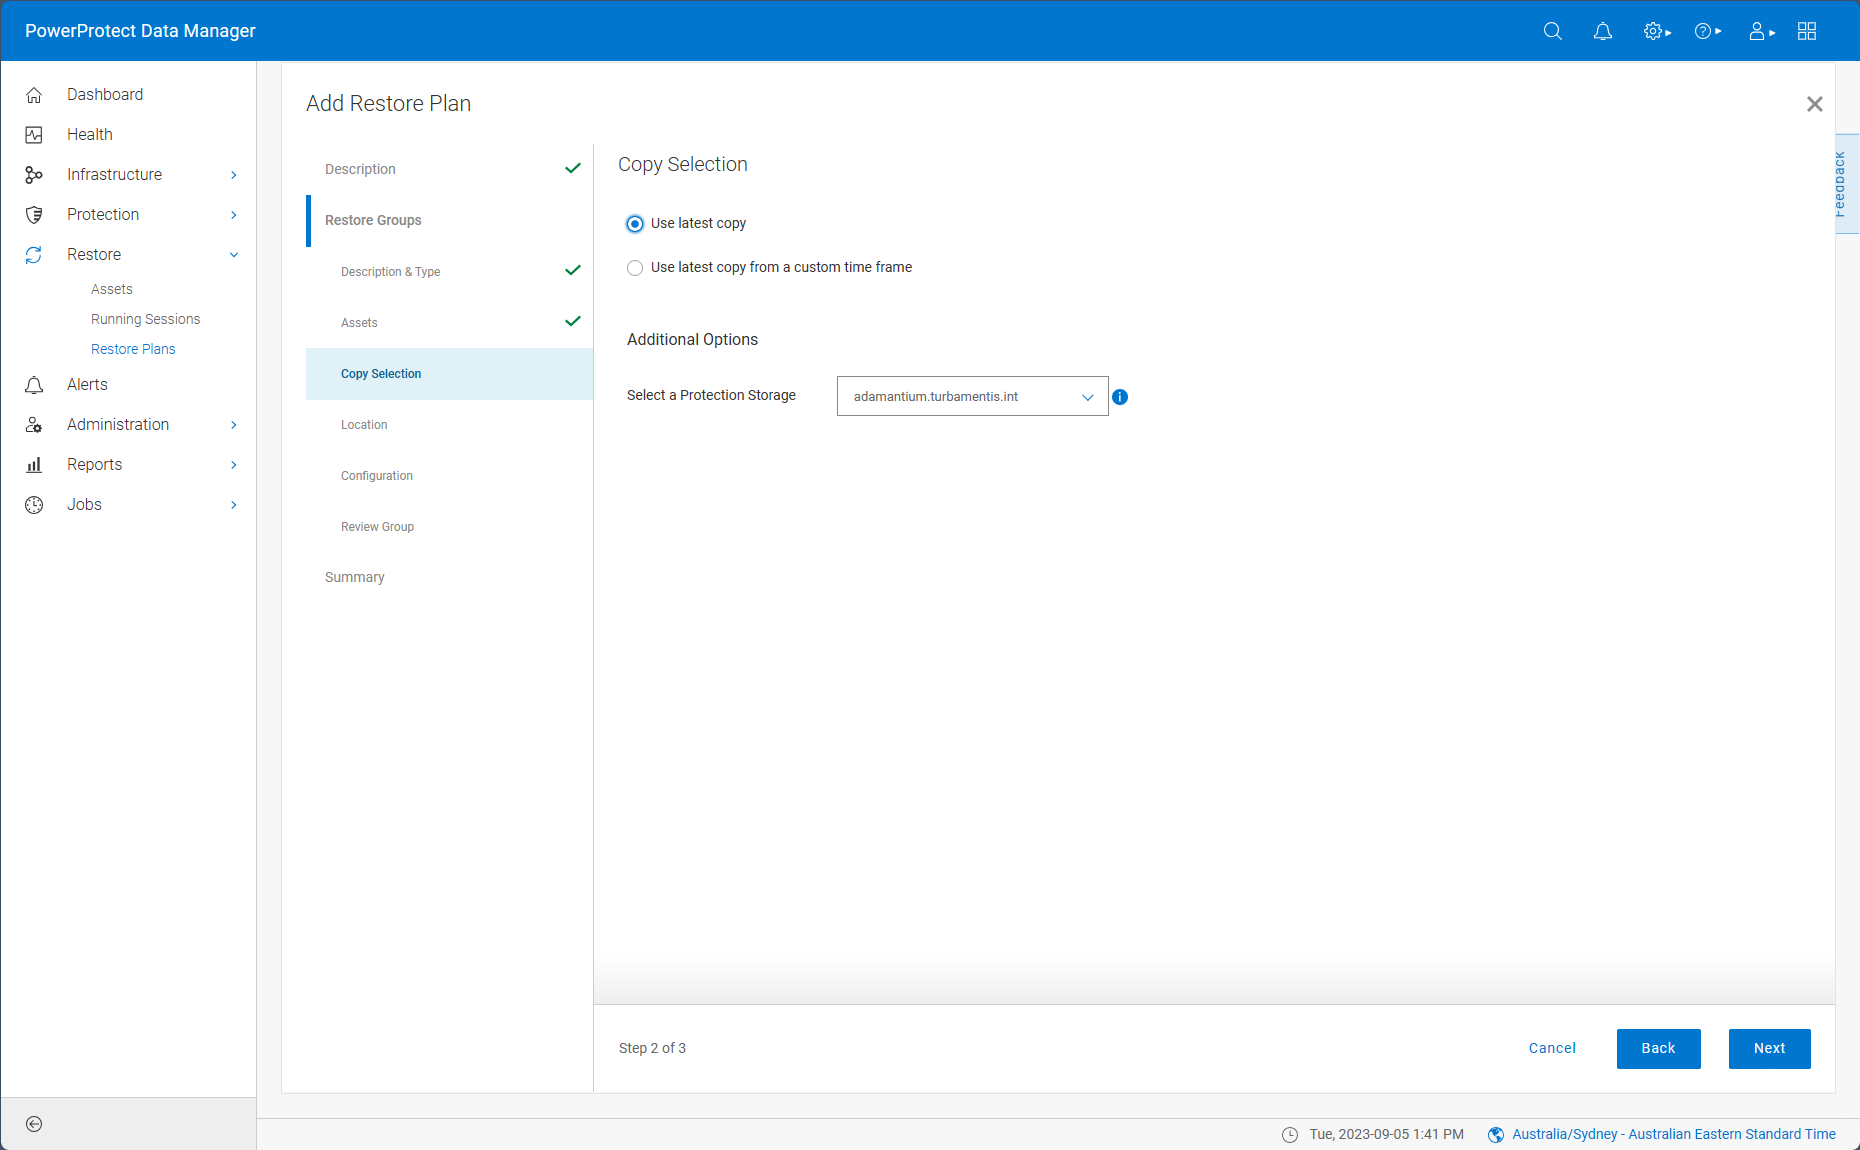
Now I get to choose which copy I want to restore – not only in terms of time, but also from which Data Domain system, too! In the example above, I’ve chosen to use the most recent copy for each selected asset. Here are the custom timeframe options:
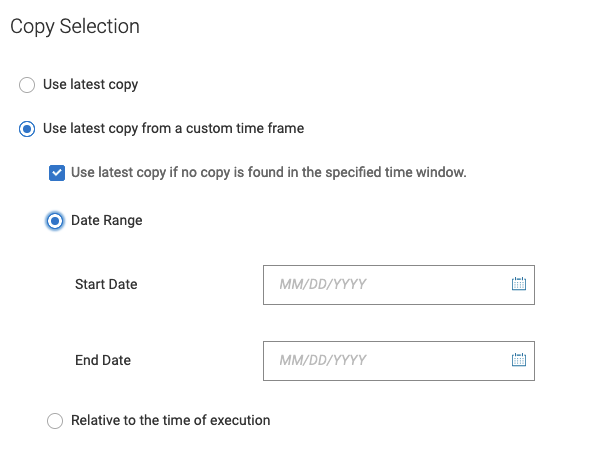
The first option, shown above, is to specify a particular date range you want to use to recover from. (Great option for randomly proving recoverability through an audited legal discovery period!) You’ll see there’s an option (selected by default) to just recover the most recent copy if there’s no copy found in the specified date range.
The other option, shown below, lets you choose to recover a copy from a particular number of days prior to whenever you run the restore plan:
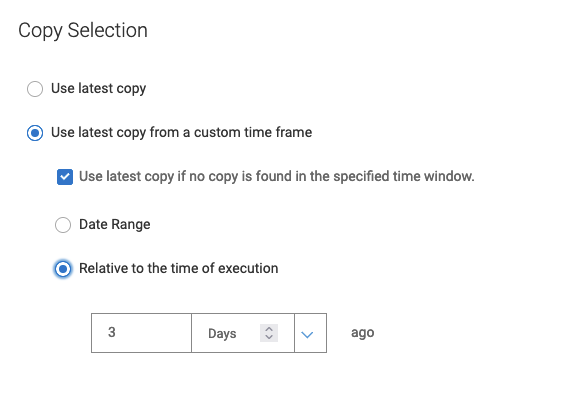
These three time range options give you a huge amount of flexibility in picking which copy you want to recover from. Having done that, it’s then a case of picking where the recovered assets will go (and remember, you get to do this for each restore group you create in a plan):
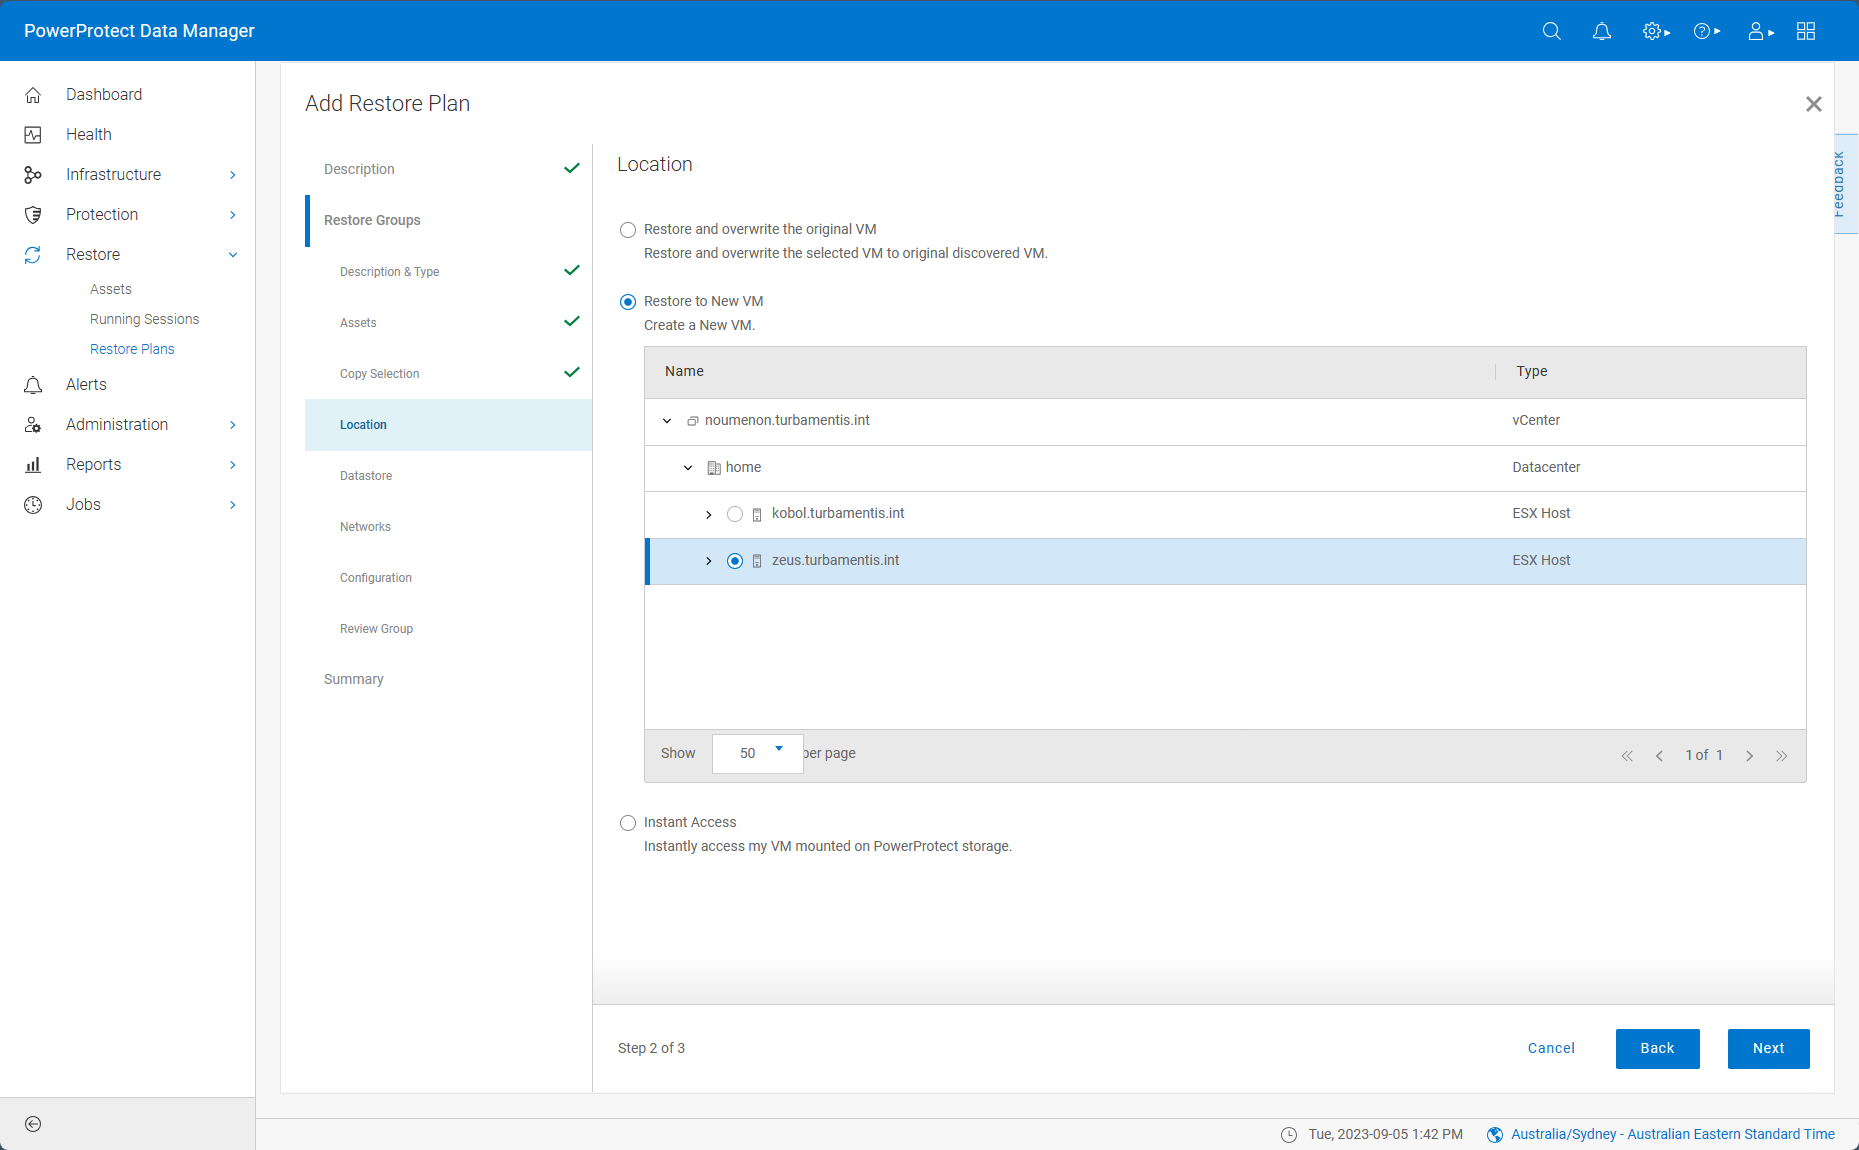
You’ll see there are three options – overwrite the original virtual machine, perform an instant access, or per my choice, restoring as a new virtual machine to a different location.
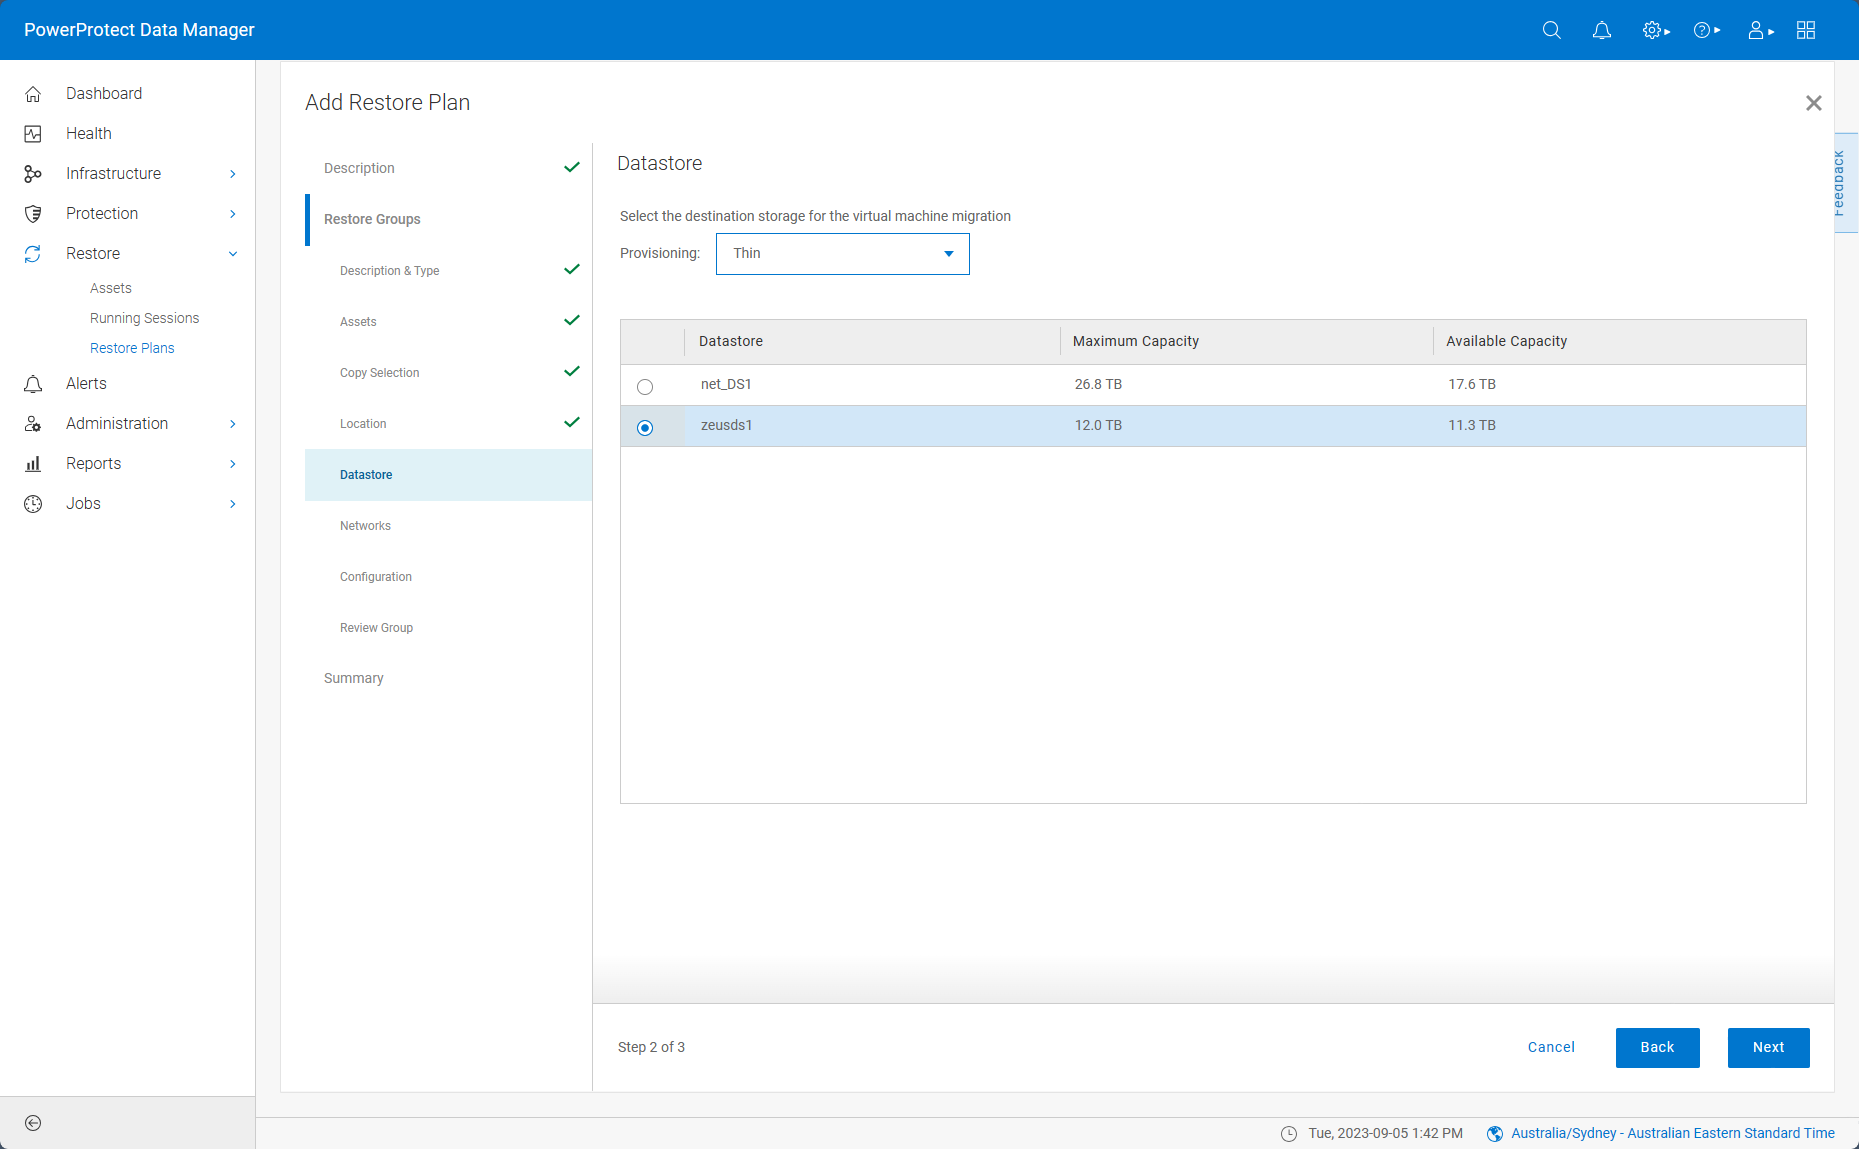
Just like for normal virtual machine recoveries, you can choose what is to be done with the virtual disks – in my case, I chose to restore them as thinly provisioned disks:
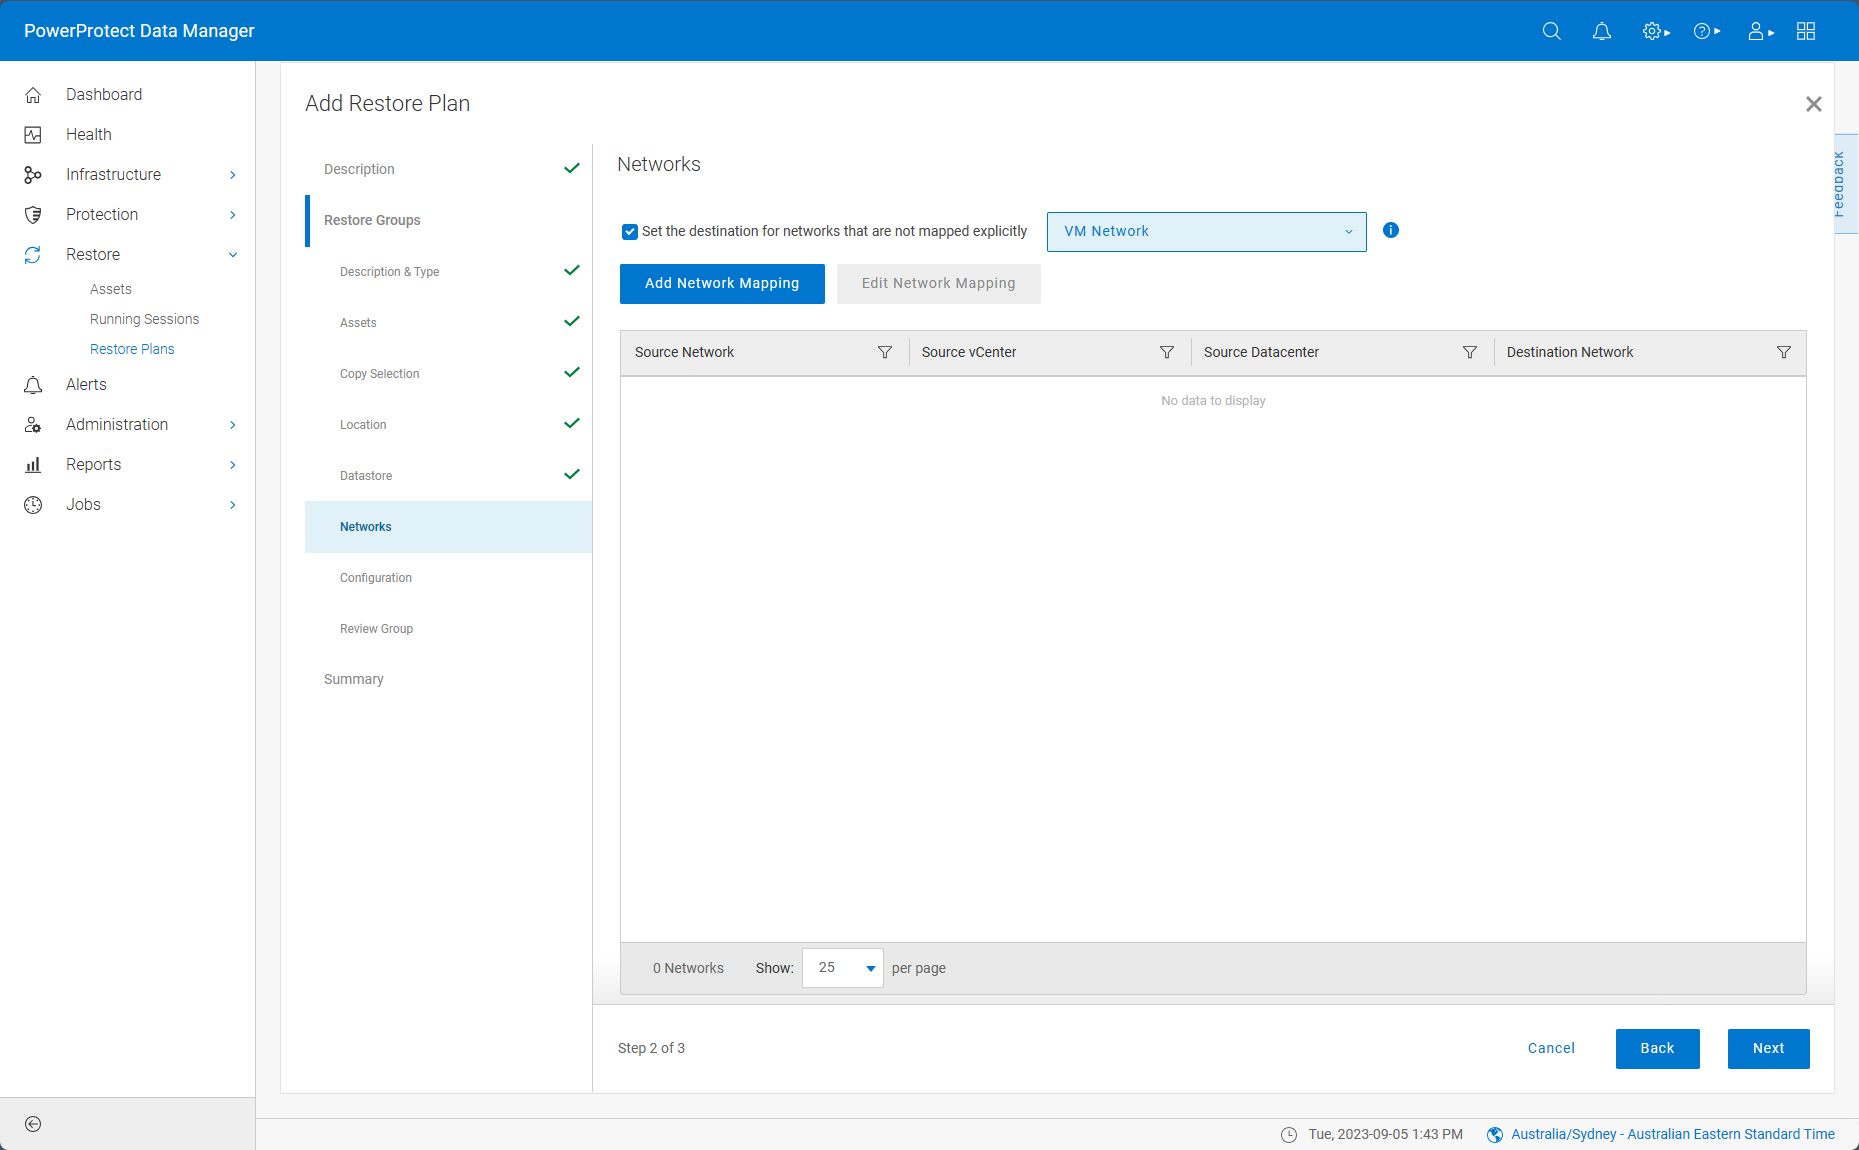
But virtual disks aren’t the only things you can configure in a restore group – you can also setup network mappings, too. If you’ve got a complex virtual machine environment, this will be invaluable for you, and given you can have multiple restore groups in a single restore plan, you’ll get a lot of flexibility for getting the right networks associated with the right virtual machines:
Next is a number of additional settings that can be assigned to the restore group:

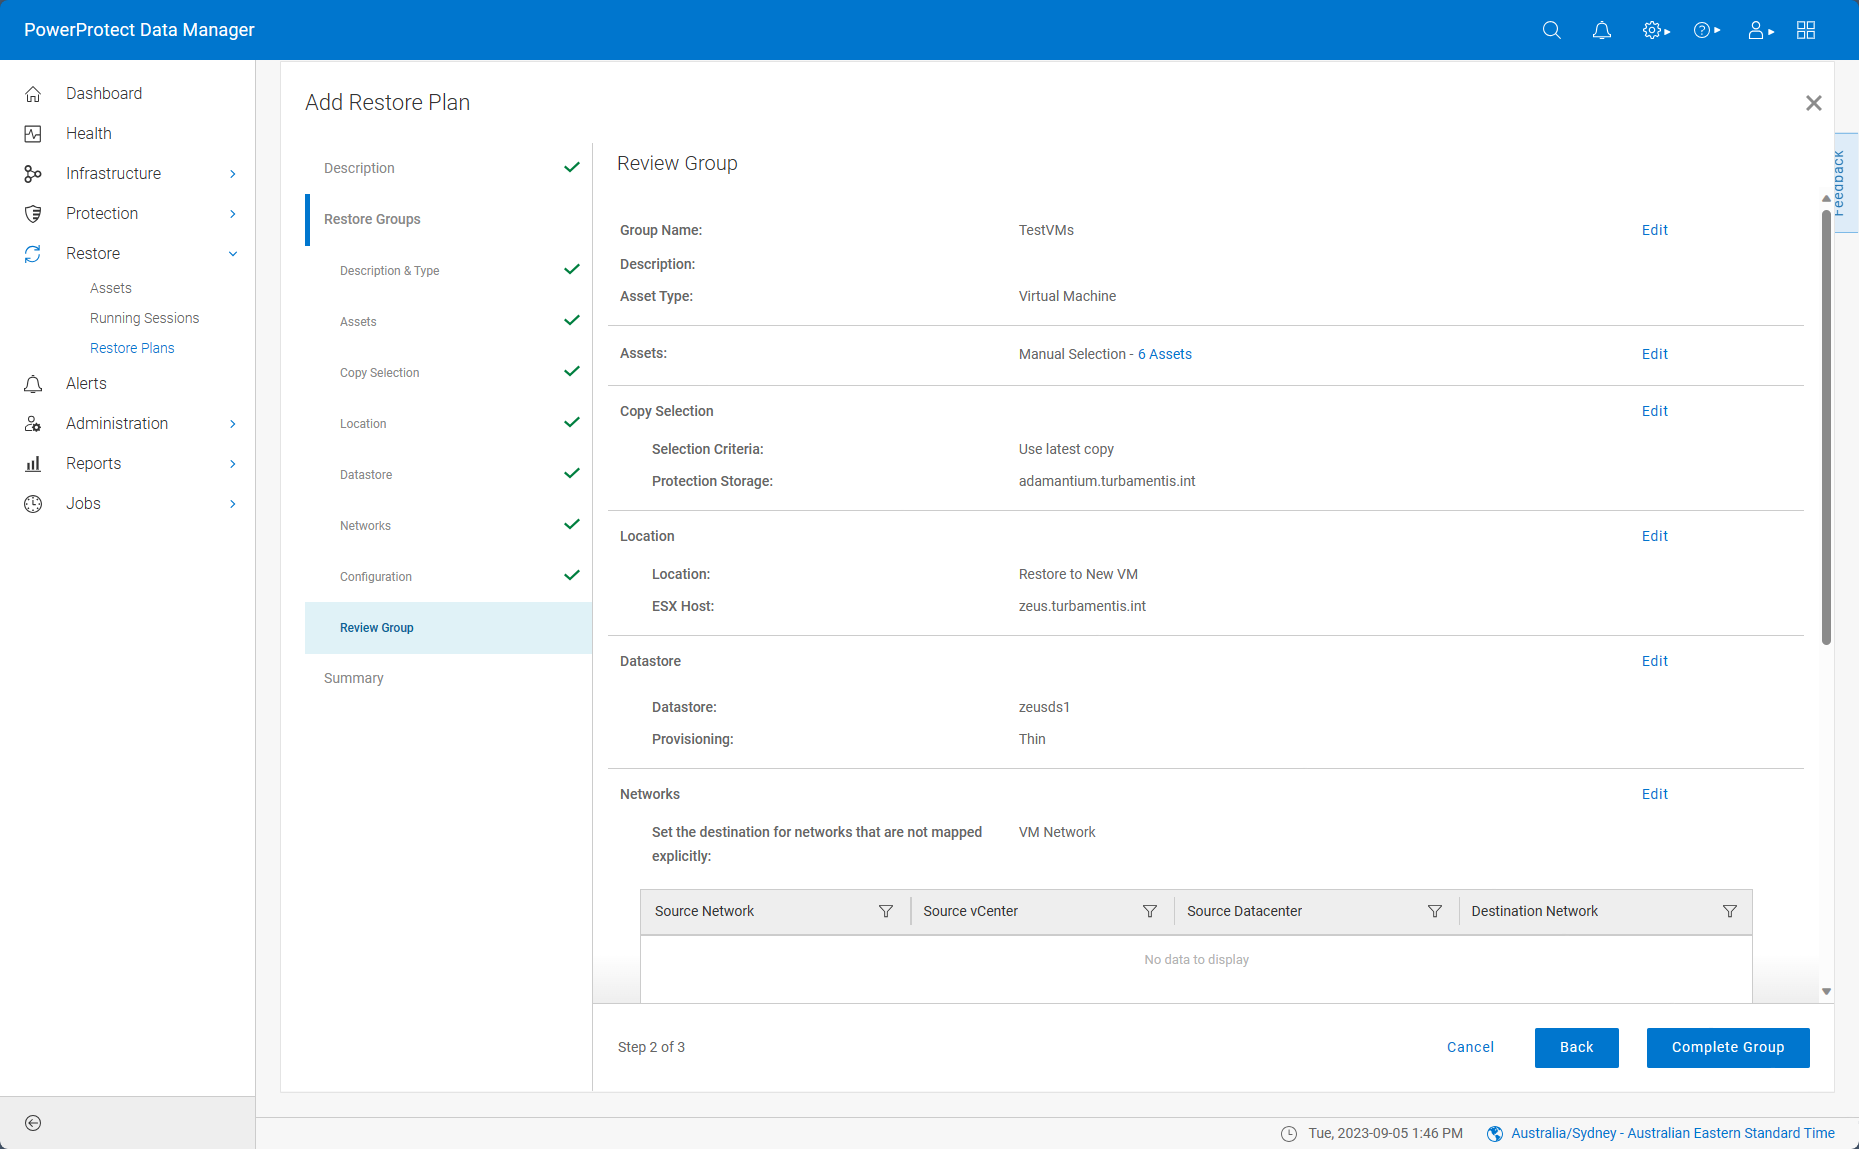
That’s it – we’re almost ready to complete the setup for the restore group after reviewing the settings:
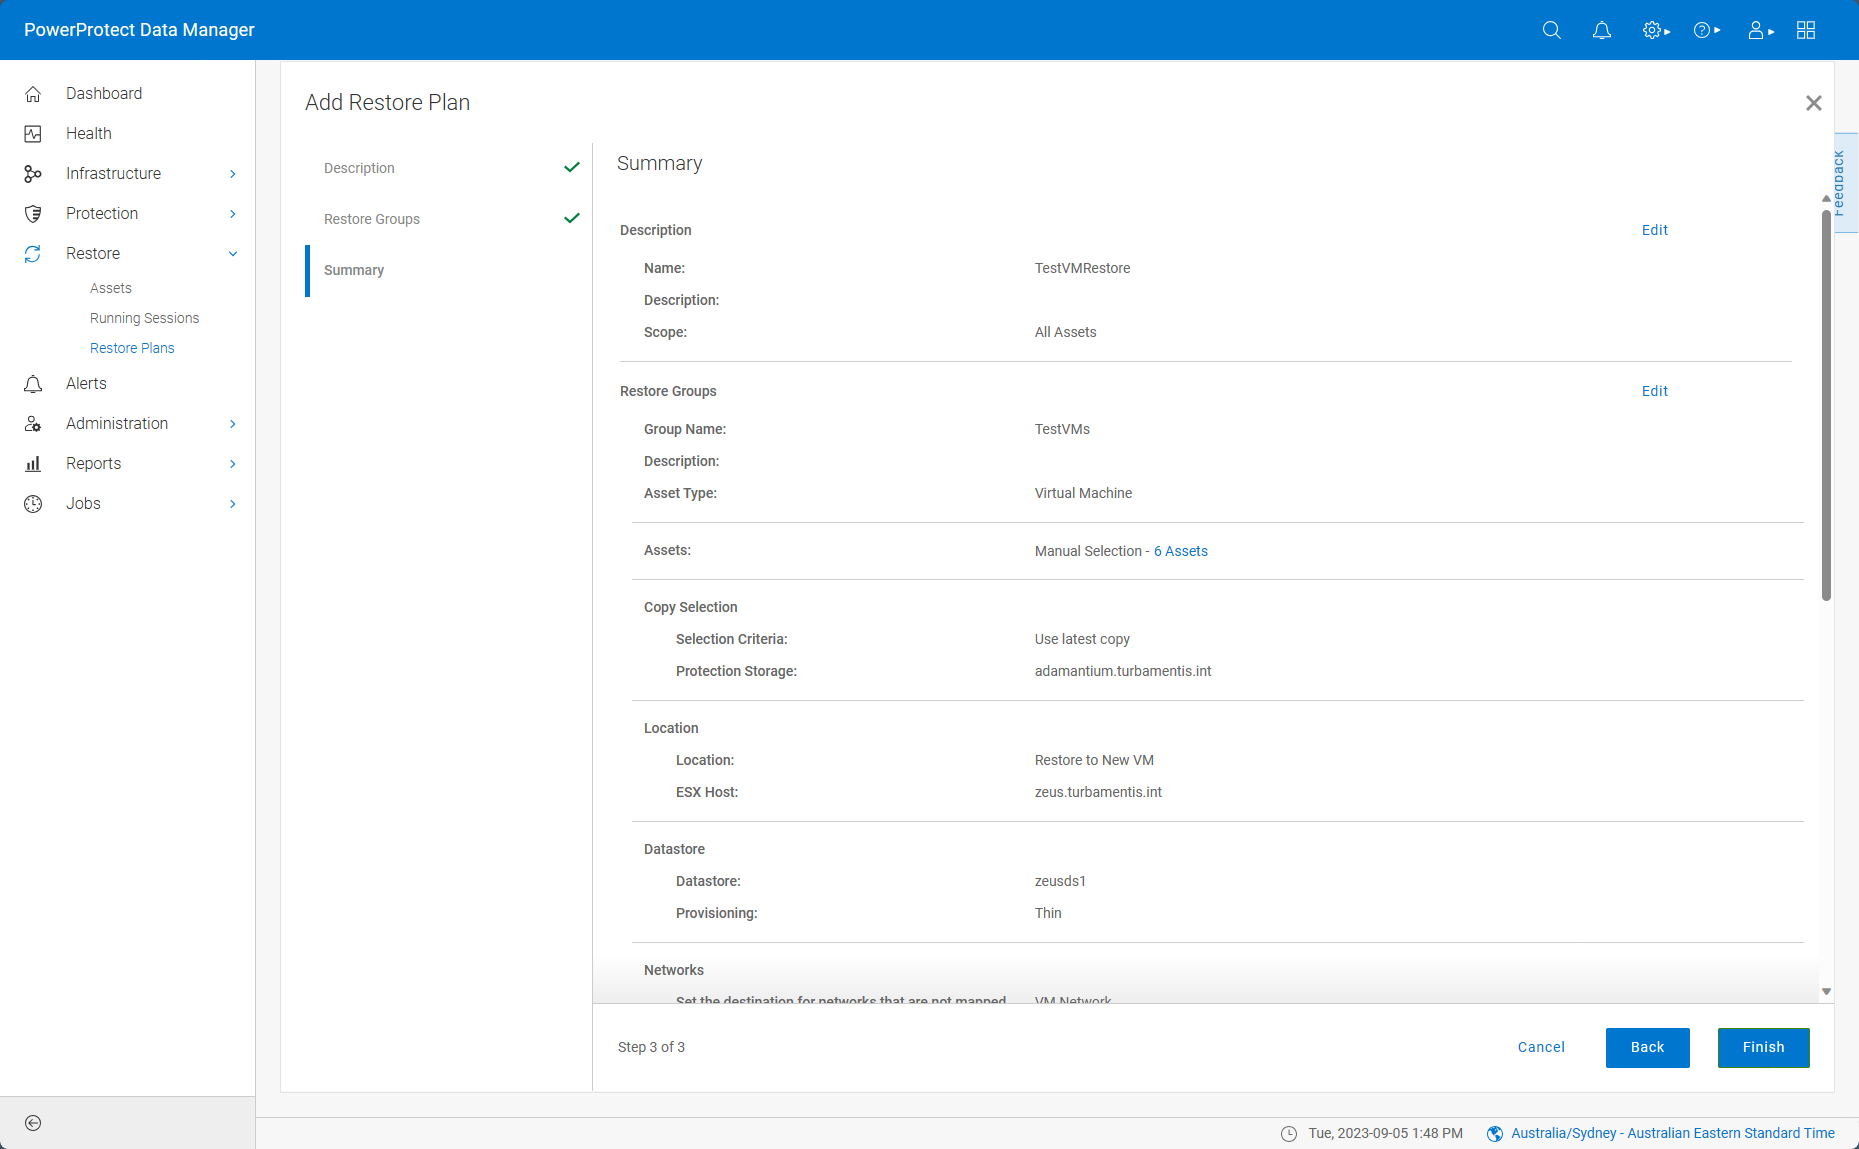
Now the restore group is created – and as I’ve mentioned before, you’re not tied to just a single restore group; you can associate multiple restore groups to the restore plan. (And you can have up to 500 virtual machines in a single restore group!) So if I’d wanted to, I could have added more restore groups, but in this case I could just push on, which let me confirm all the settings before finishing off the plan:
Now my restore plan has been created:
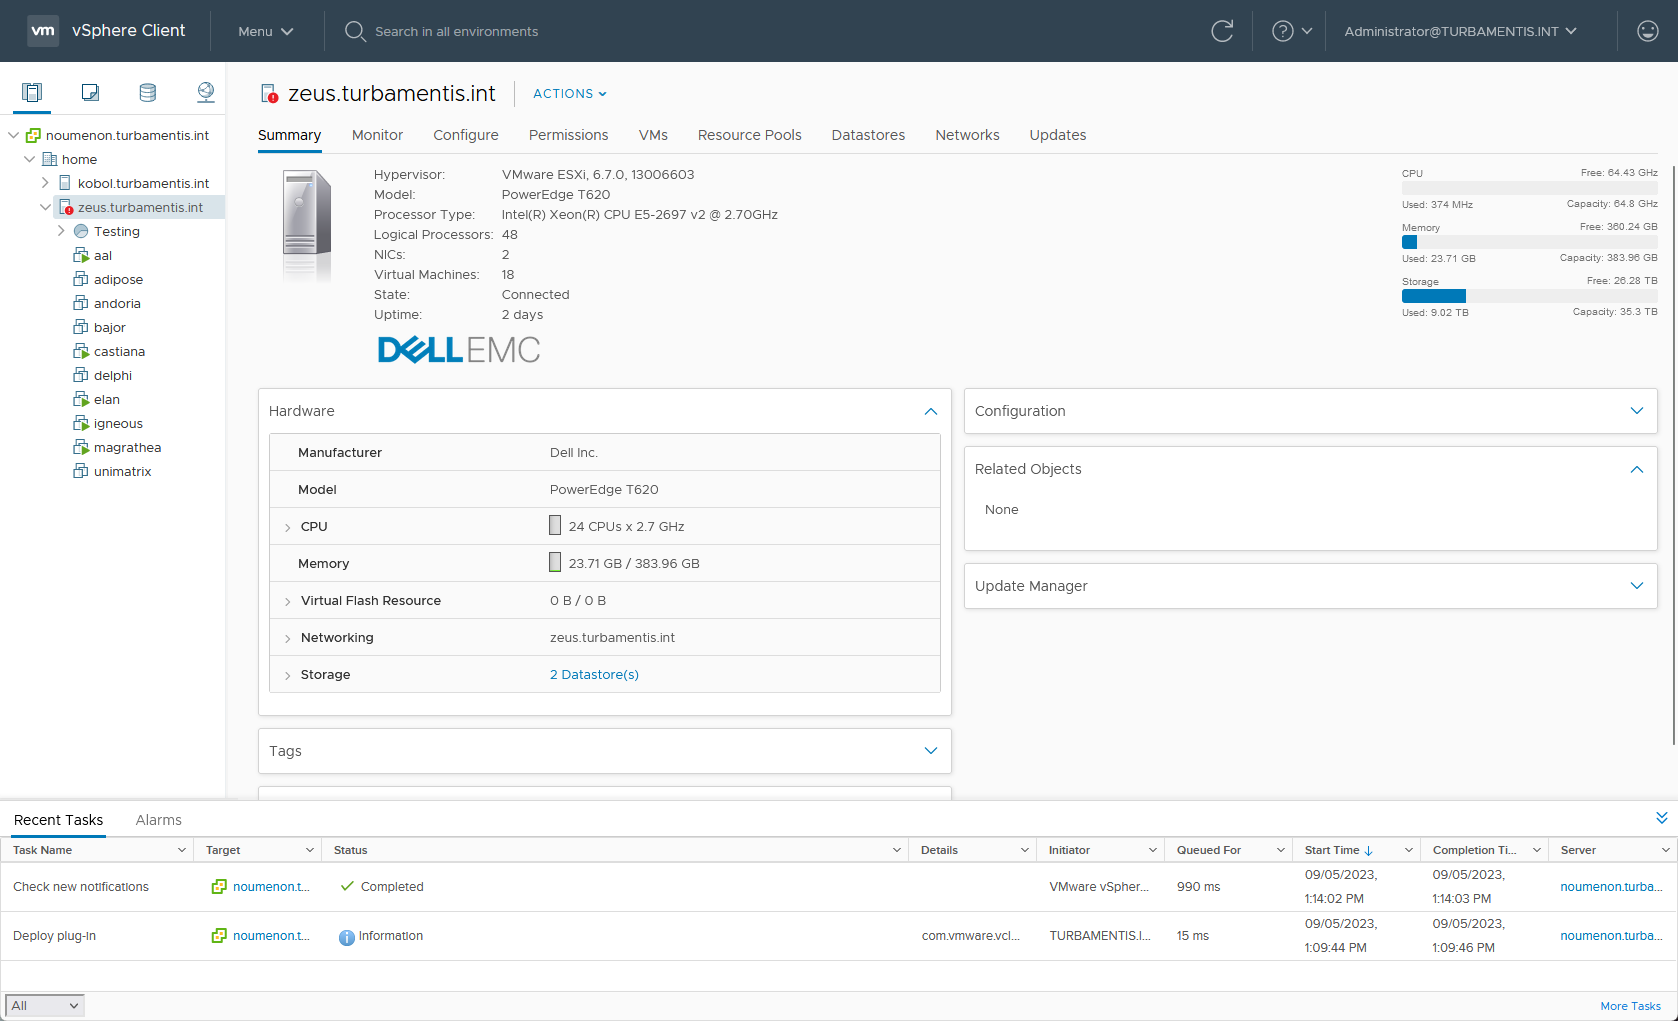
Now, before I kick off the restore plan, I’ll show the current state of the ESX server I’m going to restore to:
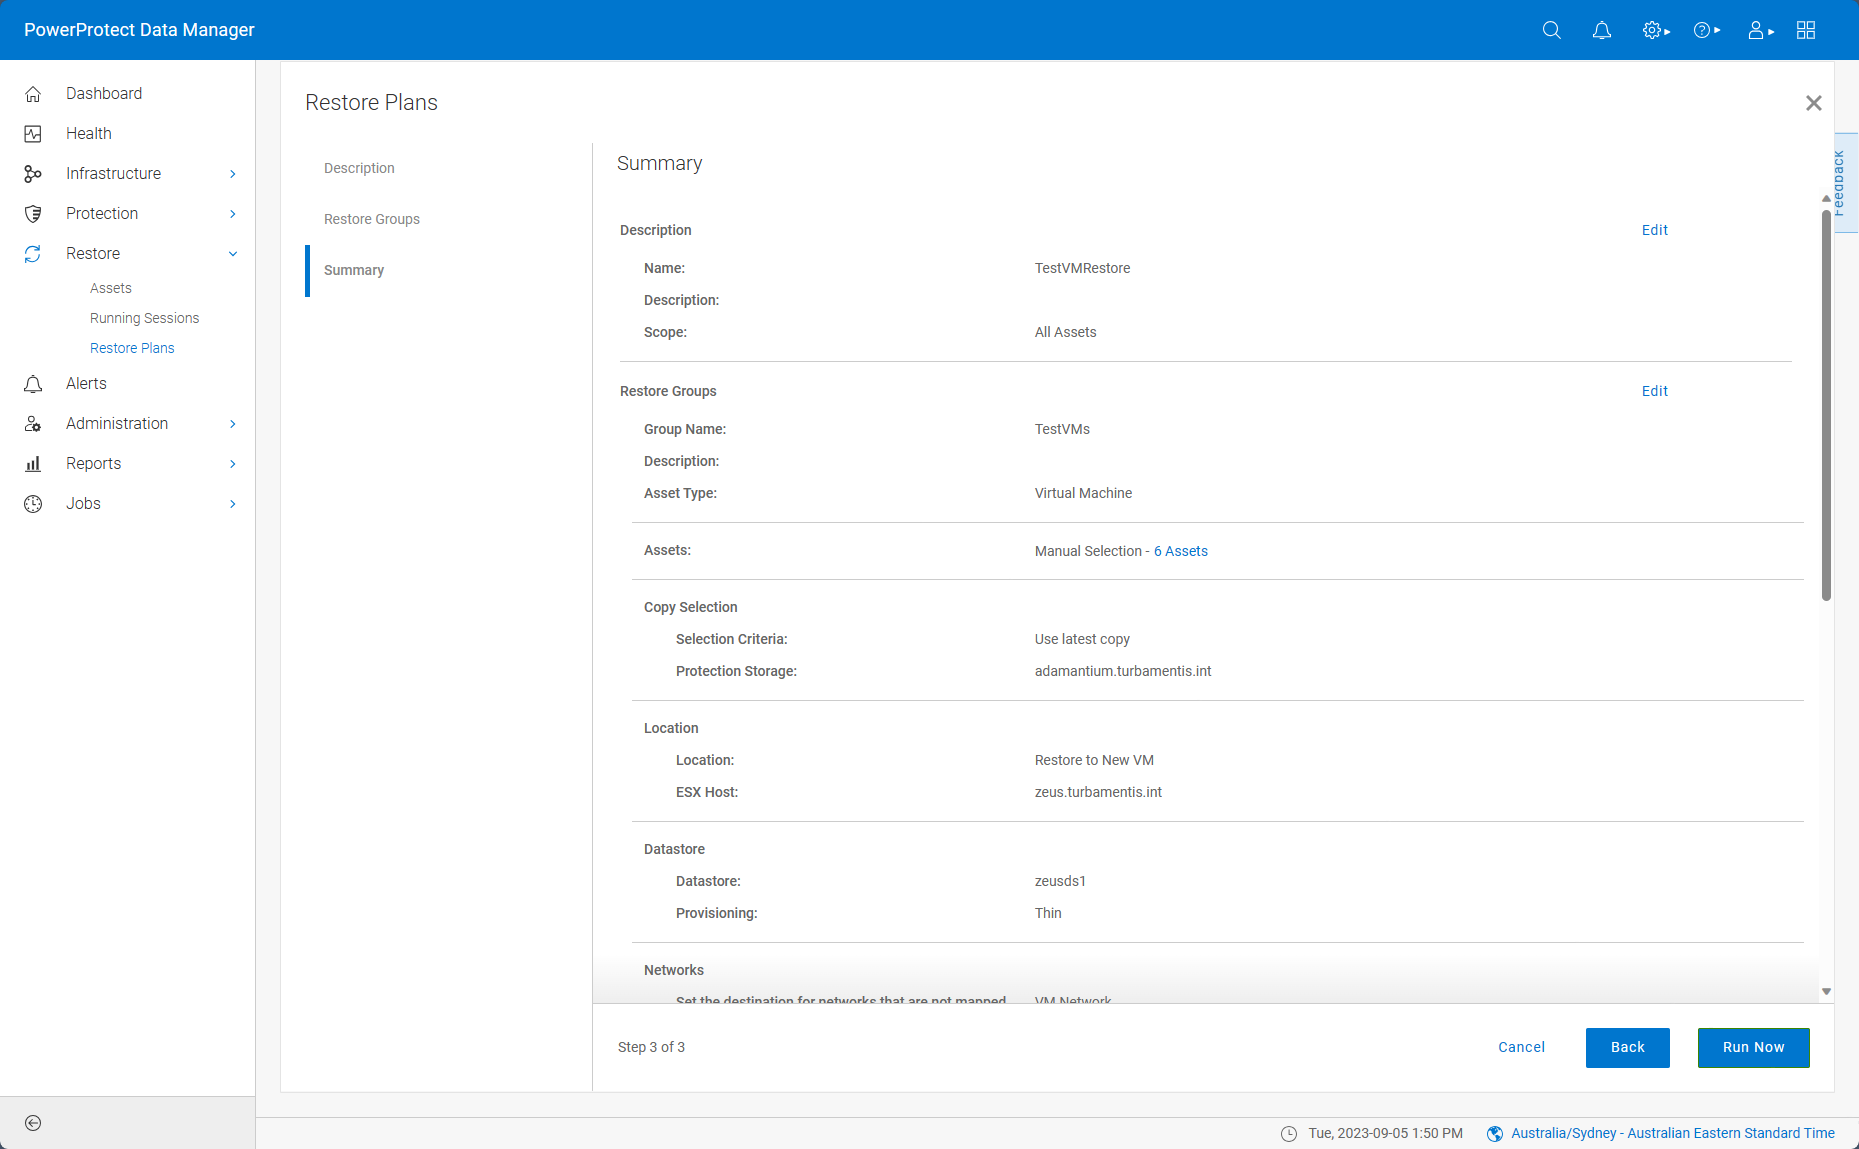
Going back to Data Manager, selecting the restore plan and choosing Restore lets me view the summary of the plan before initiating:
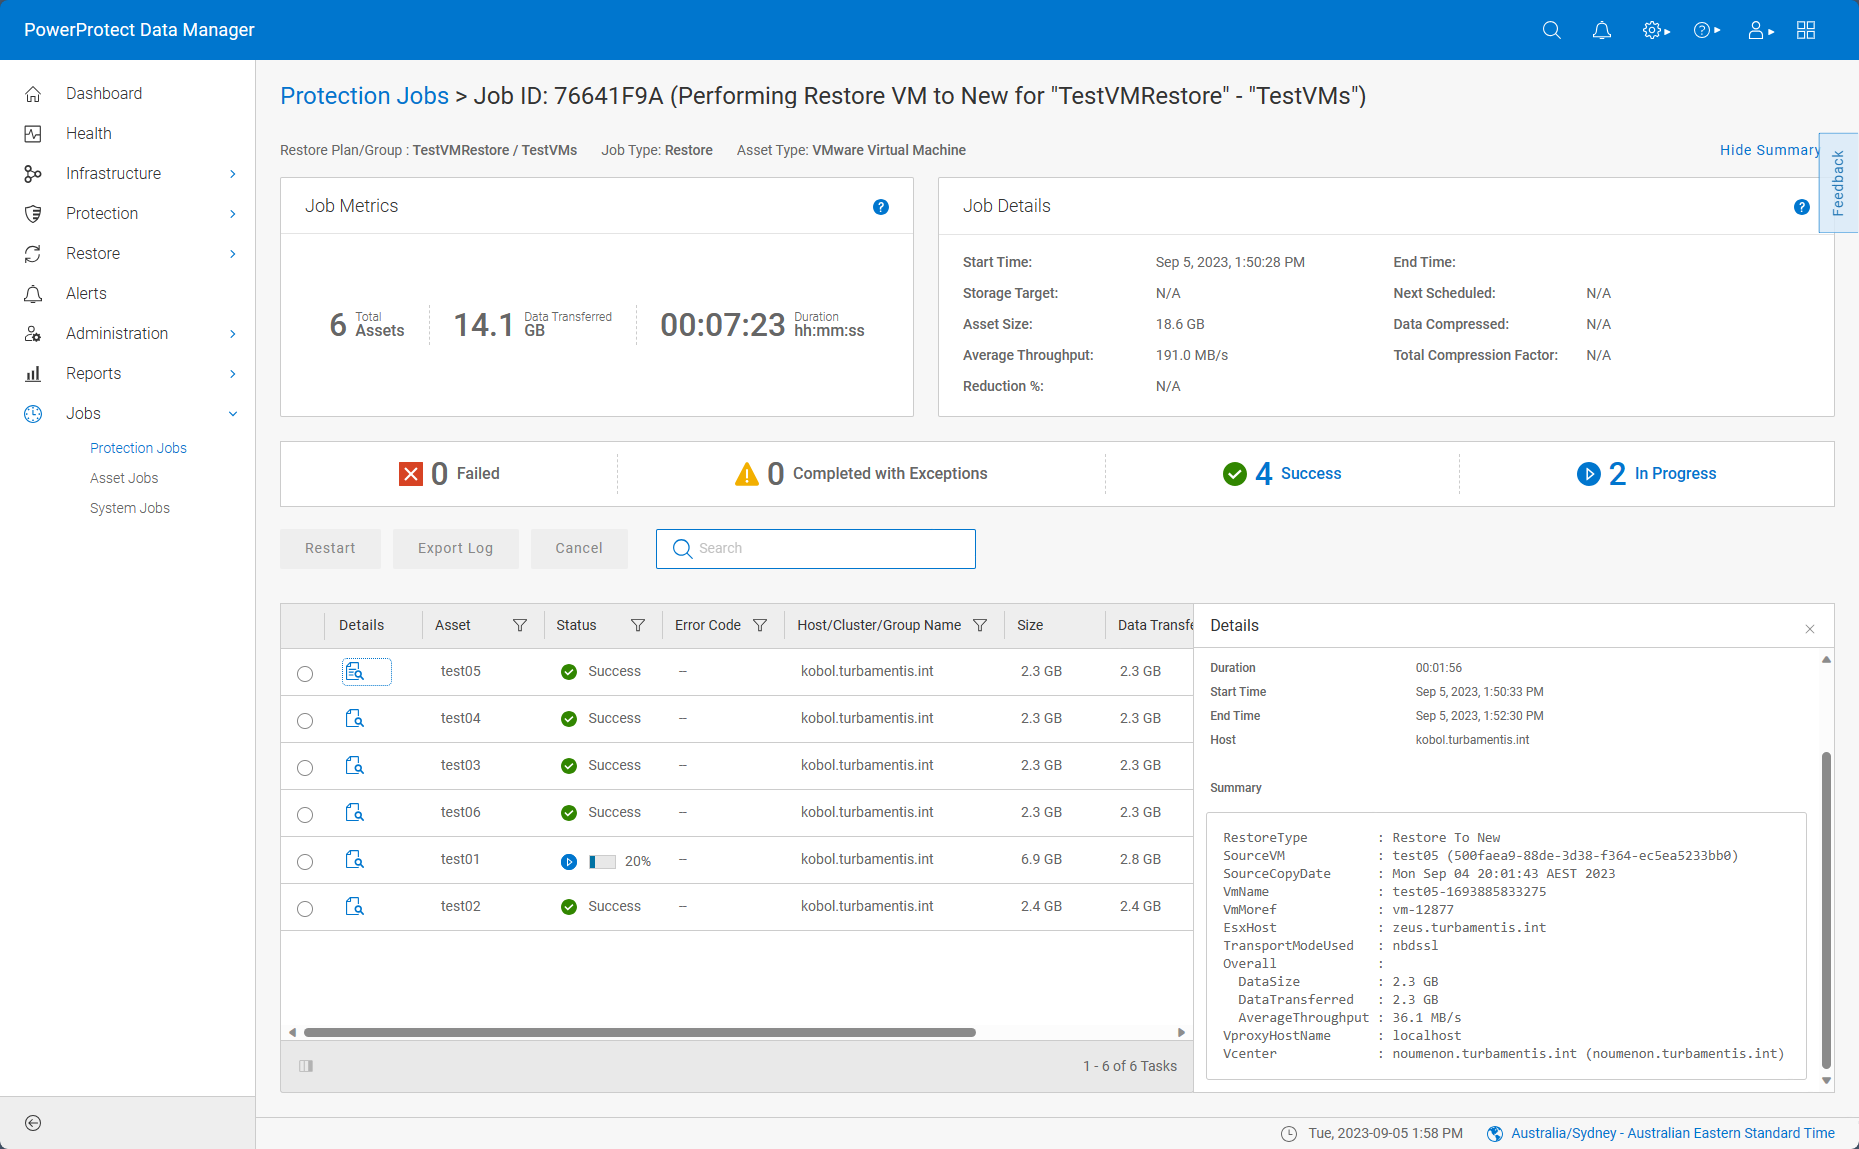
Once the restore plan is running, it can be tracked from the Jobs section. In the example below, I’ve drilled down into the job to see the progress of the individual restores, all started simultaneously:

Clicking on any individual job details will let you see information about the specific virtual machine being restored – including the name assigned to the recovery virtual machine:
And here’s the completed restore:

And if I switch back to my ESX server, I can see the restored virtual machines:
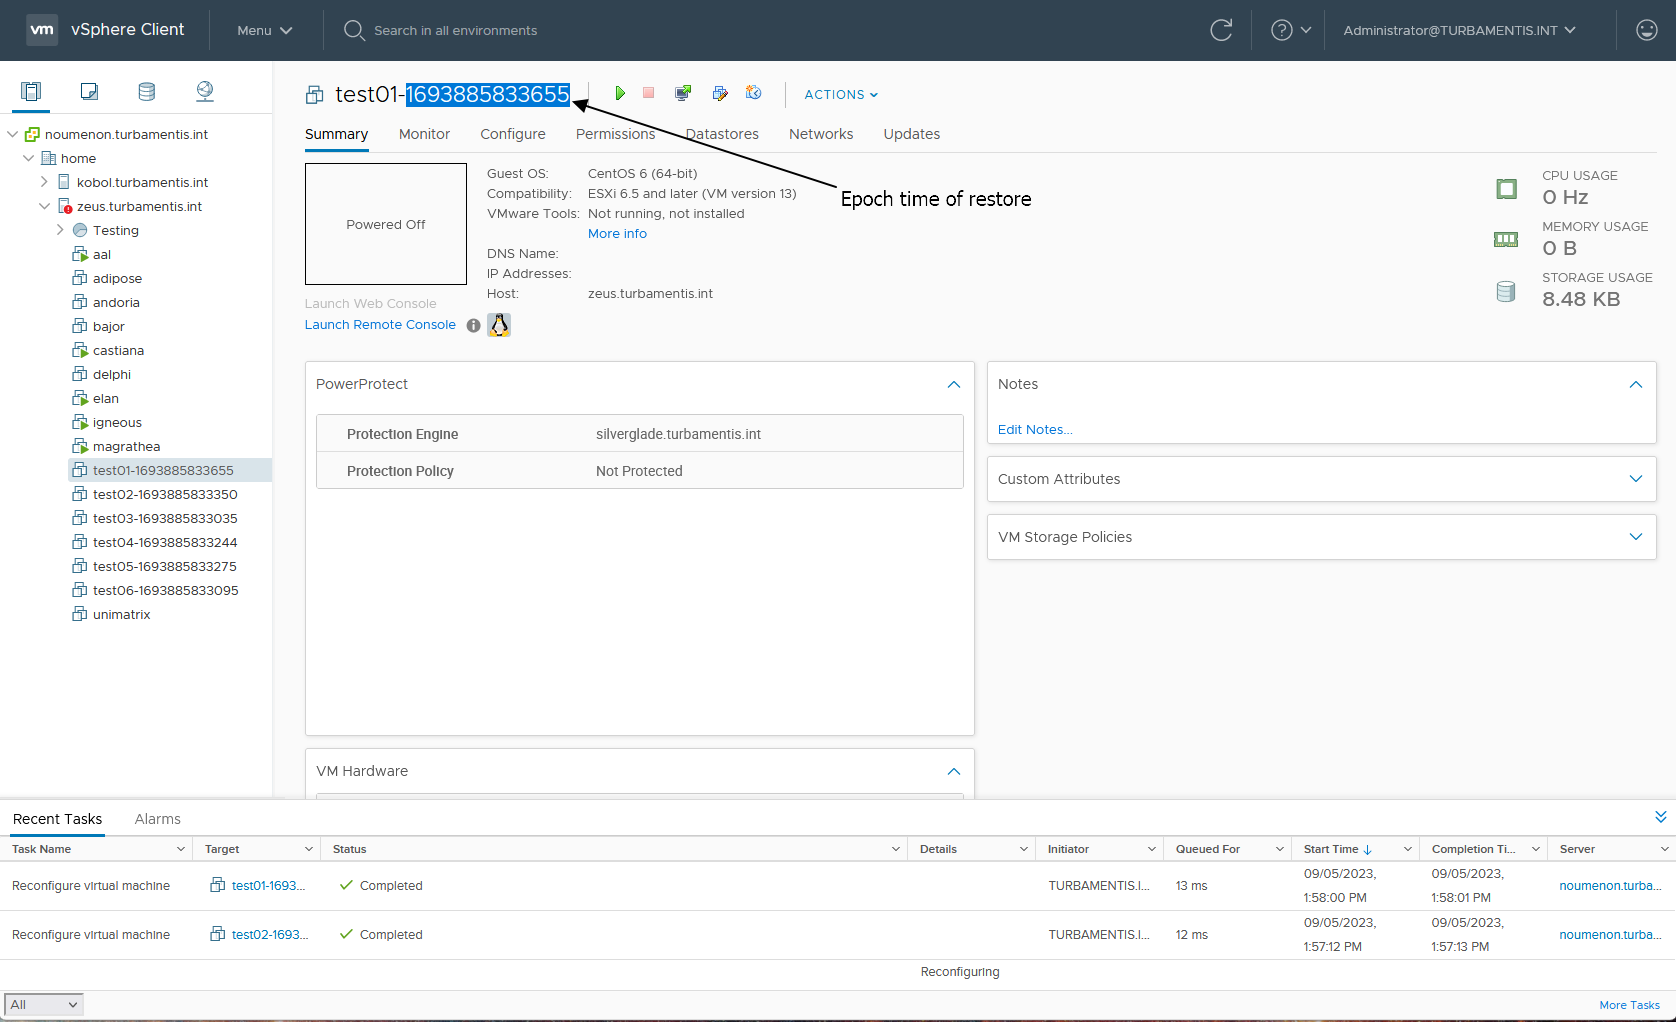
Since we’re recovering assets in bulk, the system automatically generates a new virtual machine name based on the original name, with the epoch time appended to it. Given the sheer number of virtual machines you can have in a restore plan, this saves you having to either setup rules, or enter a large number of alternate recovery names while setting it up. And it means you can run the restore plan multiple times without overwriting recovery target virtual machines.
And there you have it – PowerProtect Data Manager Restore Plans are simple to use but give you a huge amount of power for automating potentially large-scale restores in a fraction of the time it might take you otherwise. Enjoy!
Great, thanks for this arcticle.
Does anyone know if or when it will be possible to run these jobs on a scheduled basis?
Thanks
Restore plans are accessible via the REST API so you can certainly schedule/run them as you need to. Check out the developer documentation, here: https://developer.dell.com/apis/4378/versions/19.14.0/reference/ppdm-public.yaml/paths/~1api~1v2~1restore-plans/get